

Custom connectors are in beta and available to Pro and Enterprise customers.
Workspace admins can create and manage them.
Before you begin
Have the following ready:- An active Pro or Enterprise subscription and permission to manage connectors in your workspace.
- A publicly accessible HTTPS REST API and its base URL.
- Credentials for the API and access to its documentation.
- Optionally, a read-only endpoint you can use to test the connection.
Create a custom connector
1
Open the custom connector form
Select Integrations in the sidebar of your workspace. Open
Add custom, then select Add custom connector.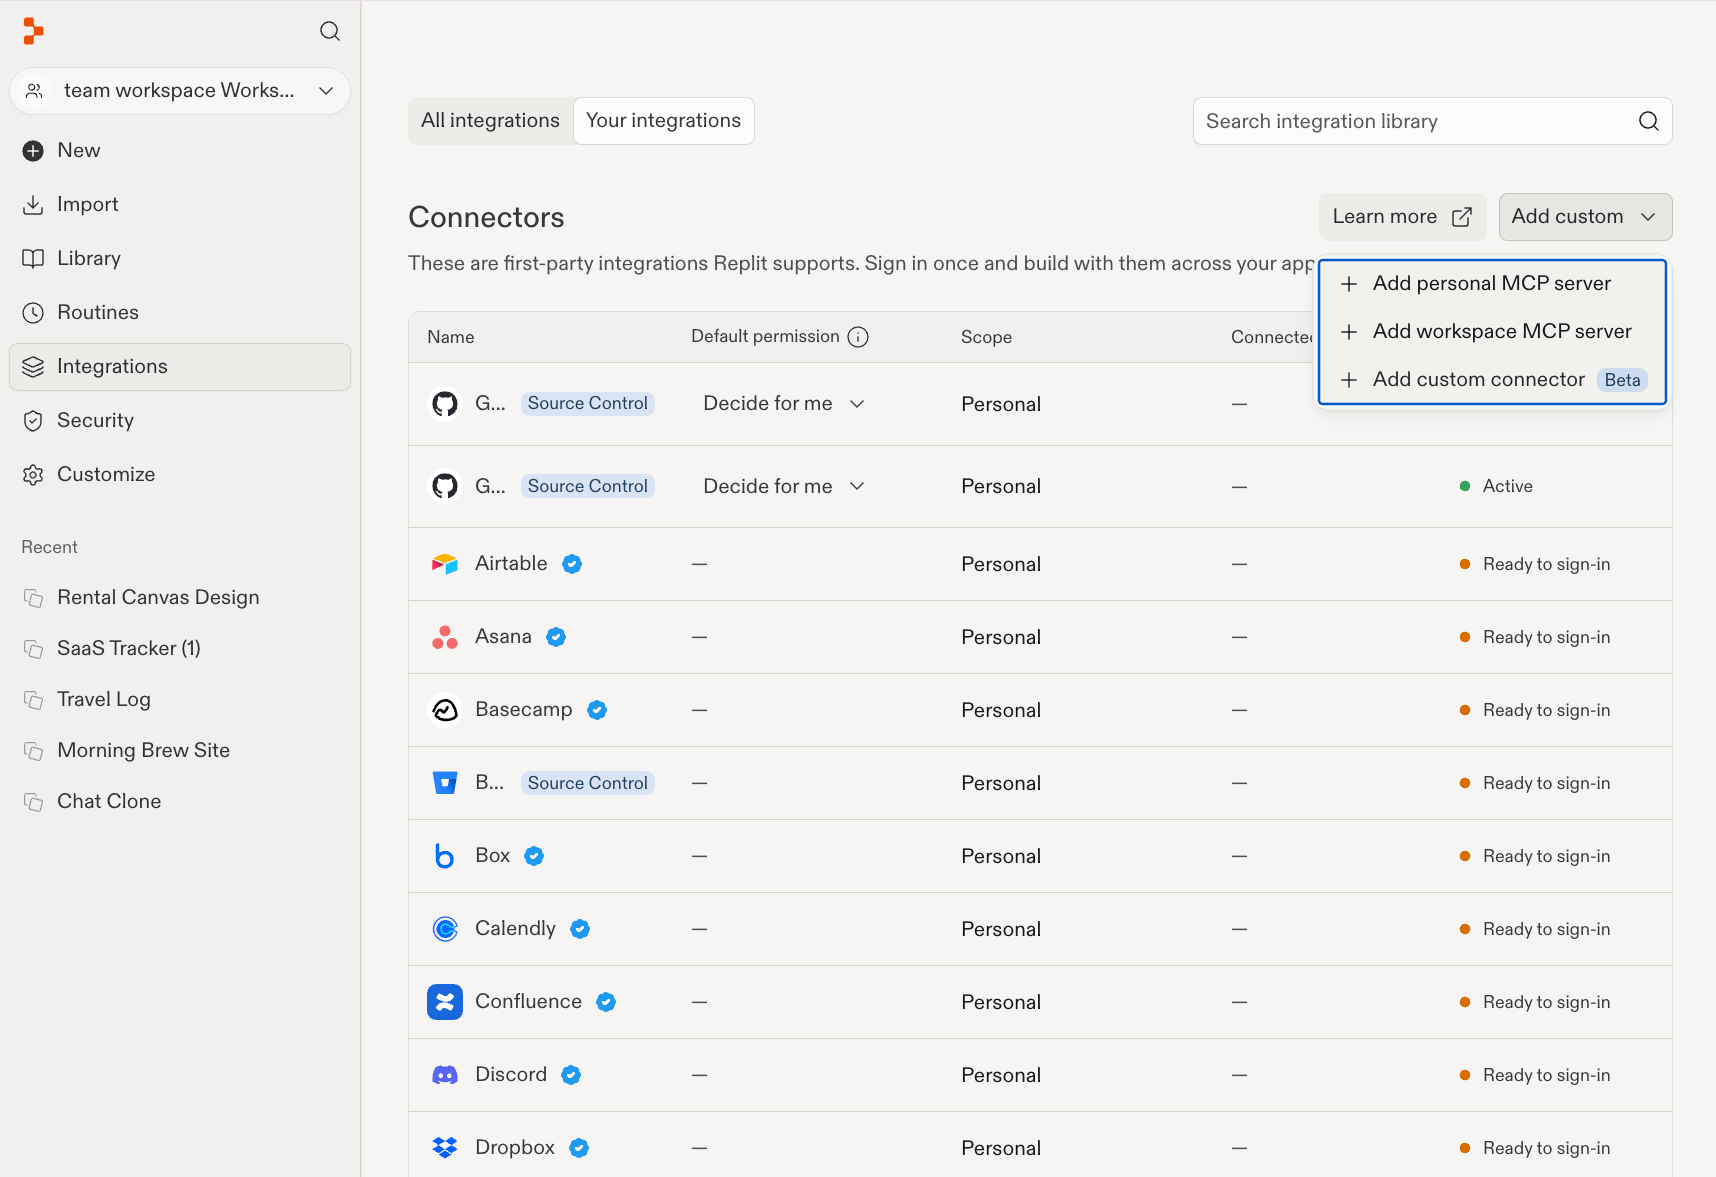
2
Describe the API
Complete the following fields: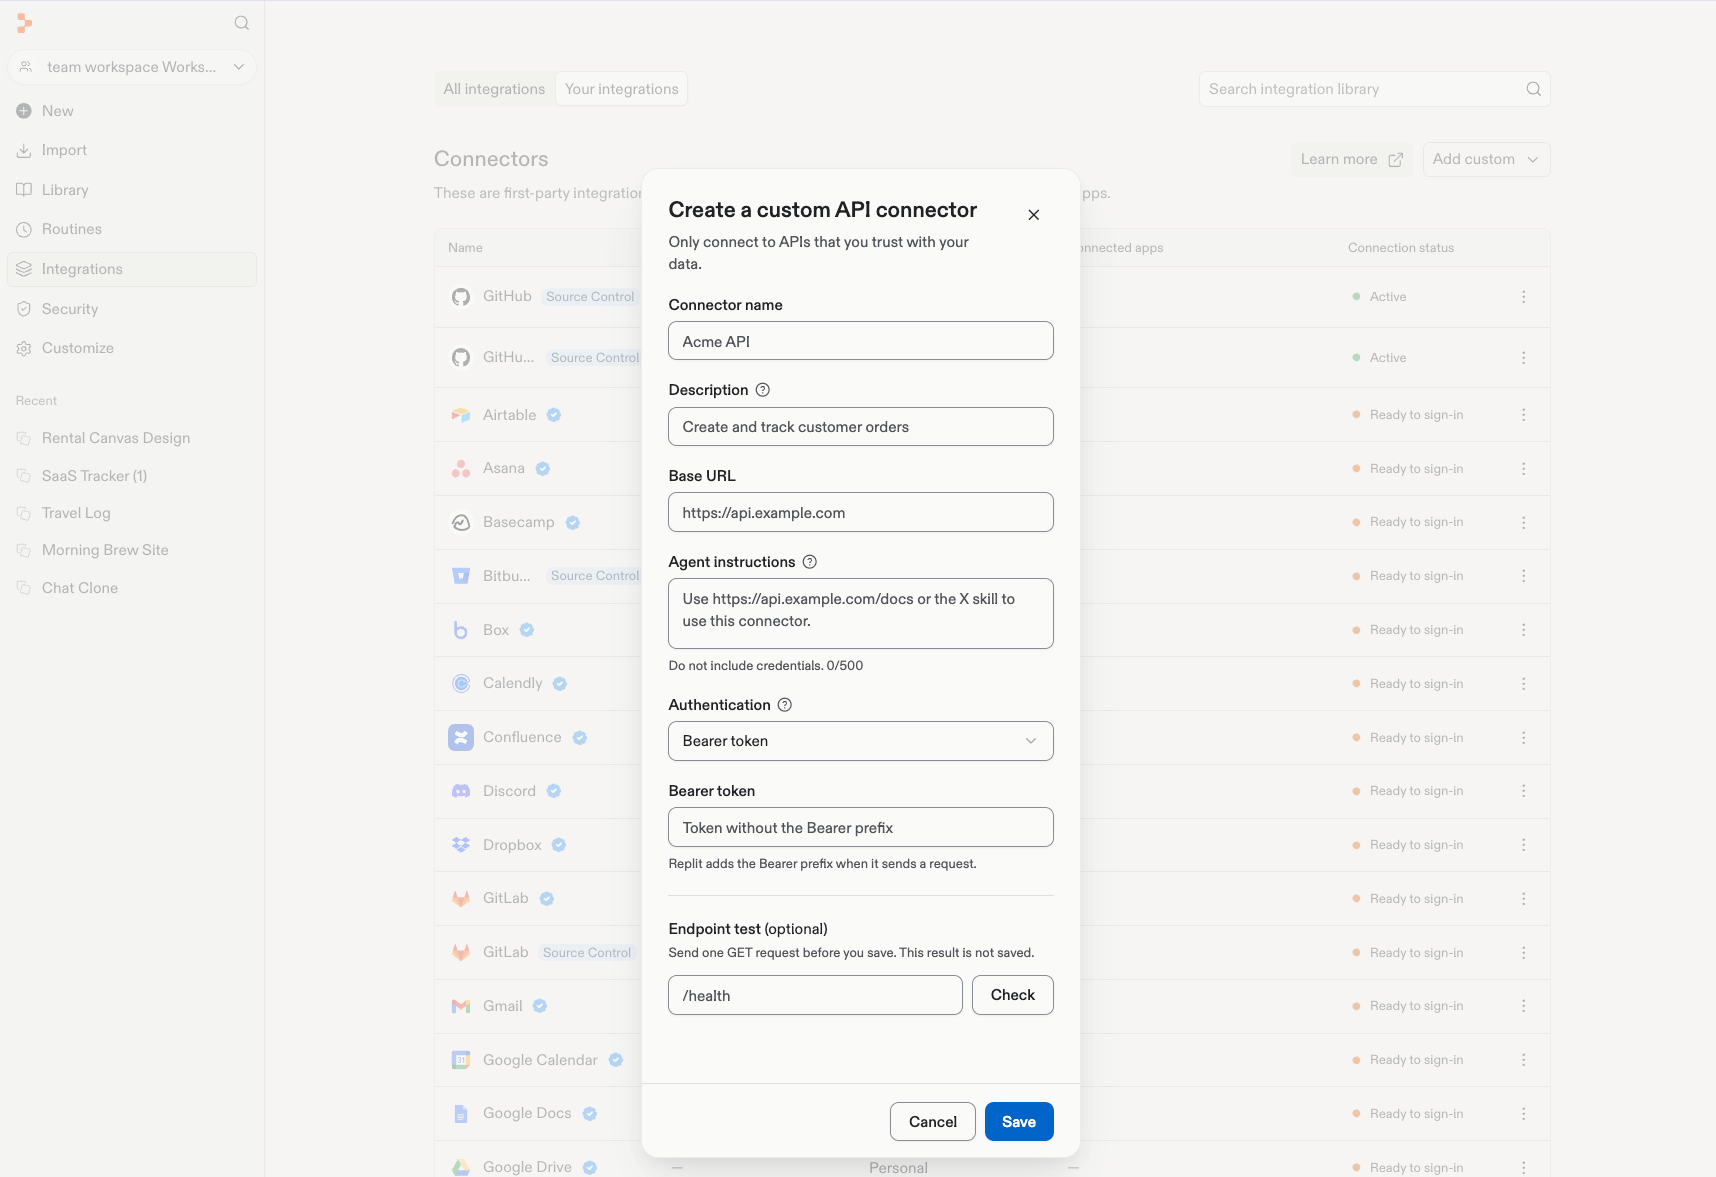
Replace the example values with those for your service. Agent instructions
have a 500-character limit.
3
Configure authentication
Select the authentication method that matches your API and complete the
fields shown.For an API that uses a bearer token, select Bearer token and enter the
token without the
Bearer prefix. Replit adds the prefix when sending a
request.4
Test an endpoint
Optionally, enter a path such as
/health under Endpoint test and select
Check.The check sends one GET request before you save. Its result is not saved.
Choose an endpoint your API supports that does not change data.A successful check verifies that request, not every endpoint or permission
you might need.5
Save the connector
Review the configuration, then select Save.
Troubleshoot an endpoint test
If the test fails, check the following against your API’s documentation:- URL and path: Confirm that the base URL and test path form the intended endpoint.
- Authentication: Confirm that the credential is valid and has permission to access the endpoint. For bearer authentication, omit the
Bearerprefix from the token field. - Request method: Choose an endpoint that accepts GET requests.
- Reachability: Confirm that the API is publicly accessible over HTTPS.
Related documentation
- Agent integrations — Explore supported integrations
- Managing your connectors — Connector administration for your workspace