A skill is a folder. Inside it lives a file called SKILL.md with the instructions Agent follows, plus any supporting files you want it to reference. Skills live in your project’s /.agents/skills directory and conform to the Agent Skills specification — an open standard that works across agents.Agent sees the name and description of every installed Skill, but only loads the full content when relevant to the current task. This makes skills context-efficient: you can install many without degrading Agent’s output.
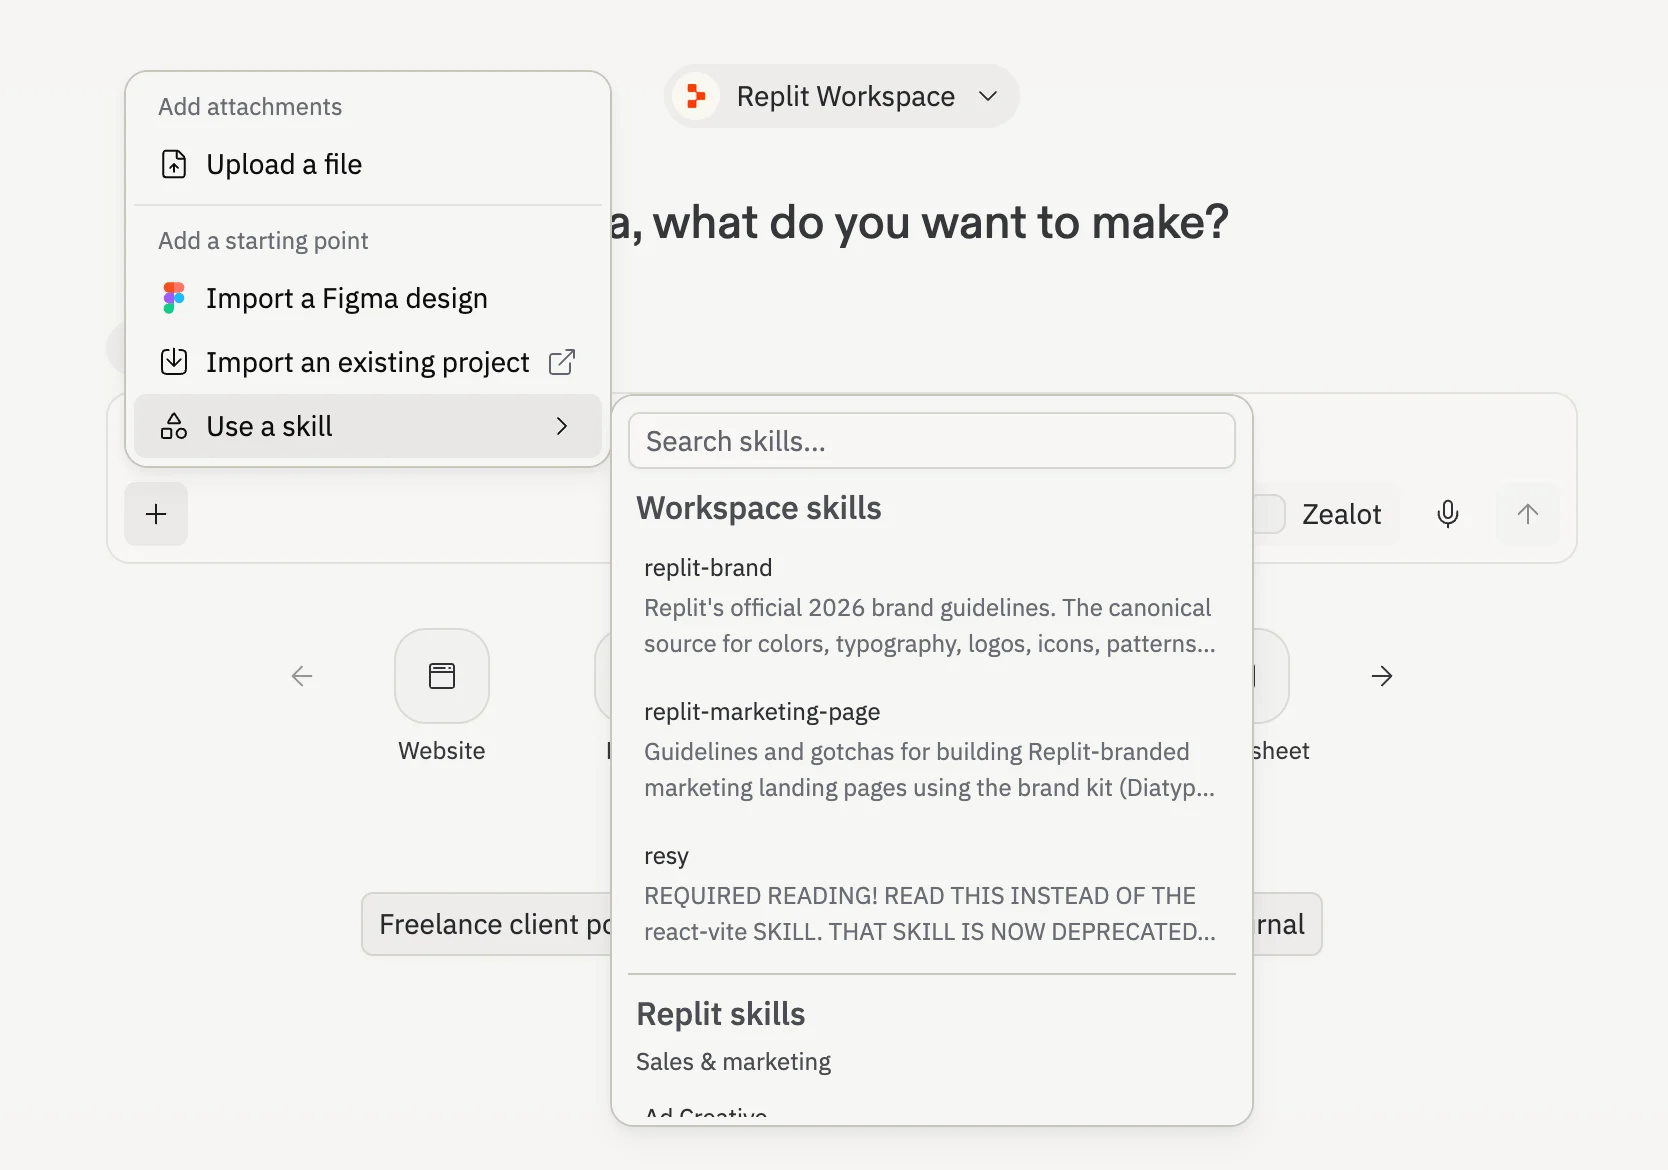
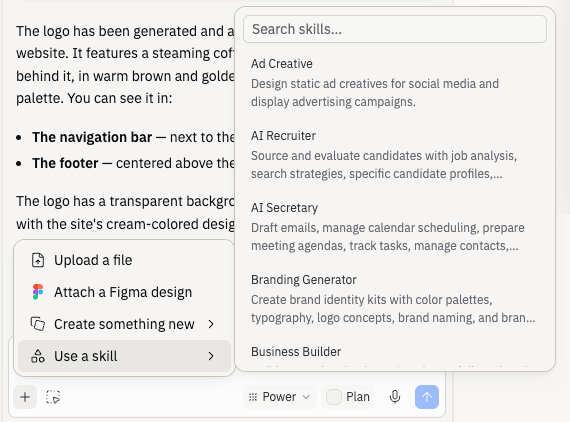
Replit ships with pre-defined skills available from the Use a skill picker in chat and from the new-project starting-point picker. These skills work in every project without installation. For the full catalog, partner skills, and how to install them, see the Skills directory.To add a pre-defined skill, open the Use a skill picker from the chat input and select a skill, or simply ask Agent to load the skill.
Create a custom Skill when you want reusable instructions in your Workspace library.
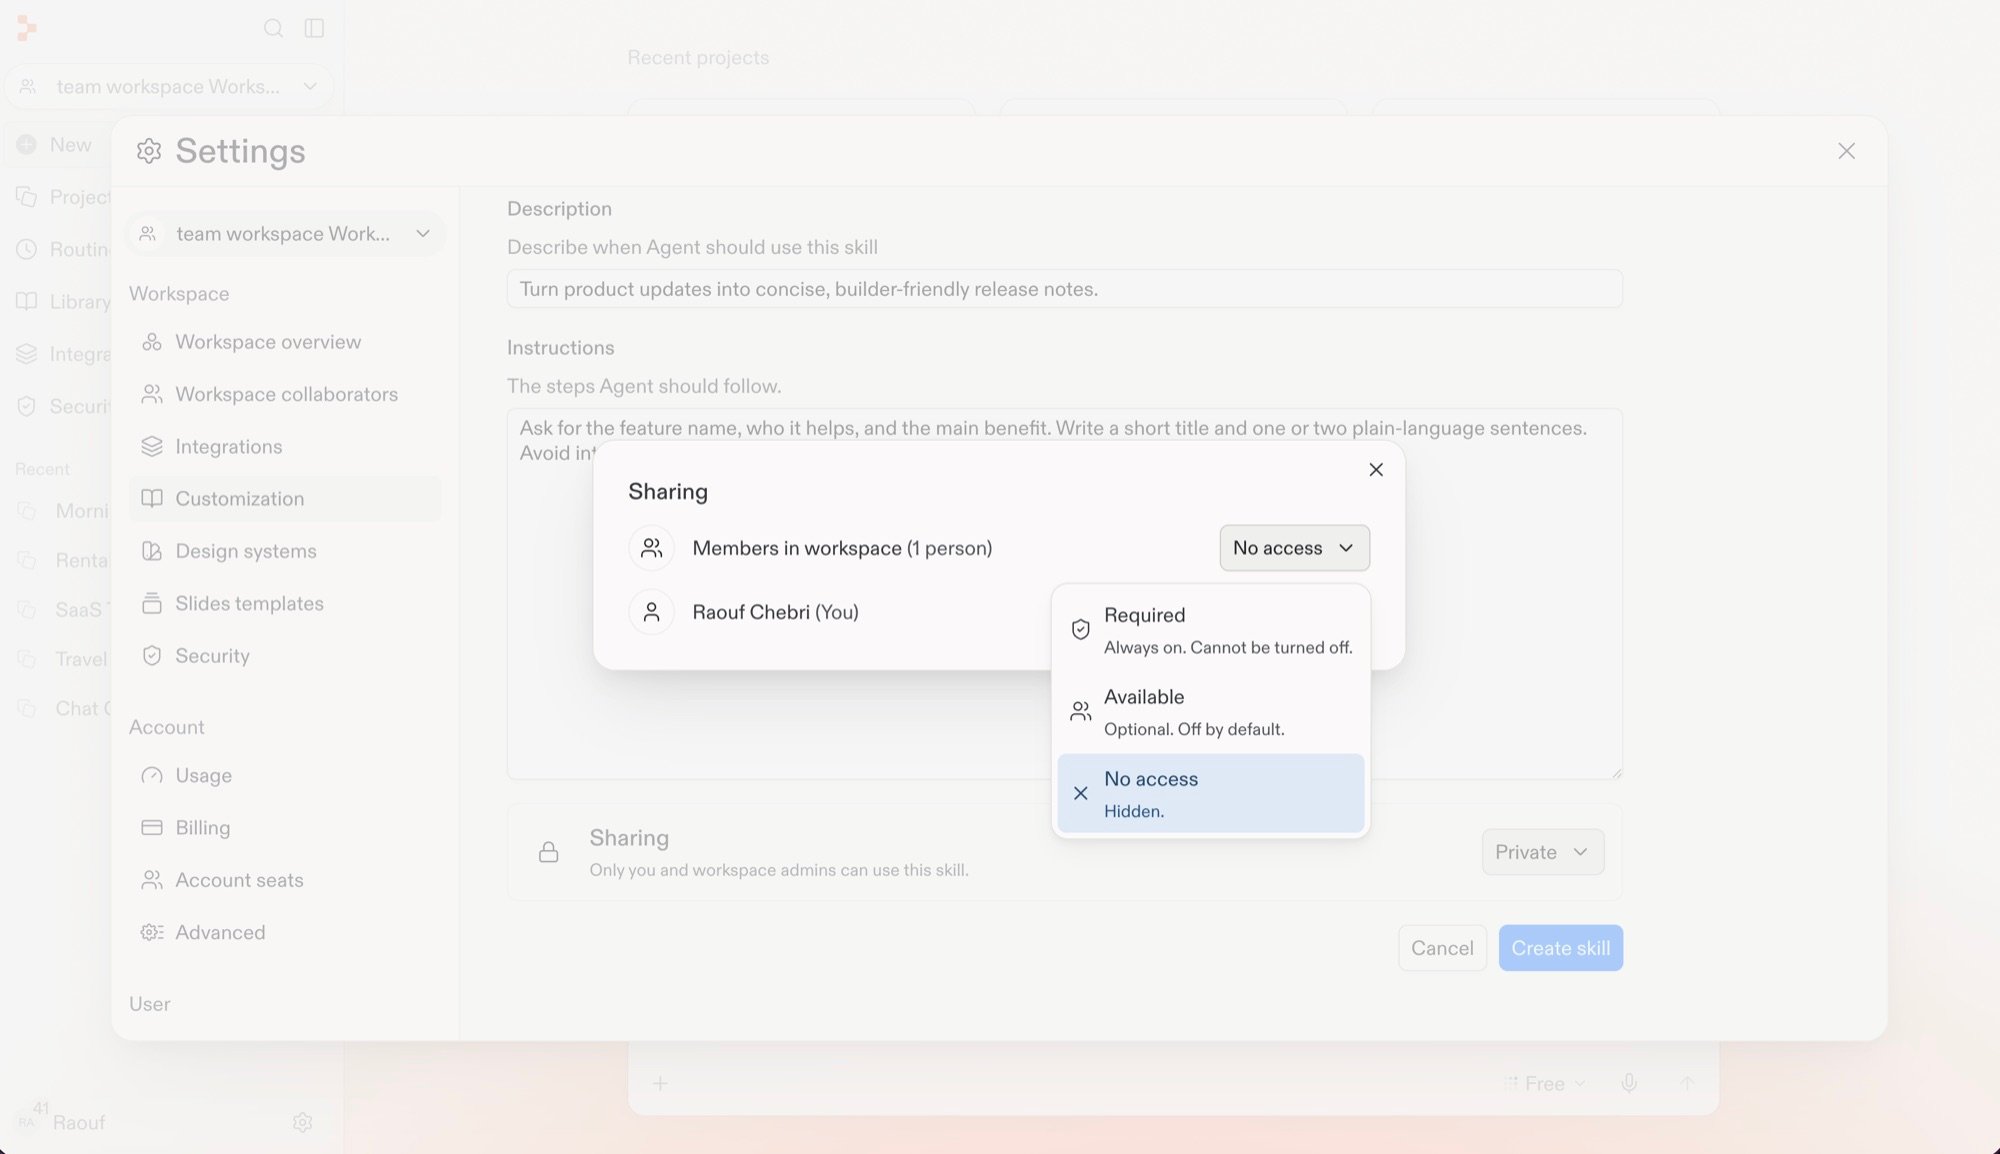
In a shared Workspace, you can set Workspace member access while creating the Skill
and update it later. Who can manage Skills depends on your plan — see
Agent Customization.Workspace member access policies are:
Policy
Access
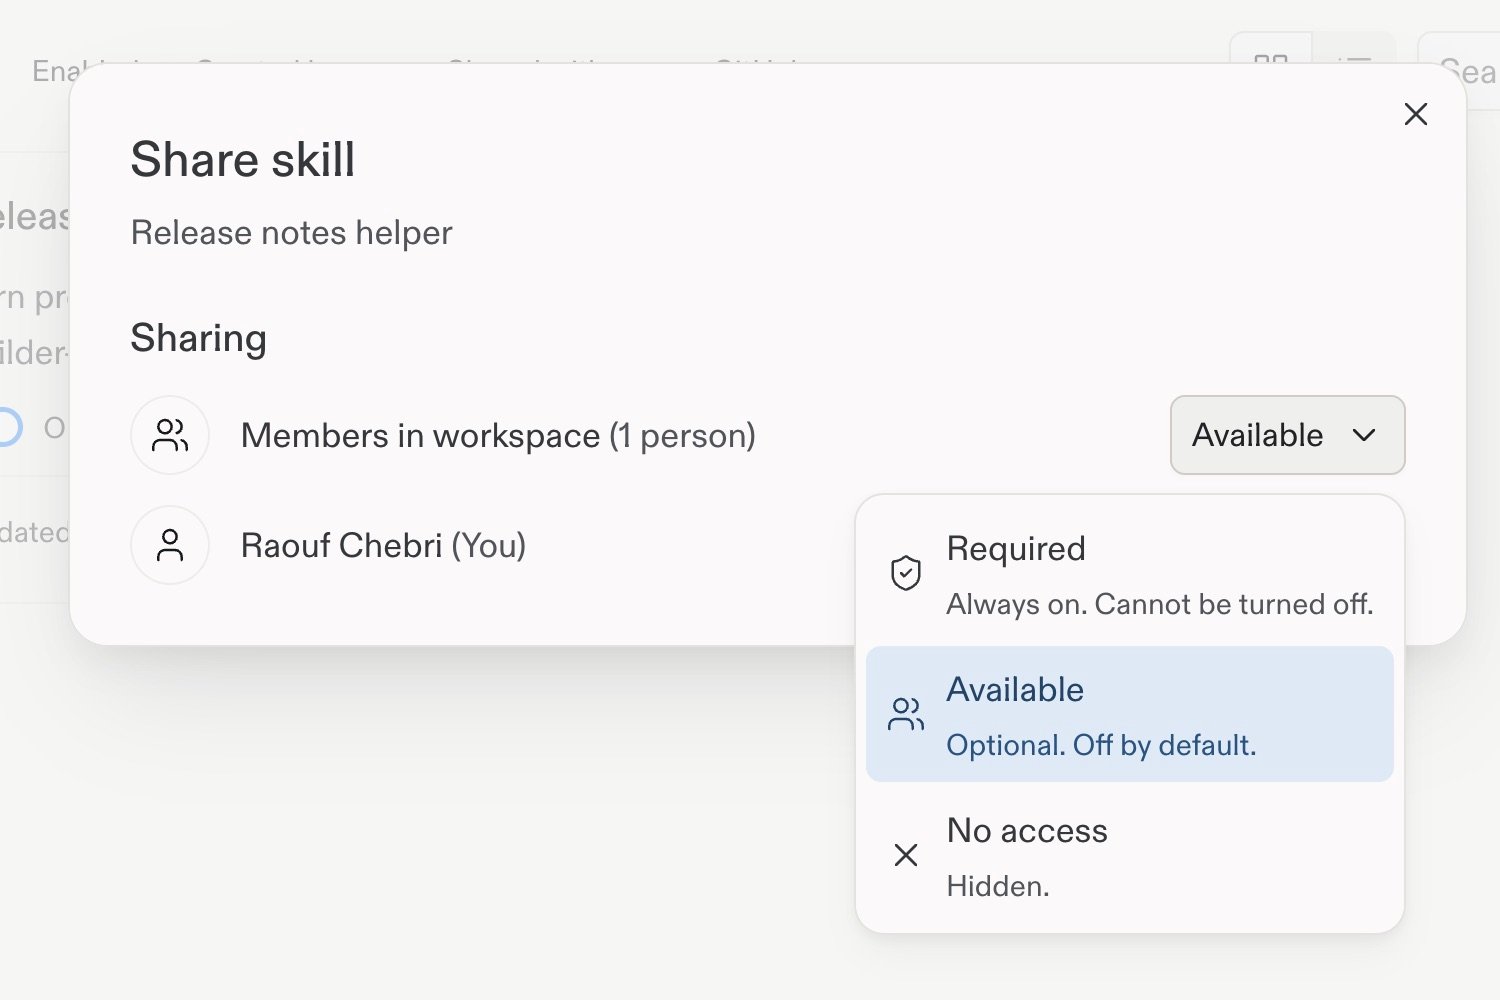
Required
Always on and cannot be turned off
Available
Optional and off by default; members must turn on the Skill to use it
No access
Hidden from members
1
Open the Skills settings
In your Workspace, go to Customization in Settings, then select Skills.
2
Start a custom Skill
Select Add, then select Write a skill.
3
Describe the Skill
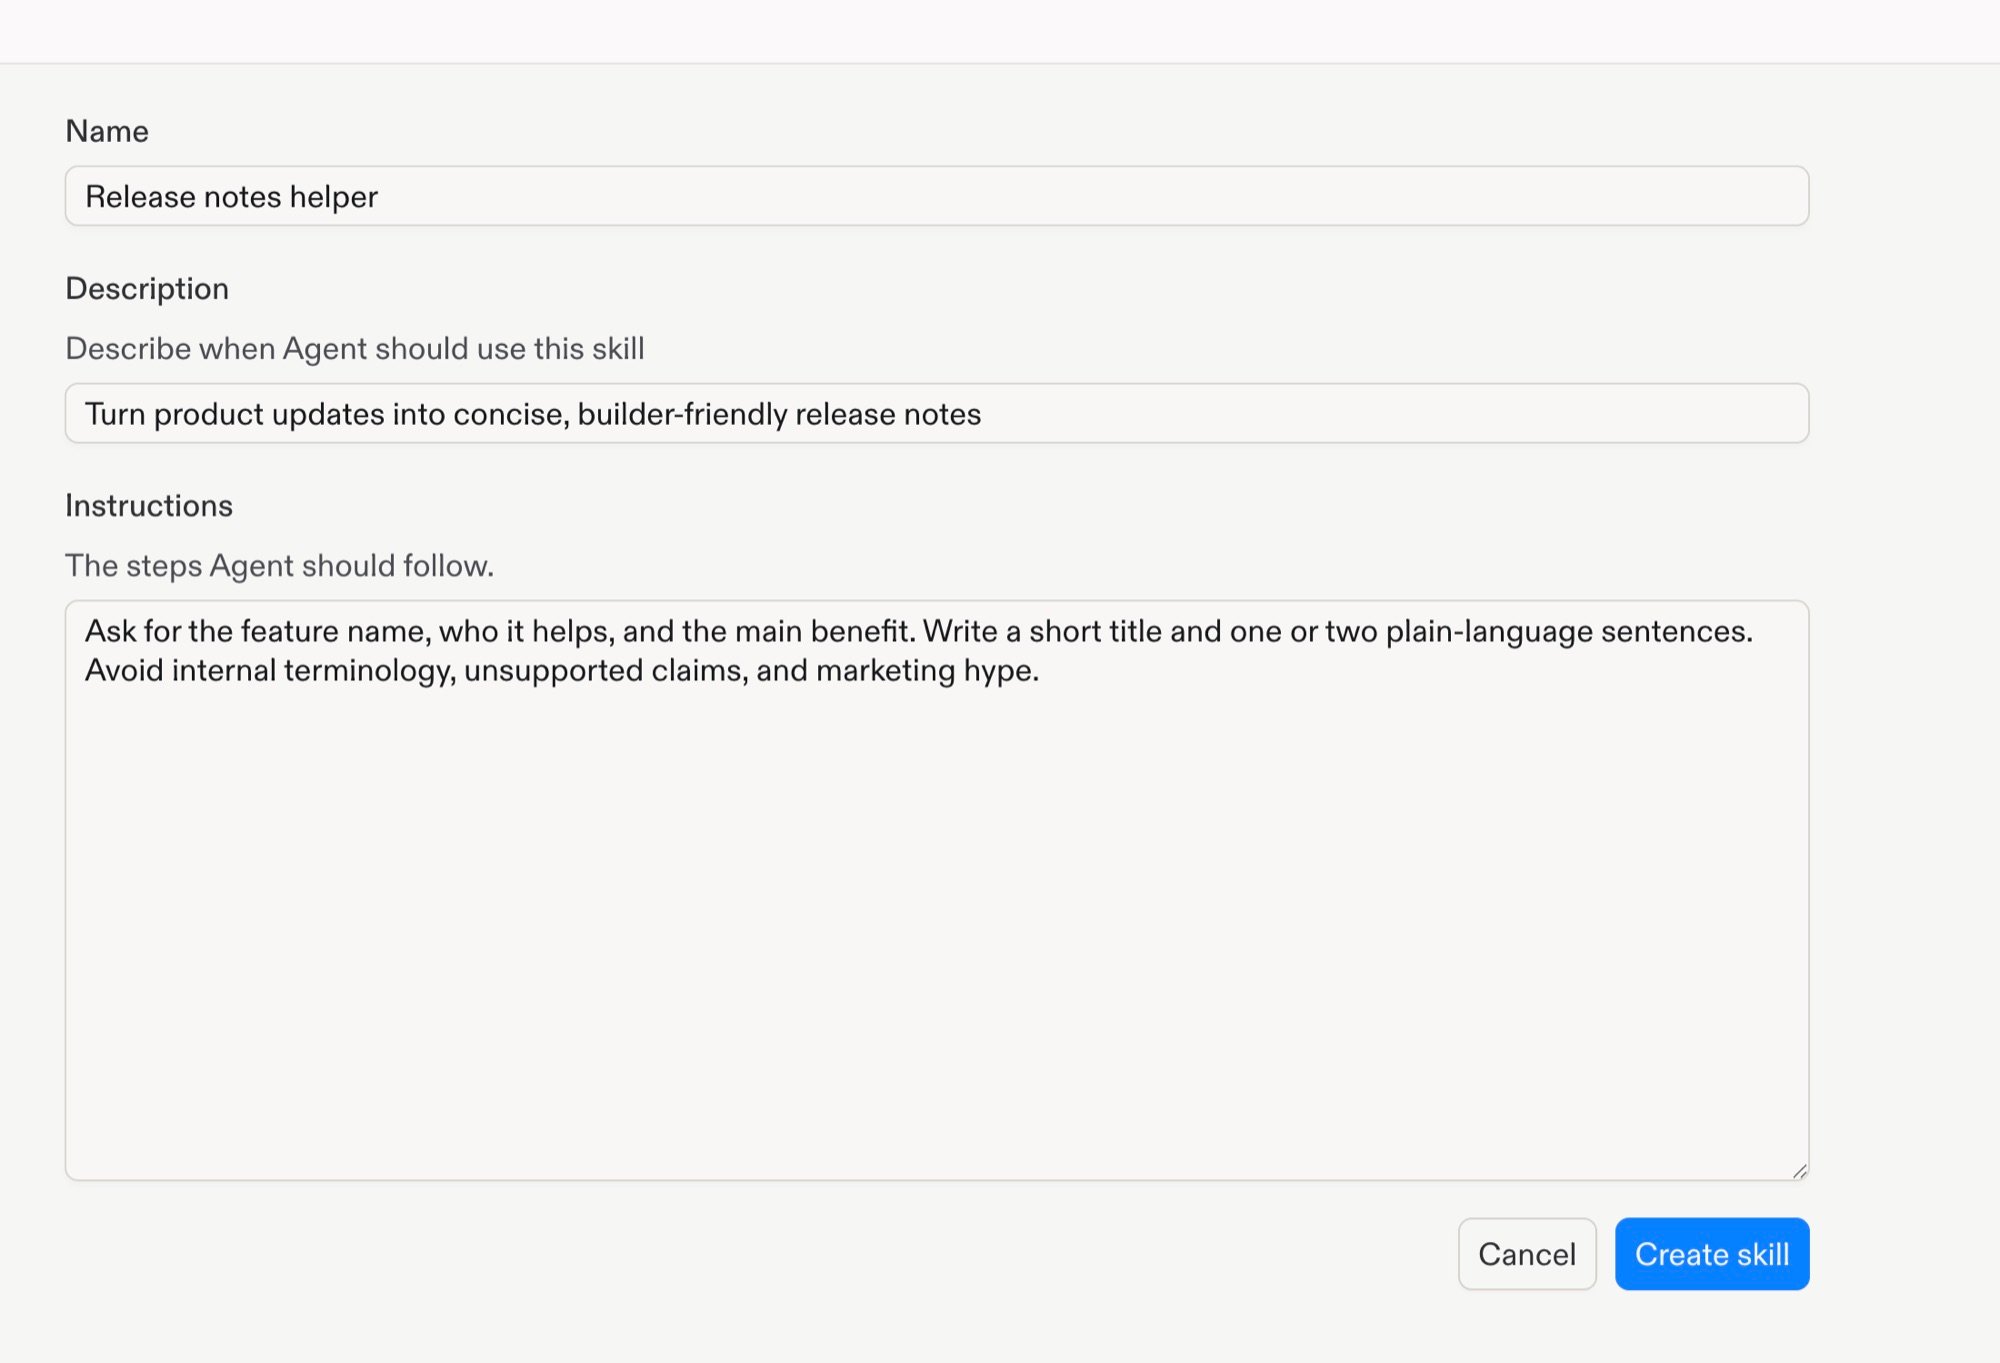
A custom Skill includes:
Name: Identifies the Skill in the Workspace library.
Description: Explains when Agent should use the Skill.
Instructions: Defines the steps Agent should follow.
Enter the details for a custom Skill in a team Workspace.
4
Set Workspace member access
A new Skill starts as Private, so only you and Workspace admins can use it.
Select the Sharing control, then set one of the policies above for Members
in workspace.
Set Workspace member access before creating the Skill.
In a shared Workspace, you can update member access after the Skill exists.
1
Create or select a Skill
Create a custom Skill with the steps above, or go to
Customization in Settings, select Skills, and choose an existing Skill.To save a project Skill to your Workspace, open Agent Skills > Project skills in your project. Select Save to workspace, enter a name, then select Save.
2
Open sharing
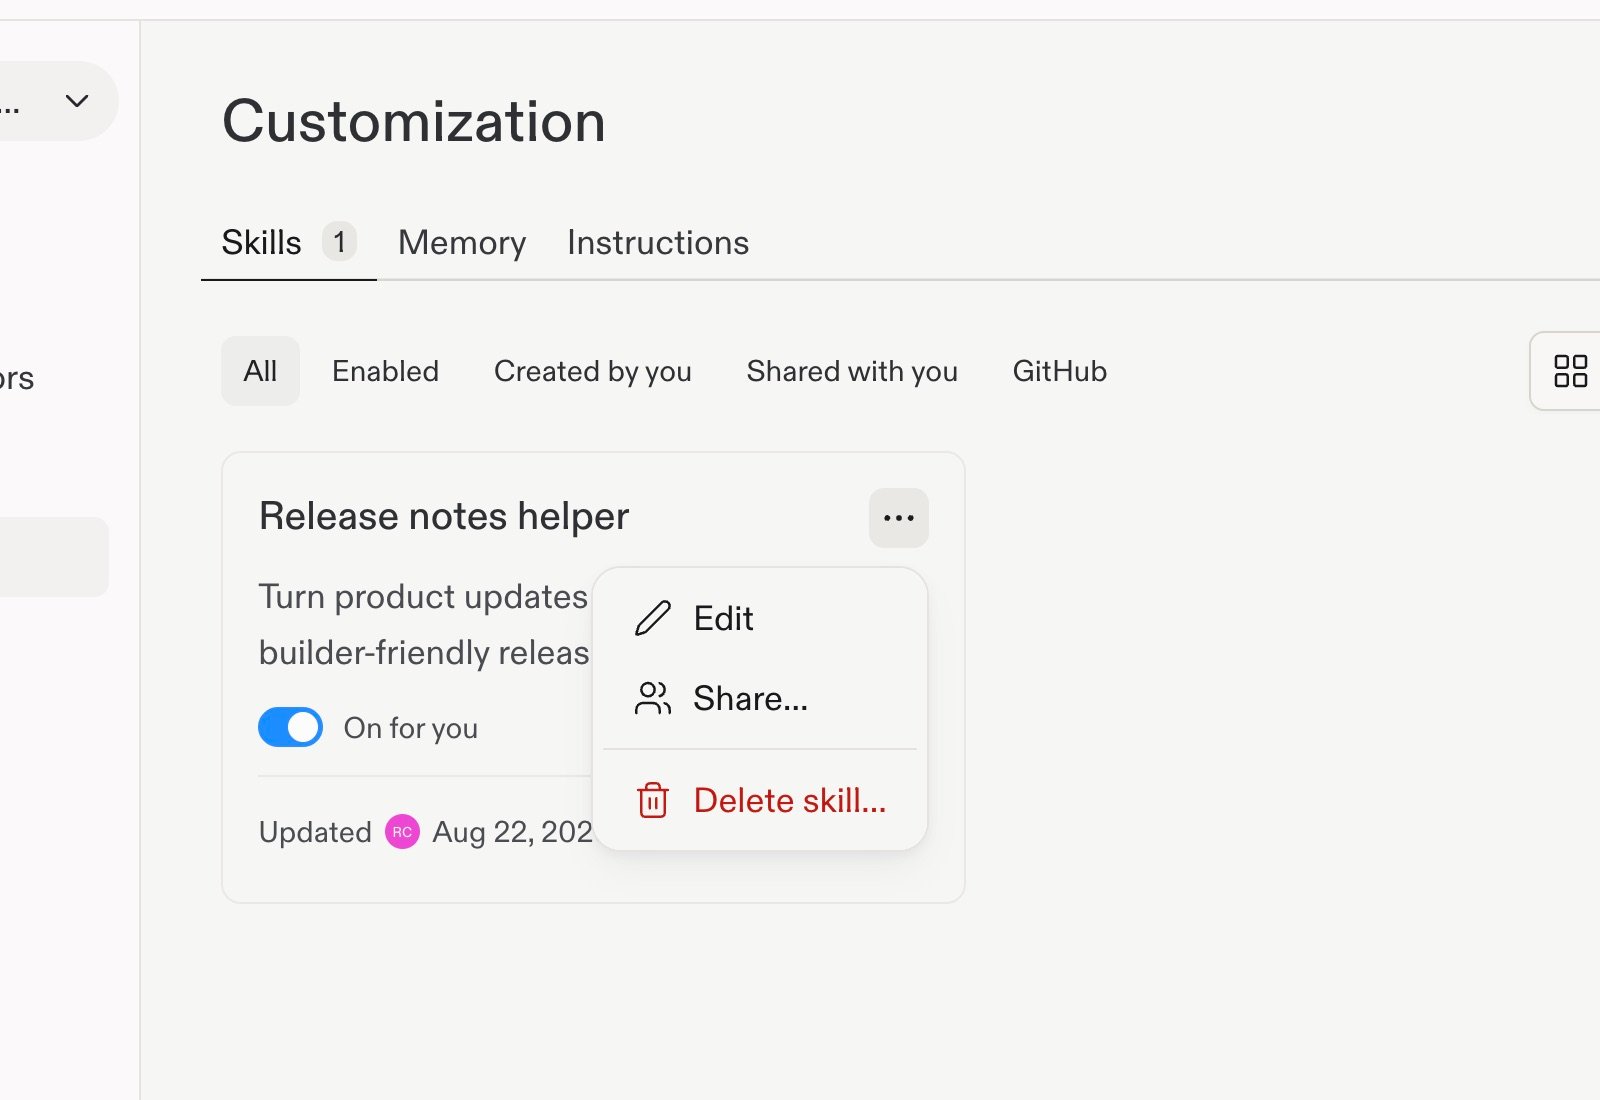
On the Skill card in the Workspace library, open the options menu, then select Share….
Open an existing Skill's menu to share it after creation.
3
Set Workspace member access
In the Share skill dialog, select one of the policies above for Members in
workspace. Your selection applies immediately; there is no separate
confirmation action.
Choose how Workspace members can access the Skill.
Add Skills from a public GitHub repository, folder, or file URL.
1
Open Workspace Skills
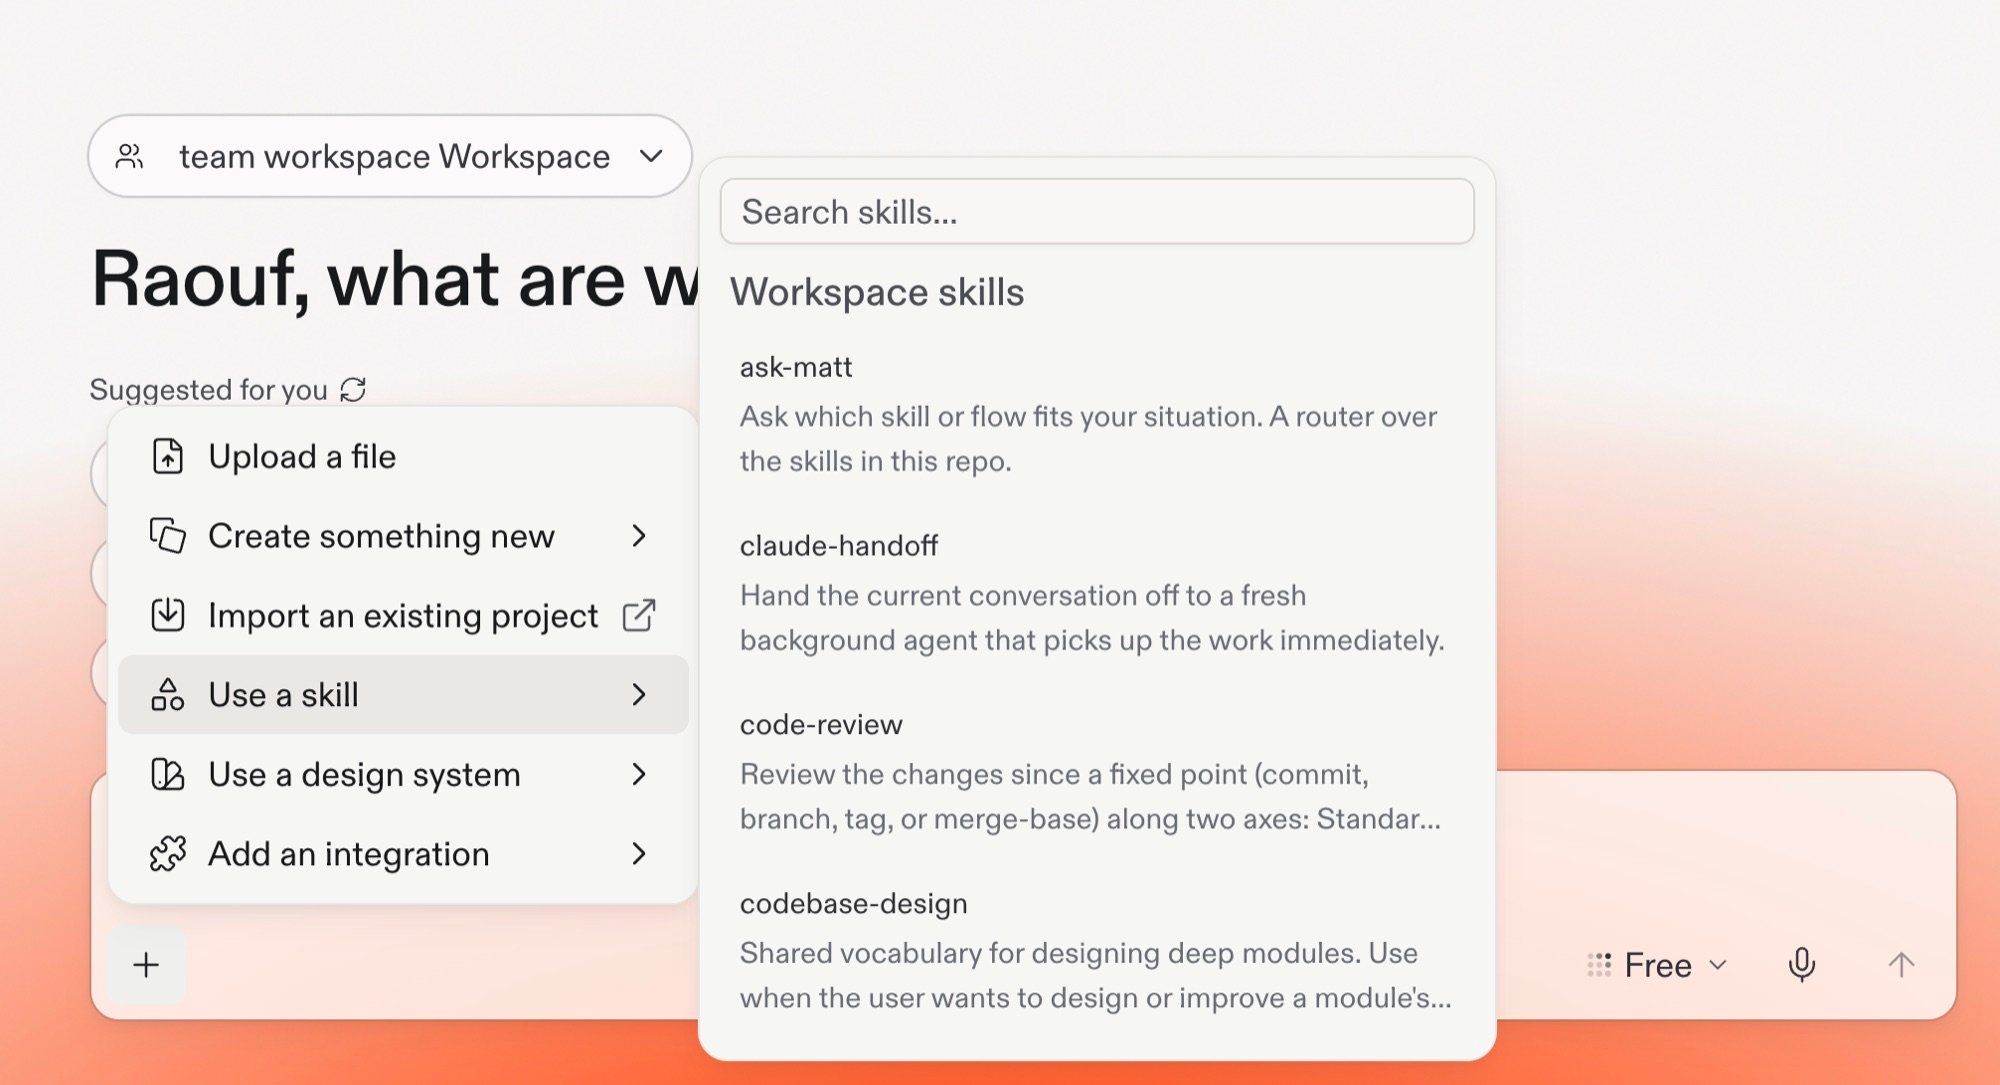
In Agent, select + > Use a skill to open Workspace Skills.
Open the plus menu and select Use a skill to access Workspace Skills.
2
Preview Skills
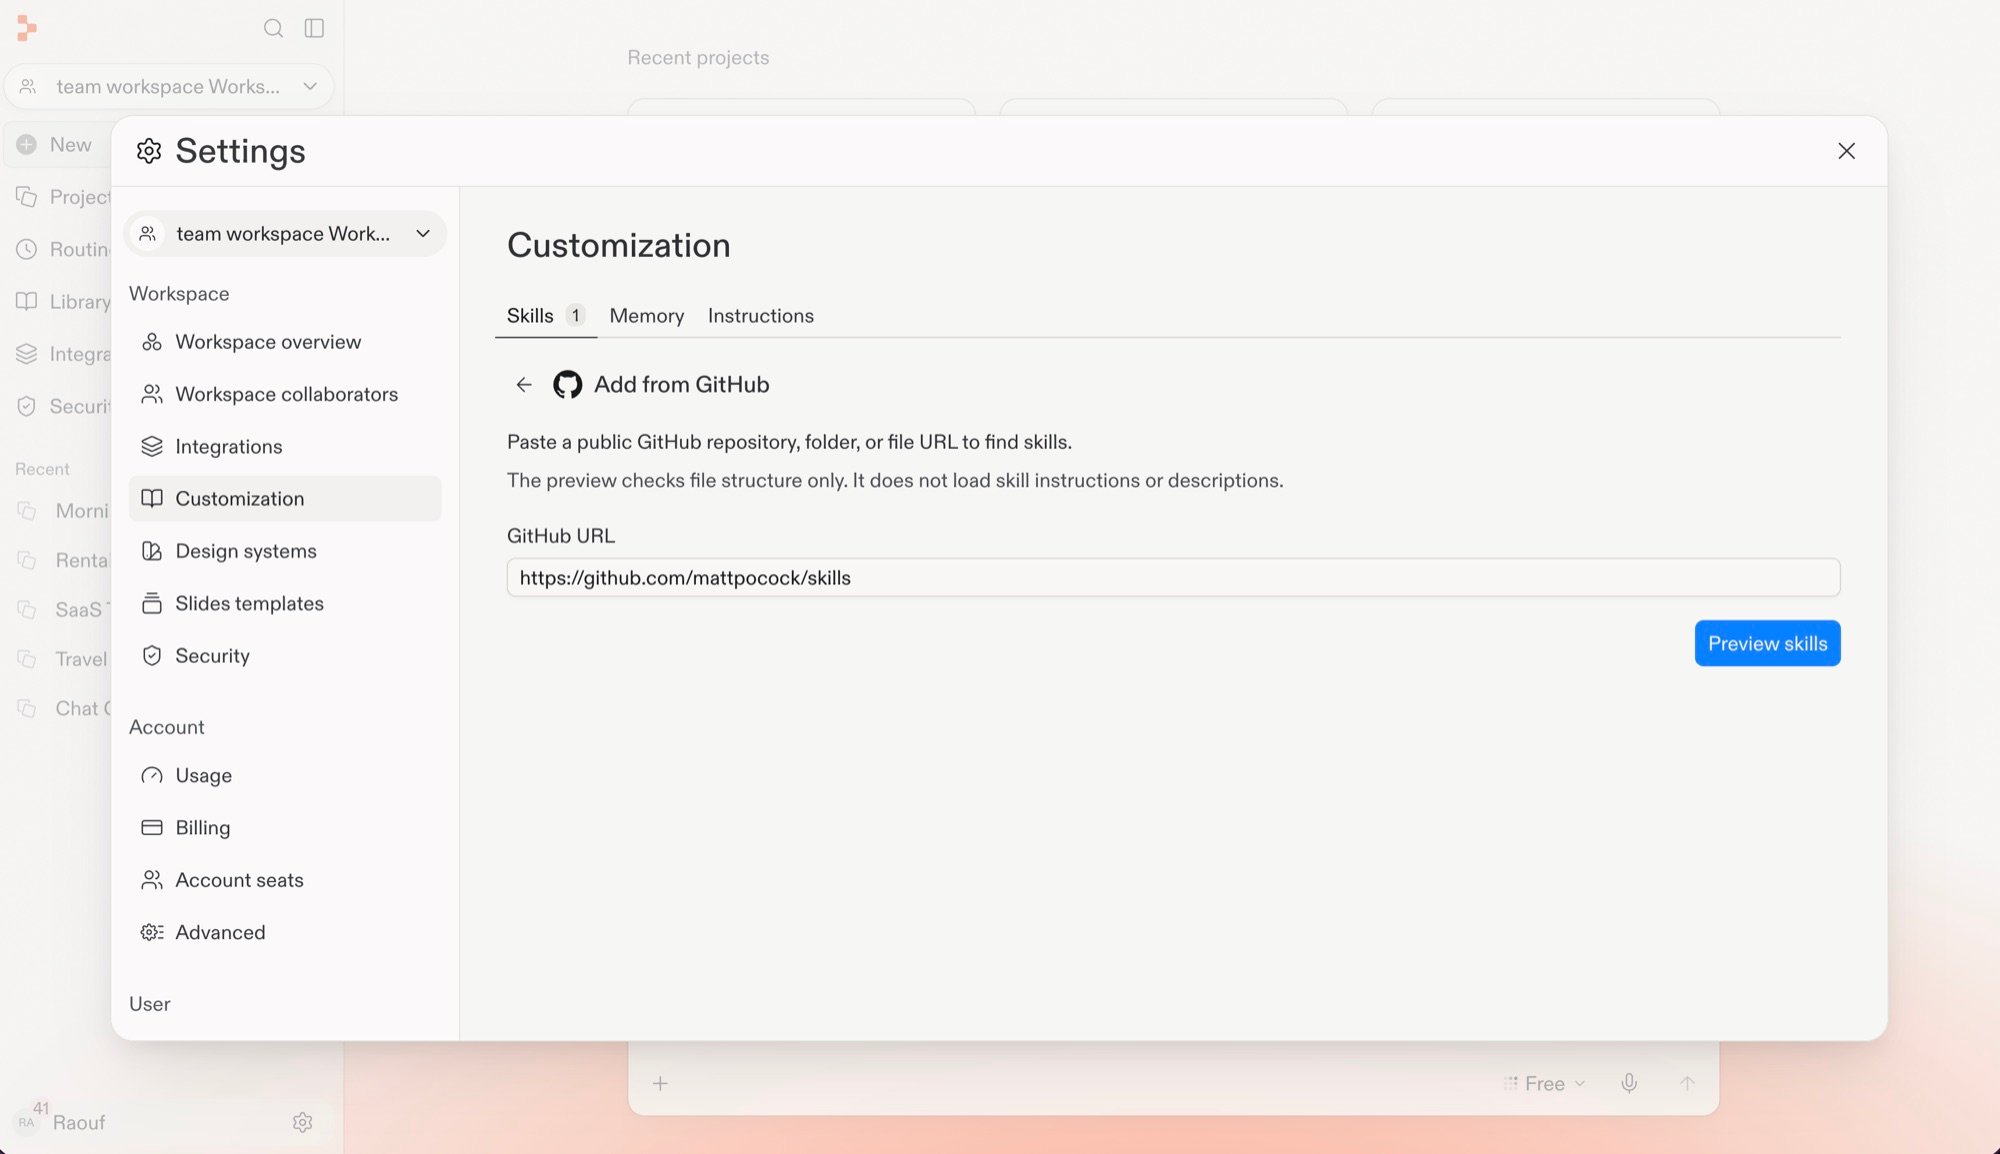
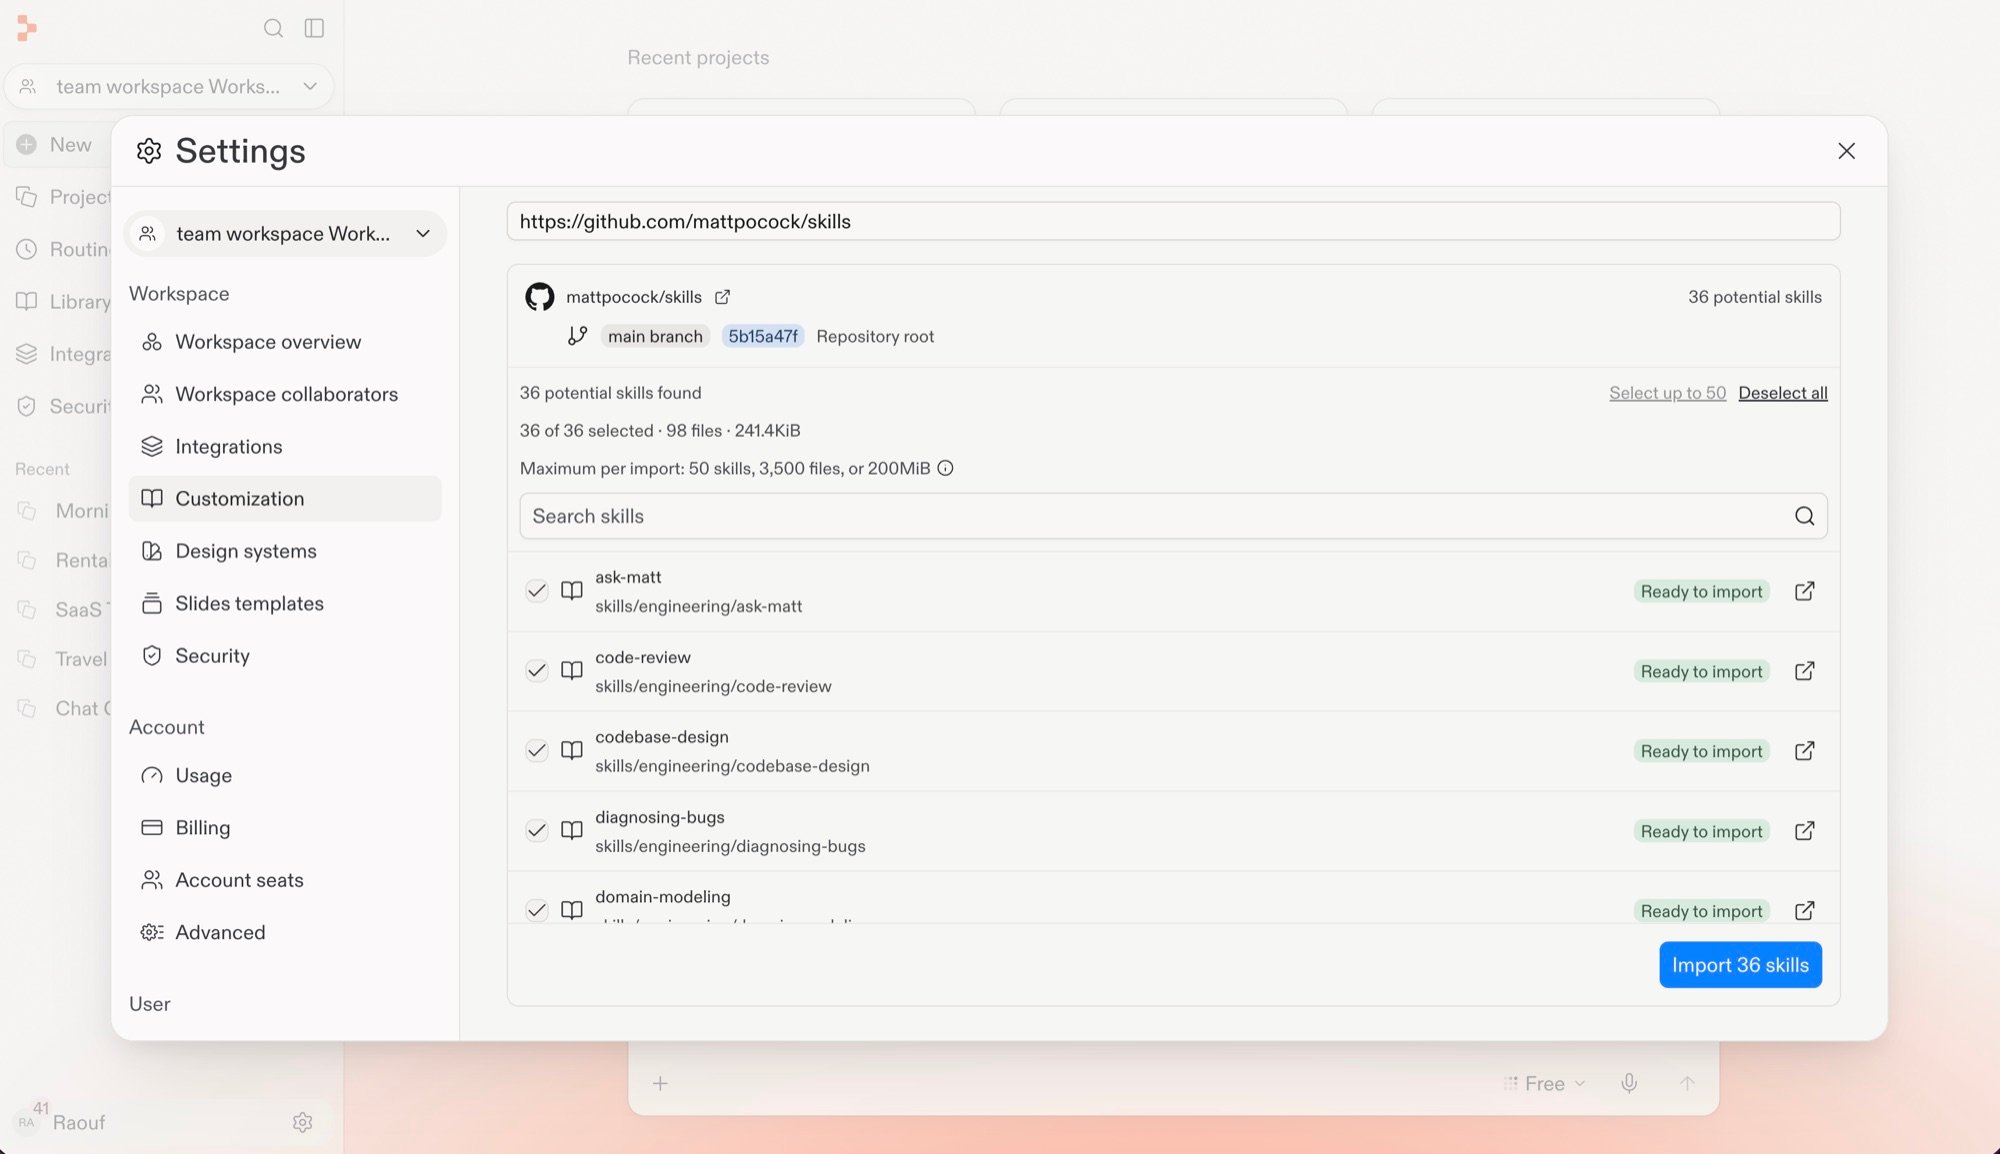
Paste a public GitHub repository, folder, or file URL, then select Preview
skills. The preview checks file structure only. It does not load Skill
instructions or descriptions.
Enter a public GitHub URL and preview its Skill file structure.
3
Select and import Skills
Review the detected Skills, select the ones to import, then select Import. The button shows the number of Skills you selected, such as Import 36 skills.
Review the detected Skills and select the ones to import.
Agent reads the metadata (name and description) of every installed skill on every chat. The full body of a skill loads only when Agent determines the skill is relevant to the current task. This keeps skill content out of the context window until needed.Installed skills persist in your project across Agent sessions and can be committed to version control for team sharing.
If you work across multiple AI coding tools, rulesync has Replit support and helps you maintain consistent configurations.You can import skills from other AI coding assistants: