Replit Auth vs. Clerk Auth — Replit offers two authentication options. Replit Auth (this page) uses Replit’s own login system, so your app’s users sign in with Replit accounts and see Replit-branded login pages. Clerk Auth gives your app its own dedicated authentication tenant powered by Clerk, with fully customizable branding and user accounts that are independent of Replit. Choose Clerk Auth if you need your own brand on the login experience or want user accounts that are not tied to Replit.
Why use Replit Auth
Authentication is a challenging problem that entire companies dedicate themselves to solving. Your app’s primary purpose likely isn’t authentication — it’s whatever unique idea or solution you’re building. Replit Auth offers:- Zero setup — Add authentication with a single prompt in Agent
- Replit account integration — Users sign in with their existing Replit accounts, so there is no separate account creation step
- Built-in security — Uses Replit’s infrastructure with protections against common attacks
- User management — Simplified user administration through the Auth pane
- Database integration — Automatic user entries in your database
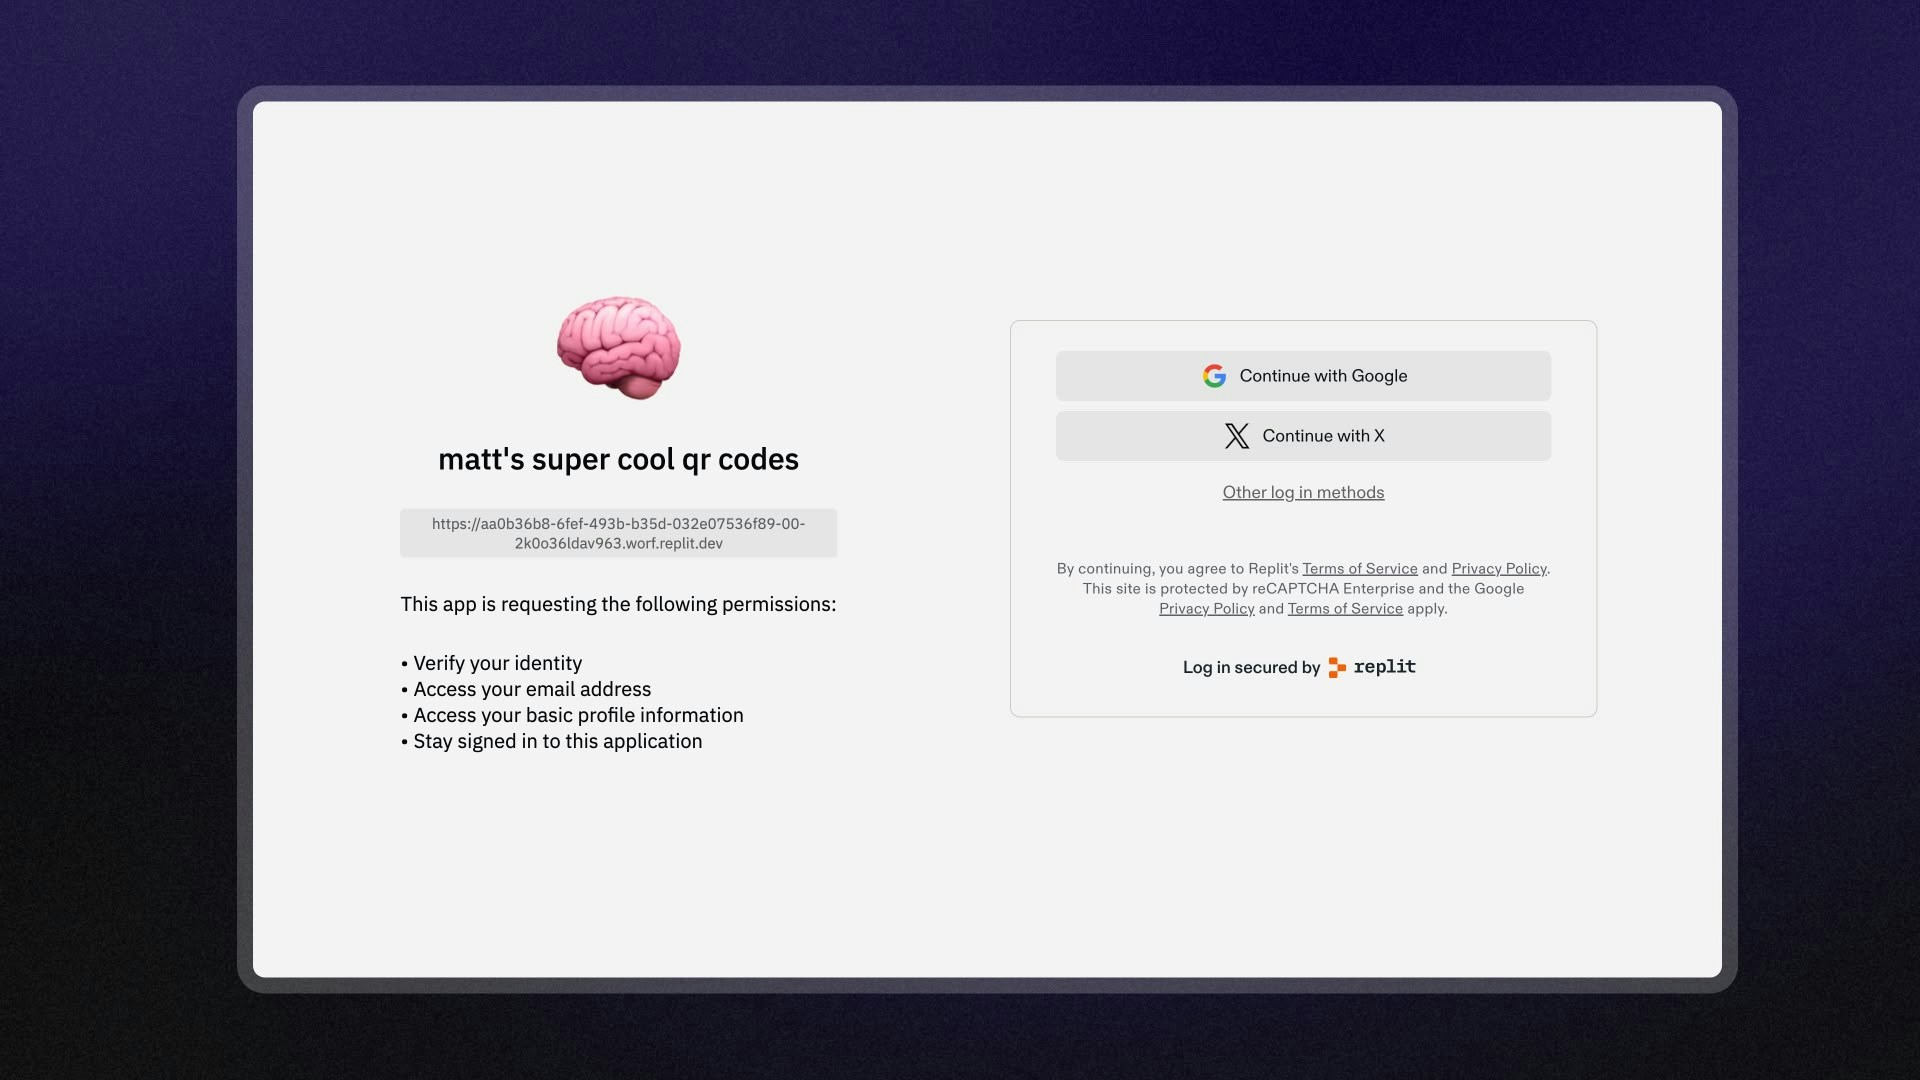
- Customizable login page — Personalize the login experience for your app (with Replit branding)
- Password reset — Replit sends password reset emails for you, so you don’t need to set up your own email delivery provider
- Referral program — Users who sign up via Replit Auth are added to your pending Replit Referrals
- Development and Published Apps — Replit Auth works seamlessly across development (replit.dev), and published apps (replit.app, and custom domains)
Enterprise-grade infrastructure
Replit Auth is more than simple user management—it’s a fully managed authentication solution built on enterprise-grade infrastructure. This powerful combination gives your app the same authentication capabilities used by Fortune 500 companies:- Firebase & Google Cloud Identity Platform - Enterprise-tier SLA with Google’s battle-tested authentication infrastructure
- Advanced security scanning - Automatic protection against bots and malicious actors with reCAPTCHA integration
- Fraud prevention - Email verification and validation powered by Clearout to prevent fake accounts
- Multi-factor authentication - Secure login options backed by Stytch’s enterprise authentication platform
- Global scale - Built to handle millions of users with automatic scaling and reliability
Getting started with Replit Auth
The only way to implement Replit Auth is by using Agent. Simply include a request for Replit Auth in your prompt:Managing users
Replit Auth provides a built-in user management interface accessible through the Auth pane in the Project Editor.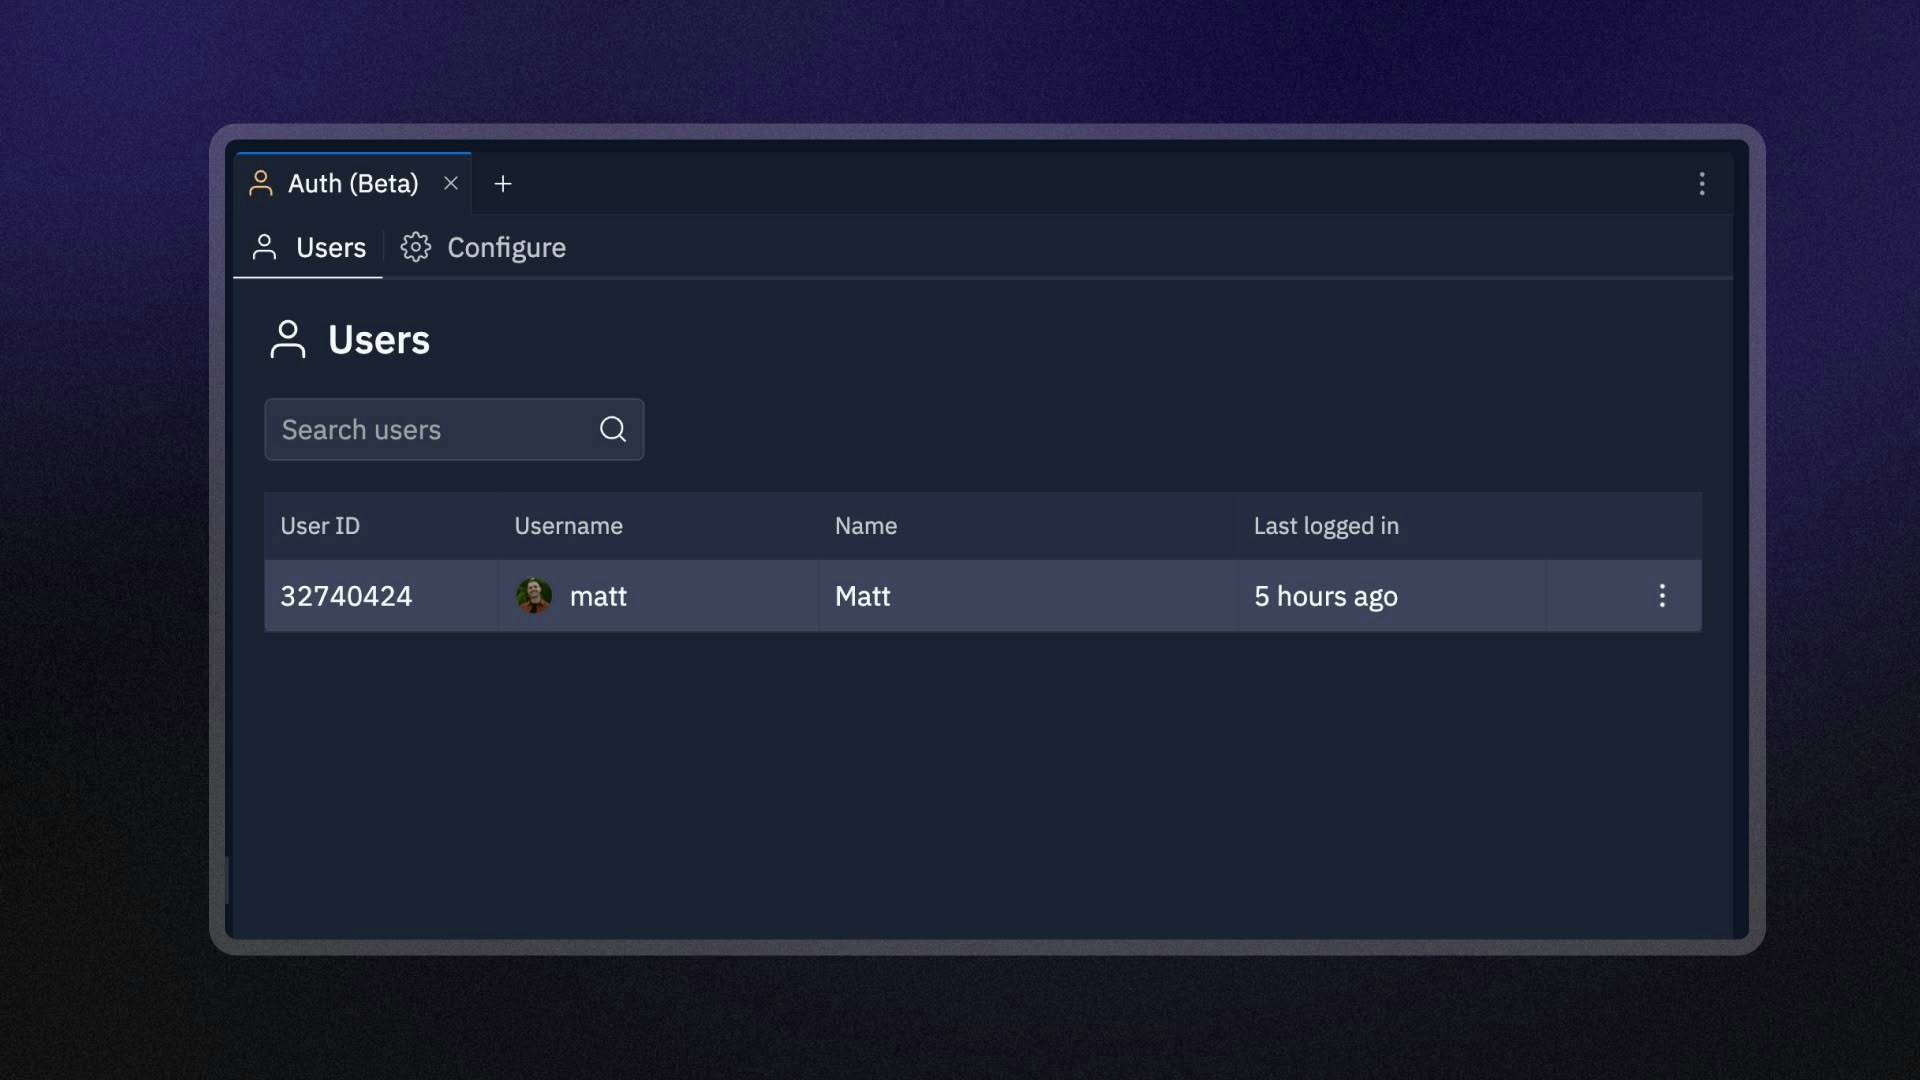
- View all authenticated users
- Ban users from your application
- View user details
- Track user activity
Customizing the login page
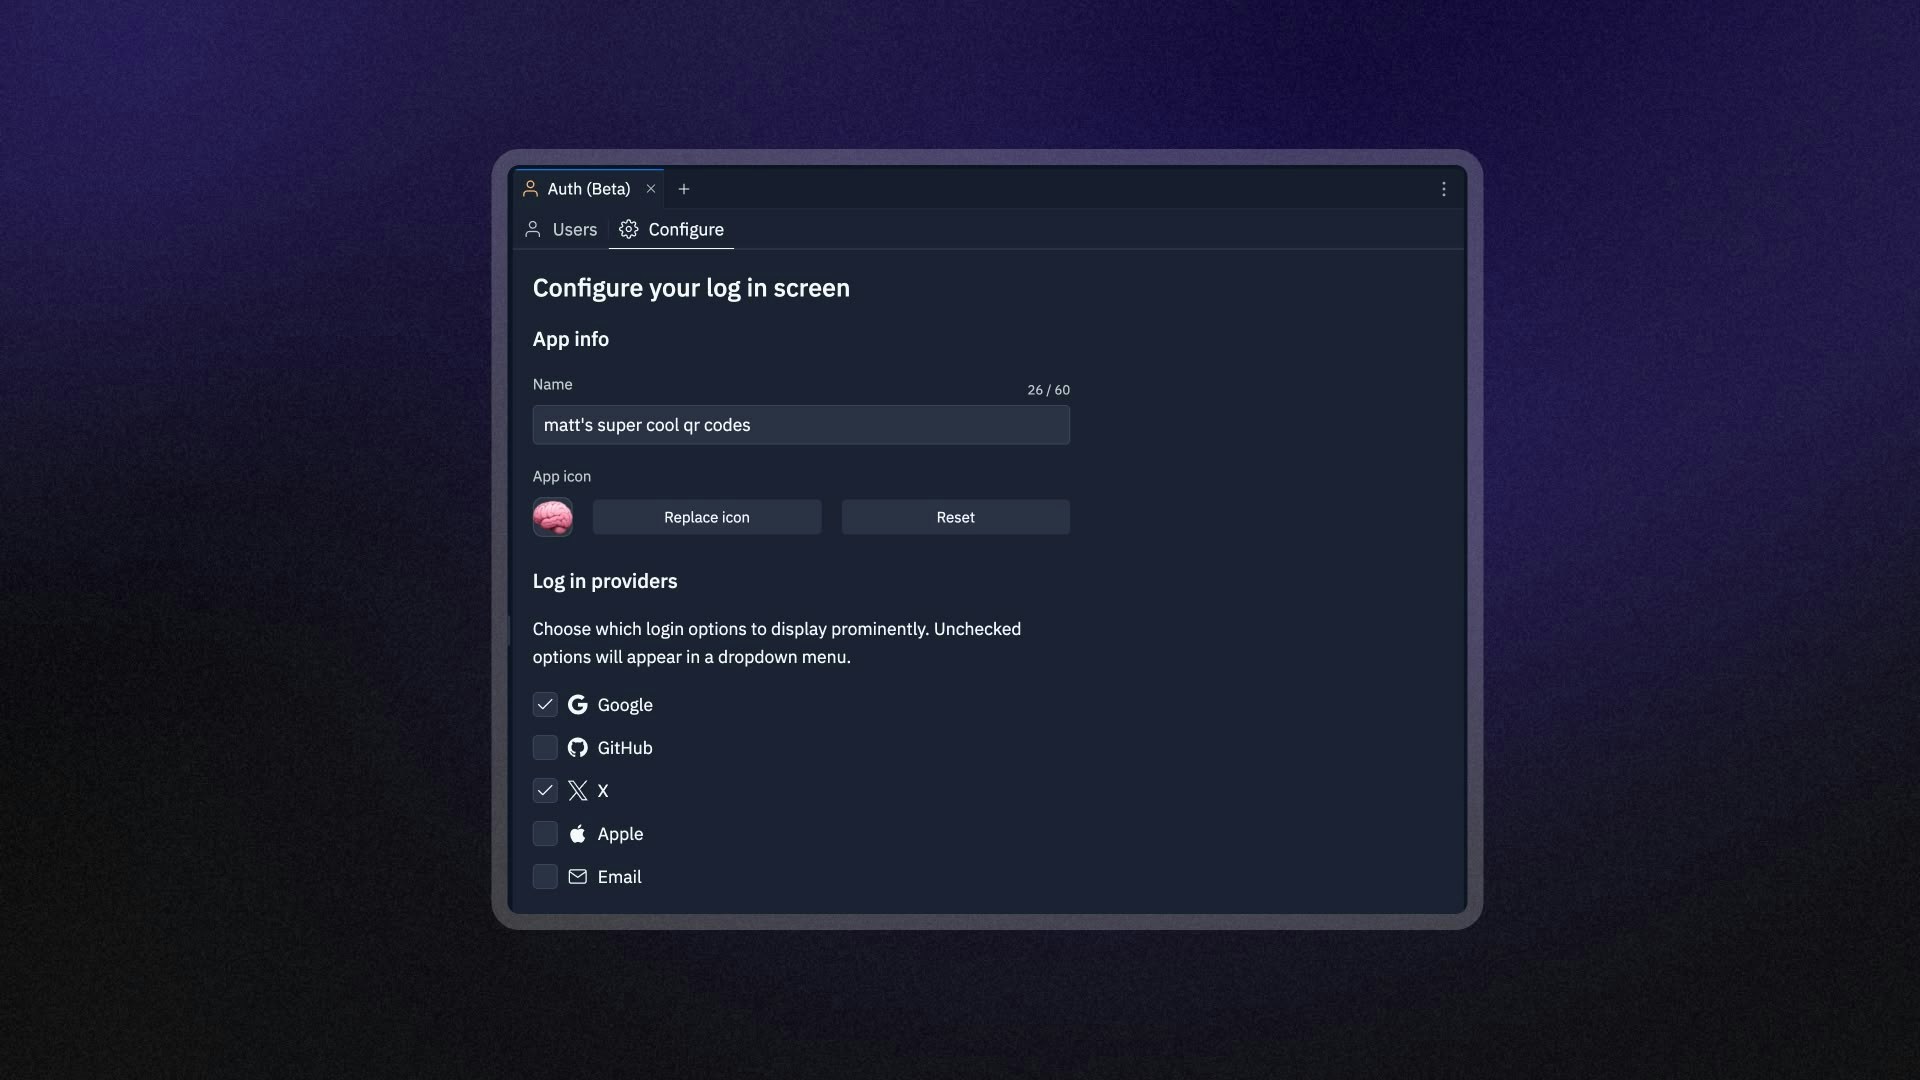
- Navigate to the Auth pane in the Project Editor
- Click on Configure
- Customize the following elements:
- App name
- App icon
- Login methods (Google, GitHub, X, Apple, Email)
Connecting user data with your database
Replit Auth automatically creates user entries in your database. This makes it easy to store user-specific data. Agent will guide you on properly connecting user data with your database.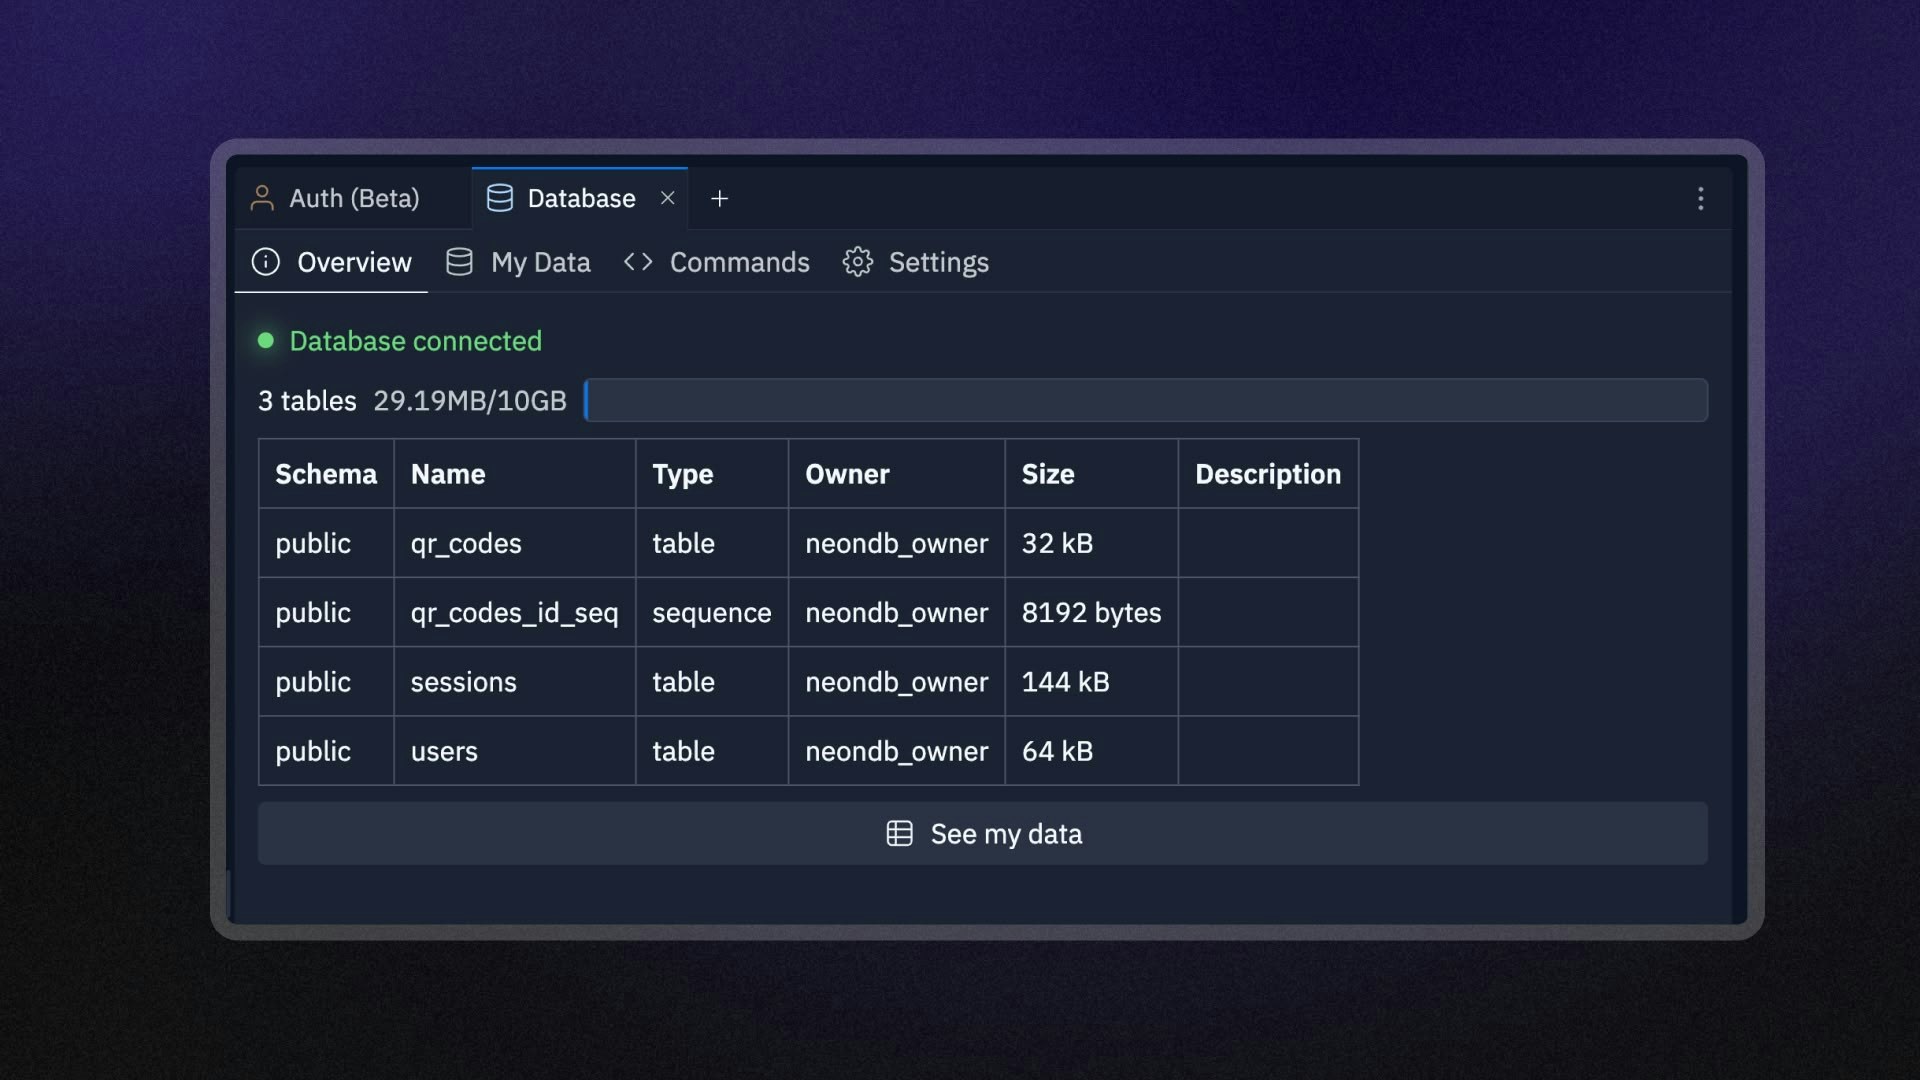
Security considerations
Replit Auth leverages Replit’s infrastructure, providing built-in protections against common security threats. However, you should still follow these best practices:- Always validate user authentication server-side before performing sensitive operations
- Never store sensitive information like passwords in your code
- Use environment variables for any API keys or secrets
- Implement proper access controls for user data
Referrals
To encourage applications that teach people about Replit, any user that signs up via Replit Auth will automatically be added to your pending Replit Referrals. If they later upgrade to Replit Core, you will receive any referral bonus you are entitled to according to the current terms of the referral program.Troubleshooting
Common issues
-
User not recognized after login
- If you’re experiencing issues, ask Replit Agent for help debugging your authentication implementation.
-
Custom icon not displaying
- Make sure the icon URL is accessible and in a supported format (PNG or JPG).
-
Newly linked custom domain isn’t working
- Republish to refresh the domain list (REPLIT_DOMAINS environment variable).