
Configure a Repl

Repls are configured with two files: the .replit and replit.nix. They affect how your Repl behaves, from code execution to development tools and languages.

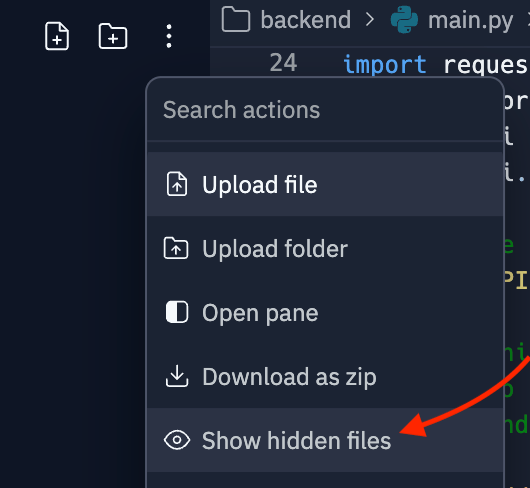
These configuration files are hidden by default. Show them in your Repl by selecting "Show hidden files" from the filetree menu.

image

replit.nix file

Replit uses Nix to manage packages and environments. The replit.nix file is used for:

Specifying system dependencies: Define exactly what software packages your Repl requires, managed through Nix, a package manager.

Creating reproducible environments: Ensure your development environment is consistent and reproducible, ideal for collaborative projects and testing across multiple systems.

You can manage Nix packages visually through the Dependencies tool. Learn more in the System Dependencies guide.

To configure packages with the replit.nix file, you can list Nix packages in the deps array, prefixed with pkgs.. Any changes will be synced after your shell is reloaded.

{ pkgs }: {
deps = [
pkgs.nodejs-19_x
pkgs.nodePackages.typescript-language-server
pkgs.yarn
pkgs.replitPackages.jest
];
}

.replit file

The .replit file controls your Repl's behavior. It uses the toml configuration format. Here are some of the key aspects that can be configured:

Run command: Specify the command that executes when the Run button is selected, allowing for immediate and repeated testing or execution of your code.

Language Server Protocol (LSP): Provides features like auto-complete, code navigation, code highlighting, and real-time linting and errors.

Environment variables: Set and manage environment variables essential for your applications to run correctly.

Dependencies and packages: Manage package installations and configurations directly through the .replit file, ensuring your Repl has all the necessary tools ready upon startup. You can manage dependencies visually through the Dependencies tool. Learn more in the System Modules guide.

For Python applications, the default .replit file looks like:

entrypoint = "main.py"
modules = ["python-3.10:v18-20230807-322e88b"]

[nix]
channel = "stable-23_05"

[unitTest]
language = "python3"

[gitHubImport]
requiredFiles = [".replit", "replit.nix"]

[deployment]
run = ["python3", "main.py"]
deploymentTarget = "cloudrun"

The following table provides a view of each setting within the .replit file, explaining what each configuration does and its impact on the Repl environment.

Configuration keyValue/ExampleDescription
entrypointmain.pySpecifies the main file to be executed and displayed by default when the editor is opened. You can rename the file name based on your application.
modules["python-3.10:v18-20230807-322e88b"]Defines specific versions of programming languages or other major dependencies supported by Replit.
[nix]Specifies settings for using Nix, a package manager, to manage system dependencies. Refer to Dependency Management document for more information.
channelstable-23_05Indicates the Nix channel to use, which affects the versions of system dependencies available.
[unitTest]Configures settings related to unit testing within the Repl.
languagepython3Specifies the language used for unit testing, indicating that Python 3 is used for writing tests.
[gitHubImport]Settings that affect how projects are imported from GitHub, specifically which files must be included.
requiredFiles[".replit", "replit.nix"]Lists the files that must be present when importing the project to ensure it functions correctly.
[deployment]Contains settings for deploying the application from the Repl to a live environment.
run["python3", "main.py"]Command executed to start the application during deployment.
deploymentTargetcloudrunSpecifies the deployment target platform for hosting the application.

Now that you have an idea of the default configurations of the .replit file use the next sections to understand how to configure basic and advanced settings for your Repl.

Configuring basic settings

Entrypoint

This is the main file of your project. If you do not define a run property, entrypoint is the file that gets executed by the runtime.

entrypoint = "<file-name>.py"

Run command

The run property in the .replit file is a key feature that determines the initial command or series of commands executed when the Run button is selected in a Replit environment. The Run command can be specified either as a string representing the command to execute, or an array of strings representing the command and individual arguments to that command.

Some common ways to configure the Run command:

  • Single command: This example shows how to pass single command to execute directly in the Repl. With this in your .replit file, pressing the Run button will display a greeting in the Console pane: Example: run = "echo 'Hello, Replit!'"

  • Explicit arguments: In some situations it may be beneficial to be more explicit, avoiding the need for parsing quotes or shell interpolation rules. We can rewrite the above example to separate the arguments. Note, we no longer need both ' and ", since we are explicitly passing the greeting as the first and only argument to echo: Example: run = ["echo", "Hello, Replit!"]

  • Multiple commands: This example shows how to run multiple processes, such as a frontend and a backend, simultaneously. This could be useful if developing a python backend and a typescript frontend, where each server binds to a different port: Example: run = "python -m app & npm run start & wait"

Process management

While multiple commands can be simultaneously run with &, you may want a better experience distinguishing logs between services. You can add system dependencies like process-compose to better orchestrate multiple processes.

Build phase

For some languages or runtimes, there is a separate compilation phase before code can be run. This covers both compiled languages like TypeScript, Golang, or Java, or offering a parameter you can use to reset your environment, data, or configuration before the next run is invoked.

  • Compiling: In a TypeScript repository, you may find yourself needing to run tsc prior to executing your code. Example:
build = "tsc app.ts"
run = "node app.js"

Including environment variables

To supply environment variables to your service before execution, you can expand the run property into a table.

This is a more involved change, and likely requires moving where your run = "..." property is located inside your .replit file.

The following diff shows suppying the command by way of [run]'s args, as well as the variable NAME supplied in [run.env]:

-run = ["bash", "-c", "echo \"Hello, $NAME!\""]

modules = ["nodejs-20"]

hidden = [".pythonlibs"]

+# We need to move our new [run] down past all the
+# top-level properties that do not start with a `[`!
+[run]
+args = ["bash", "-c", "echo \"Hello, $NAME!\""]
+
+[run.env]
+NAME="Replit"

[nix]
channel = "stable-23_11"

Interactivity

Interactive programs can also be launched by way of the Run button, offering a way to distinguish your development environment from the terminal where your program is running. Consider the following tally script:

Example

[run]
args = ["bash", "-c", """
count=0
while read -p "$PROMPT" -r next && [ -n "$next" ]; do
count=$((count+next))
done
echo "The numbers you entered sum to $count!"
"""]

[run.env]
PROMPT = "Next number ([Enter] to end): "

Advanced configuration options

Explore the detailed configuration options available for your Repl. You can customize your development environment, manage run commands, integrate language services, and handle dependencies.

ConfigurationKeyValue/ExampleDescription
onBootonBootonBoot = "npm install"Command that executes when the Repl boots up.
compilecompile(No default example)Command that runs before the run command, used in compiled languages like C++.
languagelanguagelanguage = "javascript"Specifies the language during a GitHub import or when creating a Repl.
entrypointentrypointentrypoint = "index.js"Main file to run and display when opening the editor.
hiddenhiddenhidden = [".config", "package-lock.json"]Files or folders to hide by default in the side file tree.
audioaudioaudio = trueEnables System-Wide Audio when set to true.

Notes about System-Wide Audio

When setting audio = true in your .replit file, you may need to run kill 1 in a shell to force the new setting to take effect.

When running a graphical application, you will see a pair of headphones with a checkbox in the lower right of the Output pane. Due to browser restrictions, this will need to be enabled every time you refresh.

# Ensure this is at the top of your `.replit` file, outside of any `[`-bracketed section
audio = true

Packager configuration

ConfigurationKeyValue/ExampleDescription
packagerlanguagepackager.language = "python3"Language used for package operations.
packager featuresguessImportspackager.features.guessImports = trueAutomatically guess packages to install prior to running the Repl.
packager featurespackageSearchpackager.features.packageSearch = trueEnables support for the packager when set to true.
packager featuresenabledForHostingpackager.features.enabledForHosting = falseSets whether hosting the Repl requires running a package installation.
packagerafterInstallafterInstall = "echo 'package installed'"Command executed after a new package is installed via the packager.
packagerignoredPathsignoredPaths = [".git"]Paths to ignore while attempting to guess packages.
packagerignoredPackagesignoredPackages = ["twitter", "discord"]Modules should never attempt to guess a package during installation.

Example .replit configuration for packager configuration

# Define the language for the Repl
packager.language = "python3"

# Enable features for automatic package management
[packager.features]
guessImports = true
packageSearch = true
enabledForHosting = false

# Command to run after each package installation
packager.afterInstall = "echo 'Package installed successfully'"

# Define paths and packages that should be ignored by the package manager
packager.ignoredPaths = [".git", "node_modules"]
packager.ignoredPackages = ["twitter", "discord"]

# Additional deployment settings
[deployment]
run = ["python3", "app.py"]

Deployment configuration

ConfigurationKeyValue/ExampleDescription
deploymentrundeployment.run = "npm start"Command that executes when a Deployment container starts.
deploymentbuilddeployment.build = "npm run build"Command that executes before running a Deployment.
deploymentignorePortsdeployment.ignorePorts = trueIf true, deployment success doesn't require an open port check.

Example .replit configuration for deployment configuration


# Specifies the main entry point for the project
entrypoint = "app.js"

# Configuration settings for deploying the application
[deployment]
run = "npm start"
build = "npm run build"
ignorePorts = true
note

Interpreter configuration has been deprecated and is no longer available in Replit. Instead, you are encouraged to use the Run commands to configure how scripts and applications are executed within your Repl environment.

Networking and extensions

ConfigurationKeyValue/ExampleDescription
portslocalPortlocalPort = 3000Port that Replit binds to an external port.
portsexternalPortexternalPort = 80Publicly accessible port linked to the localPort.
extensionisExtensionisExtension = trueSpecifies whether a Repl is a workspace extension.
extensionextensionIDextensionID = "492a5fcd-f090-4356-ace8-50755e8deb2b"Determines if a Repl is attached to a specific extension. Automatically filled when publishing a new extension.
extensionbuildCommandbuildCommand = "npm run build"Command to bundle the extension into a static directory for uploading.
extensionoutputDirectoryoutputDirectory = "./dist"Path to the static directory used to render the Extension relative to the Repl's root directory.

Example .replit configuration file for managing networking and extensions

# Networking configuration to expose your application on specific ports
[[ports]]
localPort = 3000
externalPort = 80

# Extension settings to define and manage a workspace extension
[extension]
isExtension = true
extensionID = "492a5fcd-f090-4356-ace8-50755e8deb2b"
buildCommand = "npm run build"
outputDirectory = "./dist"

Accessing Repl environment metadata

Node.js

To access all environment variables:

console.log(process.env);

To access a single variable (REPL_SLUG):

console.log(process.env.REPL_SLUG);

Python

To access all environment variables:

import os
print(os.environ)

To access a single variable (REPL_SLUG):

import os
variable = os.environ.get('REPL_SLUG')
print(variable)

Rust

To access all environment variables:

use std::env;
fn main() {
    for (key, value) in env::vars() {
        println!("{}: {}", key, value);
    }
}

To access a single variable (REPL_SLUG):

use std::env;
fn main() {
    let variable = env::var("REPL_SLUG").unwrap();
    println!("{}", variable);
}

Environment variables

Following are the environment variables accessible from within your Repl:

keydescription
REPL_OWNERThe username of the owner of the Repl. If your Repl is text-based and has no webserver, REPL_OWNER will reflect the value of the current user accessing the Repl
REPLIT_DB_URLThe URL of your key-value Replit database
REPL_IDThe unique UUID string of your Repl
HOMEThe home path of your Repl
systemThe operating system running on your Repl
LANGSets the language and character encoding for your Repl, affecting how text is processed and displayed
REPL_IMAGEThe docker image that corresponds to your Repl
REPL_LANGUAGEThe programming language configured for your Repl, used to determine the runtime environment and tooling
REPL_PUBKEYSA stringified JSON object containing different public API keys
REPL_SLUGA simplified, machine-readable version of the name of the Repl, suitable for use in URLs and file names
PRYBAR_FILEThe main/entrypoint file of your Repl
REPLIT_DEV_DOMAINProvides the replit.dev URL for your Repl in the Workspace. Note that this environment variable is not available in Deployments
Was this helpful?