Autoscale Deployments
Autoscale can scale to as many instances as required. You're charged in proportion to traffic, and you can scale up horizontally to handle high load when needed.
It is our recommended choice for websites, web applications, APIs, or microservices.
Autoscaling
Why Autoscale?
Autoscaling helps with two scenarios:
- Scaling down to save you money when you don't have traffic
- Scaling up to multiple instances when you have high traffic and need more servers
If you only want to scale down as much as possible, set your max number of machines to 1 during Deployment configuration.
How does scaling work?
Autoscale Deployments adds or removes instances under the following conditions:
- It will add instances as you exceed 80 concurrent requests per instance, up to your set maximum instances.
- It will remove instances as your traffic lowers, to fall beneath the 80 concurrent requests target.
Replit keeps one instance "warm" at all times. Subsequent scaling operations (scaling up beyond one instance) may occur on "cold" instances which will have a slower startup time.
- In order to keep an instance "warm", your application may be started up periodically to ensure it is ready to handle requests. Applications may be restarted at any moment.
- It's recommended that you keep application startup quick for best performance. Avoid doing expensive or long operations on startup. Use lazy loading to only initialize objects when they're needed.
- Minimize loading global variables and making global function calls to reduce the latency of scaling operations.
- Even when idle, there may be charges associated with restarts, specially if your application's startup is slow or consumes a lot of resources.
Tips for effective Autoscale services
Because Autoscale is based on request handling to be cost effective and to support horizontal scaling, there are some requirements and tips to work well.
Autoscale Requirements
Your application must meet the following requirements:
- It must listen for requests using HTTP, HTTP/2, WebSockets, or gRPCs.
- It can not perform background activities outside of request handling.
- It must be stateless, it cannot rely on persistent local state. Note that you may use external state, such as databases like PostgreSQL.
Autoscale Tips
If you are new to horizontally scaled applications, there are some tips you can follow to improve performance. The key constraints to remember are:
- Your application will start new copies frequently
- Your application will have multiple copies running at once
- State stored locally is an in-memory filesystem
Here are some tips to help you manage those contraints:
Report errors instead of crashing
Handle exceptions and do not let your application crash. Crashes will cause a new server to start, which slows your request processing. Instead, report errors using logging.
Use dependencies wisely
Dynamic languages with dependent libraries (eg NodeJS modules) add to startup latency, and will slow requests when a new instance is starting. Minimize your dependencies or utilize lazy loading if your language supports it.
Lazily load global variables
Global variables are initialized at startup, which will slow requests when a new instance is starting. Lazily initializing these variables will speed up initialization.
Avoid expensive global functions
Some languages allow functions to evaluated globally, which will occur during initialization. This will slow requests and may be expensive if those functions connect to external services such as a database. Keep in mind that due to warming, your application may startup in the background even when it doesn't receive requests.
Use remote storage
Since there are multiple copies of your application running, use an external data store that can handle multiple concurrent writers such as PostgreSQL or MongoDB.
Delete temporary files
Files your application writes locally will live in an in-memory filesystem. To free up memory for your application, use this sparingly and delete files after they are no longer needed.
Billing
What am I charged for?
Autoscale Deployments are billed based on your actual usage. You are billed for:
- CPU and RAM consumed during request processing (see below).
- Requests processed.
- Outbound transfer for bytes sent from your server.
Learn more about our pricing for these resources under usage-based billing
How does CPU billing work?
CPU and RAM are charged together in an "execution unit", based on the sizing you choose. You are only charged for execution for the time when a request is being processed. Execution time is rounded to the nearest 100 milliseconds.
This means you are not charged for time your application is running, so long as no requests are actively being processed.
An open WebSocket is considered an active HTTP request. So execution time will be billed for any time where a WebSocket connection is open.
CPU is aggressively throttled outside of request processing. If your application is based on running background activities, instead consider a Reserved VM Deployment.
How to use Autoscale Deployments
Setting up your Repl
Before using an Autoscale Deployment, you should verify that your Repl is working. You can do so using the "Run" button at the top of the workspace.
Creating a Deployment
First, open up the Deployments tab. You can do this by clicking the "Deploy" button at the top right of the workspace or opening a new pane and typing "Deployments".
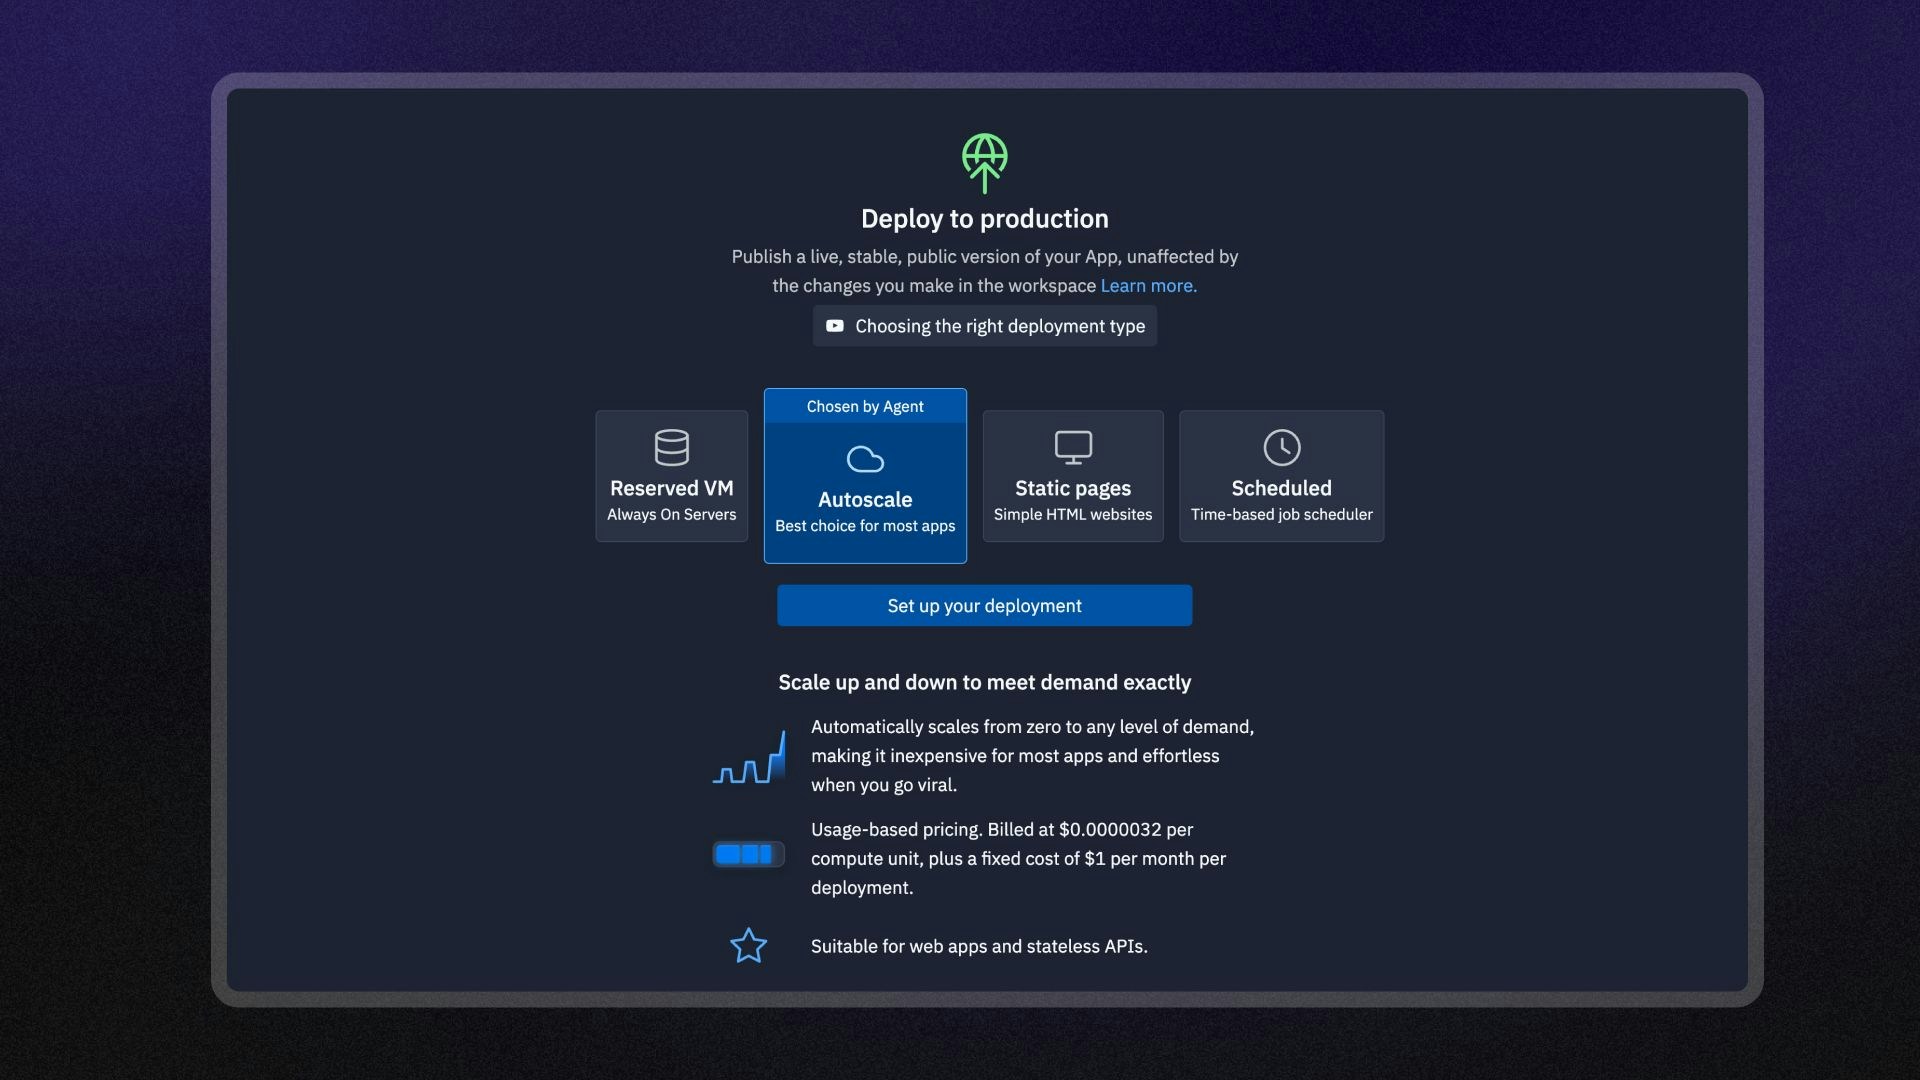
In the Deployments tool, select the "Autoscale" Deployment type, then proceed using the "Set up your deployment" button.
Configuring your Deployment
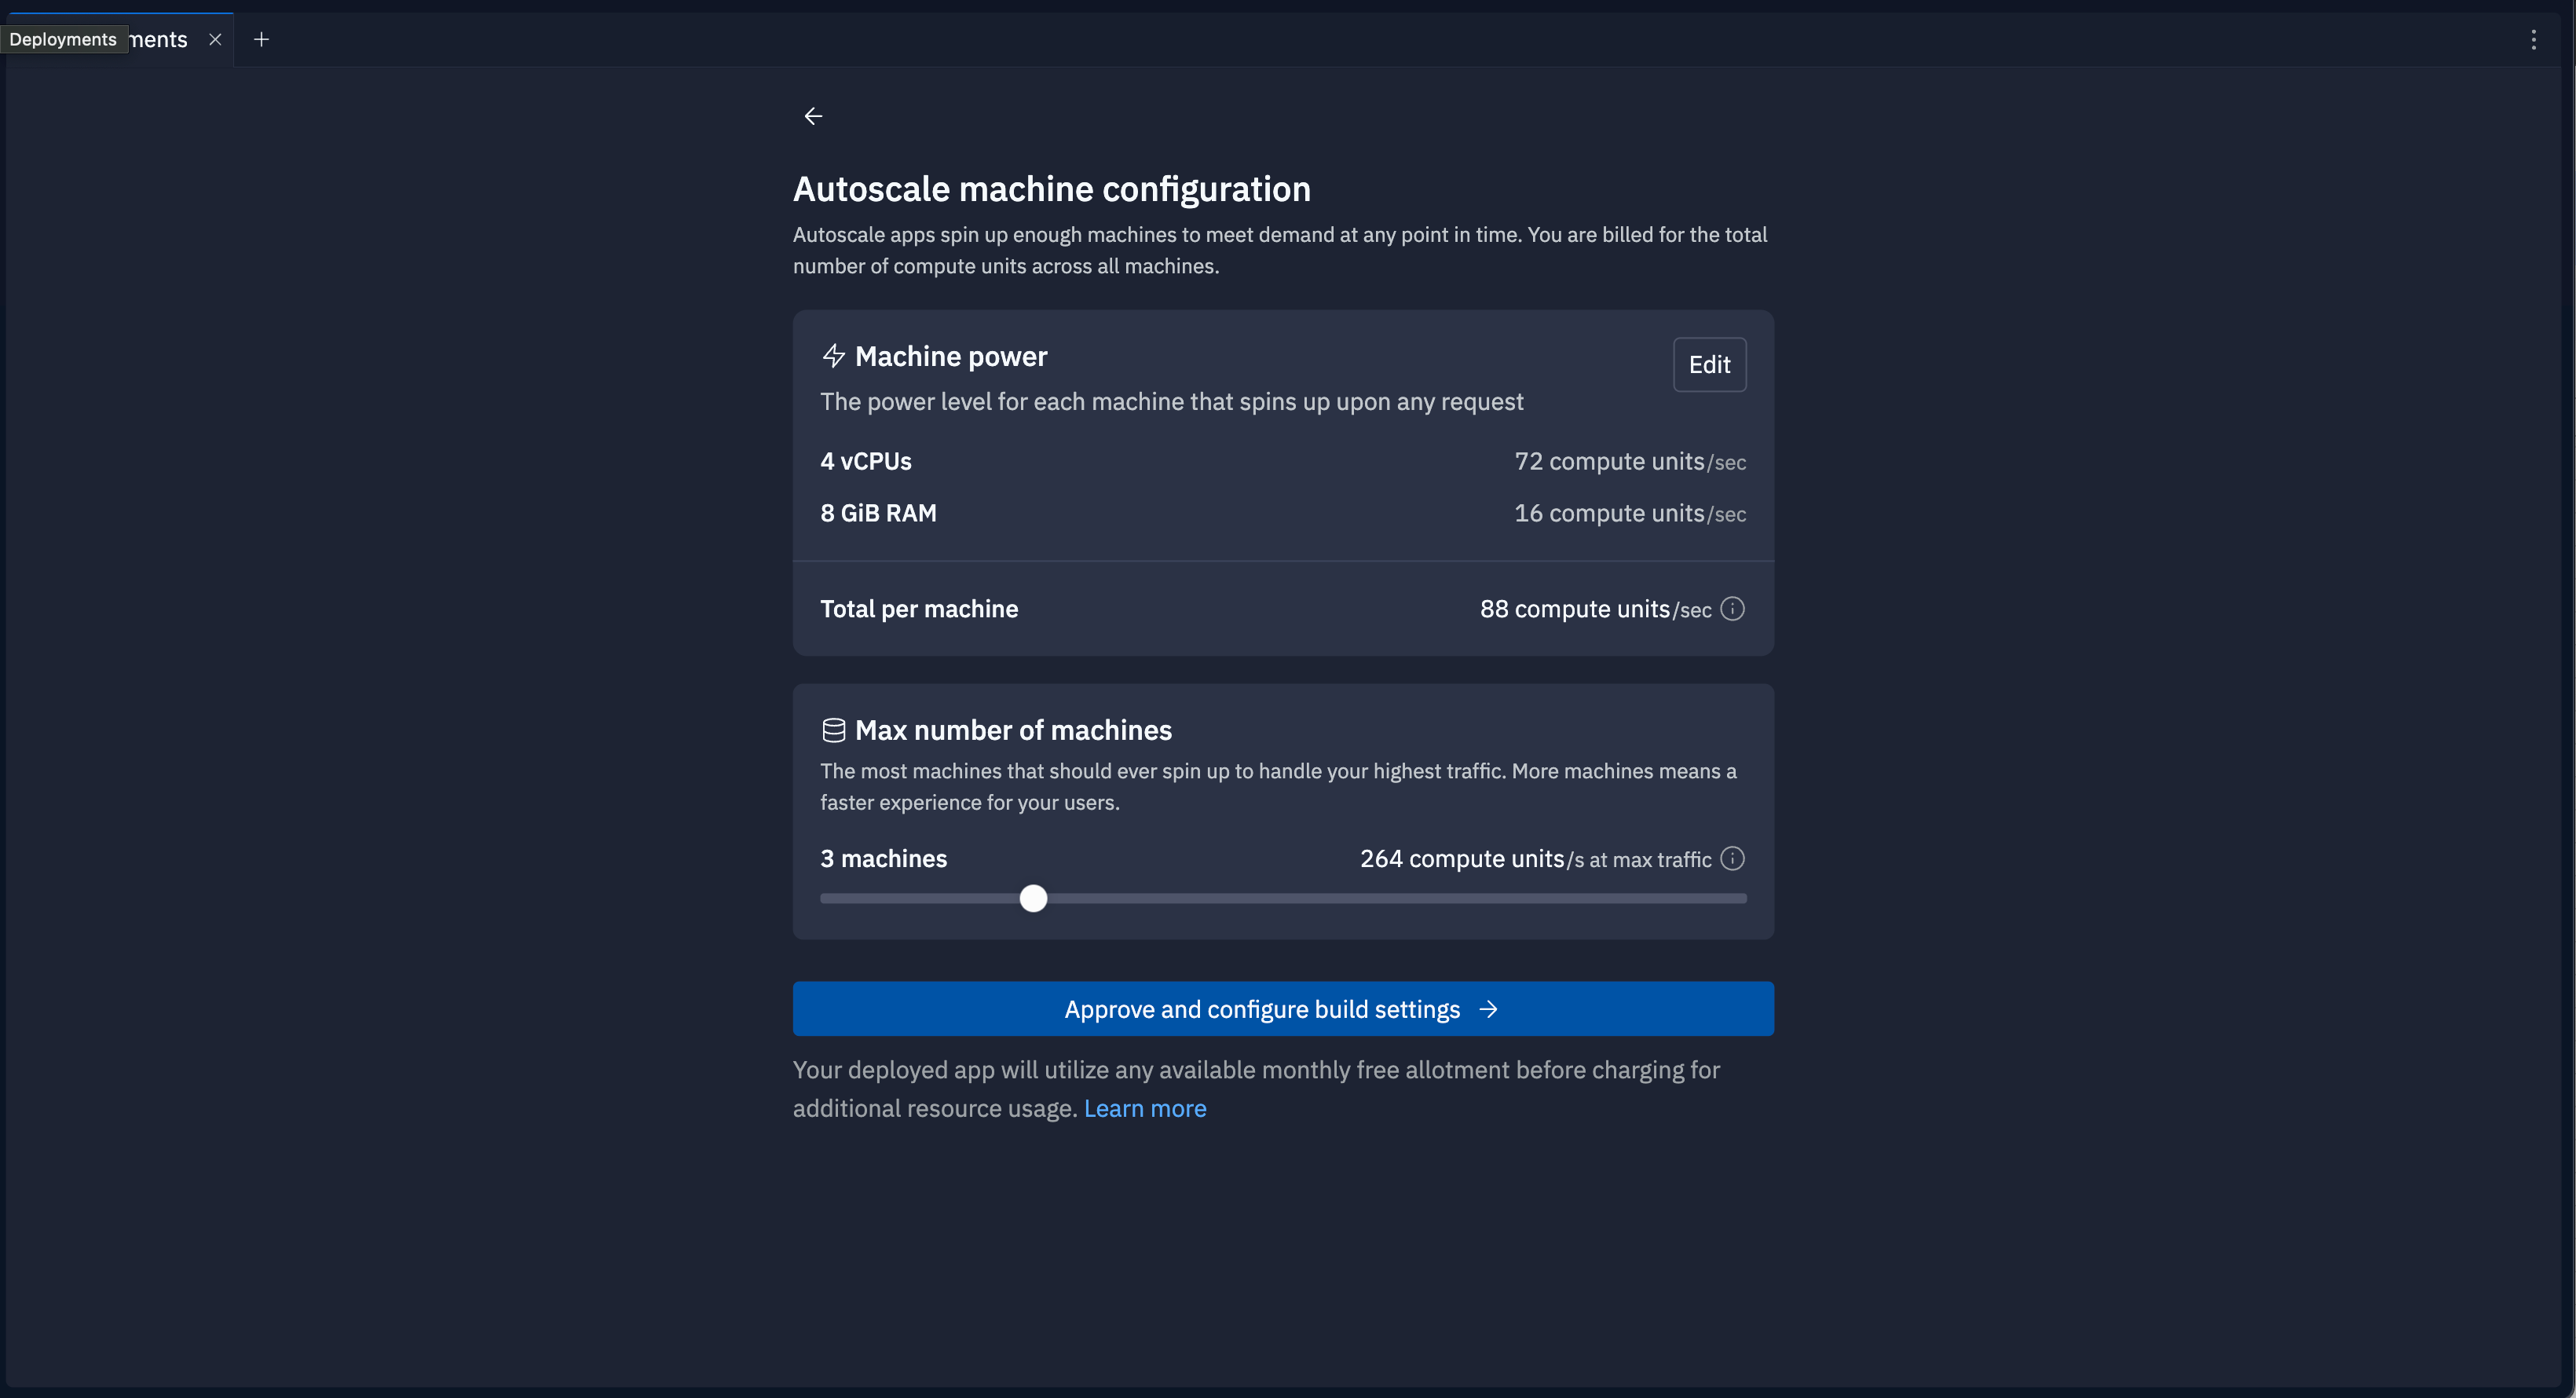
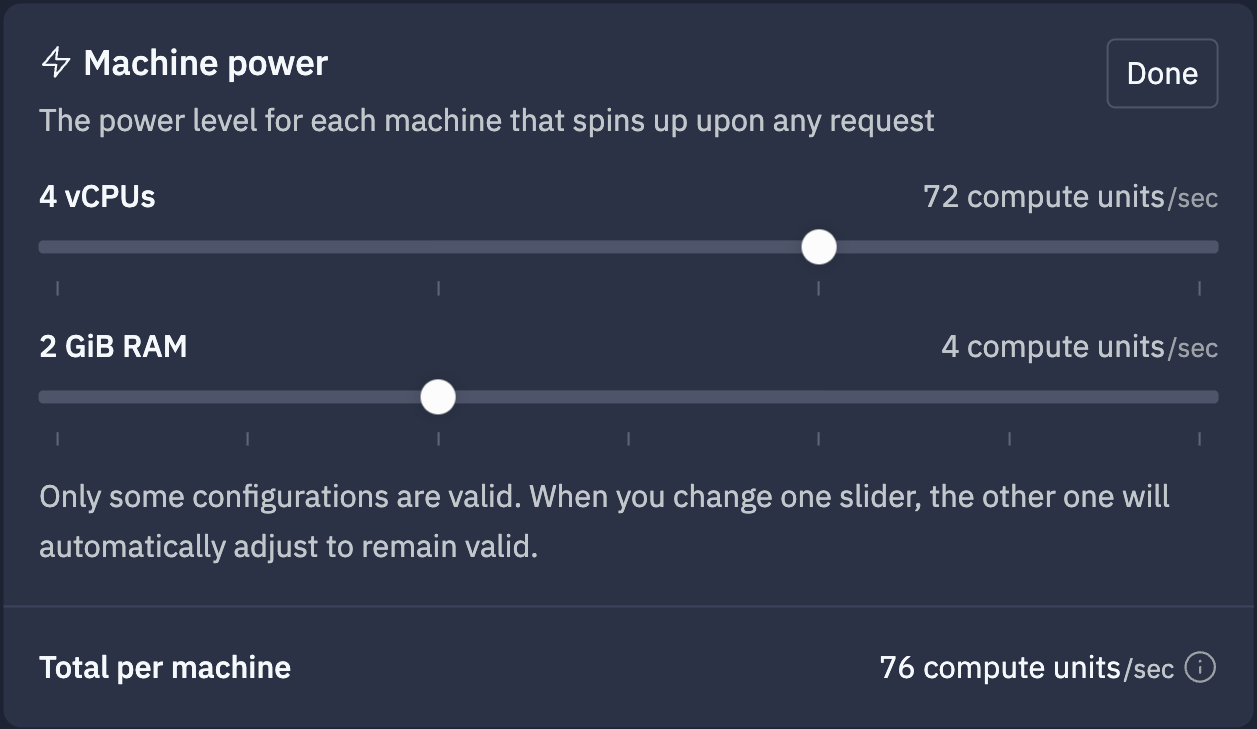
In the configuration menu, you can configure how your Autoscale Deployment behaves. You can configure the following:
- Machine Power: How much vCPU and RAM the machines in your Deployment will use (each)
- Max instances: The maximum number of machines that your Deployment will scale up to in high traffic
Host Configuration
HTTP requests will be sent to external port 80 of your Deployment. Your server must listen for traffic on 0.0.0.0, listening on localhost or 127.0.0.1 won't work. There are two ways to expose the port:
- Port Auto-Detection: If no ports have been configured in .replit, one will be detected automatically. The first opened port will be used; if your program uses multiple ports, consider using the approach below.
- Configure a port in the .replit config: If ports have been configured in .replit, one must be configured with
externalPort = 80
.
Starting your Deployment
After configuring your Deployment, click "Deploy" to start the Deployment process. Once the Deployment is complete, you can access details like the URL, build logs, and more. Learn more about managing your Deployment here.