Features
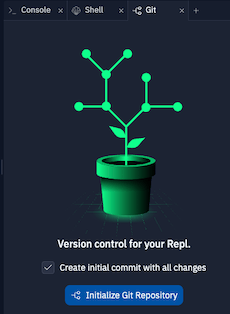
The Git pane offers comprehensive version control capabilities directly in your workspace, with a user-friendly interface that simplifies complex Git operations.- Repository management: Initialize, connect, and manage Git repositories with GitHub integration
- Commit tracking: Stage, commit, and view changes across all your files
- Branch operations: Create, switch between, and merge branches visually
- Conflict resolution: Identify and resolve merge conflicts with visual assistance
- Shell integration: Synchronization between Git commands run in Shell and the Git pane
Usage
Repository setup
How to access the Git pane
How to access the Git pane
- Navigate to the Tools section in your Replit App
- Select the + sign to add new tools
- Select Git from the list of available tools
- Initialize repository: Create a new Git repository for your Replit App
- Connect to GitHub: Link your repository to GitHub for backup and collaboration
- Configure remote: Set up and manage the connection to your GitHub repository

Change management
How to view changes
How to view changes
- Make changes to any files in your Replit App
- Open the Git pane from the Tools section
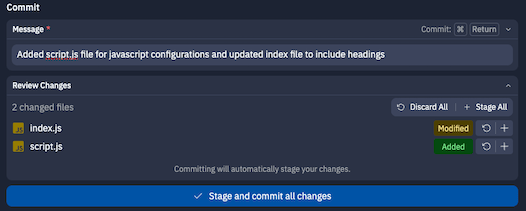
- Review changes in the Review Changes section
- Review changes: See modified files with additions and deletions highlighted
- Stage files: Select specific files to include in your next commit
- Commit changes: Save your changes with descriptive messages
- Push updates: Send your commits to GitHub with a single click

You can use Replit AI to help generate commit messages that accurately describe your changes.
Branch management
How to manage branches
How to manage branches
- Open the Git pane from the Tools section
- Select the branch dropdown next to the branch name
- Create a new branch or select an existing one
- Create branches: Make new branches to develop features separately
- Switch branches: Move between different versions of your code
- Publish branches: Share your branches to GitHub
- Pull changes: Sync with remote updates from collaborators

Merge conflict resolution
How to resolve merge conflicts
How to resolve merge conflicts
- Attempt to pull changes when conflicts exist
- The Git pane will highlight conflicting files
- Open each conflicted file to see and resolve the conflicts
- Save the files after resolving conflicts
- Complete the merge by selecting Pull
- Identify conflicts: See exactly which files contain conflicts
- Visualize differences: Review both versions of the conflicting code
- Resolve issues: Choose which code to keep or manually edit conflicts
- Finalize merges: Complete the merge process after resolving conflicts

Using Git commands in Shell
How to access Shell
How to access Shell
- Select All tools from the left Tool dock
- Select Shell from the available tools
- Command synchronization: Any Git commands executed in the Shell will automatically sync with the Git pane
- Full Git functionality: Access advanced Git features not available in the Git pane
- Seamless switching: Switch between using Shell commands and Git pane as needed
GitHub and GitLab CLI Support: In addition to standard Git commands, you can also use the GitHub CLI (
gh) and GitLab CLI (glab) in the Shell to manage and connect to external Git repositories. These tools provide enhanced functionality for working with GitHub and GitLab repositories, including pull requests, issues, and other platform-specific features.Repository operations
- Clone repository:
git clone <url-to-repository> - Initialize repository:
git init - Add remote:
git remote add origin <url-to-repository>
Making changes
- Check status:
git status(shows modified, added, and deleted files) - Stage files:
git add <filename>orgit add .(for all files) - Commit changes:
git commit -m "your commit message" - Push changes:
git push origin <branch-name> - Pull changes:
git pull origin <branch-name>
Authentication
When working with private repositories, you’ll need to authenticate:- For GitHub repositories, use a personal access token instead of your password
- To avoid re-entering credentials, you can store them using Replit Secrets:
- Create a new secret with key
GIT_URL - Set the value to
https://<username>:<token>@github.com/<user-or-org>/<repository> - Use
git push $GIT_URLto push without typing credentials
- Create a new secret with key
When using credential secrets, anyone with access to your Replit App can potentially access your Git credentials. For sensitive repositories, consider manually entering credentials each time.