- Replit managed: Built-in integrations that work automatically. Create an app and your Agent can start using these right away.
- Connectors: First-party integrations Replit supports. Sign in once. Agent can read and write to these services directly from chat — pull data, create records, send messages — and build with them across your apps.
- External integrations: Trusted third-party services you can build with. Ask Agent to set them up; you’ll provide API keys.
- Agent services: Paid third-party APIs that Agent uses behind the scenes — no API keys required. Usage is billed to your Replit credits.
Plan availability: Most connectors require a Core, Pro, or Enterprise subscription, and some are available on the Free plan. The connector catalog in your workspace shows which connectors you can use on your current plan. Free plan builders can always use Replit-managed integrations like databases, authentication, and more.
Getting started
To use an integration, mention the service or functionality you need. For example: Agent automatically detects these keywords and implements the necessary code and configuration.Let Agent suggest a connector
Sometimes several services can do the same job, like storing files or sending email. When you ask for a capability without naming a provider, Agent shows a short list of connectors that fit. Choose the one you want. Select a provider, then sign in once to connect your account. Agent uses your choice as it builds. You can also ask for a specific service by name to skip the list.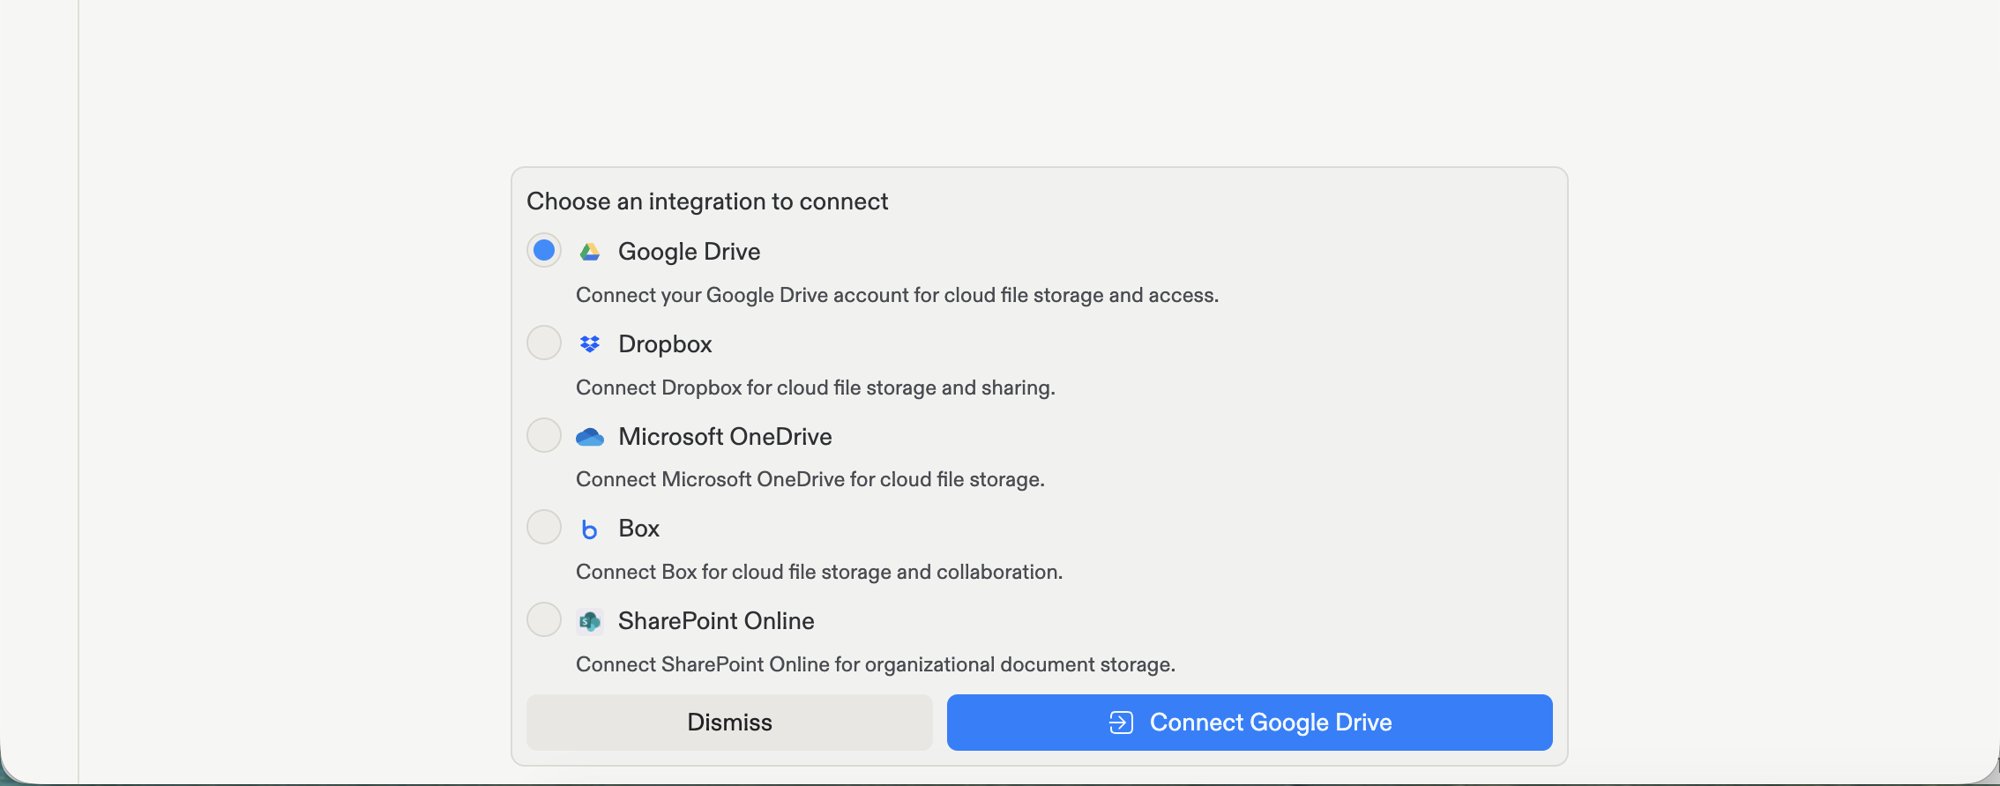
Replit managed integrations
These built-ins require no setup. Just ask Agent to use them.Replit Database
Replit Database
Managed PostgreSQL for relational data and SQL queries, built into every Replit App.
Replit App Storage
Replit App Storage
Built-in storage for app files and assets.
App Storage
App Storage
Cloud-based storage for images, videos, and other files.
Replit Auth
Replit Auth
Native authentication so people can sign in with Replit.
Replit Domains
Replit Domains
Configure and manage custom domains for your app.
Connectors
Connectors let Agent read and write to your services directly. They are first-party integrations supported by Replit. Sign in once on the Connectors page in the Project Editor, then reuse those connections across apps.Connections are tied to your Replit account and persist across all your apps. Connect a service once and use it in any app you create.
Available connectors
Google Workspace
Google Workspace
- Google Drive: Access and manage files and folders
- Google Docs: Create, read, and edit documents
- Google Sheets: Read and write spreadsheet data
- Google Slides: Create, read, and edit presentations
- Google Calendar: Read and write events and settings
- Gmail: Send, receive, and manage emails
Microsoft 365
Microsoft 365
- OneDrive: Access and manage files and folders
- Outlook: Send, receive emails and manage calendar events
- SharePoint: Read, write, and manage sites and documents
Developer tools
Developer tools
- Bitbucket: Access repositories, projects, and workspaces
- Bitbucket (Source Control): Connect Replit’s source control to Bitbucket
- GitHub: Access repositories, users, and organizations
- GitHub (Source Control): Connect Replit’s source control to GitHub
- GitLab: Access projects, issues, merge requests, and pipelines
- GitLab (Source Control): Connect Replit’s source control to GitLab
- Linear: Create and manage issues, comments, and schedules
- Jira: Read users and manage work items and issues
- Asana: Read tasks and project data
- Basecamp: Read and manage projects, to-dos, messages, and schedules
- Teamwork: Read and manage projects, tasks, and time entries
- Confluence: Read users and groups, write content to spaces
- Productboard: Read and update features, releases, and customer feedback
Cloud storage
Cloud storage
- Dropbox: Read files, content, and metadata
- Box: Read and access files and folders
Communication
Communication
- AgentMail: Send and receive emails programmatically
- Discord: Access guild information and user profiles
- Intercom: Read and write conversations, contacts, and support workflows
- Resend: Send transactional emails
- SendGrid: Send transactional emails
- Slack: Send messages and interact with channels and workflows
- Slack Agent: Build Slack-native agents with deeper workspace integration
- Slack Agent Builder: Tooling for designing and configuring Slack Agents
- Twilio: Send SMS messages and make voice calls
- Zoom: Create and manage meetings, recordings, and contacts
CRM and sales
CRM and sales
- Salesforce: Access CRM data and perform operations via REST API
- HubSpot: Read CRM objects, contacts, and deals
- Zendesk: Read and write access to Ticket API for support workflows
HR and recruiting
HR and recruiting
- Ashby: Read candidate, job, and interview data
Payments and monetization
Payments and monetization
- RevenueCat: Manage in-app purchases and subscriptions
- Stripe: Process payments and manage subscriptions. See the Stripe payments guide.
- Square: Accept payments and manage orders, customers, and inventory
- Plaid: Access financial account balances, transactions, and investment data where supported. See the Plaid connector guide.
- Shopify: Provision a Shopify store, build a custom storefront, and manage products and inventory from Agent. See the Shopify connector guide.
AI and media
AI and media
- Browserbase: Run managed headless browsers for fetch, search, and full session automation
- ElevenLabs: Generate AI voice and audio content
- OpenAI: Use GPT models for text generation and assistants
- Quiver AI: Generate SVG illustrations and vectorize raster images
- Tripo3D: Generate 3D models from text or images for games, product mockups, and AR
Data and analytics
Data and analytics
- BigQuery: Query and analyze large datasets
- Databricks (U2M): Connect Databricks Apps with user-to-machine auth
- Databricks (M2M): Connect Databricks with machine-to-machine auth
- Snowflake: Query and manage Snowflake data warehouses
- Microsoft Fabric: Access analytics, data engineering, and BI services
- PostgreSQL: Connect to a PostgreSQL database
- Hex: Build and share data notebooks and apps
- Amplitude: Access product analytics and user behavior data
- Segment: Send customer events and traits to your data pipeline
Maps and location
Maps and location
- Mobile Maps: Embed map experiences in mobile apps
Productivity
Productivity
- Airtable: Read and write to bases, tables, and records
- Calendly: Read and manage scheduled events
- ClickUp: Read and manage tasks, lists, and spaces
- Excalidraw: Create and edit diagrams and whiteboards
- Monday.com: Access boards, items, and updates
- Notion: Read and write to workspaces and pages
- Spotify: Access and manage playlists and library
- Todoist: Create and manage tasks and projects
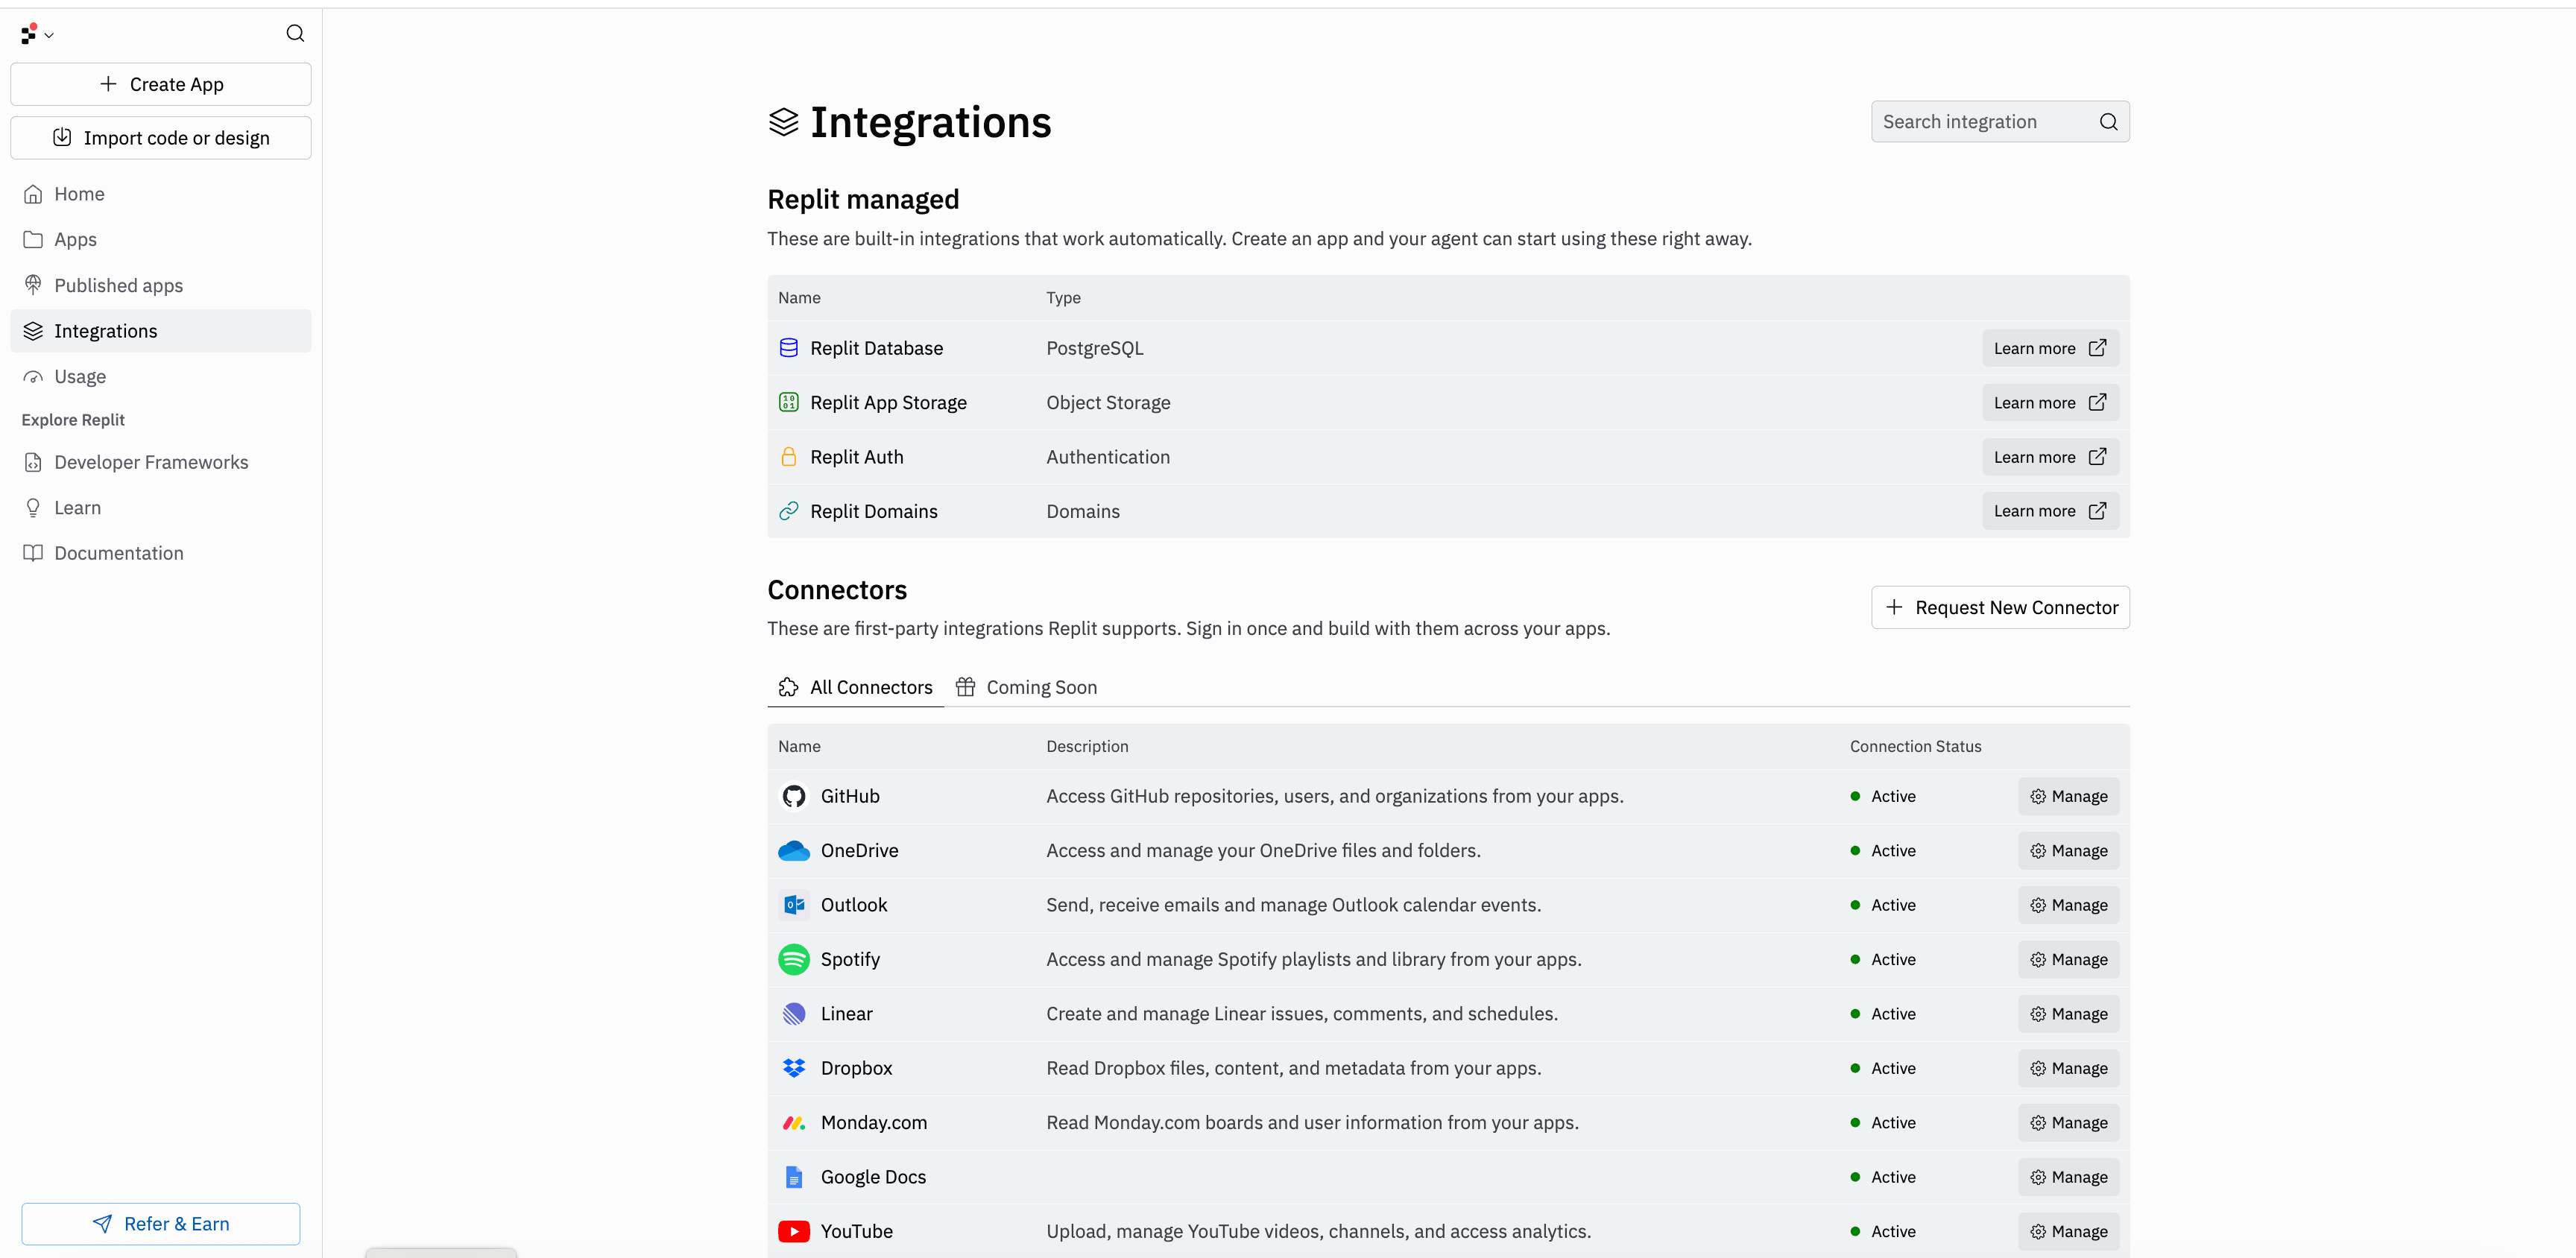
Accessing Connectors
You can access Connectors from the sidebar in the Project Editor:1
Open the Project Editor
Open your app in the Project Editor.
2
Select Connectors
Select Connectors from the sidebar.
3
Add new integration
Choose Add new integration to browse available connectors.
4
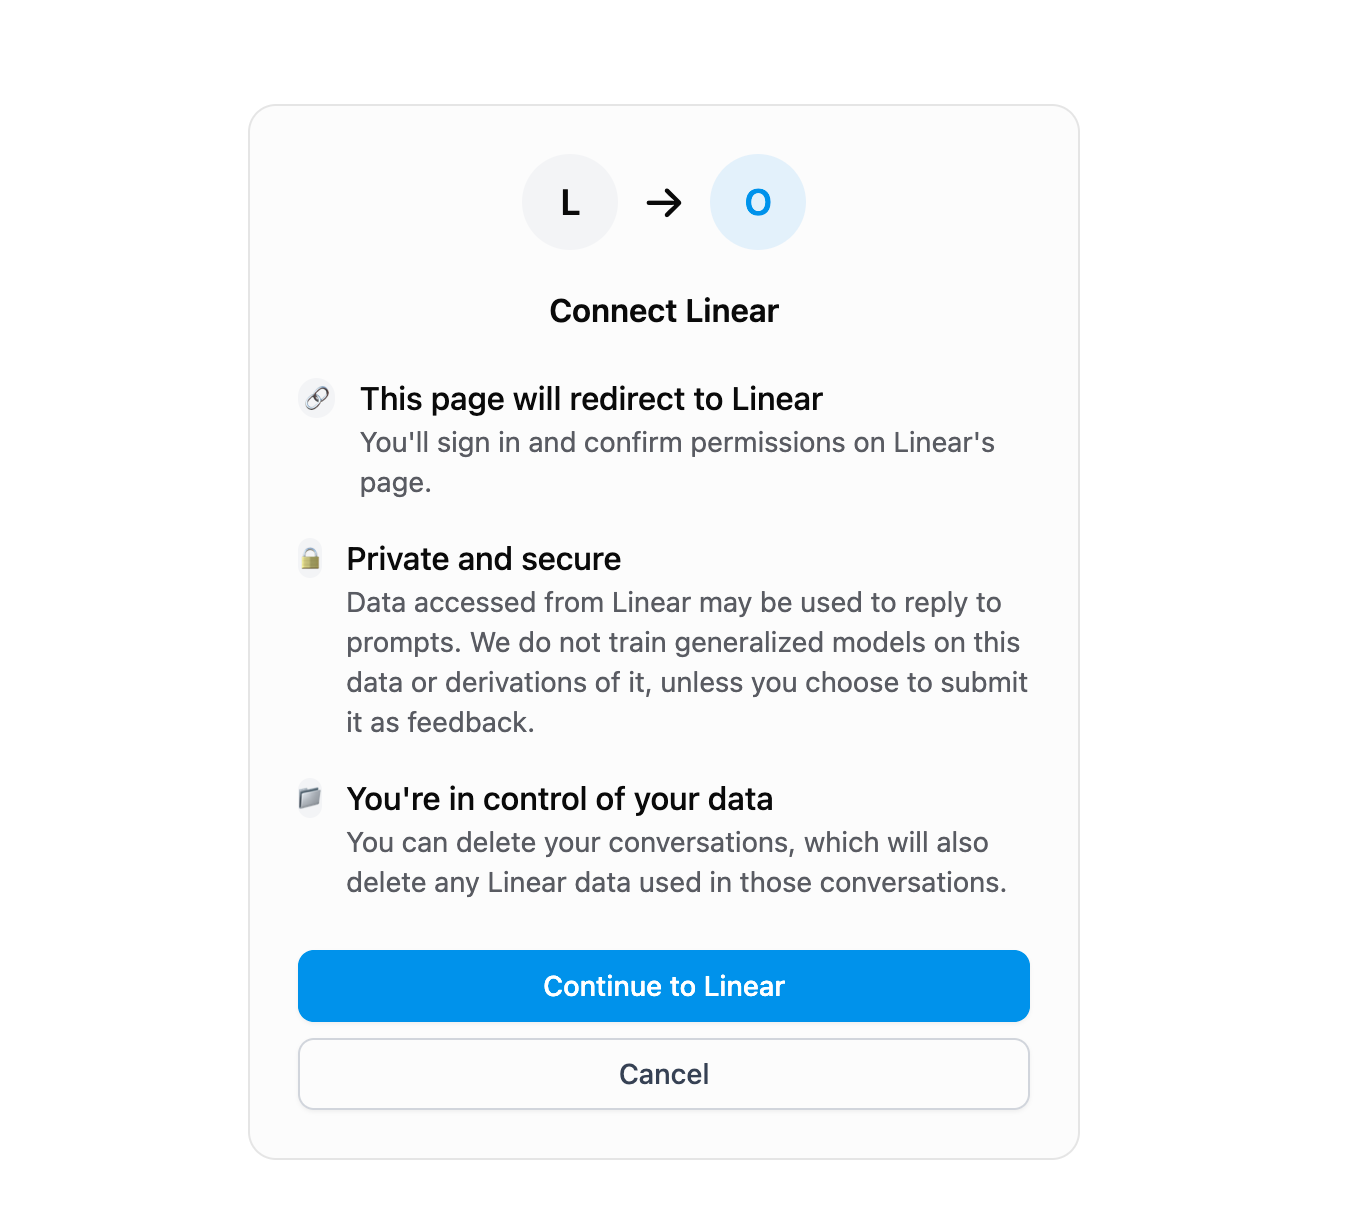
Connect
Select Connect next to the service you want to integrate.
Configuring OAuth App with Replit
Enterprise only: Configuring a custom OAuth app requires an Enterprise subscription.

1
Create an OAuth app with your provider
Sign in to the provider’s developer console or admin settings and create a new OAuth 2.0 application. Providers name this step differently — look for options like Create OAuth app, Register application, or Create client credentials.
2
Set the redirect URL
When the provider asks for an Authorized redirect URI (sometimes called Callback URL or Redirect URL), enter:This URL is where the provider sends builders back to Replit after they authorize the app. It must match exactly — trailing slashes, protocol, and subdomain all matter. If you add more than one redirect URI, this one must be included.
3
Copy the Client ID and Client Secret
After you create the app, the provider shows a Client ID and a Client Secret.
- Client ID: A public identifier for your OAuth app. It’s safe to expose in URLs and client-side code.
- Client Secret: A confidential value that proves the request is coming from your app. Treat it like a password — never commit it to a repository or share it publicly. Replit stores it securely on your behalf.
4
Choose your scopes
Scopes are permissions that define what your OAuth app is allowed to read or write on the builder’s behalf. Each provider publishes its own list of scopes in its API documentation.When you configure the connector in Replit, the scopes you enter must match exactly (character-for-character, including any URL prefixes) the scopes you registered with the provider. Common causes of mismatch errors:
- Missing the full URL prefix (for example,
https://www.googleapis.com/auth/drive.filevs.drive.file). - Extra whitespace or trailing commas.
- Requesting a scope in Replit that isn’t enabled on the provider’s app.
5
Configure the connector in Replit
From your organization’s Connectors page, select Add new integration, choose the service, and paste the Client ID, Client Secret, and Scopes from the provider. Select Configure to save.
If authentication fails after configuration, double-check that the redirect URL in the provider matches
https://replit.com/connectors/oauth/callback exactly and that every scope you entered in Replit is also authorized on the provider’s app.Example prompts
- “Integrate with Outlook to create an email dashboard”
- “Build a GitHub repository manager using my connected GitHub account”
- “Create a Linear task tracker for my team”
- “Build a Notion-powered website using my connected Notion workspace”
- “Create a Monday.com project dashboard”
Connectors provide authenticated access to your external services, eliminating the need to manage API keys or authentication tokens manually.
External integrations
Trusted third-party services. Ask Agent to set them up; you’ll provide API keys.API keys are stored securely in your app’s Secrets. Agent will prompt you to add the key when needed.
AI providers
OpenAI
OpenAI
Access GPT models for text generation, analysis, and assistants.
Google AI (Gemini)
Google AI (Gemini)
Use Gemini models for multimodal understanding and generation.
Anthropic (Claude)
Anthropic (Claude)
Access Claude models for reasoning, writing, and coding.
Perplexity
Perplexity
AI-powered search and answer generation with citations.
Mistral AI
Mistral AI
Fast, efficient language models for NLP tasks.
OpenRouter
OpenRouter
Access hundreds of AI models from multiple providers through a single API.
Business and automation
Workato
Workato
Trigger automation recipes and call APIs from your apps.
HubSpot
HubSpot
Access CRM data and manage contacts.
Communication and community
Discord
Discord
Send messages and manage servers from your apps.
Agent services
Some capabilities use paid third-party APIs behind the scenes. Agent handles the integration automatically — no API keys or setup required. You’re billed at the provider’s rate, deducted from your Replit credits.Brave Image Search
Brave Image Search
Search for images across the web using Brave’s image search API.
ElevenLabs
ElevenLabs
Generate realistic text-to-speech audio and voice content.
Google Gemini image generation (Nano Banana)
Google Gemini image generation (Nano Banana)
Generate images using Google’s Gemini image models.
Agent services are billed at the provider’s public API rate. Costs are deducted from your Replit credits and appear on your usage page.
Reconnecting integrations
If a connected service stops working — for example, if your login session expires or permissions change — Replit surfaces a reconnection alert in the Project Editor. Select the alert to reconnect the integration directly, without leaving the editor.Debugging connectors
Running into issues connecting a service? These guides walk you through common errors and how to fix them.Google Workspace: "This app is blocked"
Google Workspace: "This app is blocked"
If you see “This app is blocked” when connecting Google Drive, Docs, Sheets, Calendar, or Gmail, your organization’s Google Workspace likely restricts third-party OAuth apps. See the full troubleshooting guide to resolve it.Resolve “This app is blocked” for Google connectors
Salesforce: "Connection Expired"
Salesforce: "Connection Expired"
If your Salesforce connector stops working with a “Connection Expired” error, your Salesforce organization’s refresh token policy is likely configured to expire tokens after a set period. See the full troubleshooting guide to update your Connected App settings.Fix Salesforce connection expired errors