from flask import Flask, redirect, session, url_for, request
import google_auth_oauthlib.flow
import json
import os
import requests
from googleapiclient.discovery import build
import googleapiclient.errors
import google.oauth2.credentials
app = Flask('app')
# `FLASK_SECRET_KEY` is used by sessions. You should create a random string
# and store it as secret.
app.secret_key = os.environ.get('FLASK_SECRET_KEY') or os.urandom(24)
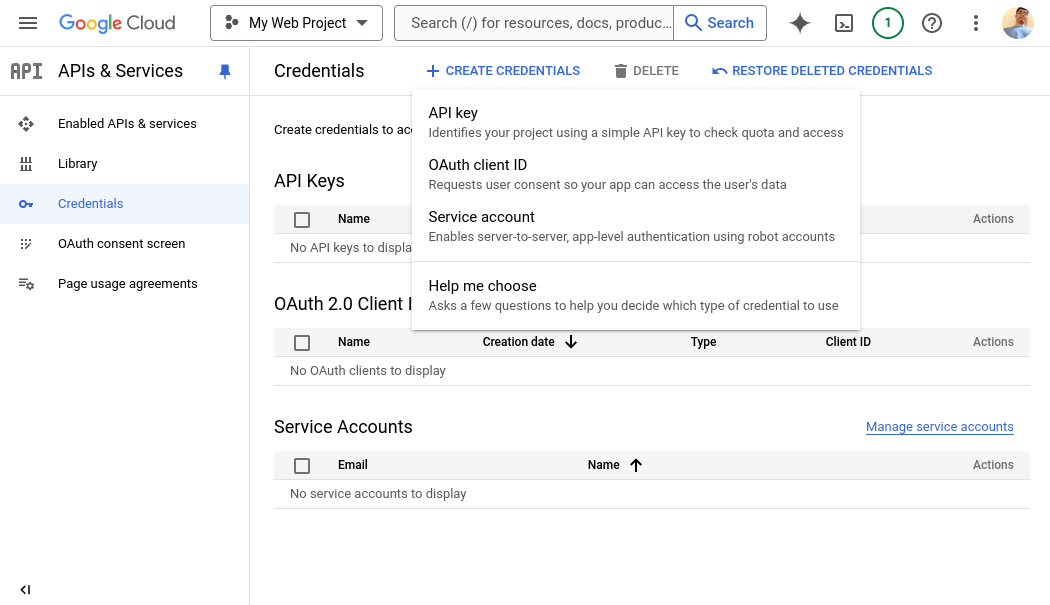
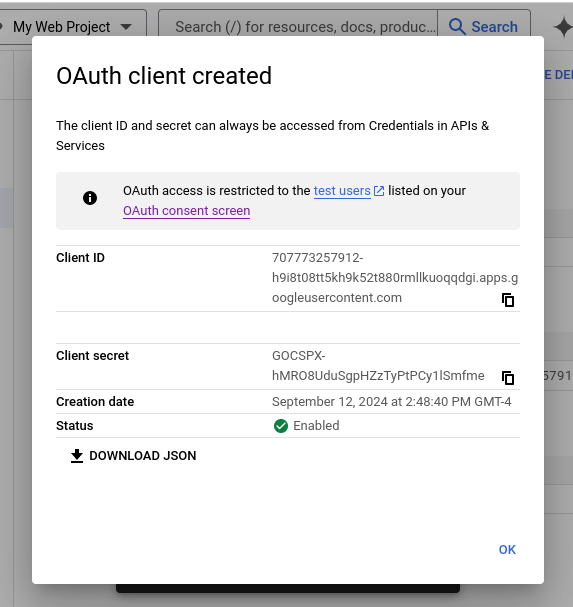
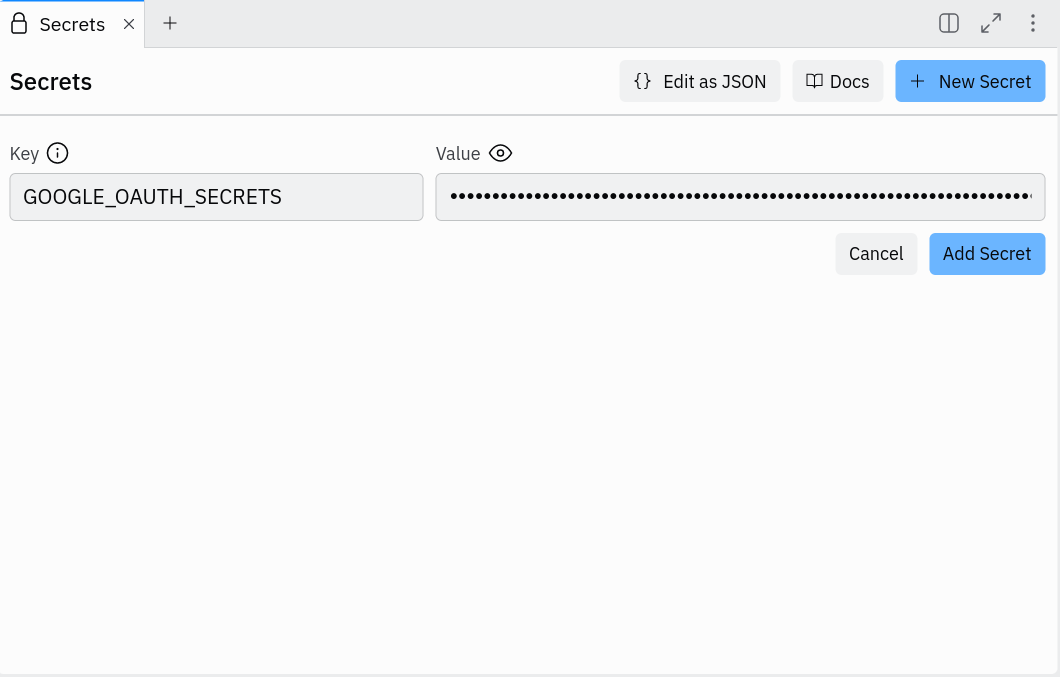
# `GOOGLE_APIS_OAUTH_SECRET` contains the contents of a JSON file to be downloaded
# from the Google Cloud Credentials panel. See next section.
oauth_config = json.loads(os.environ['GOOGLE_OAUTH_SECRETS'])
# This sets up a configuration for the OAuth flow
oauth_flow = google_auth_oauthlib.flow.Flow.from_client_config(
    oauth_config,
    # scopes define what APIs you want to access on behave of the user once authenticated
    scopes=[
        "https://www.googleapis.com/auth/userinfo.email",
        "openid",
        "https://www.googleapis.com/auth/userinfo.profile",
        "https://www.googleapis.com/auth/spreadsheets.readonly"
    ]
)
# This is entrypoint of the login page. It will redirect to the Google login service located at the
# `authorization_url`. The `redirect_uri` is actually the URI which the Google login service will use to
# redirect back to this app.
@app.route('/signin')
def signin():
# We rewrite the URL from http to https because inside the Replit App http is used,
# but externally it's accessed via https, and the redirect_uri has to match that
oauth_flow.redirect_uri = url_for('oauth2callback', _external=True).replace('http://', 'https://')
authorization_url, state = oauth_flow.authorization_url()
session['state'] = state
return redirect(authorization_url)
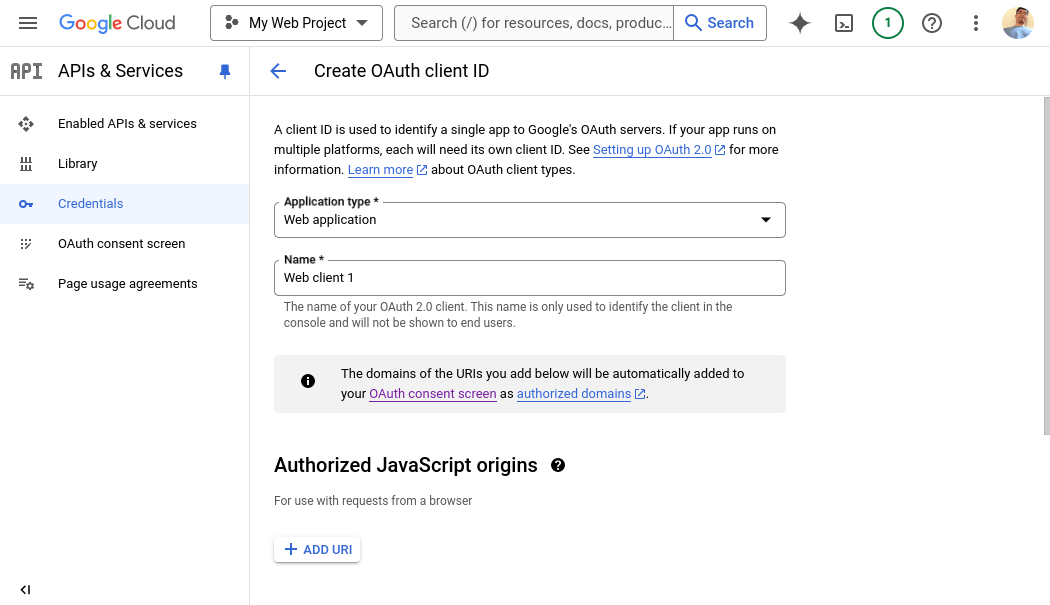
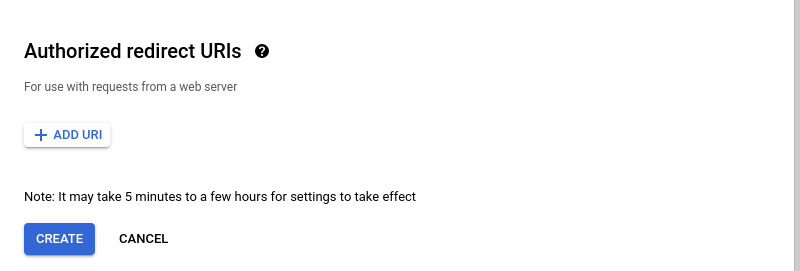
# This is the endpoint that Google login service redirects back to. It must be added to the "Authorized redirect URIs"
# in the API credentials panel within Google Cloud. It will call a Google endpoint to request
# an access token and store it in the user session. After this, the access token can be used to access
# APIs on behalf of the user.
@app.route('/oauth2callback')
def oauth2callback():
if not session['state'] == request.args['state']:
return 'Invalid state parameter', 400
oauth_flow.fetch_token(authorization_response=request.url.replace('http:', 'https:'))
session['access_token'] = oauth_flow.credentials.token
return redirect("/")
# Call the userinfo API to get the user's information with a valid access token.
# This is the first example of using the access token to access an API on the user's behalf.
def get_user_info(access_token):
response = requests.get("https://www.googleapis.com/oauth2/v3/userinfo", headers={
"Authorization": f"Bearer {access_token}"
})
if response.status_code == 200:
user_info = response.json()
return user_info
else:
print(f"Failed to fetch user info: {response.status_code} {response.text}")
return None
@app.route('/logout')
def logout():
session.clear()
return redirect('/')
# fetch all sheets within a Google spreadsheet
def get_sheets(sheets_api, spreadsheet_id) -> list[str]:
result = sheets_api.get(spreadsheetId=spreadsheet_id).execute()
return [sheet["properties"]["title"] for sheet in result["sheets"]]
# fetch the data for a given sheet within a Google spreadsheet
def get_sheet_data(sheets_api, spreadsheet_id, sheet_title) -> list[list[str]]:
result = (
sheets_api.values()
.get(spreadsheetId=spreadsheet_id, range=sheet_title)
.execute()
)
return result["values"]
# Render a form to allow importing a spreadsheet
@app.route("/import_spreadsheet_form")
def import_spreadsheet_form():
return """
<h3>Import Spreadsheet</h3>
<form action="/import_spreadsheet" method="POST">
<label>Spreadsheet ID</label>
<input type="text" name="spreadsheet_id">
<button type="submit">Import</button>
</form>
"""
@app.route("/import_spreadsheet", methods = ['POST'])
def import_spreadsheet():
if 'access_token' not in session:
return redirect('/signin')
spreadsheet_id = request.form["spreadsheet_id"]
credentials = google.oauth2.credentials.Credentials(token=session['access_token'])
service = build("sheets", "v4", credentials=credentials)
sheets_api = service.spreadsheets()
try:
sheets = get_sheets(sheets_api, spreadsheet_id)
data_by_sheets = {}
for sheet in sheets:
data = get_sheet_data(sheets_api, spreadsheet_id, sheet)
data_by_sheets[sheet] = data
except googleapiclient.errors.HttpError as e:
return f"upload failure"
dirpath = os.path.join("static", "uploads", spreadsheet_id)
filepath = os.path.join(dirpath, "data.json")
os.makedirs(dirpath, exist_ok=True)
with open(filepath, "w") as file:
json.dump(data_by_sheets, file)
return "upload success! Really!"
@app.route('/')
def welcome():
if "access_token" in session:
user_info = get_user_info(session["access_token"])
if user_info:
return f"""
Hello {user_info["given_name"]}!<br>
Your email address is {user_info["email"]}<br>
<a href="/signin">Sign In to Google</a><br>
<a href="/import_spreadsheet_form">Import a Sheet</a>
"""
return """
<h1>Welcome to Google Sheet Importer</h1>
<a href="/signin">Sign In to Google</a><br>
<a href="/import_spreadsheet_form">Import a Sheet</a>
"""
if __name__ == '__main__':
app.run(host='0.0.0.0', port=5000)