

환경마다 한 가지 방법 선택하기
환경마다 한 가지 방법만 사용하고, 둘을 동시에 사용하지 마세요. 같은 환경에서 함께 사용하면 연결 충돌이 발생합니다.
개발에서는 커넥터의 샌드박스를, 프로덕션에서는 직접 가진 라이브 키를 사용하는 것처럼 환경별로 서로 다른 방법을 사용할 수 있습니다.
다음과 같은 경우에 적합합니다
- 예약, 대여, 약속을 운영하며 자신의 시간을 보호할 보증금이 필요한 창업자.
- 오늘은 샌드박스에서 결제를 작동시키고, 수동 키 설정 없이 라이브 결제까지 가고 싶은 빌더.
- 기존 Stripe 계정이 있거나, 수동으로 관리하는 SDK 및 웹훅 연동이 필요한 팀.
Replit Stripe 커넥터
API 키를 붙여넣지 않고 예약 시 환불 가능한 보증금을 받고 나중에 잔금을 청구하려면 이 방법을 사용하세요.커넥터
시작하기 전에
백엔드, 로그인, 데이터베이스가 있는 앱에서 시작하여 각 예약에 결제 상태를 저장할 수 있게 하세요. 그런 다음 금액 계산 방식을 정하세요.- 예약 시 보증금: $500 같은 고정 금액 또는 총액의 일정 비율.
- 나중에 잔금: 나머지 금액으로, 고객이 도착했을 때 저장된 카드로 청구됩니다.
- 환불 기한: 고객이 취소해도 보증금을 돌려받을 수 있는 마감 시점. 일반적으로 48시간이 기본값입니다.
Agent에게 프롬프트하기
Agent가 Stripe 커넥터를 제안하고 Stripe 샌드박스를 설정해 줍니다. Stripe 대시보드에서 키를 복사할 필요가 없습니다.예상 결과
Agent가 결제, 보증금 및 잔금 흐름, 환불 규칙을 추가합니다. Stripe의 테스트 카드4242 4242 4242 4242, 미래의 임의 만료일, 임의의 3자리 CVC로 미리보기에서 테스트하세요.
- 예약을 만들고 보증금을 결제하세요. 예약에 보증금이 결제됨으로, 카드가 등록됨으로 표시되는지 확인하세요.
- 예약에서 잔금을 청구하세요. 결제됨으로 표시되는지 확인하세요.
- 환불 기한 밖에서 두 번째 예약을 취소하세요. Stripe 샌드박스 대시보드에서 환불을 확인하세요.
- 기한 안에서 세 번째 예약을 취소하세요. 앱이 보증금을 유지하고 그 이유를 설명하는지 확인하세요.
- Stripe의 거절 테스트 카드
4000 0000 0000 0002로 결제하세요. 예약이 확정되지 않는지 확인하세요.
나에게 맞게 만들기
문제 해결
- 보증금 결제는 성공했지만 예약이 확정되지 않는 경우: Agent에게 Stripe 결제 성공 이벤트를 데이터베이스의 예약 상태에 연결하도록 요청한 다음 다른 예약으로 다시 테스트하세요.
- Agent가 Stripe 키를 붙여넣거나 웹훅을 설정하라고 요청하는 경우: Agent에게 대신 Replit Stripe 커넥터를 사용하라고 알려 주세요. 같은 환경에서 커넥터와 직접 가진 키를 섞어 쓰면 충돌이 발생합니다.
- 게시할 때 라이브 Stripe 계정을 연결하라고 하는 경우: 샌드박스는 테스트 결제만 받을 수 있습니다. 라이브 전환하기에 설명된 대로 게시 창에서 라이브 계정을 연결하세요.
- 모바일 앱에 구독이 필요한 경우: 대신 RevenueCat 구독을 사용하세요.
Your own Stripe keys
Connect Stripe yourself: store your own API keys in Secrets, take payments with the Stripe SDK, and receive payment events through a webhook. Use this path when you already manage a Stripe account and want full control over the setup.Before you start with your own keys
Copy your test API keys from the Stripe Dashboard and add them to your app’s Secrets. Add the webhook signing secret later, when you start the listener described below.
Keep test keys in development. Configure live keys separately in your published app’s secrets.
To add a key, select Tools in the Project Editor, then Secrets under Setup.
Select New Secret, enter the exact name in Key, enter your Stripe key in Value, and select Add Secret.
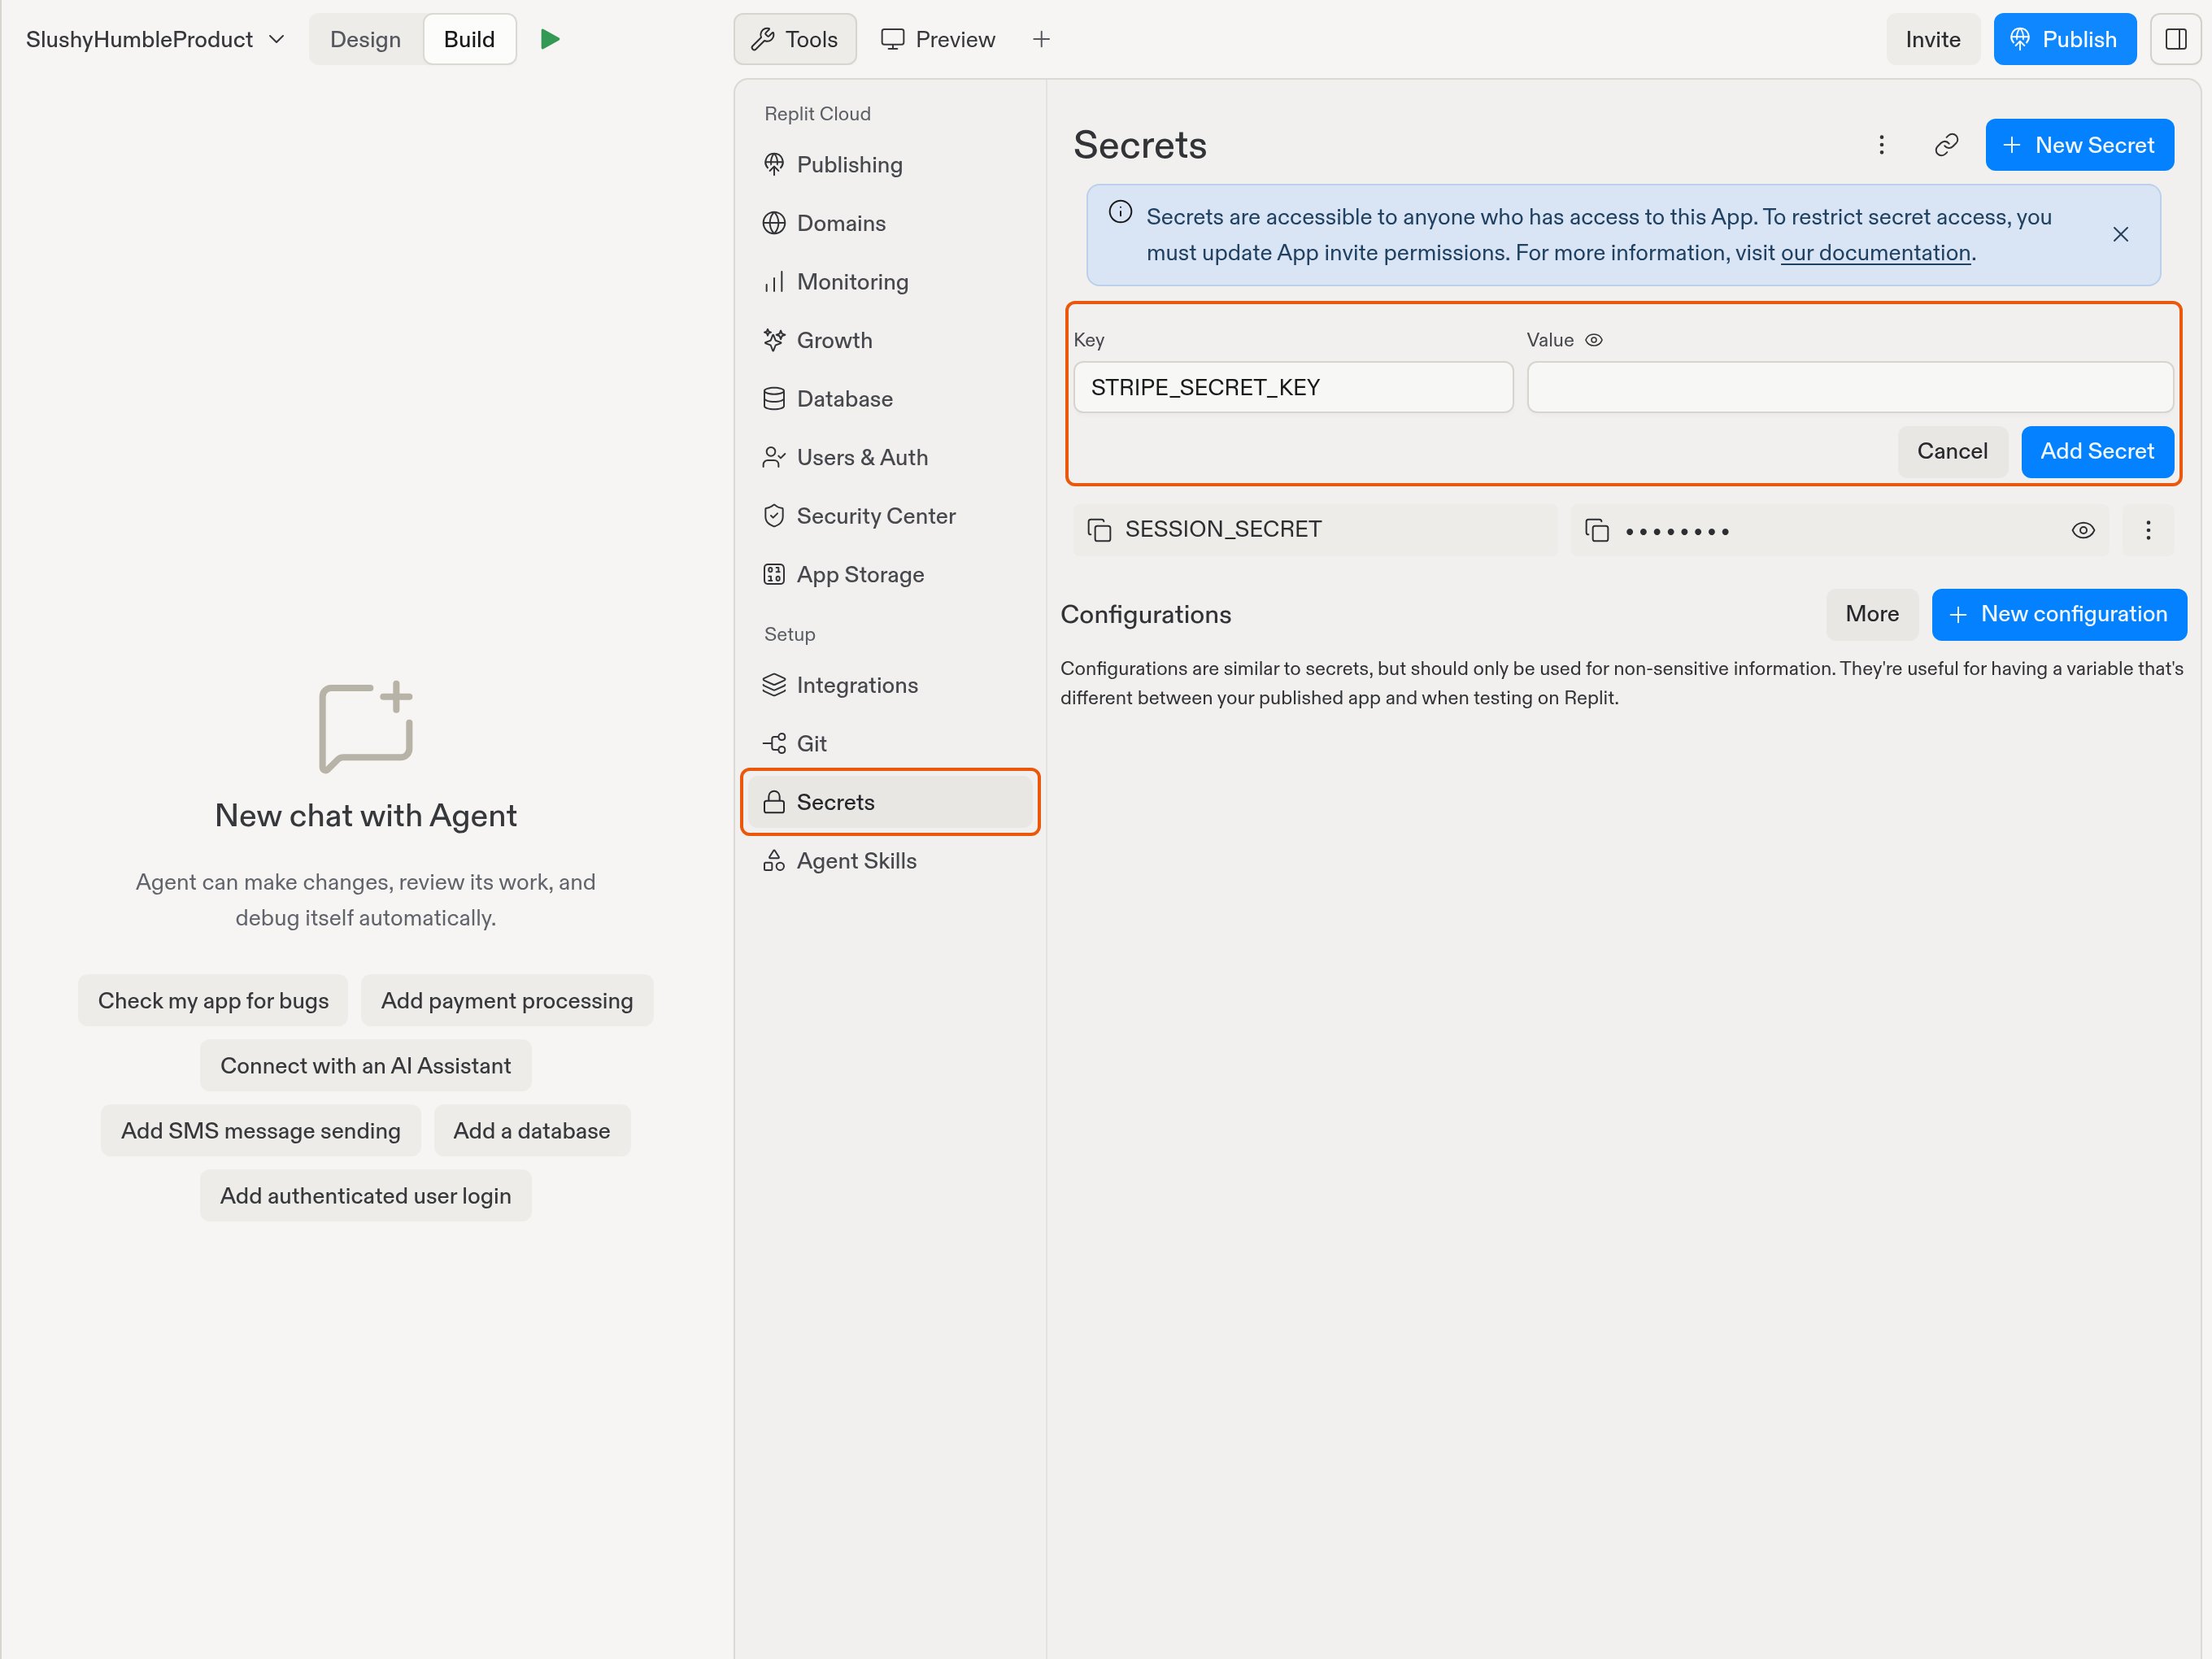
Enter the exact secret name in Key. The example leaves Value empty; enter your own key there.
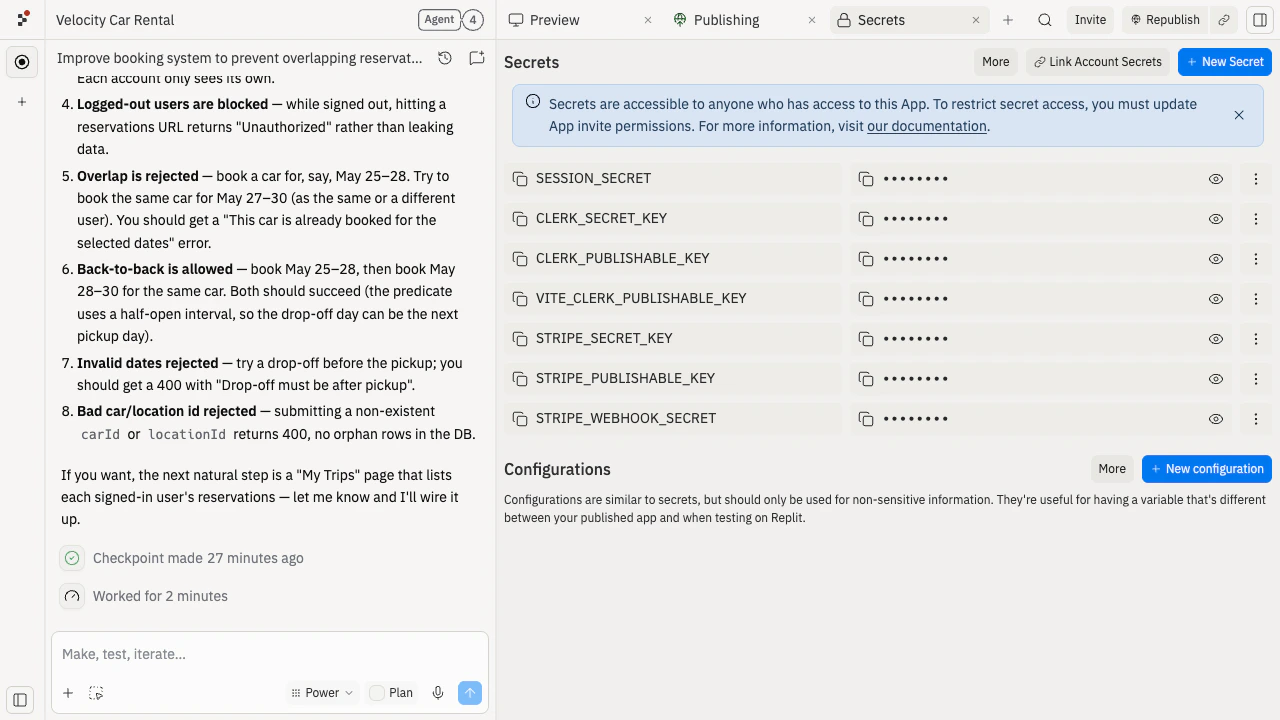
Prompt the agent for manual setup
Test the manual integration
Agent adds checkout and a webhook endpoint. For development, follow Stripe’s webhooks quickstart to install and authenticate the Stripe CLI in your project’s Shell. Ask Agent for your server’s local port and webhook path. Run the listener in that same environment, replacing the example port and path with your app’s values:stripe listen as STRIPE_WEBHOOK_SECRET in your development
Secrets, then restart your app so it reads the value. Keep both the app and the listener running
while you test in Preview. The listener forwards test events to the development server, so you
don’t need a published URL or a public development webhook endpoint yet.
Watch the walkthrough to see the full setup:
Test with Stripe’s test card 4242 4242 4242 4242, any future expiry, and any 3-digit CVC.
Confirm the order shows as paid in your app and the Stripe CLI reports a successful response
from your webhook endpoint.
Publish with your own live keys
Keep your development test keys and listener secret unchanged. In Publishing > Adjust settings > Production app secrets, setSTRIPE_SECRET_KEY and STRIPE_PUBLISHABLE_KEY to your live keys.
See Manage production secrets.
Register a separate live-mode webhook endpoint in Stripe using your published app URL plus the
webhook path. Set STRIPE_WEBHOOK_SECRET in Production app secrets to that endpoint’s signing
secret, not the CLI listener’s secret, then publish or republish.
If this is your first publish, establish the published URL first, then finish the endpoint and
secret setup and republish before accepting payments.
If development uses the Replit Stripe connector’s sandbox and production uses your own keys,
publishing checks STRIPE_SECRET_KEY:
- It must hold a live secret key (
sk_live_...) or a live restricted key (rk_live_...). Test keys, publishable keys, and keys stored under other names don’t count. - Without a valid live key, publishing stops with Connect a live Stripe account before publishing.
- Products and prices don’t sync from the sandbox to your live account. Create them in your live Stripe account yourself.
Customize the manual integration
Troubleshoot the manual integration
- Publishing says “Connect a live Stripe account before publishing”: check that the secret is named exactly
STRIPE_SECRET_KEYand holds a live key that starts withsk_live_orrk_live_. - Webhook events fail signature checks: make sure
STRIPE_WEBHOOK_SECRETmatches the endpoint’s signing secret, and that you use the live-mode secret in production. - The connector and your own keys are both set up in one environment: remove one of them. To remove the connector, see Update or remove the Stripe connection.
관련 항목
결제 및 Stripe 도움말
설정 방법, 필수 시크릿 이름, 게시 오류에 대한 답변입니다.
Stripe 결제
샌드박스부터 라이브 계정까지 Stripe 커넥터가 작동하는 방식입니다.