

環境ごとに1つの方法を選ぶ
各環境で使う方法は1つだけにし、両方を同時に使わないでください。同じ環境で組み合わせると接続の競合が発生します。
環境ごとに異なる方法を使うことは可能です。たとえば、開発環境ではconnectorのサンドボックスを、本番環境では独自のライブキーを使うといった構成です。
こんな方に最適
- 予約、レンタル、アポイントメントを運営し、時間を守るためのデポジットが必要な起業家。
- 今日からサンドボックスで決済を動かし、手動のキー設定なしで本番決済に移行したいビルダー。
- 既存のStripeアカウントがある、または手動管理のSDKとWebhook統合が必要なチーム。
Replit Stripe connector
APIキーを貼り付けることなく、予約時に返金可能なデポジットを受け取り、残額を後日請求したい場合にこの方法を使います。コネクタ
始める前に
バックエンド、サインイン、データベースを備えたアプリから始めてください。これにより、各予約に支払いステータスを保存できます。次に、金額の計算方法を決めます。- 予約時のデポジット: 500ドルなどの固定額、または合計金額に対する割合。
- 後日の残額: 料金の残りの部分。顧客が来店したときに保存済みのカードに請求されます。
- 返金期間: デポジットの返金を受けられる最終キャンセル期限。48時間が一般的なデフォルトです。
Agentに指示する
AgentがStripe connectorを提案し、Stripeサンドボックスを設定します。Stripeダッシュボードからキーをコピーする必要はありません。期待される動作
Agentはチェックアウト、デポジットと残額のフロー、返金ルールを追加します。Stripeのテストカード4242 4242 4242 4242、将来の有効期限、任意の3桁のCVCを使って、Previewでテストしてください。
- 予約して、デポジットを支払います。予約にデポジットが支払い済みで、カードが登録されていると表示されることを確認します。
- 予約から残額を請求します。支払い済みと表示されることを確認します。
- 2件目の予約を返金期間外にキャンセルします。Stripeサンドボックスのダッシュボードで返金を確認します。
- 3件目の予約を返金期間内にキャンセルします。アプリがデポジットを保持し、その理由を説明することを確認します。
- Stripeの拒否用テストカード
4000 0000 0000 0002で支払います。予約が確定されないことを確認します。
自分に合わせてカスタマイズする
トラブルシューティング
- デポジットは成功したが予約が確定されない: AgentにStripeの支払い成功イベントをデータベースの予約ステータスに接続するよう依頼し、別の予約でもう一度テストしてください。
- AgentからStripeキーの貼り付けやWebhookの設定を求められる: 代わりにReplit Stripe connectorを使うようAgentに伝えてください。同じ環境でconnectorと独自のキーを混在させると競合が発生します。
- 公開時にライブStripeアカウントの接続を求められる: サンドボックスではテスト決済しか受け付けられません。公開するの説明に従い、Publishペインからライブアカウントを接続してください。
- モバイルアプリでサブスクリプションが必要: 代わりにRevenueCatサブスクリプションを使用してください。
Your own Stripe keys
Connect Stripe yourself: store your own API keys in Secrets, take payments with the Stripe SDK, and receive payment events through a webhook. Use this path when you already manage a Stripe account and want full control over the setup.Before you start with your own keys
Copy your test API keys from the Stripe Dashboard and add them to your app’s Secrets. Add the webhook signing secret later, when you start the listener described below.
Keep test keys in development. Configure live keys separately in your published app’s secrets.
To add a key, select Tools in the Project Editor, then Secrets under Setup.
Select New Secret, enter the exact name in Key, enter your Stripe key in Value, and select Add Secret.
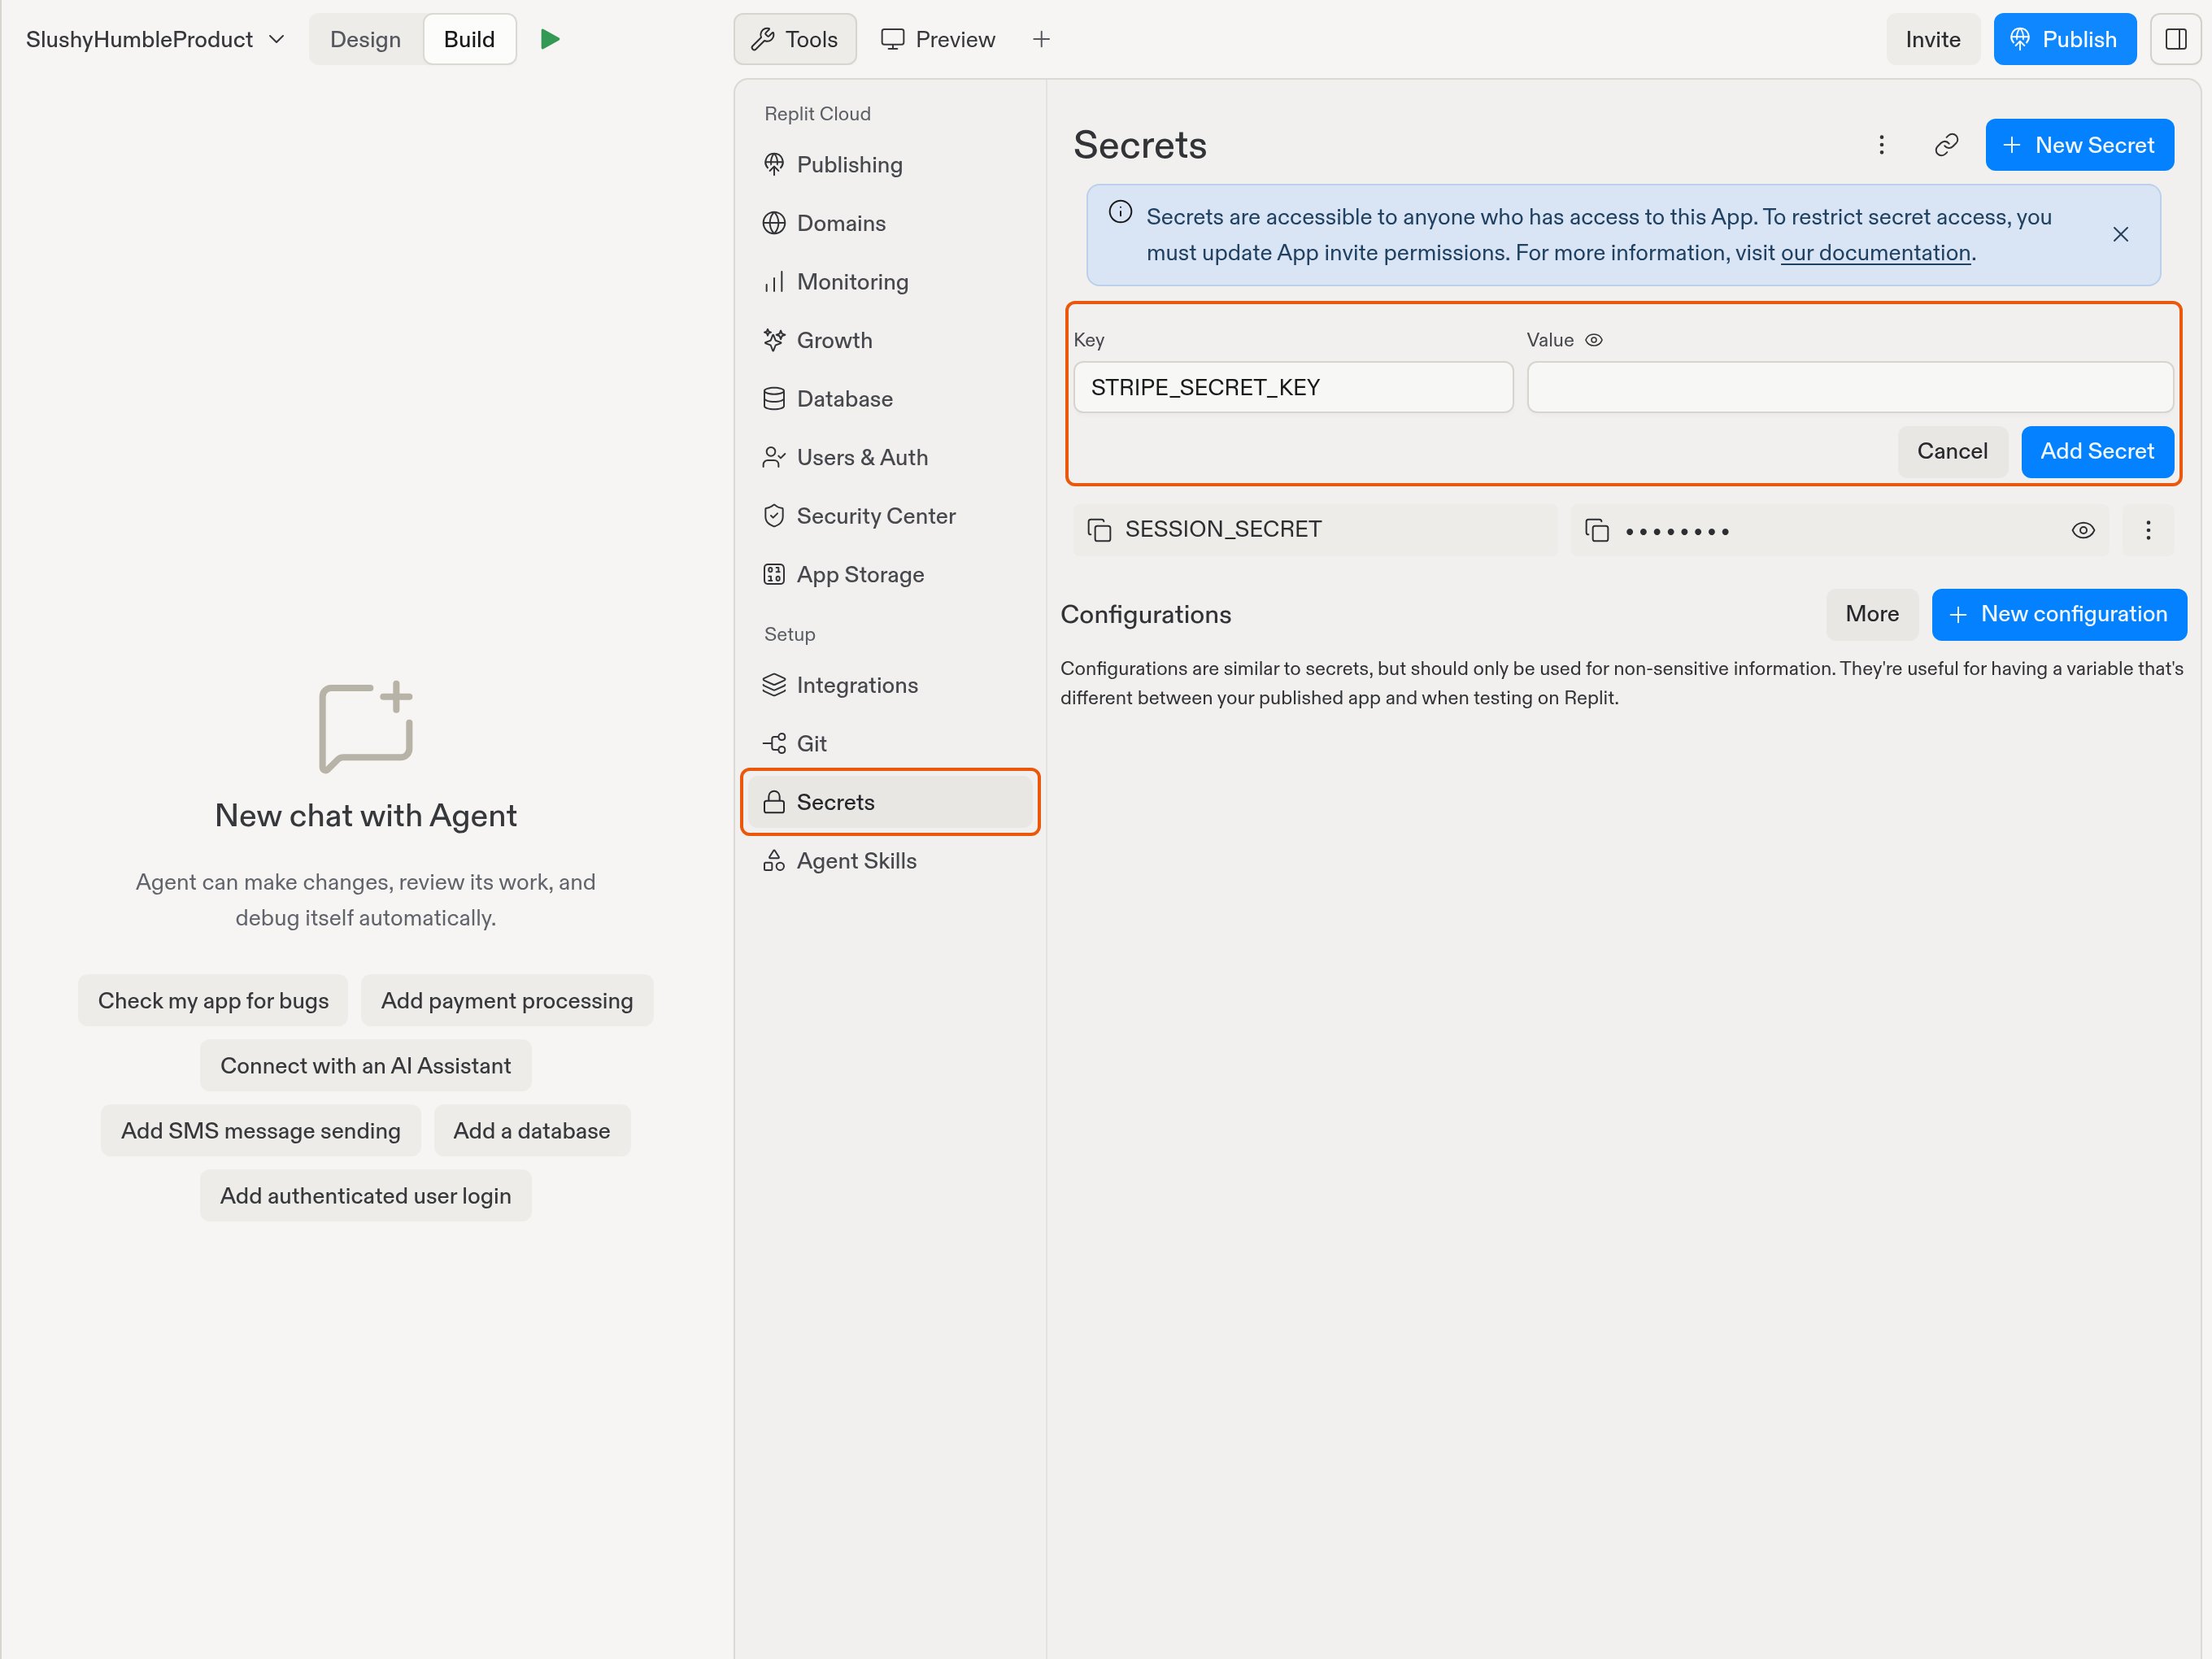
Enter the exact secret name in Key. The example leaves Value empty; enter your own key there.
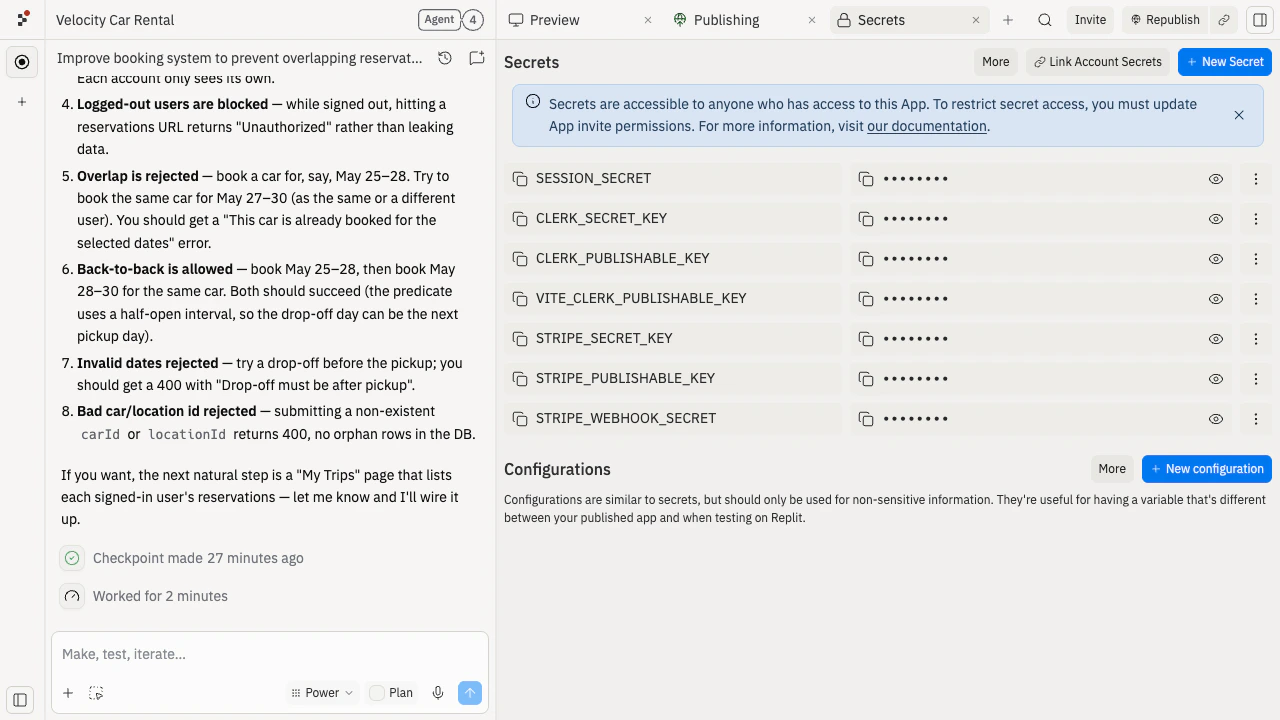
Prompt the agent for manual setup
Test the manual integration
Agent adds checkout and a webhook endpoint. For development, follow Stripe’s webhooks quickstart to install and authenticate the Stripe CLI in your project’s Shell. Ask Agent for your server’s local port and webhook path. Run the listener in that same environment, replacing the example port and path with your app’s values:stripe listen as STRIPE_WEBHOOK_SECRET in your development
Secrets, then restart your app so it reads the value. Keep both the app and the listener running
while you test in Preview. The listener forwards test events to the development server, so you
don’t need a published URL or a public development webhook endpoint yet.
Watch the walkthrough to see the full setup:
Test with Stripe’s test card 4242 4242 4242 4242, any future expiry, and any 3-digit CVC.
Confirm the order shows as paid in your app and the Stripe CLI reports a successful response
from your webhook endpoint.
Publish with your own live keys
Keep your development test keys and listener secret unchanged. In Publishing > Adjust settings > Production app secrets, setSTRIPE_SECRET_KEY and STRIPE_PUBLISHABLE_KEY to your live keys.
See Manage production secrets.
Register a separate live-mode webhook endpoint in Stripe using your published app URL plus the
webhook path. Set STRIPE_WEBHOOK_SECRET in Production app secrets to that endpoint’s signing
secret, not the CLI listener’s secret, then publish or republish.
If this is your first publish, establish the published URL first, then finish the endpoint and
secret setup and republish before accepting payments.
If development uses the Replit Stripe connector’s sandbox and production uses your own keys,
publishing checks STRIPE_SECRET_KEY:
- It must hold a live secret key (
sk_live_...) or a live restricted key (rk_live_...). Test keys, publishable keys, and keys stored under other names don’t count. - Without a valid live key, publishing stops with Connect a live Stripe account before publishing.
- Products and prices don’t sync from the sandbox to your live account. Create them in your live Stripe account yourself.
Customize the manual integration
Troubleshoot the manual integration
- Publishing says “Connect a live Stripe account before publishing”: check that the secret is named exactly
STRIPE_SECRET_KEYand holds a live key that starts withsk_live_orrk_live_. - Webhook events fail signature checks: make sure
STRIPE_WEBHOOK_SECRETmatches the endpoint’s signing secret, and that you use the live-mode secret in production. - The connector and your own keys are both set up in one environment: remove one of them. To remove the connector, see Update or remove the Stripe connection.
関連情報
決済とStripeのヘルプ
セットアップ方法、必須のシークレット名、公開時のエラーに関する回答。
Stripe決済統合
サンドボックスからライブアカウントまで、Stripe connectorの仕組み。