> ## Documentation Index
> Fetch the complete documentation index at: https://docs.replit.com/llms.txt
> Use this file to discover all available pages before exploring further.

# Build and publish from a template

> Start from a Replit Design template, turn the selected frame into a functional website with Agent, test it in Preview, and publish a live URL.

⏰ *Estimated time: 10 minutes*

By the end of this guide, you will have a small app published at a URL you can share.

<Frame>
  <img src="https://mintcdn.com/replit/19qgTrUVf3Dm9vud/images/first-app-template/07-published-site.jpg?fit=max&auto=format&n=19qgTrUVf3Dm9vud&q=85&s=d522791d07c7bc5450709f2d32dca337" alt="The selected template built as a website and open at its public Replit URL" width="1274" height="717" data-path="images/first-app-template/07-published-site.jpg" />
</Frame>

You will start with a polished template, turn it into a functional website, and publish it. The exact templates available may change, so choose one that fits what you want to make.

## Before you start

You need a [Replit account](https://replit.com). Building a new app from a Design frame requires Core or Pro. See [Build your design](/design/build-your-design) and [Billing](/billing/ai-billing) for plan details.

The goal is to finish one complete loop:

* Choose a template in [Replit Design](https://replit.com/design),
* Build it with [Agent](/features/agent/overview),
* Test the app,
* Publish, and share.

Agent is Replit's AI builder. You describe what you want, and Agent helps create, explain, and fix the app.

## Choose, build, and publish a template

<Steps>
  <Step title="Browse design templates">
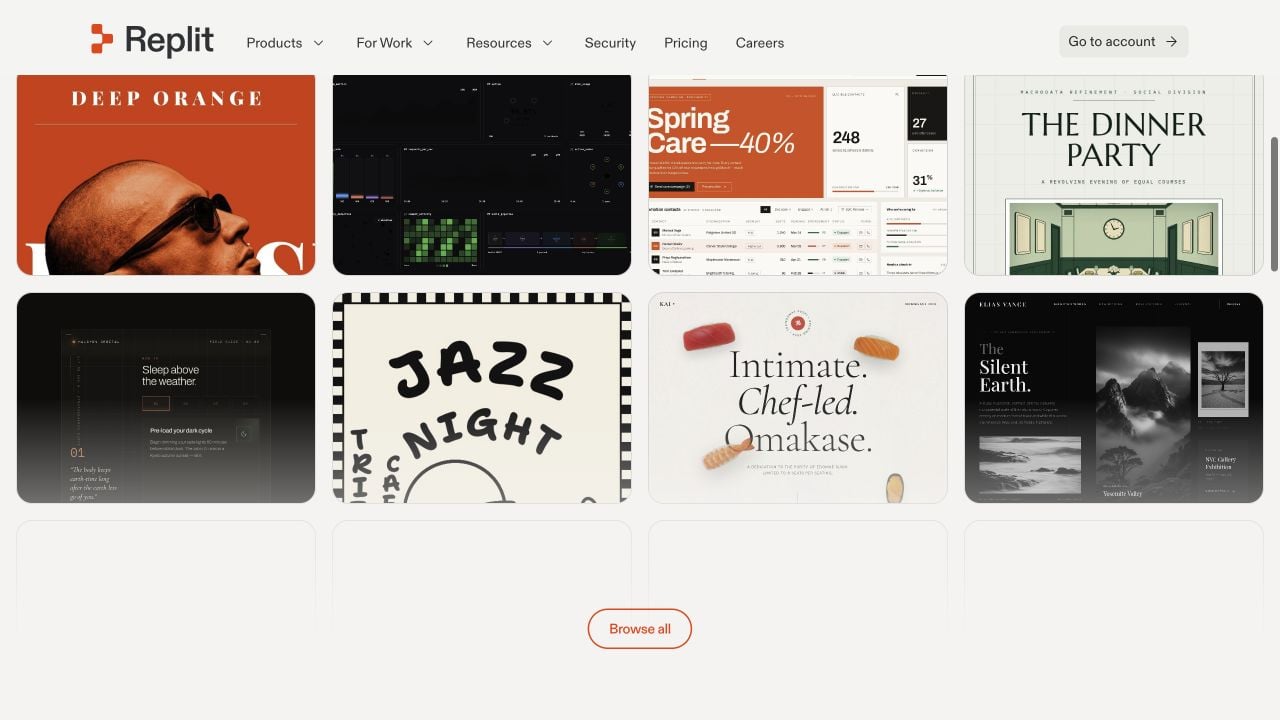
    Open [replit.com/design](https://replit.com/design). Browse the featured templates or filter by **Landing Pages**, **Mobile**, **Prototypes**, and other formats.

    <Frame>
      <img src="https://mintcdn.com/replit/19qgTrUVf3Dm9vud/images/first-app-template/01-design-gallery.jpg?fit=max&auto=format&n=19qgTrUVf3Dm9vud&q=85&s=3c00280a1b20c5bff141183d7a741f50" alt="The Replit Design gallery with featured templates and format filters" width="1280" height="720" data-path="images/first-app-template/01-design-gallery.jpg" />
    </Frame>
  </Step>

  <Step title="Preview and use a template">
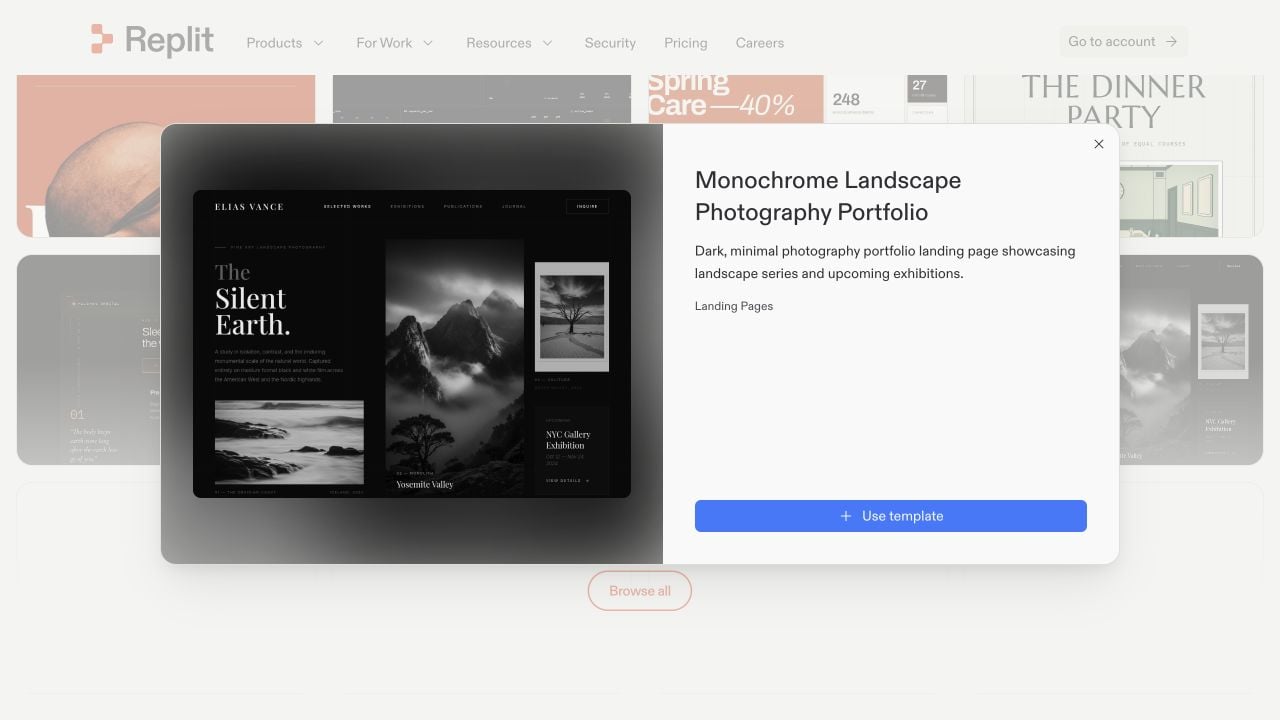
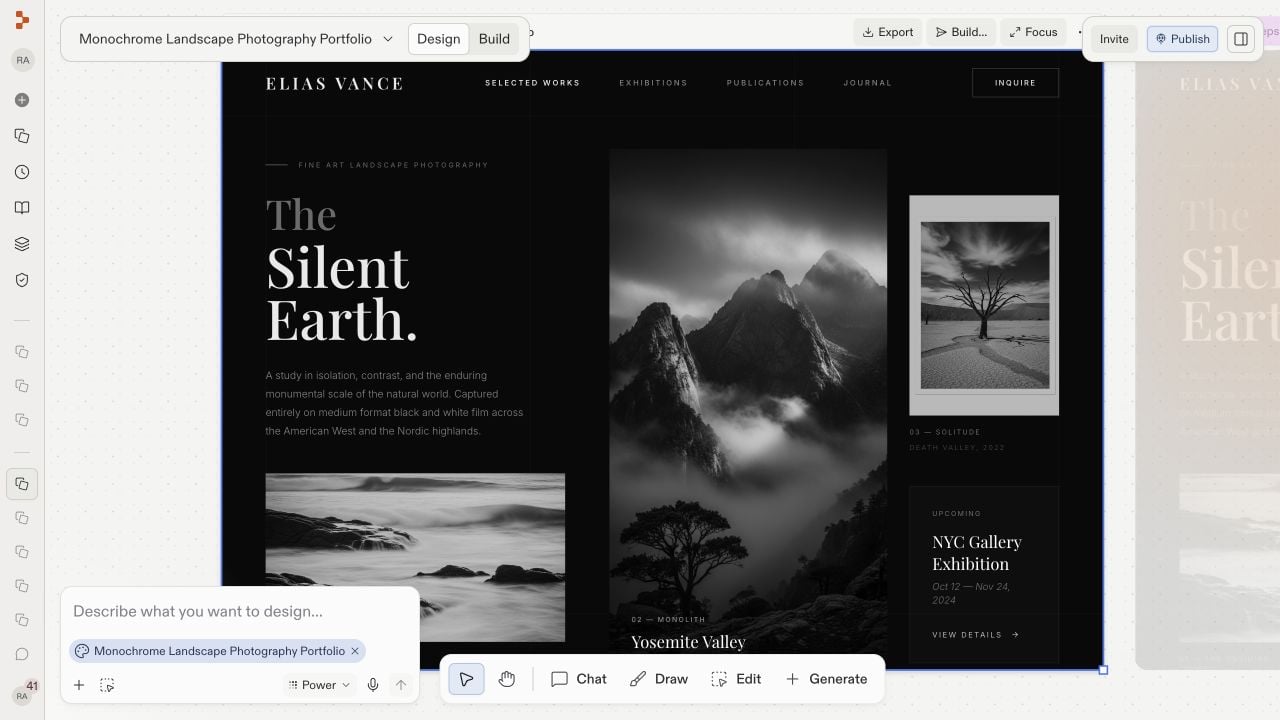
    Select a template to inspect it, then select **Use template**. Replit creates a new project and places the template on the Design canvas. If you started from a template's cover page instead, see [Start from a template](/design/start-from-a-template) for the remix flow.

    <Frame>
      <img src="https://mintcdn.com/replit/19qgTrUVf3Dm9vud/images/first-app-template/02-template-preview.jpg?fit=max&auto=format&n=19qgTrUVf3Dm9vud&q=85&s=090fda02a1643cd376d00b83dcd84ecb" alt="A Replit Design template preview with the Use template button" width="1280" height="720" data-path="images/first-app-template/02-template-preview.jpg" />
    </Frame>

    The remixed template opens on the Design canvas inside its new project.
    <Frame>
      <img src="https://mintcdn.com/replit/19qgTrUVf3Dm9vud/images/first-app-template/03-remixed-design.jpg?fit=max&auto=format&n=19qgTrUVf3Dm9vud&q=85&s=e4174b4f149b82c868173d22140baf8a" alt="The selected template remixed onto the Design canvas in a new Replit project" width="1280" height="720" data-path="images/first-app-template/03-remixed-design.jpg" />
    </Frame>
  </Step>

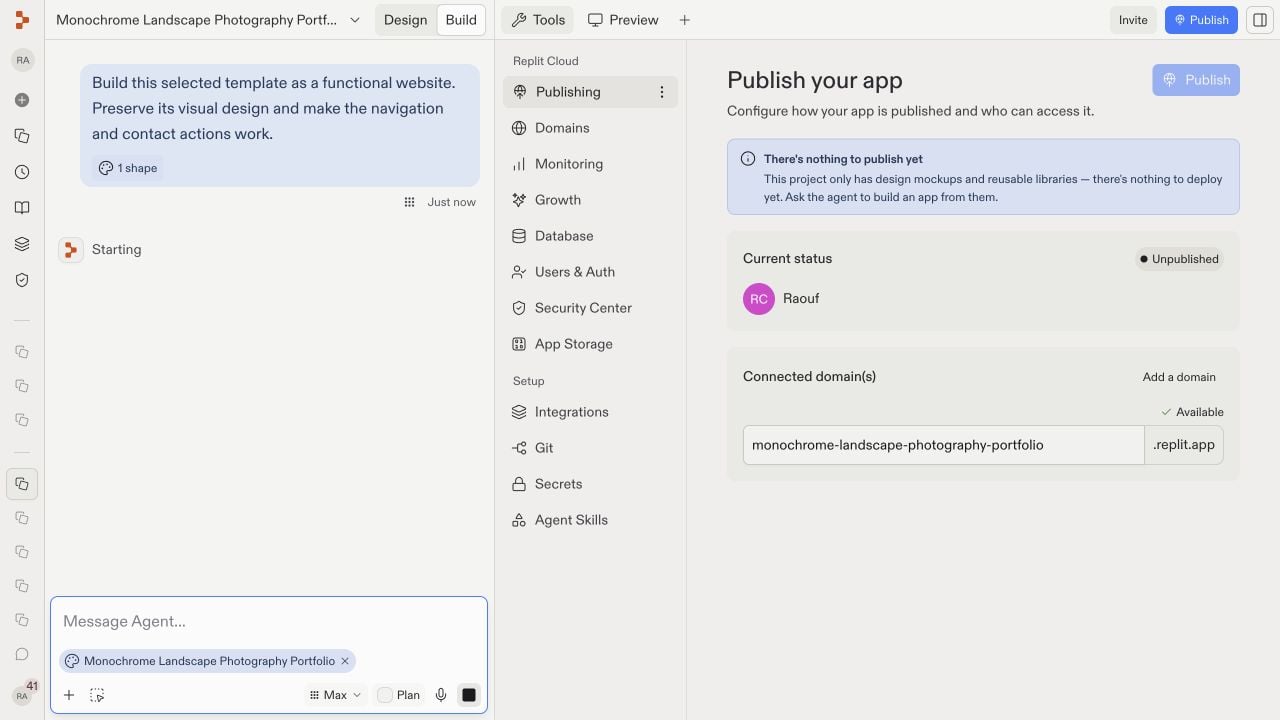
  <Step title="Turn the design into a website">
    A template starts as a design mockup. Before it can be published, switch to **Build** and ask Agent to turn the selected design into a functional website. For example:

    > Build this selected template as a functional website. Preserve its visual design and make its navigation and contact actions work.

    Agent creates a website artifact in the same project and uses the selected design as its source.

    <Note>
      The **Publish** button is also visible in Design. If the project contains only design mockups, Publishing reports that there is nothing to deploy yet and directs you to ask Agent to build an app. After a Website artifact exists, you can publish from either Design or Build.
    </Note>

    <Frame>
      <img src="https://mintcdn.com/replit/19qgTrUVf3Dm9vud/images/first-app-template/04-build-request.jpg?fit=max&auto=format&n=19qgTrUVf3Dm9vud&q=85&s=0086fff335263cb1dcfe83d79d299721" alt="The Build workspace with a selected portfolio design attached, the build request in Agent chat, and Publishing explaining that a design-only project has nothing to deploy yet" width="1280" height="720" data-path="images/first-app-template/04-build-request.jpg" />
    </Frame>
  </Step>

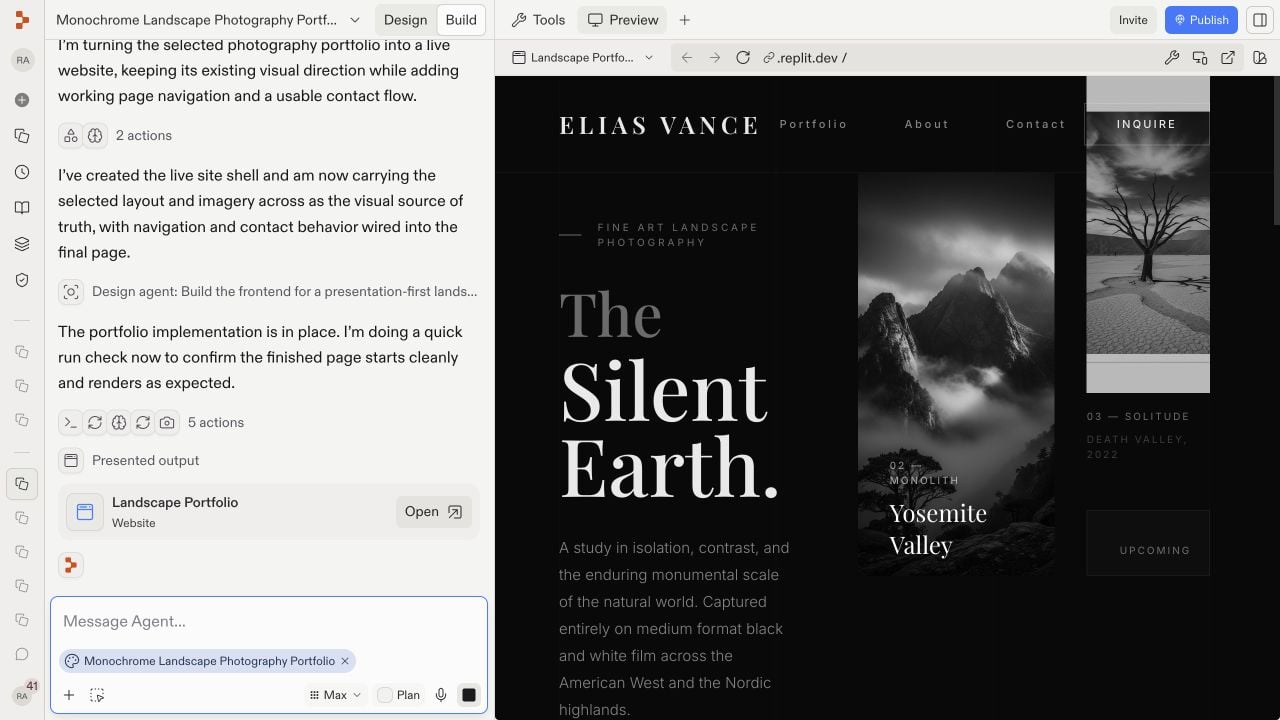
  <Step title="Confirm the app works in Preview">
    When Agent finishes, open [Preview](/features/editor/preview) and use the app like a visitor. Preview is where you test the app while you are building, before publishing it.

    Check that you can:

    * Follow the main navigation.
    * Use the template's buttons and forms.
    * See a clear success or validation state after an action.
    * Refresh the page and use the site again.
    * Resize Preview to a phone-sized width.

    If something breaks, describe the symptom to Agent. You do not need to diagnose the code yourself.

    <Frame>
      <img src="https://mintcdn.com/replit/19qgTrUVf3Dm9vud/images/first-app-template/05-preview.jpg?fit=max&auto=format&n=19qgTrUVf3Dm9vud&q=85&s=8a4aa6fe26961c70b48f89be1713e45a" alt="The template-based website running in the Project Editor Preview" width="1280" height="720" data-path="images/first-app-template/05-preview.jpg" />
    </Frame>

    <Tip>
      Want to explore visual variations before publishing? See [Explore suggestions](/design/explore-suggestions) to generate alternative looks side by side and apply the one you like.
    </Tip>
  </Step>

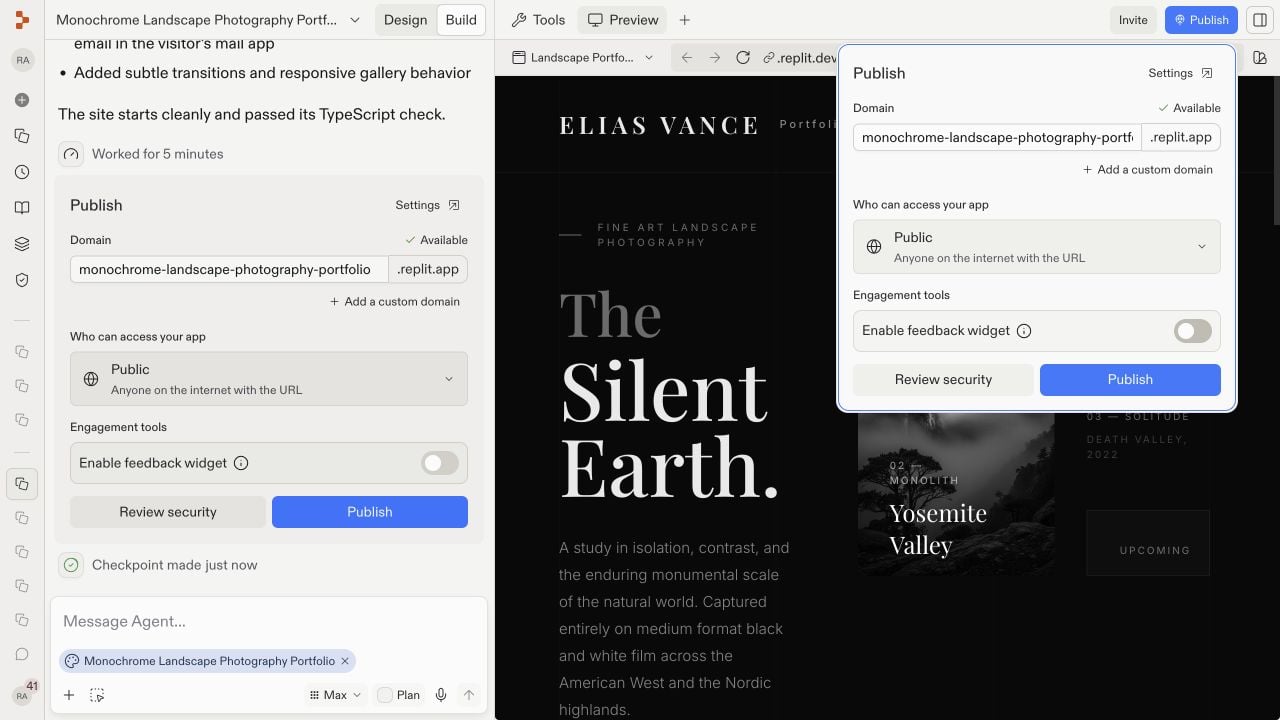
  <Step title="Publish your app">
    When Preview works, select **Publish**. Confirm the generated subdomain, choose who can access the app, and review the security settings. Then select **Publish** in the dialog.

    Publishing creates a public version of your app with a URL you can share.

    <Frame>
      <img src="https://mintcdn.com/replit/19qgTrUVf3Dm9vud/images/first-app-template/06-publish-dialog.jpg?fit=max&auto=format&n=19qgTrUVf3Dm9vud&q=85&s=59b2f5b98e3ec216858c5d0b762dd7b8" alt="The Publish dialog with the generated subdomain, access settings, and Publish button" width="1280" height="720" data-path="images/first-app-template/06-publish-dialog.jpg" />
    </Frame>
  </Step>

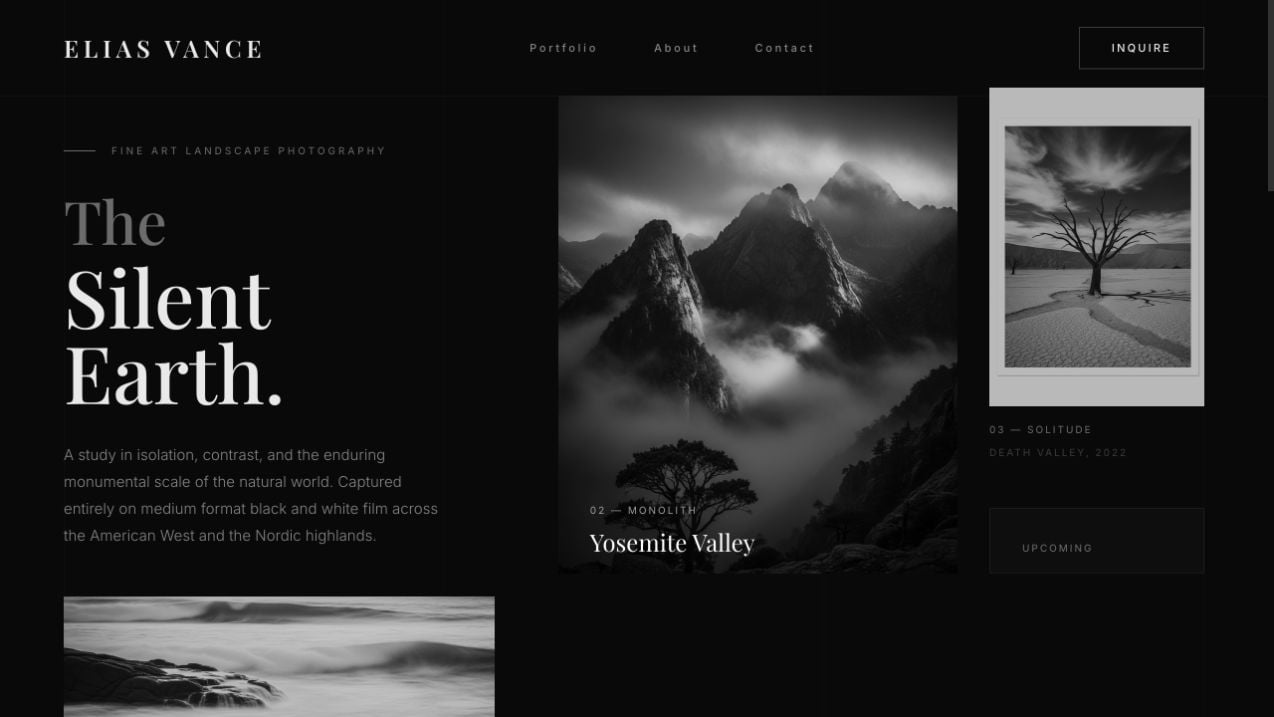
  <Step title="Open your published app">
    Open the public URL in a new browser tab and repeat the same checks. The app should work outside the Project Editor before you share it.

    If the published app behaves differently from Preview, check the publishing logs and any production settings the app needs. For common publishing problems, see [Troubleshoot publishing](/build/troubleshooting).

    <Frame>
      <img src="https://mintcdn.com/replit/19qgTrUVf3Dm9vud/images/first-app-template/07-published-site.jpg?fit=max&auto=format&n=19qgTrUVf3Dm9vud&q=85&s=d522791d07c7bc5450709f2d32dca337" alt="The completed template-based website open at its public Replit URL" width="1274" height="717" data-path="images/first-app-template/07-published-site.jpg" />
    </Frame>
  </Step>
</Steps>

## 🎉 Congratulations — you shipped your first app

You went from a design template to a live, shareable URL. Along the way you:

* Chose and remixed a template from Replit Design.
* Asked Agent to turn the selected design into a functional website.
* Tested the result in Preview.
* Published the app and opened it at its public URL.

That's a complete Replit workflow — choose a starting point, build, test, improve, and publish.

## Next steps

<section className="chat-mkt chat-workflow-grid has-visuals">
  <a className="chat-example has-visual" href="/design/explore-suggestions">
    <div className="chat-use-case-visual palette-blush">
      <div className="chat-use-case-window">
        <i />

        <i />

        <i />

        <b />

        <b />

        <b />
      </div>

      <em>
        <Icon icon="palette" size={24} />
      </em>
    </div>

    <span>
      <Icon icon="palette" size={19} />
    </span>

    <div className="chat-card-title">Design with Canvas</div>
    <p>Explore visual variations and apply a new design without rebuilding.</p>
    <div className="chat-card-link">Explore Design →</div>
  </a>

  <a className="chat-example has-visual" href="/core-concepts/agent/task-system">
    <div className="chat-use-case-visual palette-stone">
      <div className="chat-use-case-window">
        <i />

        <i />

        <i />

        <b />

        <b />

        <b />
      </div>

      <em>
        <Icon icon="list-check" size={24} />
      </em>
    </div>

    <span>
      <Icon icon="list-check" size={19} />
    </span>

    <div className="chat-card-title">Build in parallel</div>

    <p>
      Run multiple Agent tasks at once so different parts of the app move
      forward together.
    </p>

    <div className="chat-card-link">Learn more →</div>
  </a>

  <a className="chat-example has-visual" href="/learn/foundations/vibe-coding-101">
    <div className="chat-use-case-visual palette-ink">
      <div className="chat-use-case-window">
        <i />

        <i />

        <i />

        <b />

        <b />

        <b />
      </div>

      <em>
        <Icon icon="robot" size={24} />
      </em>
    </div>

    <span>
      <Icon icon="robot" size={19} />
    </span>

    <div className="chat-card-title">Vibe coding 101</div>
    <p>Learn how to guide Agent from idea to working app.</p>
    <div className="chat-card-link">Open the guide →</div>
  </a>

  <a className="chat-example has-visual" href="/build/add-database">
    <div className="chat-use-case-visual">
      <div className="chat-use-case-window">
        <i />

        <i />

        <i />

        <b />

        <b />

        <b />
      </div>

      <em>
        <Icon icon="database" size={24} />
      </em>
    </div>

    <span>
      <Icon icon="database" size={19} />
    </span>

    <div className="chat-card-title">Add a database</div>
    <p>Save app data after refresh.</p>
    <div className="chat-card-link">Continue →</div>
  </a>
</section>