> ## Documentation Index
> Fetch the complete documentation index at: https://docs.replit.com/llms.txt
> Use this file to discover all available pages before exploring further.

# 통합

> 도구를 연결하고, 재사용 가능한 Skill을 추가하고, MCP로 Replit을 확장하세요.

export const IntegrationsOverviewCover = () => <div className="chat-mkt" role="img" aria-label="A frosted integrations catalog with connected service cards" style={{
  margin: "28px 0 42px",
  borderTop: 0,
  paddingTop: 0
}}>
    <div className="chat-use-case-visual" style={{
  aspectRatio: "auto",
  minHeight: "clamp(220px, 34vw, 320px)",
  overflow: "hidden",
  background: "radial-gradient(circle at 50% -18%, rgba(255,255,255,.82), transparent 42%), radial-gradient(circle at 4% 96%, rgba(255,184,146,.48), transparent 38%), linear-gradient(140deg, #ff764d, #ff3c00 60%, #c92d00)"
}}>
      <div aria-hidden="true" style={{
  position: "absolute",
  inset: 0,
  background: "linear-gradient(180deg, rgba(255,255,255,.14), rgba(255,255,255,0) 48%, rgba(111,24,0,.2))"
}} />
      <div aria-hidden="true" style={{
  position: "relative",
  zIndex: 1,
  display: "grid",
  gridTemplateColumns: "repeat(3, minmax(0, 1fr))",
  gap: "clamp(10px, 2vw, 18px)",
  width: "min(720px, 82%)",
  minHeight: "inherit",
  alignItems: "center",
  margin: "auto"
}}>
        {["48%", "74%", "58%"].map((lineWidth, index) => <div key={lineWidth} style={{
  display: "grid",
  gap: 10,
  minHeight: "clamp(122px, 20vw, 164px)",
  padding: "clamp(12px, 2vw, 18px)",
  border: "1px solid rgba(255,255,255,.56)",
  borderRadius: 18,
  background: index === 1 ? "linear-gradient(180deg, rgba(255,255,255,.38), rgba(255,255,255,.16))" : "rgba(255,255,255,.16)",
  boxShadow: "0 16px 30px rgba(55,27,18,.16)",
  backdropFilter: "blur(6px)"
}}>
            <span style={{
  width: 26,
  height: 26,
  borderRadius: 8,
  background: index === 1 ? "rgba(255,255,255,.9)" : "rgba(255,255,255,.42)"
}} />
            <span style={{
  width: "88%",
  height: 8,
  borderRadius: 999,
  background: "rgba(255,255,255,.74)"
}} />
            <span style={{
  width: lineWidth,
  height: 7,
  borderRadius: 999,
  background: "rgba(255,255,255,.38)"
}} />
          </div>)}
      </div>
    </div>
  </div>;

export const chatIcon = (name, size = 19) => {
  const paths = {
    MessageCircle: <path d="M7.9 20A9 9 0 1 0 4 16.1L2 22Z" />,
    ChartNoAxesCombined: <>
        <path d="M12 16v5" />
        <path d="M16 14v7" />
        <path d="M20 10v11" />
        <path d="m22 3-8.646 8.646a.5.5 0 0 1-.708 0L9.354 8.354a.5.5 0 0 0-.708 0L2 15" />
        <path d="M4 18v3" />
        <path d="M8 14v7" />
      </>,
    Workflow: <>
        <rect width="8" height="8" x="3" y="3" rx="2" />
        <path d="M7 11v4a2 2 0 0 0 2 2h4" />
        <rect width="8" height="8" x="13" y="13" rx="2" />
      </>,
    Lightbulb: <>
        <path d="M15 14c.2-1 .7-1.7 1.5-2.5 1-.9 1.5-2.2 1.5-3.5A6 6 0 0 0 6 8c0 1 .2 2.2 1.5 3.5.7.7 1.3 1.5 1.5 2.5" />
        <path d="M9 18h6" />
        <path d="M10 22h4" />
      </>,
    Code2: <>
        <path d="m18 16 4-4-4-4" />
        <path d="m6 8-4 4 4 4" />
        <path d="m14.5 4-5 16" />
      </>,
    Presentation: <>
        <path d="M2 3h20" />
        <path d="M21 3v11a2 2 0 0 1-2 2H5a2 2 0 0 1-2-2V3" />
        <path d="m7 21 5-5 5 5" />
      </>,
    PanelsTopLeft: <>
        <rect width="18" height="18" x="3" y="3" rx="2" />
        <path d="M3 9h18" />
        <path d="M9 21V9" />
      </>,
    Keyboard: <>
        <rect width="20" height="14" x="2" y="5" rx="2" />
        <path d="M6 9h.01M10 9h.01M14 9h.01M18 9h.01M6 13h.01M10 13h.01M14 13h.01M18 13h.01M8 17h8" />
      </>,
    Layers3: <>
        <path d="m12 2 9 5-9 5-9-5 9-5Z" />
        <path d="m3 12 9 5 9-5M3 17l9 5 9-5" />
      </>,
    CalendarClock: <>
        <path d="M16 2v4M8 2v4M3 10h18" />
        <rect width="18" height="19" x="3" y="4" rx="2" />
        <path d="M12 14v3l2 1" />
      </>,
    ConversationProject: <>
        <path d="M3 4h8v6H6l-3 2V4Z" />
        <rect width="9" height="9" x="12" y="11" rx="1.5" />
        <path d="M12 14h9M15 11v9" />
      </>,
    CursorDesign: <>
        <path d="m5 3 13 7-6 2-2 6L5 3Z" />
        <path d="M15 16h6M18 13v6" />
      </>,
    AppWindow: <>
        <rect width="20" height="18" x="2" y="3" rx="2" />
        <path d="M2 8h20M6 5.5h.01M9 5.5h.01" />
      </>,
    CloudUpload: <>
        <path d="M12 13v8M8 17l4-4 4 4" />
        <path d="M20 16.5A5 5 0 0 0 18 7h-1.3A7 7 0 0 0 3.3 9.4 4.5 4.5 0 0 0 5 18h2" />
      </>,
    Image: <>
        <rect width="18" height="18" x="3" y="3" rx="2" ry="2" />
        <circle cx="9" cy="9" r="2" />
        <path d="m21 15-3.086-3.086a2 2 0 0 0-2.828 0L6 21" />
      </>,
    FileUp: <>
        <path d="M15 2H6a2 2 0 0 0-2 2v16a2 2 0 0 0 2 2h12a2 2 0 0 0 2-2V7Z" />
        <path d="M14 2v4a2 2 0 0 0 2 2h4" />
        <path d="M12 12v6" />
        <path d="m15 15-3-3-3 3" />
      </>,
    Search: <>
        <circle cx="11" cy="11" r="8" />
        <path d="m21 21-4.3-4.3" />
      </>,
    Sparkles: <path d="M9.937 15.5A2 2 0 0 0 8.5 14.063l-6.135-1.582a.5.5 0 0 1 0-.962L8.5 9.936A2 2 0 0 0 9.937 8.5l1.582-6.135a.5.5 0 0 1 .963 0L14.063 8.5A2 2 0 0 0 15.5 9.937l6.135 1.581a.5.5 0 0 1 0 .964L15.5 14.063a2 2 0 0 0-1.437 1.437l-1.582 6.135a.5.5 0 0 1-.963 0z" />,
    Briefcase: <>
        <path d="M16 20V4a2 2 0 0 0-2-2h-4a2 2 0 0 0-2 2v16" />
        <rect width="20" height="14" x="2" y="6" rx="2" />
      </>,
    WandSparkles: <>
        <path d="m21.64 3.64-1.28-1.28a1.21 1.21 0 0 0-1.72 0L2.36 18.64a1.21 1.21 0 0 0 0 1.72l1.28 1.28a1.2 1.2 0 0 0 1.72 0L21.64 5.36a1.2 1.2 0 0 0 0-1.72" />
        <path d="m14 7 3 3" />
        <path d="M5 6v4" />
        <path d="M19 14v4" />
        <path d="M10 2v2" />
        <path d="M7 8H3" />
        <path d="M21 16h-4" />
        <path d="M11 3H9" />
      </>
  };
  return <svg width={size} height={size} viewBox="0 0 24 24" fill="none" stroke="currentColor" strokeWidth="1.8" strokeLinecap="round" strokeLinejoin="round" aria-hidden="true">
      {paths[name] ?? paths.Sparkles}
    </svg>;
};

<IntegrationsOverviewCover />

커피숍 조사를 통해 방향을 얻었습니다. 이 방향을 상세한 출시 계획으로
발전시키기 전에, 필요한 정보를 담고 있는 도구와 파일에 Replit을 연결하는
방법을 알아보세요.

## 통합을 사용하는 이유

통합은 이미 사용 중인 도구의 정보를 Replit으로 가져옵니다. 서비스를 연결한
다음, 같은 Conversation에서 Replit에게 관련 맥락을 찾거나, 질문에 답하거나,
작업을 완료하도록 요청하세요.

커피숍 출시를 위해 예산 메모, 위치 조사, 메뉴 아이디어, 비주얼 레퍼런스의
출처로 Google Drive를 사용하게 됩니다. 계속 발전하는 계획을 문서화하는
데는 Notion을 사용합니다. 먼저 통합을 연결하는 방법을 살펴보겠습니다.

## 통합 연결하기

Replit은 커뮤니케이션, 이메일, 캘린더, 파일, 고객 기록, 프로젝트 관리 등을
위한 커넥터를 지원합니다. Workspace의 커넥터 카탈로그에서 사용 중인
플랜에서 이용 가능한 항목을 확인할 수 있습니다.

### 통합 연결하기

<Steps>
  <Step title="Integrations 열기">
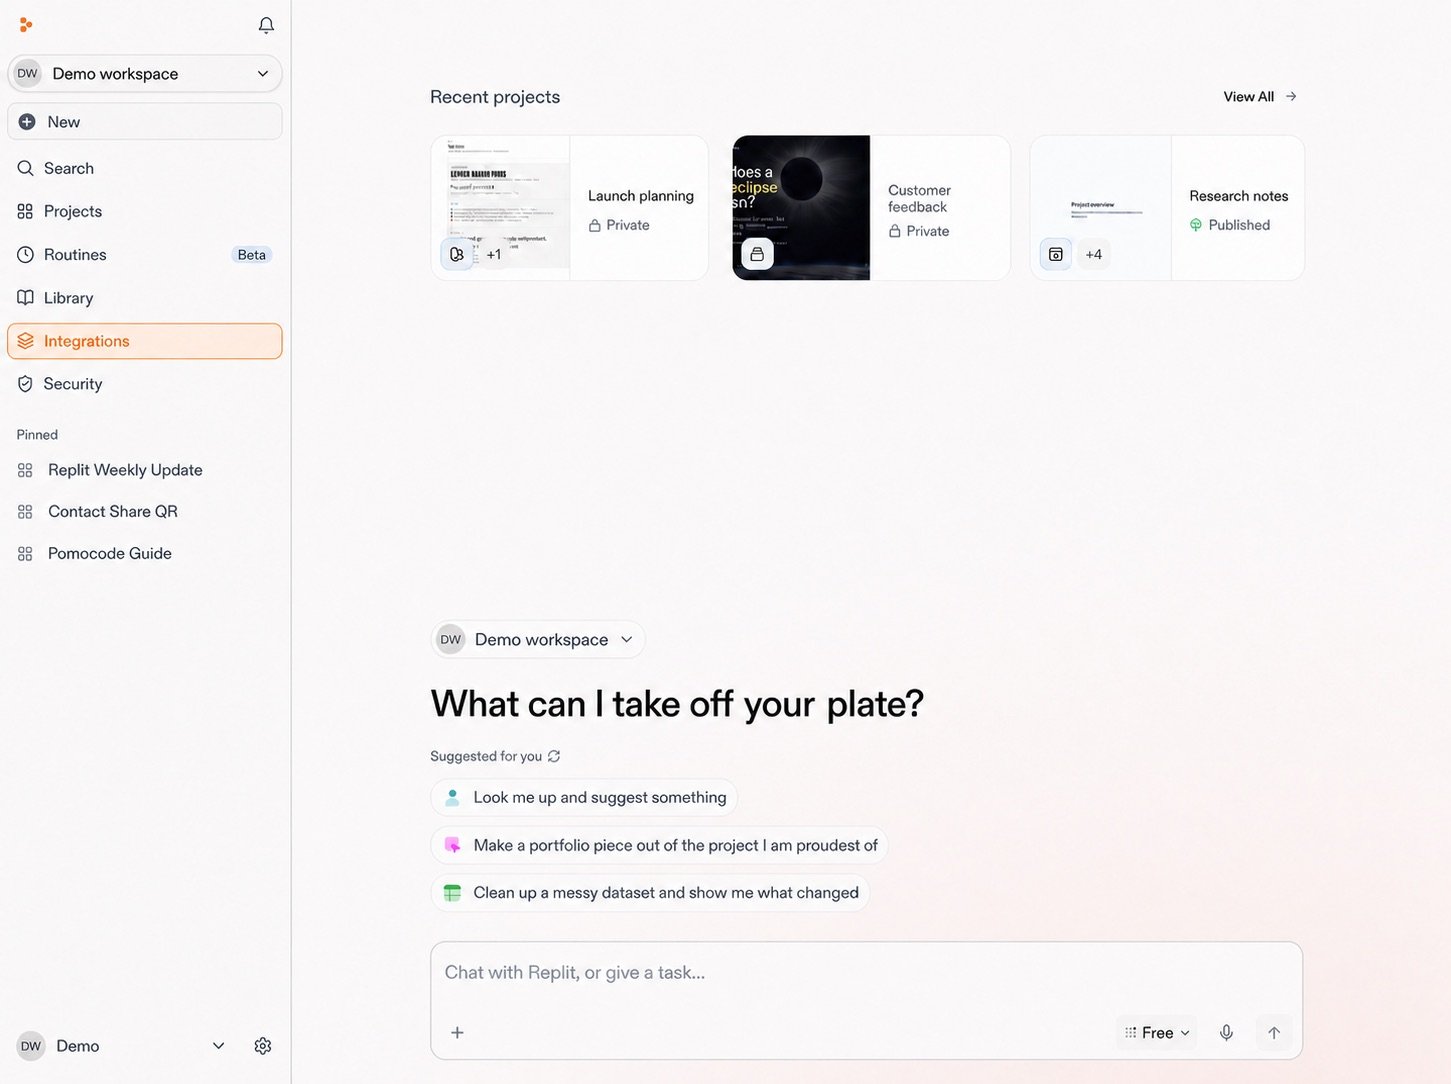
    Workspace에서 사이드바의 **Integrations**를 선택하세요.

    <Frame>
      <img src="https://mintcdn.com/replit/teDUL4A-lNO7dv1O/images/chat/integrations-open-from-workspace.jpg?fit=max&auto=format&n=teDUL4A-lNO7dv1O&q=85&s=c0febc56b64d0ae9223249a2f8bb7cf9" alt="왼쪽 사이드바에 Integrations가 강조 표시된, 정보가 삭제된 Replit Workspace 홈 화면" width="1451" height="1084" data-path="images/chat/integrations-open-from-workspace.jpg" />
    </Frame>
  </Step>

  <Step title="통합 선택하기">
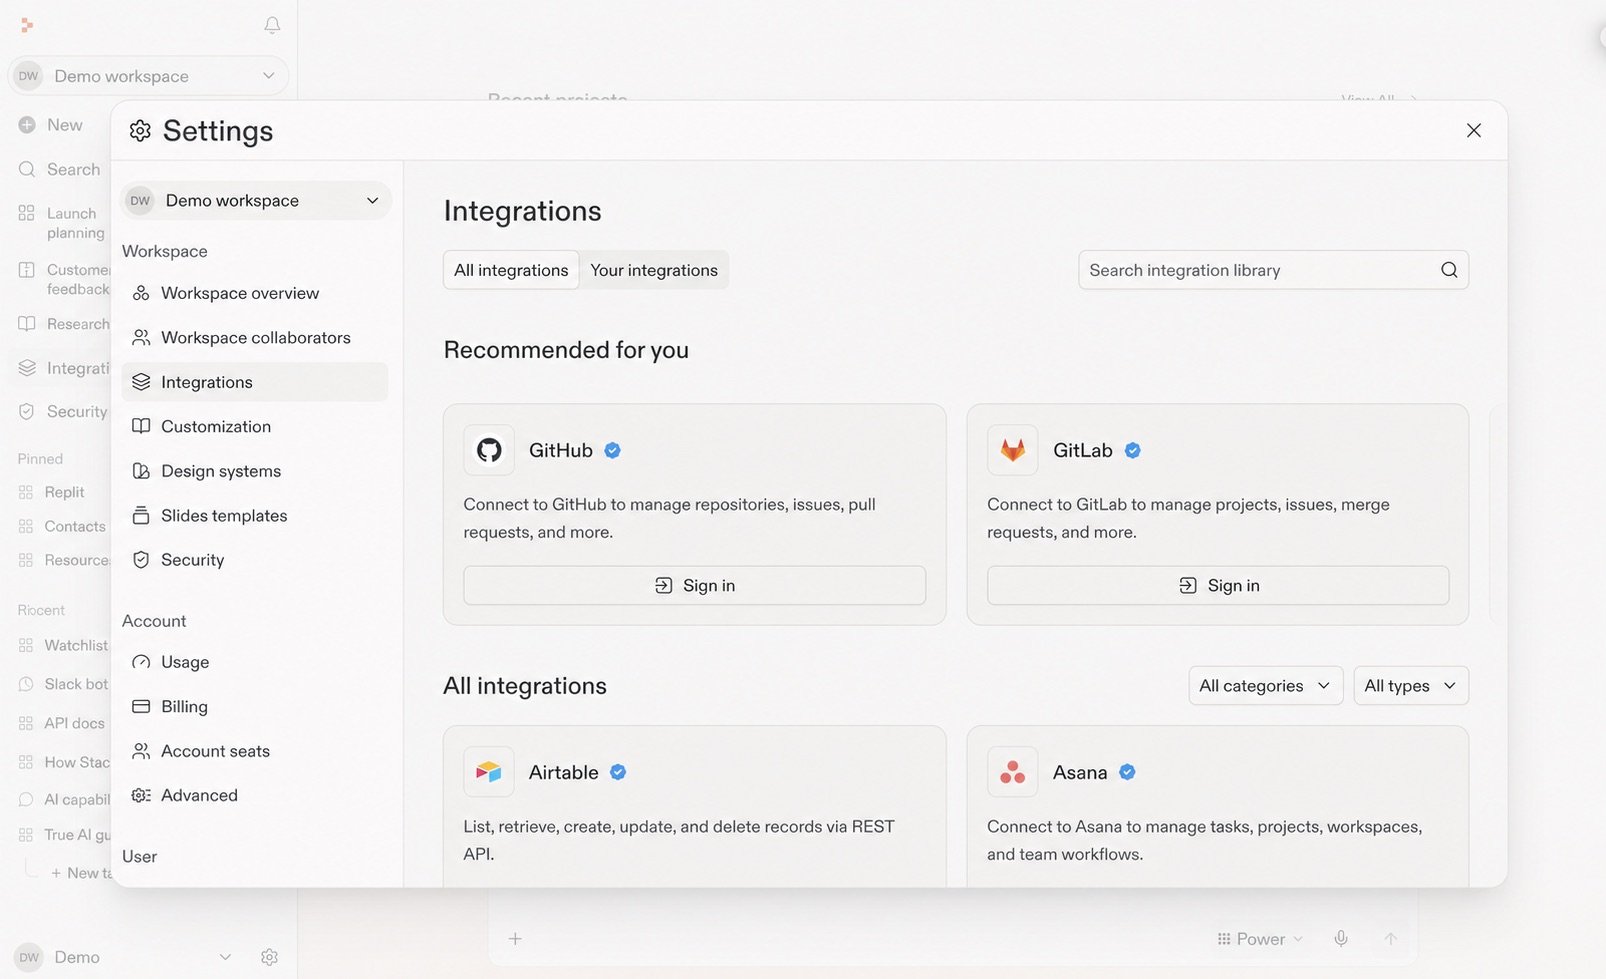
    통합 라이브러리를 둘러보거나 검색한 다음, 필요한 서비스를 선택하세요.

    <Frame>
      <img src="https://mintcdn.com/replit/teDUL4A-lNO7dv1O/images/chat/integrations-library-sanitized.jpg?fit=max&auto=format&n=teDUL4A-lNO7dv1O&q=85&s=c7c02cdd6628fda3018d08ee7a05ab8f" alt="추천 통합과 사용 가능한 통합을 보여주는, 정보가 삭제된 Replit 통합 라이브러리" width="1606" height="979" data-path="images/chat/integrations-library-sanitized.jpg" />
    </Frame>
  </Step>

  <Step title="연결하기">
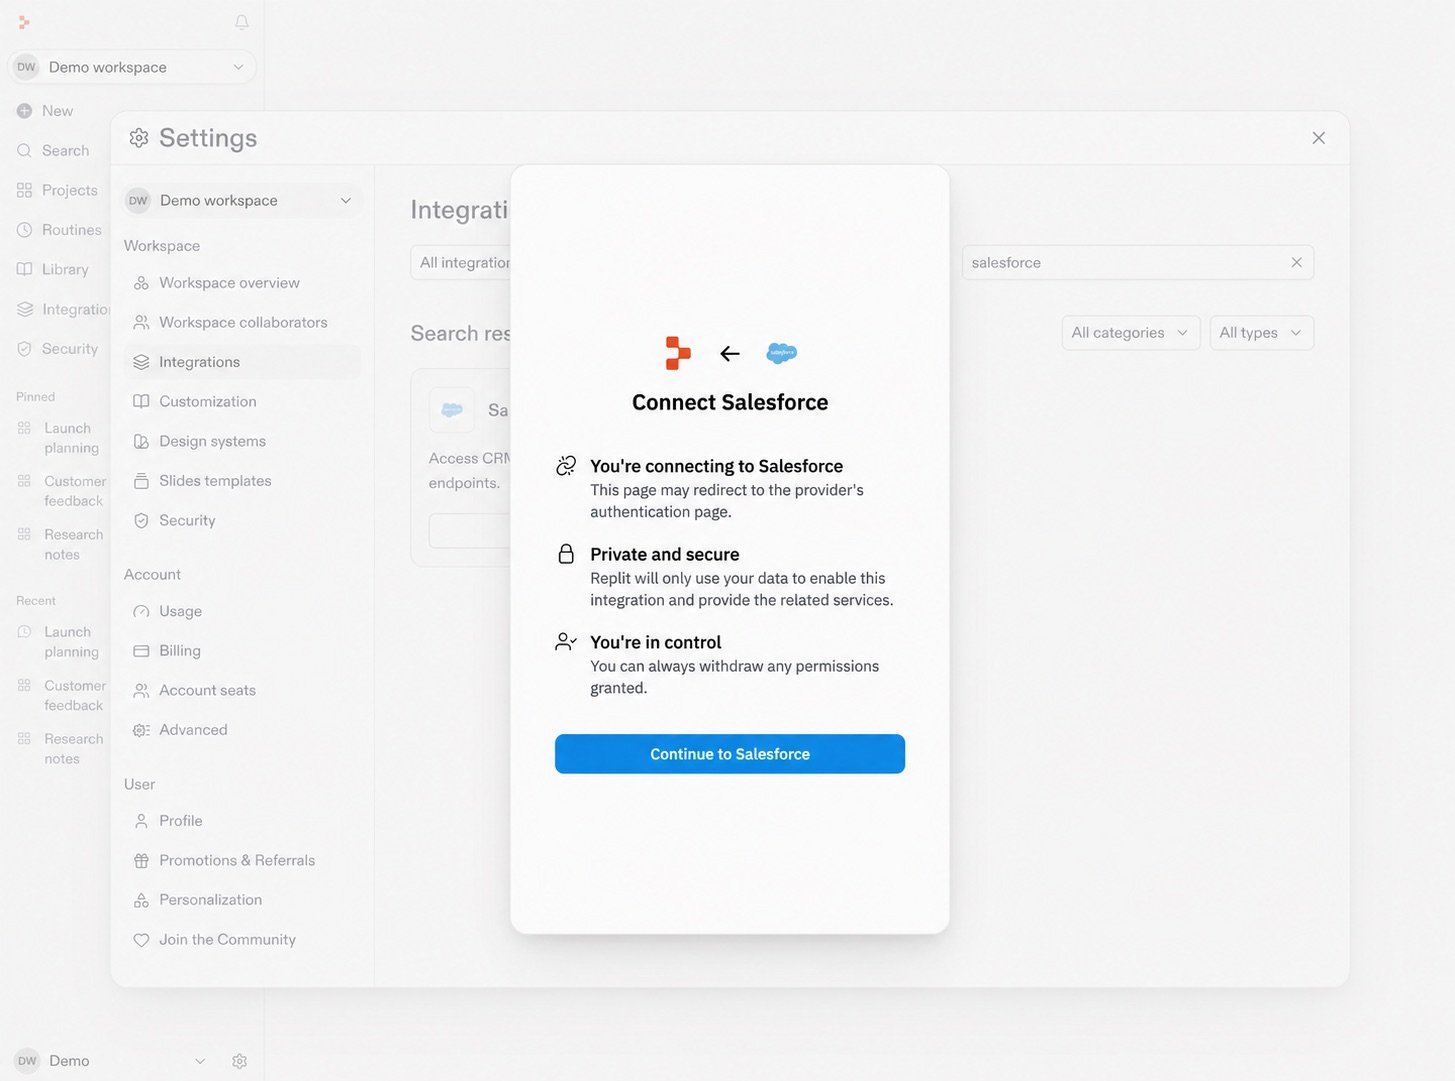
    해당 통합이 접근할 수 있는 항목을 검토한 다음, 제공업체의 로그인 및 권한
    부여 절차를 진행하세요. 여기서는 Salesforce를 예로 보여줍니다. 다른
    통합은 절차가 다를 수 있습니다.

    <Frame>
      <img src="https://mintcdn.com/replit/teDUL4A-lNO7dv1O/images/chat/salesforce-connect-permissions-sanitized.jpg?fit=max&auto=format&n=teDUL4A-lNO7dv1O&q=85&s=428570b45b627f40db0ba56dc4579254" alt="인증, 개인정보 보호, 권한, Continue to Salesforce 버튼을 설명하는, 정보가 삭제된 Salesforce 연결 대화 상자" width="1455" height="1081" data-path="images/chat/salesforce-connect-permissions-sanitized.jpg" />
    </Frame>
  </Step>
</Steps>

연결된 서비스는 로그인에 사용한 계정의 권한을 그대로 따릅니다. Replit은
해당 계정이 접근할 수 있는 정보에만 접근할 수 있습니다.

## 더 살펴보기

통합은 Replit을 다른 애플리케이션과 연결하는 한 가지 방법입니다. 재사용
가능한 가이드가 필요하면 Skill을, 추가 연결이 필요하면 MCP를 사용할 수도
있습니다.
<section className="chat-mkt chat-workflow-grid has-visuals">
  <a className="chat-example has-visual" href="/ko/features/agent/skills">
    <div className="chat-use-case-visual">
      <div className="chat-use-case-icon">
        {chatIcon("Sparkles", 32)}
      </div>
    </div>

    <div className="chat-example-tag">재사용 가능한 가이드</div>
    <div className="chat-card-title">Skill 살펴보기</div>

    <p>
      Replit에게 반복 가능한 접근 방식, 지침, 지원 파일을 제공하세요.
    </p>

    <div className="chat-card-link">Skill 살펴보기 →</div>
  </a>

  <a className="chat-example has-visual" href="/ko/features/mcp/overview">
    <div className="chat-use-case-visual">
      <div className="chat-use-case-icon">
        {chatIcon("Plug", 32)}
      </div>
    </div>

    <div className="chat-example-tag">추가 연결</div>
    <div className="chat-card-title">MCP 살펴보기</div>
    <p>MCP를 통해 Replit을 추가 도구 및 데이터 소스와 연결하세요.</p>
    <div className="chat-card-link">MCP 살펴보기 →</div>
  </a>
</section>

### 통합 워크플로 예시 보기

<section className="chat-mkt chat-workflow-grid has-visuals">
  <a className="chat-example has-visual" href="/ko/use-cases/prepare-for-a-customer-call">
    <div className="chat-use-case-visual palette-blush">
      <div className="chat-use-case-window">
        <b />

        <b />

        <b />
      </div>

      <div className="chat-use-case-icon">
        <svg width="24" height="24" viewBox="0 0 24 24" fill="none" stroke="currentColor" strokeWidth="2" strokeLinecap="round" strokeLinejoin="round" aria-hidden="true">
          <circle cx="11" cy="11" r="7" />

          <path d="m20 20-4-4" />

          <path d="M8 11h6M11 8v6" />
        </svg>
      </div>
    </div>

    <span>
      <svg width="19" height="19" viewBox="0 0 24 24" fill="none" stroke="currentColor" strokeWidth="2" strokeLinecap="round" strokeLinejoin="round" aria-hidden="true">
        <circle cx="11" cy="11" r="7" />

        <path d="m20 20-4-4" />

        <path d="M8 11h6M11 8v6" />
      </svg>
    </span>

    <div className="chat-example-tag">조사 및 분석</div>
    <div className="chat-card-title">고객 통화 준비하기</div>

    <p>
      고객과의 대화 전에 Salesforce, Slack, Google Drive의 맥락을 한데
      모으세요.
    </p>

    <div className="chat-card-link">사용 사례 살펴보기 →</div>
  </a>
</section>

## 다음 단계

<section className="chat-mkt chat-workflow-grid has-visuals">
  <a className="chat-example has-visual" href="/ko/home/integrate-tools">
    <div className="chat-use-case-visual">
      <div className="chat-use-case-icon">
        {chatIcon("Paperclip", 32)}
      </div>
    </div>

    <div className="chat-example-tag">커피숍 프로젝트</div>
    <div className="chat-card-title">도구 통합</div>

    <p>
      Drive와 Notion을 연결한 다음 Replit에게 계획을 한데 모아 달라고
      요청하세요.
    </p>

    <div className="chat-card-link">계속하기 →</div>
  </a>
</section>