> ## Documentation Index
> Fetch the complete documentation index at: https://docs.replit.com/llms.txt
> Use this file to discover all available pages before exploring further.

# Conversations

> Conversations를 사용하여 질문하고, 루틴을 실행하고, 아이디어나 정보를 유용한 결과물로 전환하세요.

export const PromptingCardVisual = () => <div className="chat-use-case-visual" aria-hidden="true" style={{
  background: "radial-gradient(circle at 48% -30%, rgba(255,255,255,.78), transparent 54%), linear-gradient(140deg, #ff764d, #ff3c00 60%, #c92d00)"
}}>
    <div style={{
  position: "relative",
  width: "72%",
  margin: "auto",
  padding: 12,
  border: "1px solid rgba(255,255,255,.56)",
  borderRadius: 14,
  background: "rgba(255,255,255,.2)"
}}>
      <span style={{
  display: "block",
  width: "66%",
  height: 7,
  borderRadius: 999,
  background: "rgba(255,255,255,.8)"
}} />
      <span style={{
  display: "block",
  width: "92%",
  height: 7,
  marginTop: 7,
  borderRadius: 999,
  background: "rgba(255,255,255,.38)"
}} />
      <span style={{
  display: "block",
  width: "82%",
  height: 22,
  marginTop: 12,
  border: "1px solid rgba(255,255,255,.62)",
  borderRadius: 8,
  background: "rgba(255,255,255,.16)"
}} />
    </div>
  </div>;

export const ChatConversationsCover = () => <div className="chat-mkt" role="img" aria-label="Replit Conversation window with a message thread and prompt box" style={{
  margin: "28px 0 42px",
  borderTop: 0,
  paddingTop: 0
}}>
    <div className="chat-use-case-visual" style={{
  aspectRatio: "auto",
  minHeight: "clamp(220px, 34vw, 320px)",
  overflow: "hidden",
  background: "radial-gradient(circle at 50% -18%, rgba(255,255,255,.82), transparent 42%), radial-gradient(circle at 4% 96%, rgba(255,184,146,.48), transparent 38%), linear-gradient(140deg, #ff764d, #ff3c00 60%, #c92d00)"
}}>
      <div aria-hidden="true" style={{
  position: "absolute",
  inset: 0,
  background: "linear-gradient(180deg, rgba(255,255,255,.14), rgba(255,255,255,0) 48%, rgba(111,24,0,.2))"
}} />
      <div aria-hidden="true" style={{
  position: "absolute",
  width: "clamp(280px, 72%, 780px)",
  maxWidth: "calc(100% - 12px)",
  height: "68%",
  left: "50%",
  top: "15%",
  transform: "translateX(-50%) rotate(3deg)",
  opacity: 0.46,
  border: "1px solid rgba(255,255,255,.34)",
  borderRadius: 28,
  background: "transparent"
}} />
      <div aria-hidden="true" style={{
  position: "relative",
  zIndex: 1,
  display: "flex",
  width: "100%",
  minHeight: "inherit",
  alignItems: "center",
  justifyContent: "center",
  padding: "clamp(10px, 2vw, 20px)"
}}>
        <div style={{
  width: "clamp(260px, 70%, 760px)",
  maxWidth: "calc(100% - 20px)",
  minWidth: 0,
  boxSizing: "border-box",
  padding: "clamp(16px, 3vw, 26px)",
  border: "1px solid rgba(255,255,255,.54)",
  borderRadius: 24,
  background: "linear-gradient(180deg, rgba(255,255,255,.27), rgba(255,255,255,.1))",
  boxShadow: "0 18px 36px rgba(55,27,18,.2)",
  backdropFilter: "blur(5px)"
}}>
          <div style={{
  display: "flex",
  alignItems: "center",
  gap: 7
}}>
            <span style={{
  width: 8,
  height: 8,
  borderRadius: 999,
  background: "rgba(255,255,255,.92)"
}} />
            <span style={{
  width: 8,
  height: 8,
  borderRadius: 999,
  background: "rgba(255,255,255,.52)"
}} />
            <span style={{
  width: 8,
  height: 8,
  borderRadius: 999,
  background: "rgba(255,255,255,.32)"
}} />
          </div>
          <div style={{
  display: "flex",
  gap: "clamp(12px, 3vw, 20px)",
  marginTop: "clamp(14px, 3vw, 22px)"
}}>
            <div style={{
  display: "grid",
  width: "clamp(34px, 7vw, 52px)",
  minWidth: "clamp(34px, 7vw, 52px)",
  alignContent: "start",
  gap: 10,
  padding: "8px 8px 8px 0",
  borderRight: "1px solid rgba(255,255,255,.32)"
}}>
              <span style={{
  width: 12,
  height: 12,
  borderRadius: 4,
  background: "rgba(255,255,255,.9)"
}} />
              <span style={{
  width: 12,
  height: 12,
  border: "1px solid rgba(255,255,255,.66)",
  borderRadius: 4,
  background: "rgba(255,255,255,.12)"
}} />
              <span style={{
  width: 12,
  height: 12,
  border: "1px solid rgba(255,255,255,.48)",
  borderRadius: 999
}} />
            </div>
            <div style={{
  display: "grid",
  minWidth: 0,
  flex: "1 1 auto",
  gap: 9,
  alignContent: "start"
}}>
              <span style={{
  width: "68%",
  height: 24,
  border: "1px solid rgba(255,255,255,.46)",
  borderRadius: "14px 14px 14px 4px",
  background: "rgba(255,255,255,.18)"
}} />
              <span style={{
  justifySelf: "end",
  width: "58%",
  height: 24,
  borderRadius: "14px 14px 4px 14px",
  background: "rgba(255,255,255,.78)"
}} />
              <span style={{
  width: "76%",
  height: 32,
  border: "1px solid rgba(255,255,255,.4)",
  borderRadius: "14px 14px 14px 4px",
  background: "rgba(255,255,255,.14)"
}} />
            </div>
          </div>
          <div style={{
  display: "flex",
  alignItems: "center",
  justifyContent: "space-between",
  gap: 10,
  marginTop: "clamp(14px, 3vw, 20px)",
  padding: "10px 11px 10px 13px",
  border: "1px solid rgba(255,255,255,.58)",
  borderRadius: 15,
  background: "rgba(255,255,255,.16)"
}}>
            <span style={{
  width: "64%",
  height: 7,
  borderRadius: 999,
  background: "rgba(255,255,255,.7)"
}} />
            <span style={{
  display: "grid",
  width: 24,
  height: 24,
  placeItems: "center",
  flex: "0 0 auto",
  borderRadius: 8,
  background: "rgba(255,255,255,.9)",
  color: "#4b5563",
  fontSize: 15,
  fontWeight: 700
}}>
              ↑
            </span>
          </div>
        </div>
      </div>
    </div>
  </div>;

<ChatConversationsCover />

Replit의 모든 작업은 Conversation에서 시작됩니다. 여기서 질문하거나, 정보를 탐색하거나, Routine을 예약하거나, 원하는 결과물을 설명할 수 있습니다.

* Conversation에서 빌드를 시작하세요.
* 질문하고 Routines를 실행하는 데 사용하세요.
* 컨텍스트를 수집하고, 파일을 첨부하고, 만들고자 하는 것을 명확히 하세요.
* 작업이 상당해지면 Replit에 Conversation을 Project로 전환하도록 요청하세요. 수집한 컨텍스트와 파일이 그대로 이어집니다.

<Note>
  Conversations는 비공개입니다. Workspace에서 본인만 접근할 수 있습니다. 협업하려면
  Replit에 Project를 만들도록 요청하세요.
</Note>

자세히 알아보기: [Conversation을 Project로 전환하기](/ko/chat/continue-or-create-a-project).

<Frame>
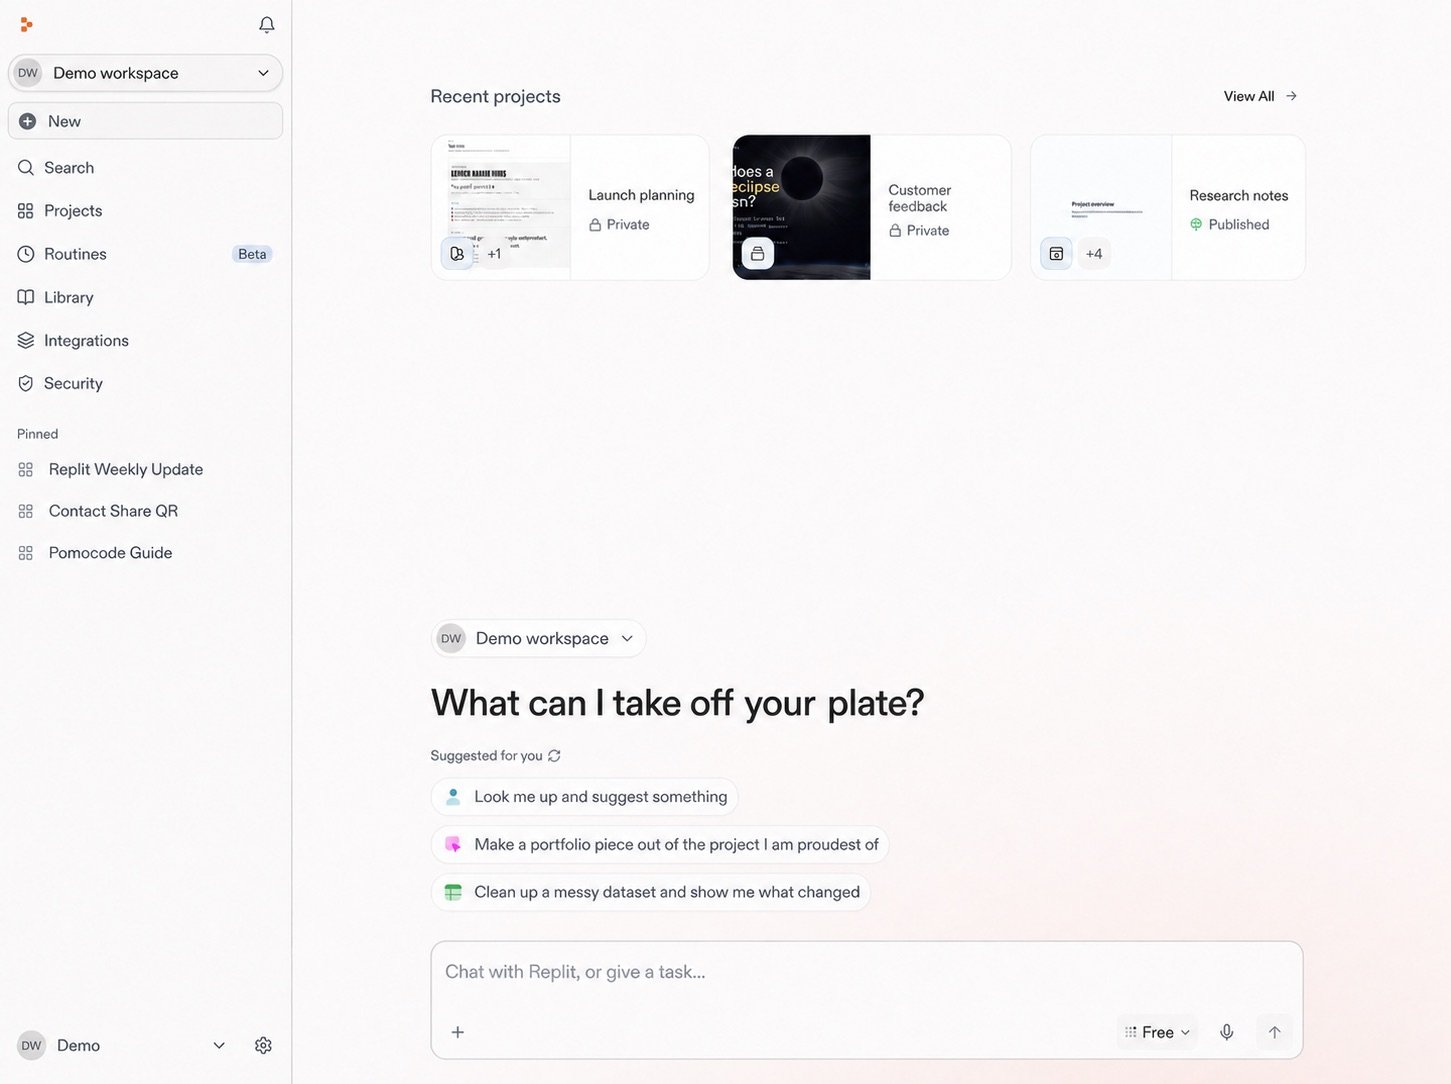
  <img src="https://mintcdn.com/replit/teDUL4A-lNO7dv1O/images/chat/start-new-conversation-home-sanitized-neutral.jpg?fit=max&auto=format&n=teDUL4A-lNO7dv1O&q=85&s=cf93f549696aff0eab748dd953aea0b6" alt="Projects, Conversations, Routines, 추천 프롬프트, Conversation 메시지 상자가 표시된 정리된 Replit Workspace 홈" width="1451" height="1084" data-path="images/chat/start-new-conversation-home-sanitized-neutral.jpg" />
</Frame>

## 새 Conversation 시작하기

<Steps>
  <Step title="New 선택">
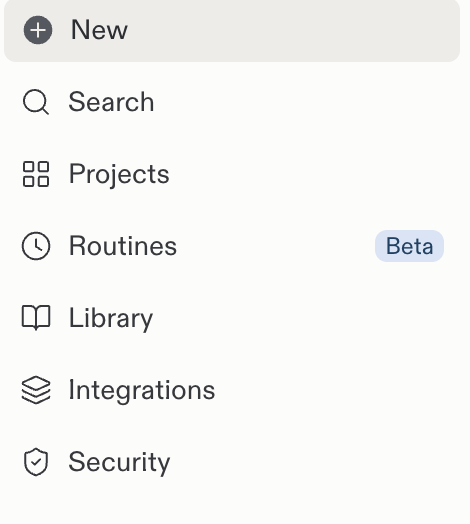
    Replit 사이드바에서 **New**를 선택하세요.

    <Frame>
      <img src="https://mintcdn.com/replit/teDUL4A-lNO7dv1O/images/chat/start-new-conversation-sidebar.png?fit=max&auto=format&n=teDUL4A-lNO7dv1O&q=85&s=52b729bd549daddbde87f995c8f0b4b1" alt="Search, Projects, Routines 등 다른 탐색 항목 위에 New 버튼이 있는 Replit 사이드바" width="470" height="524" data-path="images/chat/start-new-conversation-sidebar.png" />
    </Frame>
  </Step>

  <Step title="요청 작성">
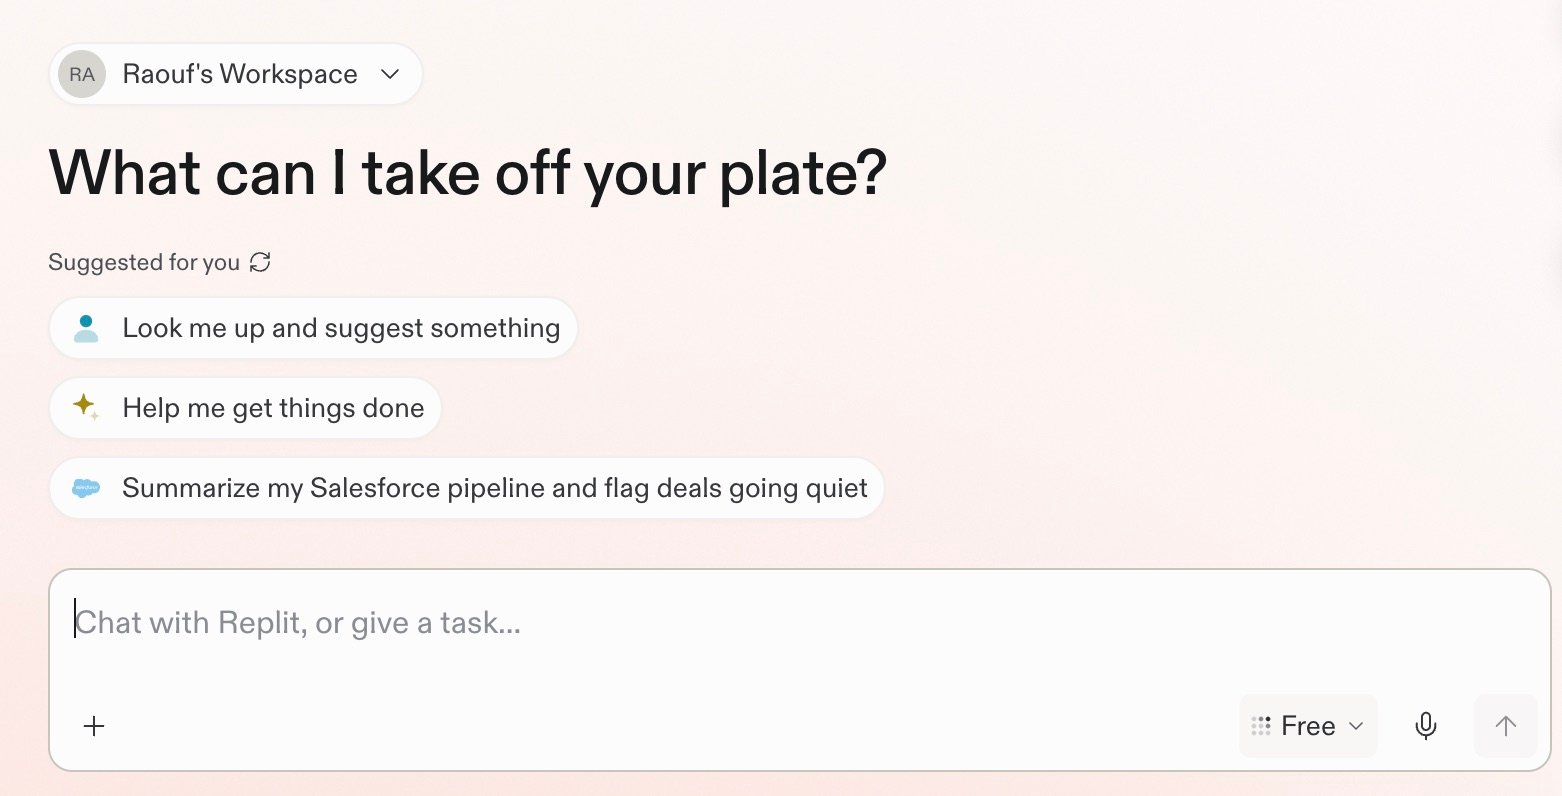
    프롬프트 상자를 사용하여 요청을 작성하세요. 예를 들어 Replit에
    "이번 주 Slack 활동을 요약하고 답장이 필요한 메시지를 표시해줘"라고 요청하세요.

    <Frame>
      <img src="https://mintcdn.com/replit/teDUL4A-lNO7dv1O/images/chat/replit-conversation-home.jpg?fit=max&auto=format&n=teDUL4A-lNO7dv1O&q=85&s=ab82b3d581eb83c0d5f90c3e6fcd918e" alt="추천 프롬프트와 Replit과 채팅하거나 작업을 지시할 수 있는 메시지 상자가 있는 Replit conversation 홈 화면" width="1562" height="796" data-path="images/chat/replit-conversation-home.jpg" />
    </Frame>
  </Step>
</Steps>

## 원하는 작업으로 시작하기

### 질문하기

Replit은 웹, 연결된 도구, 업로드된 파일에서 정보를 리서치하고 분석할 수 있습니다. 명확한 질문을 하거나 Replit이 사용할 컨텍스트를 제공하세요.

예를 들어 Replit에 이번 주 Slack 활동을 요약하고 답장이 필요한 메시지를 표시하도록
요청하세요.

### 루틴 실행하기

Routine은 Conversation 내에서 반복 작업을 예약합니다. Replit은 각 결과를 동일한 Conversation에 반환하며, 여기서 작업을 검토하고 계속할 수 있습니다. 자세한 내용은 [Routines](/ko/chat/routines)를 참조하세요.

예를 들어 Replit에 매일 아침 Slack을 검토하고 우선순위를 알려주도록 요청하세요.

### 결과물 설명하기

Conversation은 아이디어, 리서치, 인사이트를 앱, 프레젠테이션, 디자인 같은 구체적인 결과물로 전환할 수 있습니다.

예를 들어 Replit에 팀을 위한 간단한 프로젝트 트래커를 만들도록 요청하세요.

### 더 알아보기

각 경로에 대한 구체적인 예시를 살펴보세요.
<section className="chat-mkt chat-workflow-grid has-visuals catalog-three-up">
  <a className="chat-example has-visual" href="/ko/use-cases/prepare-for-a-customer-call">
    <div className="chat-use-case-visual">
      <div className="customer-call-marks customer-call-marks-card" aria-hidden="true">
        <div className="customer-call-mark">
          <Icon icon="salesforce" iconType="brands" size={44} color="#ffffff" />
        </div>

        <div className="customer-call-mark">
          <Icon icon="slack" iconType="brands" size={44} color="#ffffff" />
        </div>

        <div className="customer-call-mark">
          <Icon icon="google-drive" iconType="brands" size={44} color="#ffffff" />
        </div>
      </div>
    </div>

    <div className="chat-example-tag">질문하기</div>

    <div className="chat-card-title" style={{ marginTop: 16, fontSize: 20 }}>
      고객 미팅 준비하기
    </div>

    <p>연결된 소스를 모아 집중적인 미팅 브리핑을 준비하세요.</p>
    <div className="chat-card-link">살펴보기 →</div>
  </a>

  <a className="chat-example has-visual" href="/ko/schedule-a-routine">
    <div className="chat-use-case-visual palette-ink">
      <div className="chat-use-case-window">
        <i />

        <i />

        <i />

        <b />

        <b />

        <b />
      </div>

      <em>
        <Icon icon="arrows-rotate" size={24} />
      </em>
    </div>

    <div className="chat-example-tag">루틴 실행하기</div>

    <div className="chat-card-title" style={{ marginTop: 16, fontSize: 20 }}>
      루틴 예약하기
    </div>

    <p>
      반복 작업을 예약하고 동일한 Conversation에서 각 결과를 검토하세요.
    </p>

    <div className="chat-card-link">살펴보기 →</div>
  </a>

  <a className="chat-example has-visual" href="/ko/build/your-first-app">
    <div className="chat-use-case-visual">
      <div className="chat-use-case-window">
        <i />

        <i />

        <i />

        <b />

        <b />

        <b />
      </div>

      <em>
        <Icon icon="code" size={24} />
      </em>
    </div>

    <div className="chat-example-tag">결과물 설명하기</div>

    <div className="chat-card-title" style={{ marginTop: 16, fontSize: 20 }}>
      인사이트를 바탕으로 빌드하기
    </div>

    <p>중요한 정보를 중심으로 대시보드, 앱, 도구를 만드세요.</p>
    <div className="chat-card-link">살펴보기 →</div>
  </a>
</section>

## 다음 단계

Prompting은 Replit에 필요한 것을 알려주고, 유용한 컨텍스트를 가리키고, 명확한 방향을 제시하는 데 도움이 됩니다. 여기서 시작하거나 전체 리서치 예시를 따라가세요.

<section className="chat-mkt chat-workflow-grid has-visuals">
  <a className="chat-example has-visual" href="/ko/chat/prompting">
    <PromptingCardVisual />

    <div className="chat-example-tag">추천 다음 단계</div>

    <div className="chat-card-title" style={{ marginTop: 11, fontSize: 20 }}>
      Prompting
    </div>

    <p>Replit에 유용한 방향과 컨텍스트를 제공하는 방법을 알아보세요.</p>
    <div className="chat-card-link">계속하기 →</div>
  </a>

  <a className="chat-example has-visual" href="/ko/use-cases/prepare-for-a-customer-call">
    <div className="chat-use-case-visual">
      <div className="customer-call-marks customer-call-marks-card" aria-hidden="true">
        <div className="customer-call-mark">
          <Icon icon="salesforce" iconType="brands" size={44} color="#ffffff" />
        </div>

        <div className="customer-call-mark">
          <Icon icon="slack" iconType="brands" size={44} color="#ffffff" />
        </div>

        <div className="customer-call-mark">
          <Icon icon="google-drive" iconType="brands" size={44} color="#ffffff" />
        </div>
      </div>
    </div>

    <div className="chat-example-tag">리서치 및 분석</div>

    <div className="chat-card-title" style={{ marginTop: 11, fontSize: 20 }}>
      고객 미팅 준비하기
    </div>

    <p>연결된 소스를 모아 집중적인 미팅 브리핑을 준비하세요.</p>
    <div className="chat-card-link">사용 사례 살펴보기 →</div>
  </a>
</section>

[Prompting](/ko/chat/prompting)으로 이동하여 초기 아이디어를 Replit을 위한 명확한 요청으로 전환하는 방법을 알아보세요.