> ## Documentation Index
> Fetch the complete documentation index at: https://docs.replit.com/llms.txt
> Use this file to discover all available pages before exploring further.
# Groups and permissions
> Create Enterprise groups, add collaborators, and configure Workspace, group, and app permissions so each team has the access it needs to work in Replit.
Groups let you manage permissions for several collaborators at once. Create groups for teams such as Finance, Marketing, or Design, then grant each group the access it needs.
Custom groups are available on Enterprise. They add access alongside a collaborator's base role; they don't replace that role.
## Create a group and add members
Select your team Workspace and open **Settings** using the cogwheel in the bottom-left corner. Under **Workspace**, select **Groups**.
This page separates built-in **Roles** from your custom **Groups**.
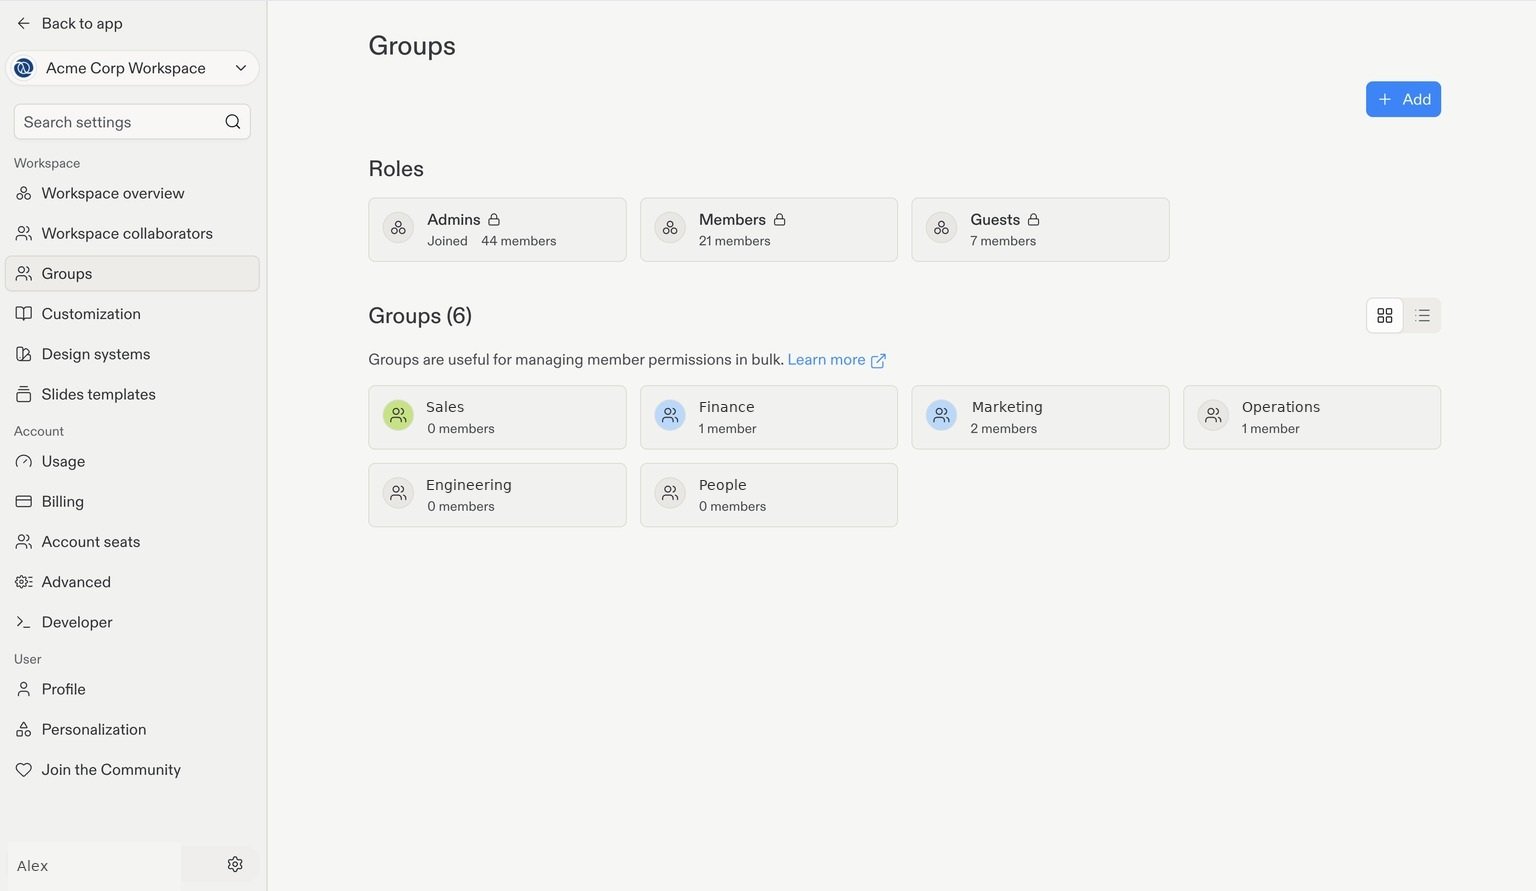 Select **+ Add** in the top-right corner. Enter a group name; you can also choose a color and icon to make it easier to recognize. Complete the creation dialog to open your new group.
To manage an existing group, select its card on the Groups page.
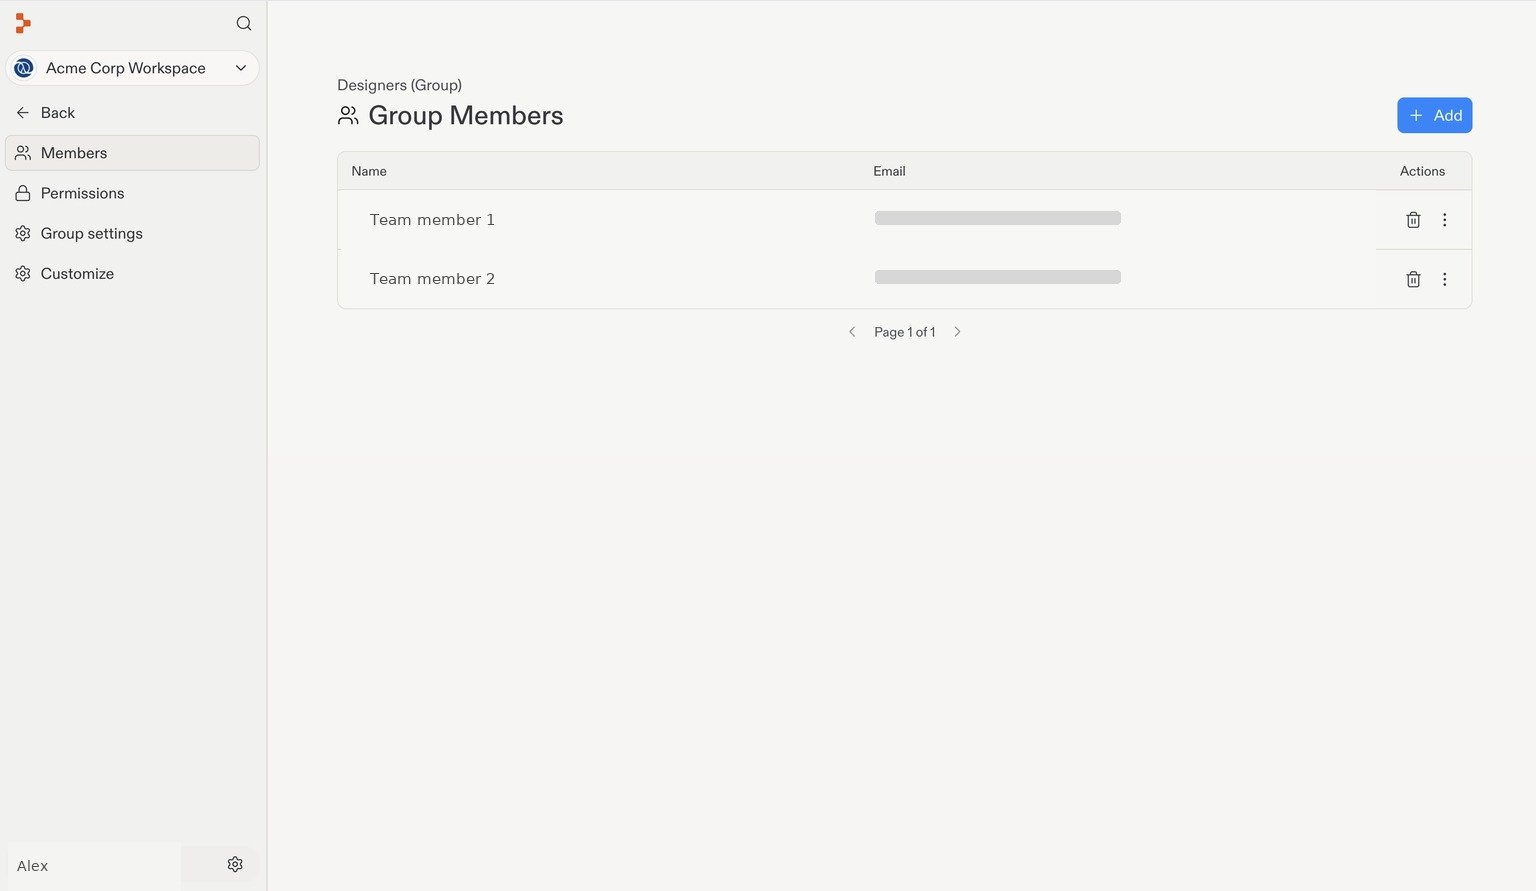
Inside the group, select **Members** to see who belongs to it. Select **+ Add** to add collaborators.
Select **+ Add** in the top-right corner. Enter a group name; you can also choose a color and icon to make it easier to recognize. Complete the creation dialog to open your new group.
To manage an existing group, select its card on the Groups page.
Inside the group, select **Members** to see who belongs to it. Select **+ Add** to add collaborators.
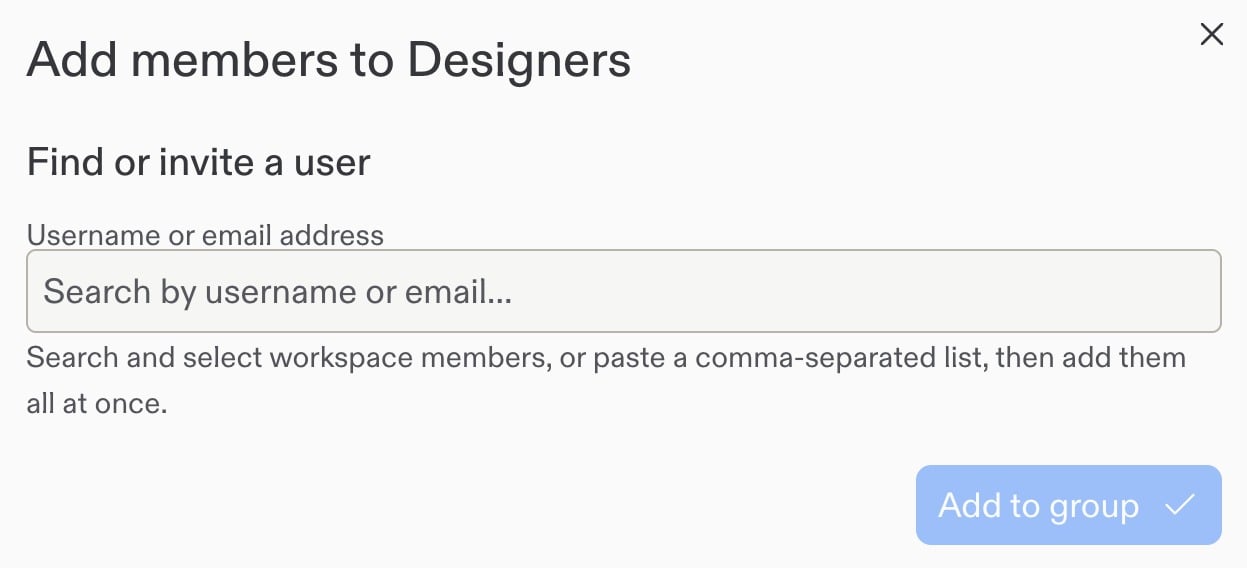
 Search for Workspace members by username or email and select the people to add. You can also paste a comma-separated list to add several people at once. Select **Add to group**.
 ## Configure group permissions
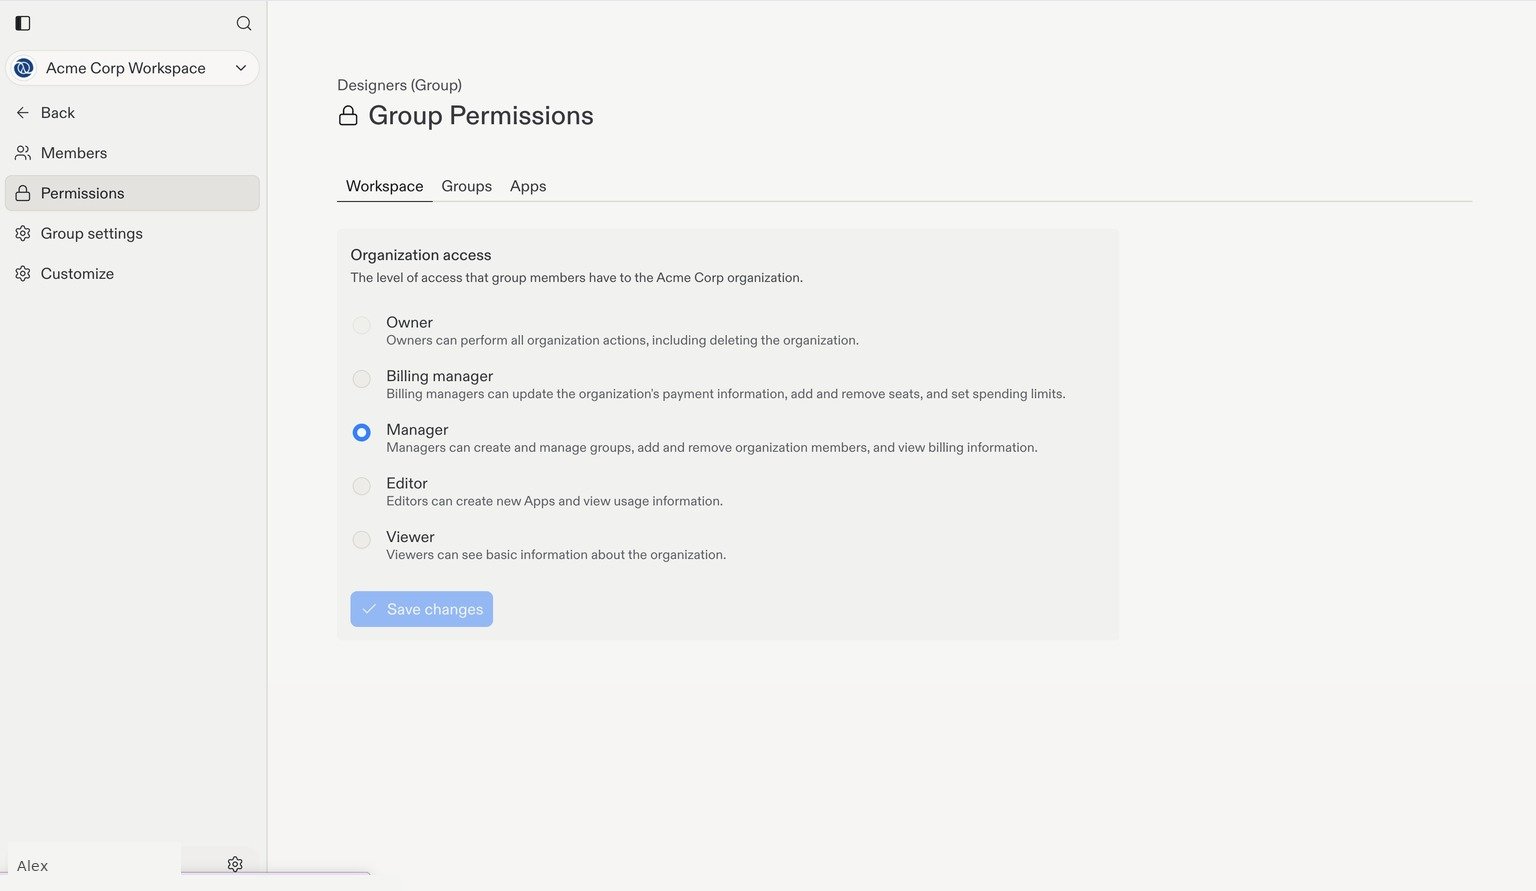
Inside the group, select **Permissions** in the left navigation. The three tabs control different resources: **Workspace**, **Groups**, and **Apps**.
Choose the lowest access level that lets the group do its work. Review permissions before adding more members, because grants to the group apply to its members.
### Workspace permissions
On the **Workspace** tab, choose the group's **Organization access** level, then select **Save changes**.
## Configure group permissions
Inside the group, select **Permissions** in the left navigation. The three tabs control different resources: **Workspace**, **Groups**, and **Apps**.
Choose the lowest access level that lets the group do its work. Review permissions before adding more members, because grants to the group apply to its members.
### Workspace permissions
On the **Workspace** tab, choose the group's **Organization access** level, then select **Save changes**.
 | Level | What it allows |
| --------------- | ------------------------------------------------------------------------------------------- |
| Owner | All organization actions, including deleting the organization. |
| Billing manager | Update payment information, add or remove seats, and set spending limits. |
| Manager | Create and manage groups, add or remove organization members, and view billing information. |
| Editor | Create apps and view usage information. |
| Viewer | View basic organization information. |
These are permissions granted through a group, not the Member, Guest, or Viewer roles you choose when inviting a collaborator.
### Access to other groups
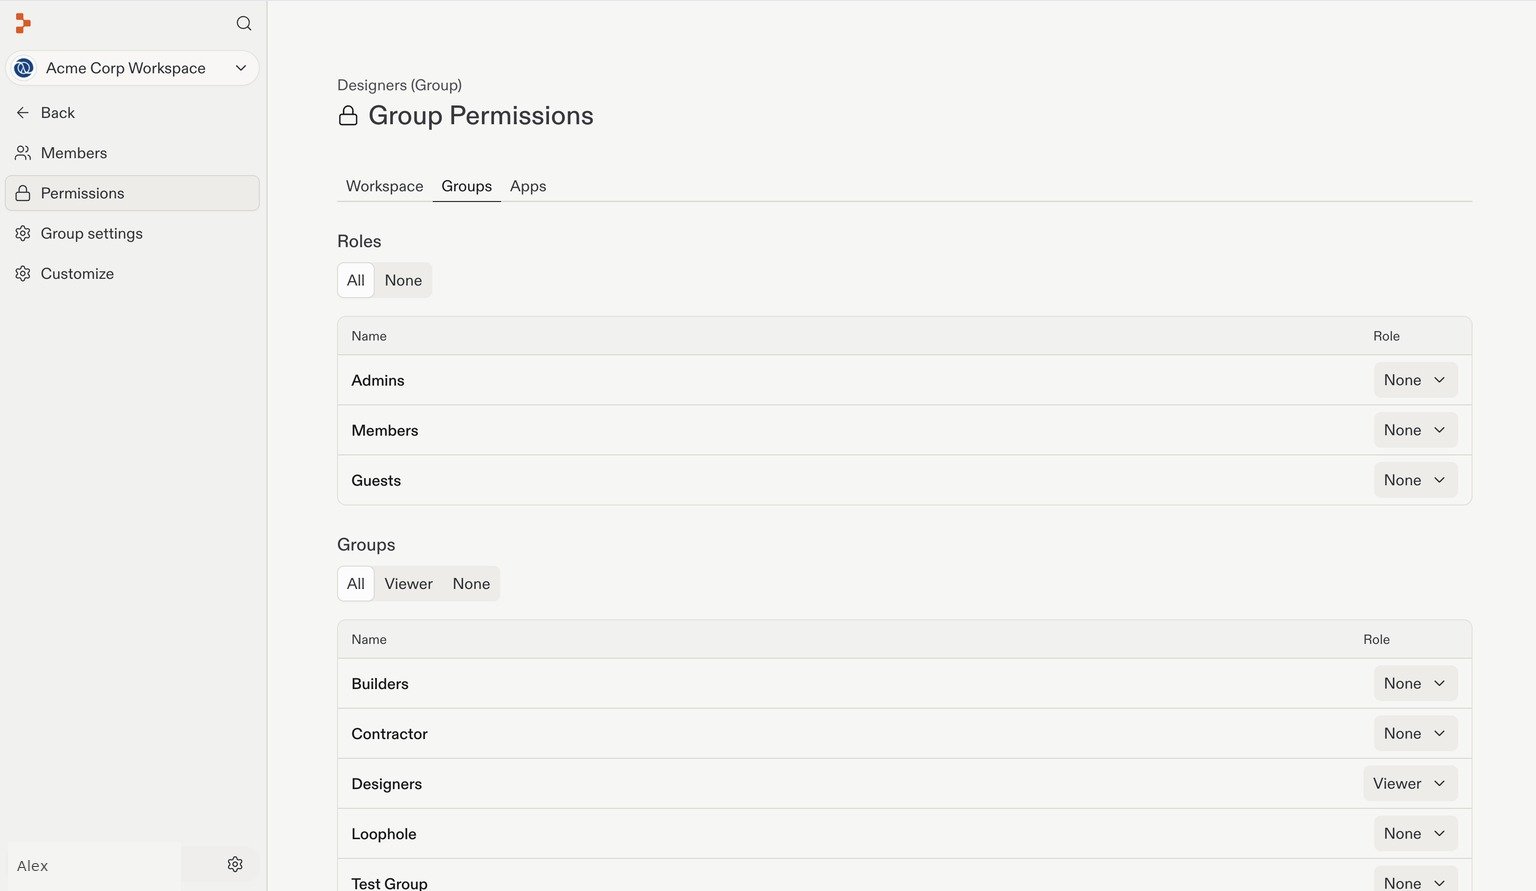
On the **Groups** tab, use the **Role** dropdown beside a role or custom group to set the current group's access to that target group. For example, you can let members of the Designers group view another group's membership without allowing them to change it.
| Level | What it allows |
| --------------- | ------------------------------------------------------------------------------------------- |
| Owner | All organization actions, including deleting the organization. |
| Billing manager | Update payment information, add or remove seats, and set spending limits. |
| Manager | Create and manage groups, add or remove organization members, and view billing information. |
| Editor | Create apps and view usage information. |
| Viewer | View basic organization information. |
These are permissions granted through a group, not the Member, Guest, or Viewer roles you choose when inviting a collaborator.
### Access to other groups
On the **Groups** tab, use the **Role** dropdown beside a role or custom group to set the current group's access to that target group. For example, you can let members of the Designers group view another group's membership without allowing them to change it.
 | Level | What it allows on the target group |
| ---------- | --------------------------------------------------------------------- |
| Owner | View and manage members, edit the group's name, and delete the group. |
| Manager | View and manage members, but not edit or delete the group. |
| Viewer | View the group and its members. |
| Restricted | View and leave the group, but not see other members. |
| None | No access to the group through this grant. |
The available options depend on the target group and your permissions. **All**, **Viewer**, and **None** above the lists are filters, not controls that grant access to every group.
### App permissions
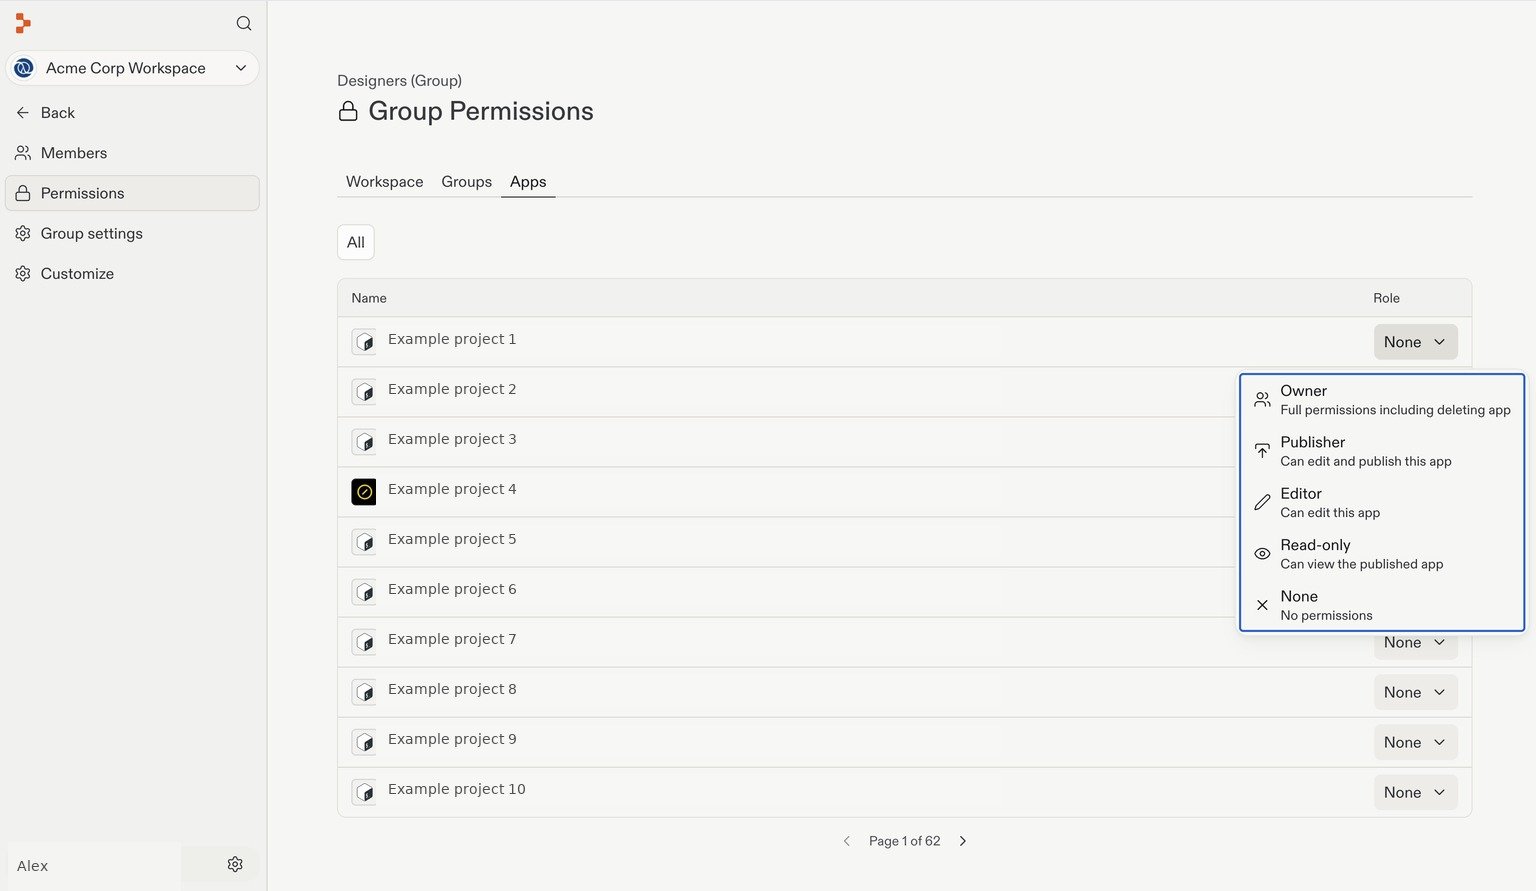
On the **Apps** tab, use each app's **Role** dropdown to choose the group's access to that app.
| Level | What it allows on the target group |
| ---------- | --------------------------------------------------------------------- |
| Owner | View and manage members, edit the group's name, and delete the group. |
| Manager | View and manage members, but not edit or delete the group. |
| Viewer | View the group and its members. |
| Restricted | View and leave the group, but not see other members. |
| None | No access to the group through this grant. |
The available options depend on the target group and your permissions. **All**, **Viewer**, and **None** above the lists are filters, not controls that grant access to every group.
### App permissions
On the **Apps** tab, use each app's **Role** dropdown to choose the group's access to that app.
 | Level | What it allows on the app |
| --------- | ---------------------------------------------- |
| Owner | Full permissions, including deleting the app. |
| Publisher | Edit and publish the app. |
| Editor | Edit the app. |
| Read-only | View the published app without editing it. |
| None | No permissions through this group's app grant. |
Removing a group's access doesn't remove access a person has through their base role or another grant. Review those permissions too when restricting access.
For more detail, see [Roles, Groups and Access](/teams/identity-and-access-management/groups-and-permissions). If you sync groups from your identity provider, see [SCIM provisioning](/teams/identity-and-access-management/scim).
## Next step
Control how your team publishes apps and protects access.
| Level | What it allows on the app |
| --------- | ---------------------------------------------- |
| Owner | Full permissions, including deleting the app. |
| Publisher | Edit and publish the app. |
| Editor | Edit the app. |
| Read-only | View the published app without editing it. |
| None | No permissions through this group's app grant. |
Removing a group's access doesn't remove access a person has through their base role or another grant. Review those permissions too when restricting access.
For more detail, see [Roles, Groups and Access](/teams/identity-and-access-management/groups-and-permissions). If you sync groups from your identity provider, see [SCIM provisioning](/teams/identity-and-access-management/scim).
## Next step
Control how your team publishes apps and protects access.