> ## Documentation Index
> Fetch the complete documentation index at: https://docs.replit.com/llms.txt
> Use this file to discover all available pages before exploring further.
# Create your Workspace
> Create a team Workspace in Replit Enterprise, then open its overview to review your new shared space and personalize its name and logo.
When you first sign in to Replit, you start in your personal Workspace. To build with your team, create a team Workspace where you can invite collaborators and manage their shared work.
## What is a Workspace?
A Workspace is where your projects live. It brings together your projects, people, settings, integrations, and shared resources in one place.
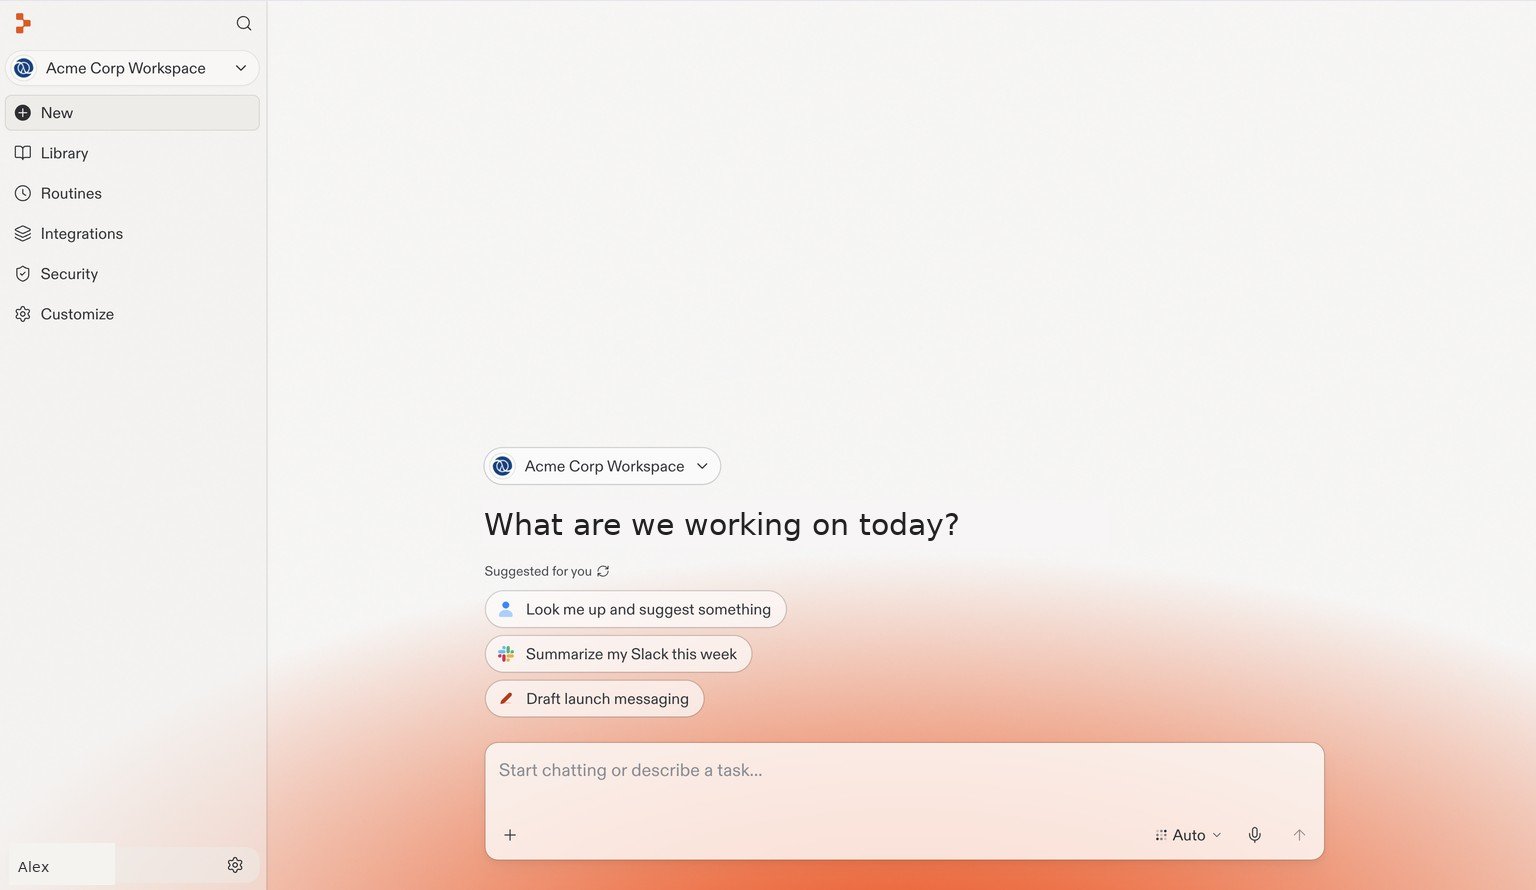 Your current Workspace appears in the top-left corner. Start a conversation in the center of the page, or use the left navigation to find your Library, Routines, and Integrations.
Your **personal Workspace** is for your own projects. A **team Workspace** gives your collaborators a shared space to build together. As an admin, you can invite people to the Workspace and manage access centrally instead of inviting them to each project separately.
For more detail, see [Workspaces](/features/collaboration/workspaces).
## Create a team Workspace
Select your Workspace name in the top-left corner to open the Workspace menu. Select **+ Create workspace** at the bottom of the menu.
Your current Workspace appears in the top-left corner. Start a conversation in the center of the page, or use the left navigation to find your Library, Routines, and Integrations.
Your **personal Workspace** is for your own projects. A **team Workspace** gives your collaborators a shared space to build together. As an admin, you can invite people to the Workspace and manage access centrally instead of inviting them to each project separately.
For more detail, see [Workspaces](/features/collaboration/workspaces).
## Create a team Workspace
Select your Workspace name in the top-left corner to open the Workspace menu. Select **+ Create workspace** at the bottom of the menu.
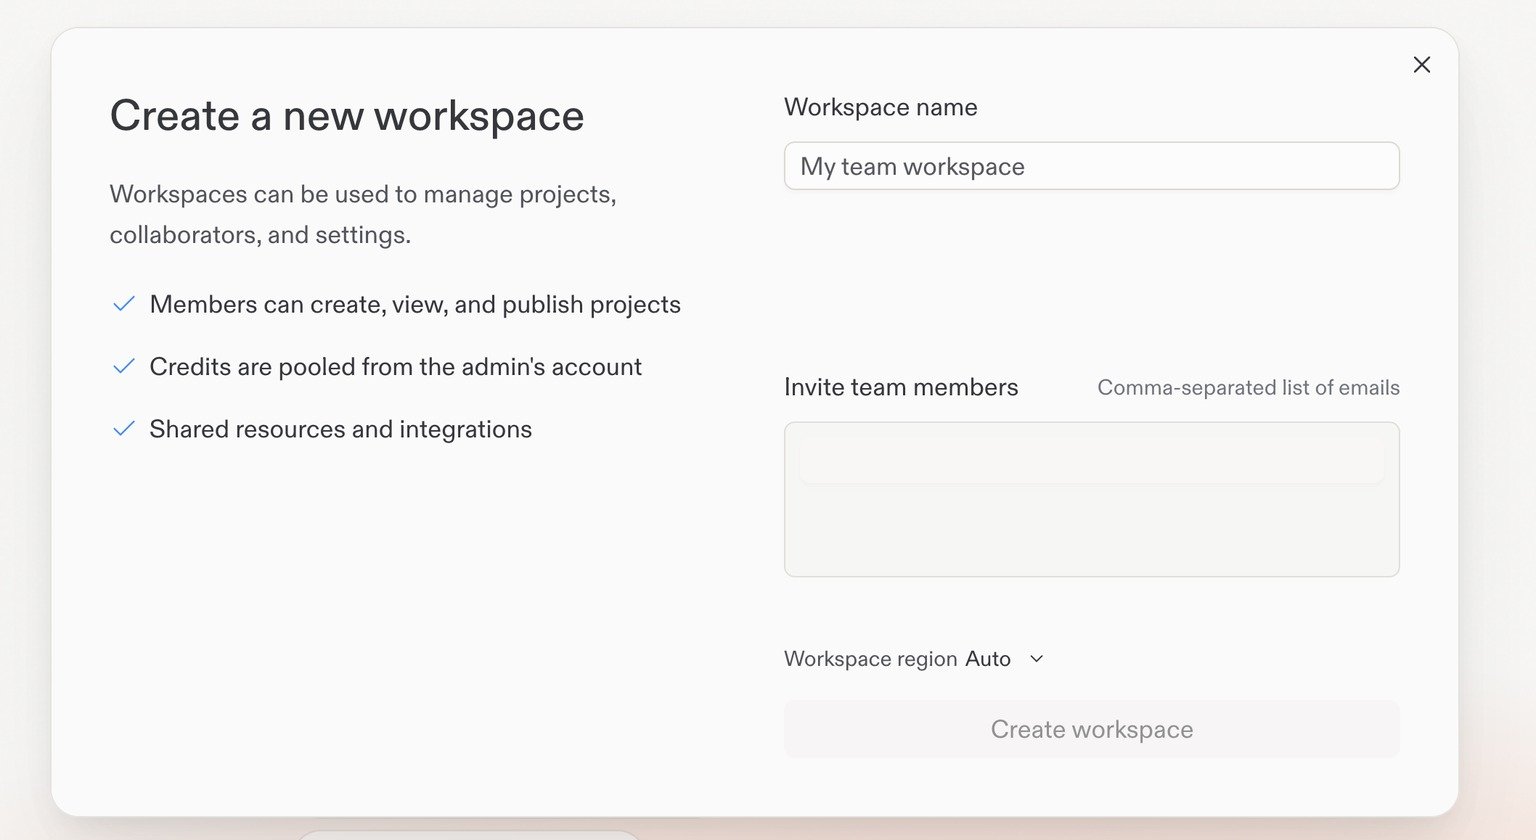
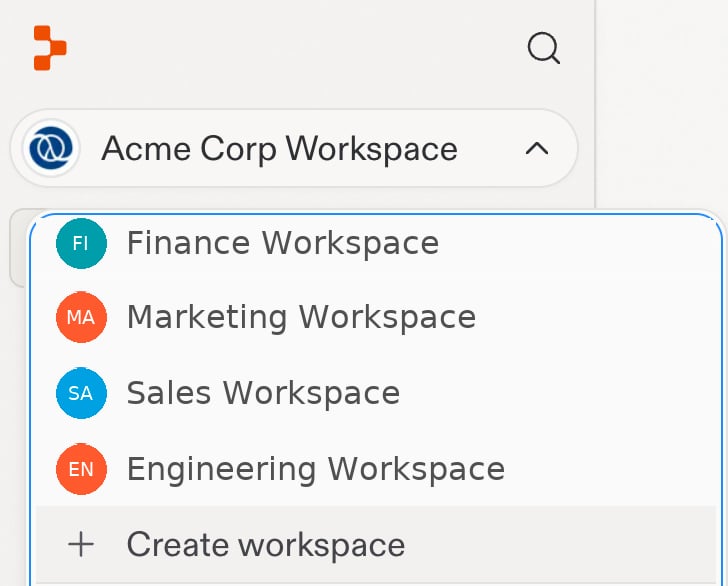 Enter a name for your team Workspace, then select **Create workspace**.
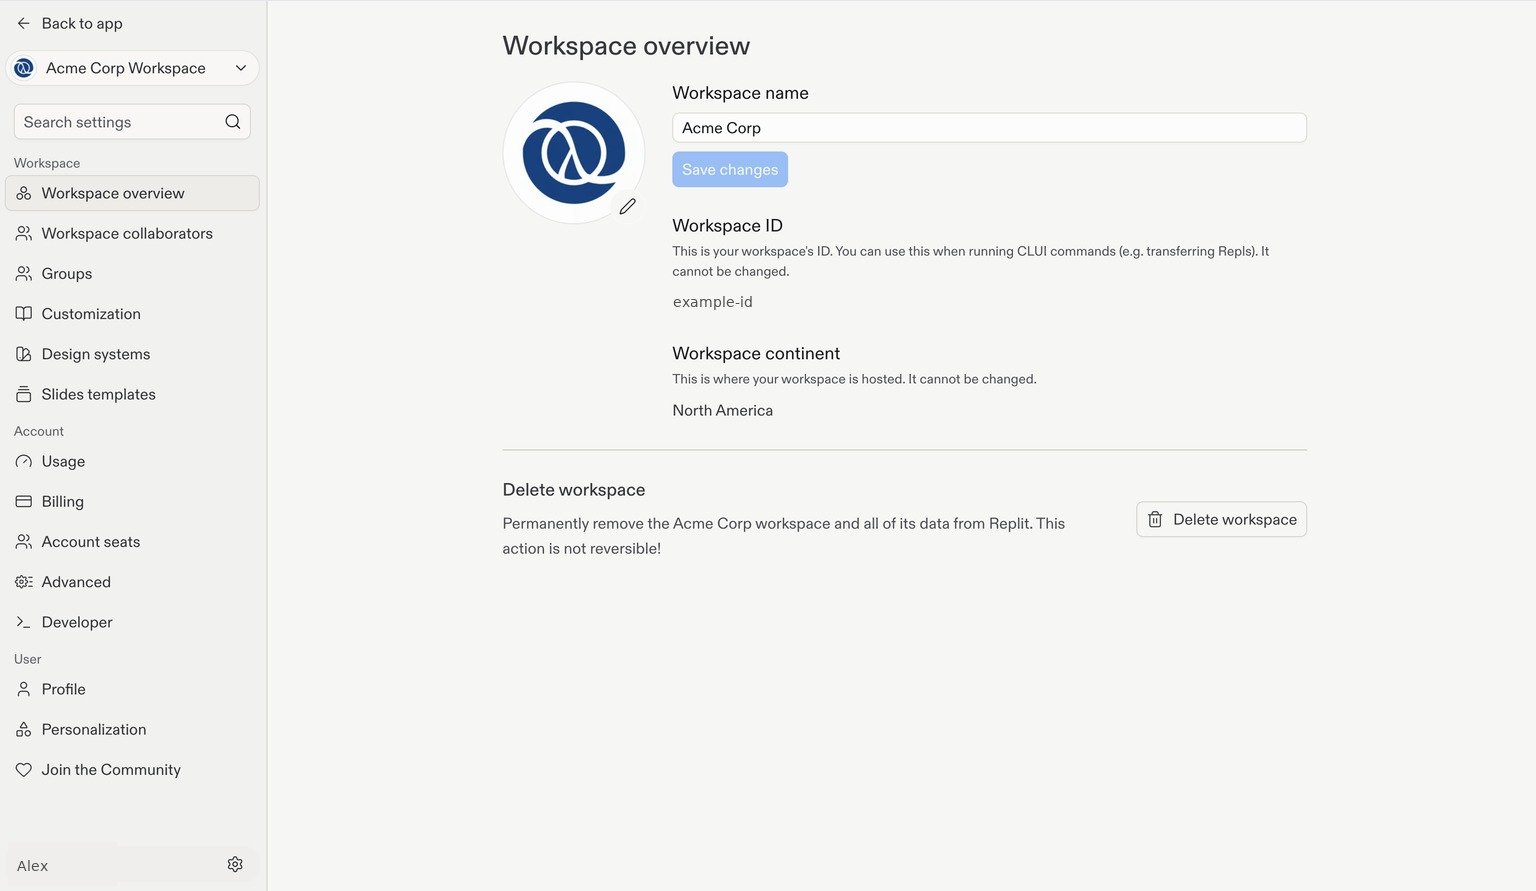
 In your new Workspace, select the **Settings** cogwheel icon in the bottom-left corner of Replit. Under **Workspace**, select **Workspace overview**.
You can change your Workspace's name and logo here. Edit **Workspace name** and select **Save changes** to rename it, or select the pencil icon beside the current logo to change the image.
In your new Workspace, select the **Settings** cogwheel icon in the bottom-left corner of Replit. Under **Workspace**, select **Workspace overview**.
You can change your Workspace's name and logo here. Edit **Workspace name** and select **Save changes** to rename it, or select the pencil icon beside the current logo to change the image.
 ## Next step
Connect your identity provider so your team can sign in with company credentials.
## Next step
Connect your identity provider so your team can sign in with company credentials.