> ## Documentation Index
> Fetch the complete documentation index at: https://docs.replit.com/llms.txt
> Use this file to discover all available pages before exploring further.
# 고객 통화 준비하기
> 연결된 도구 전반에서 질문을 조사하고, 근거를 비교하고, 명확한 답변을 준비합니다.
export const AiPrompt = ({children}) => {
return
{children}
;
};
Conversation을 사용해 연결된 서비스와 추가한 파일 전반에서 하나의 질문을
조사하세요. Replit이 관련 맥락을 수집하고, 소스를 비교하고, 필요한 결과에
맞춰 발견 사항을 정리할 수 있습니다.
## 고객 통화 준비하기
갱신 통화 전에 Salesforce의 고객 레코드, 관련 Slack 스레드, Google Drive의
갱신 브리프를 검토하세요. Replit에게 위험, 성과, 답변되지 않은 질문, 그리고
통화를 위한 다섯 가지 주제를 정리해 달라고 요청하세요.
## 소스 전반에서 조사하기
Salesforce, Slack, Google Drive가 연결되어 있는지 확인하세요. 커넥터
권한에 따라 Replit이 접근할 수 있는 레코드, 대화, 파일이 결정됩니다.
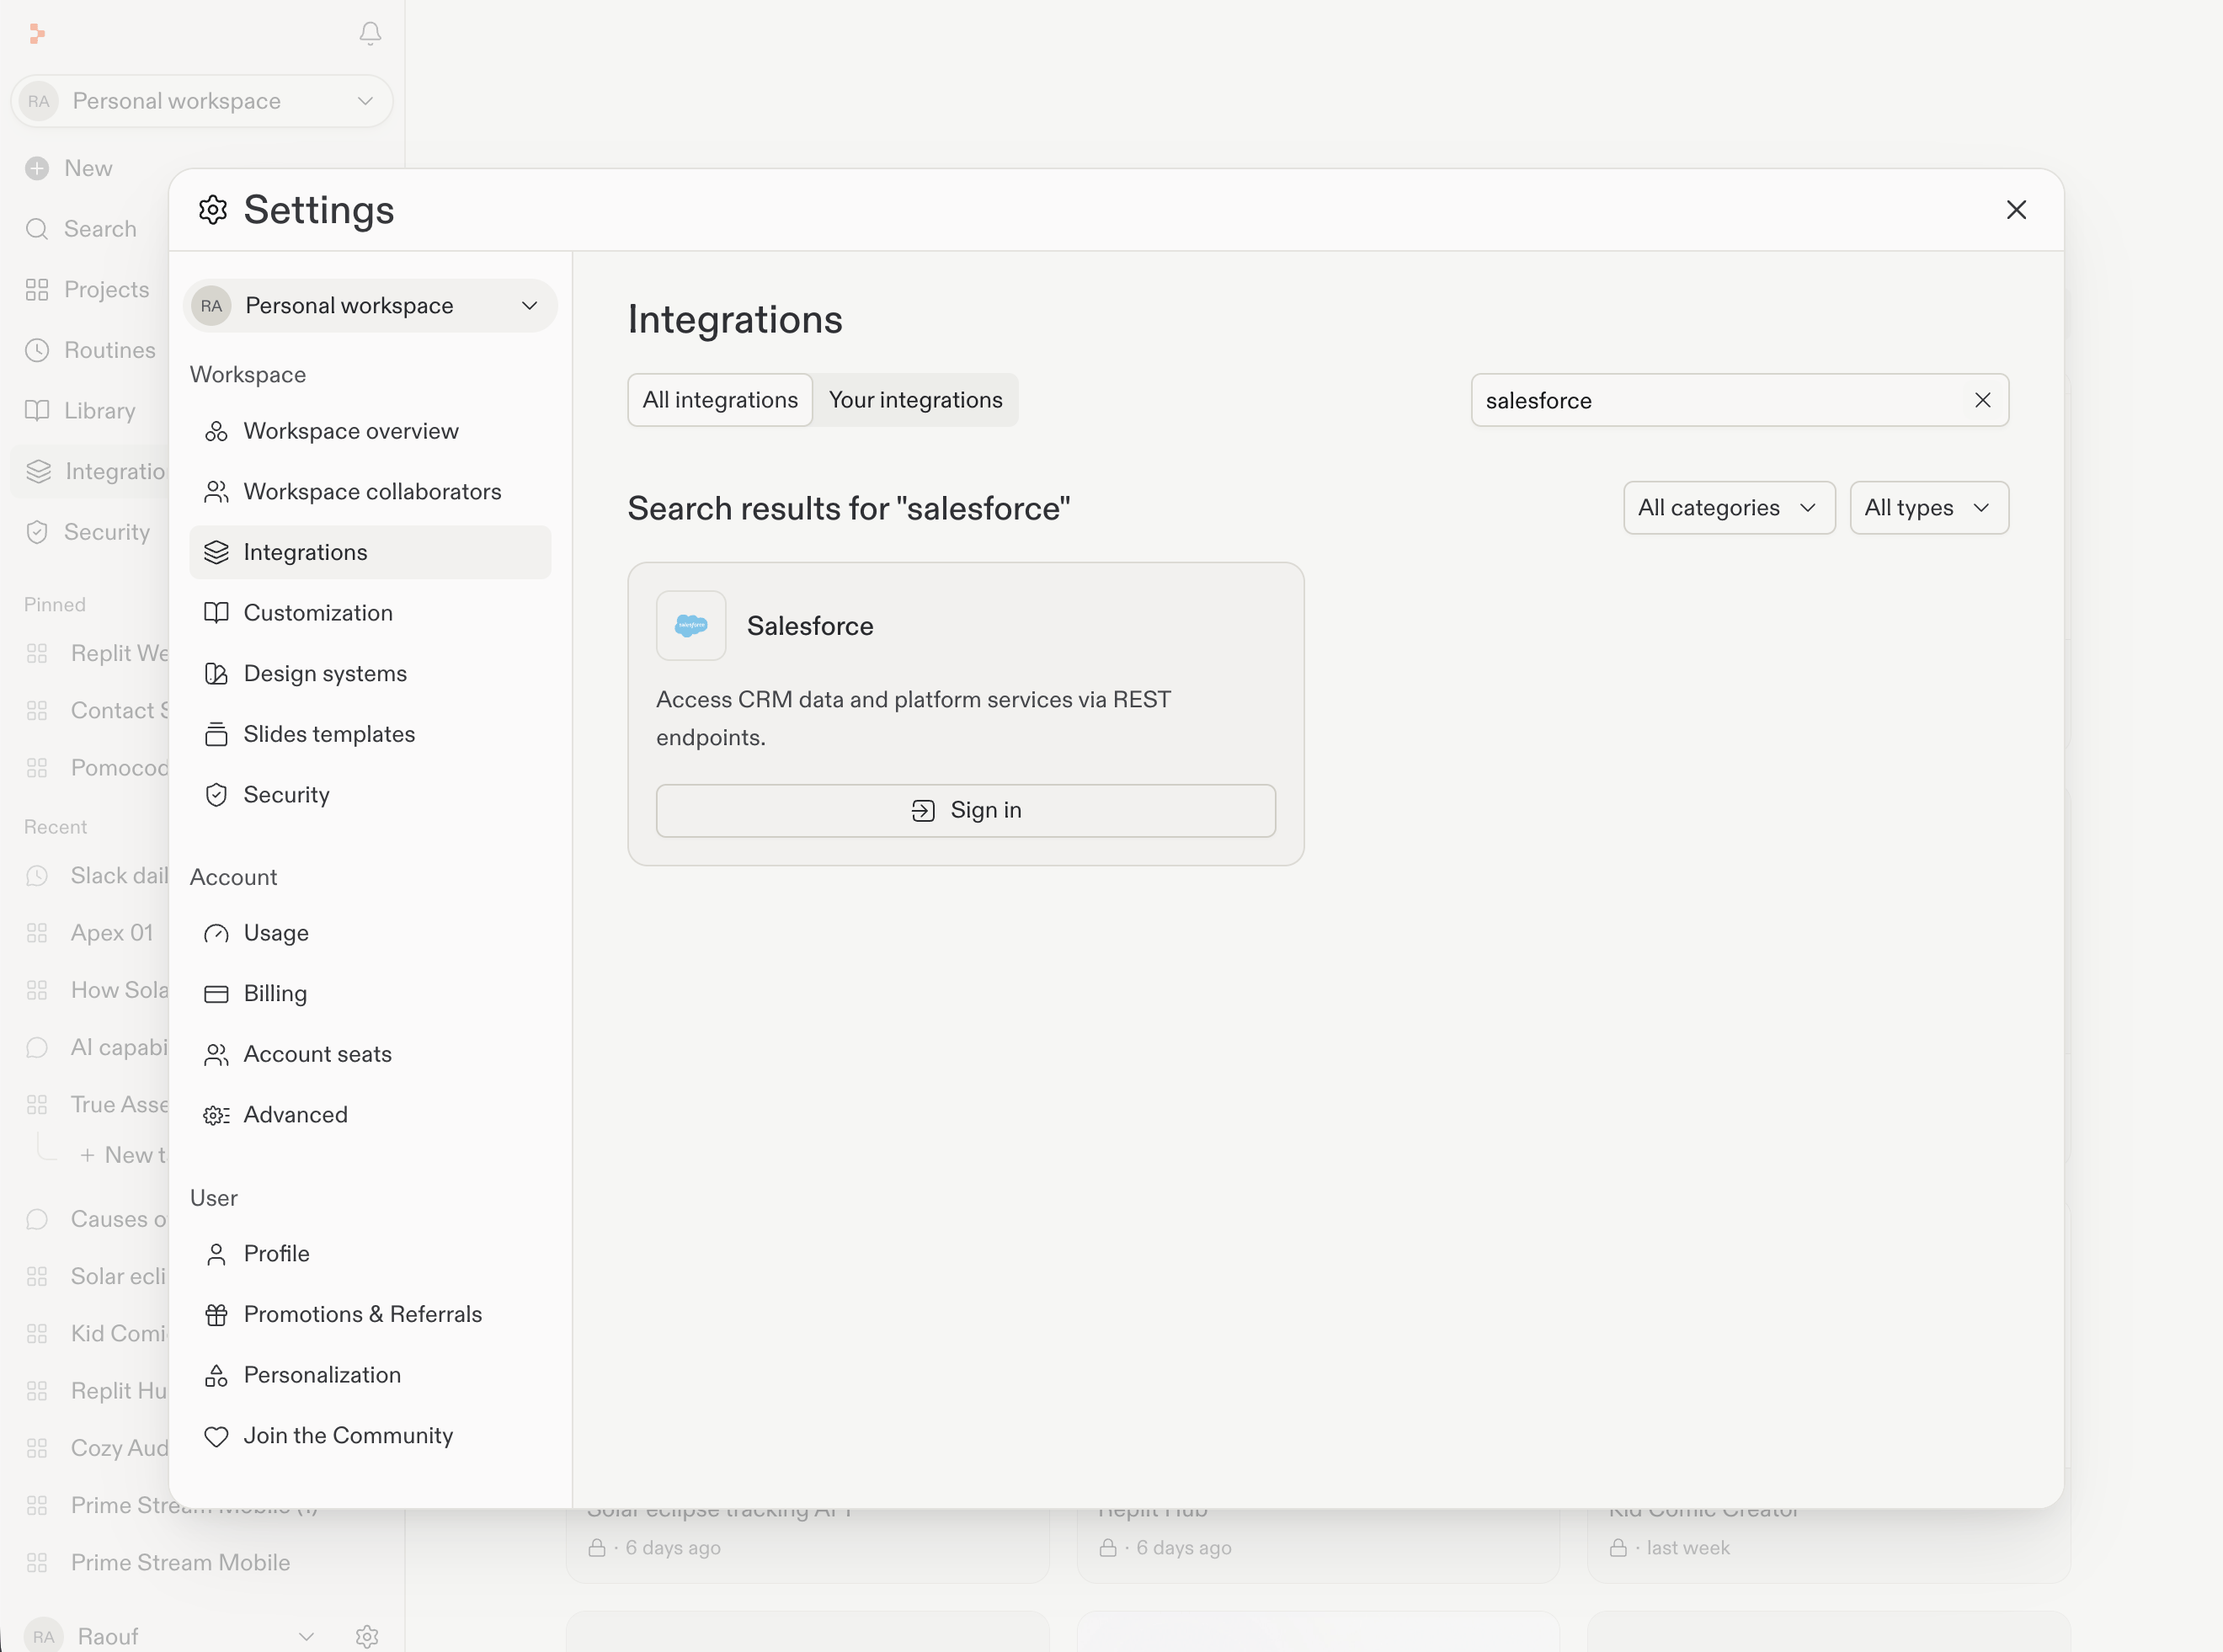
아래 예시는 Salesforce입니다. 다른 통합은 설정 및 권한 화면이 다를 수
있습니다.
1. **Settings > Integrations**를 엽니다.
2. 필요한 도구를 검색합니다.
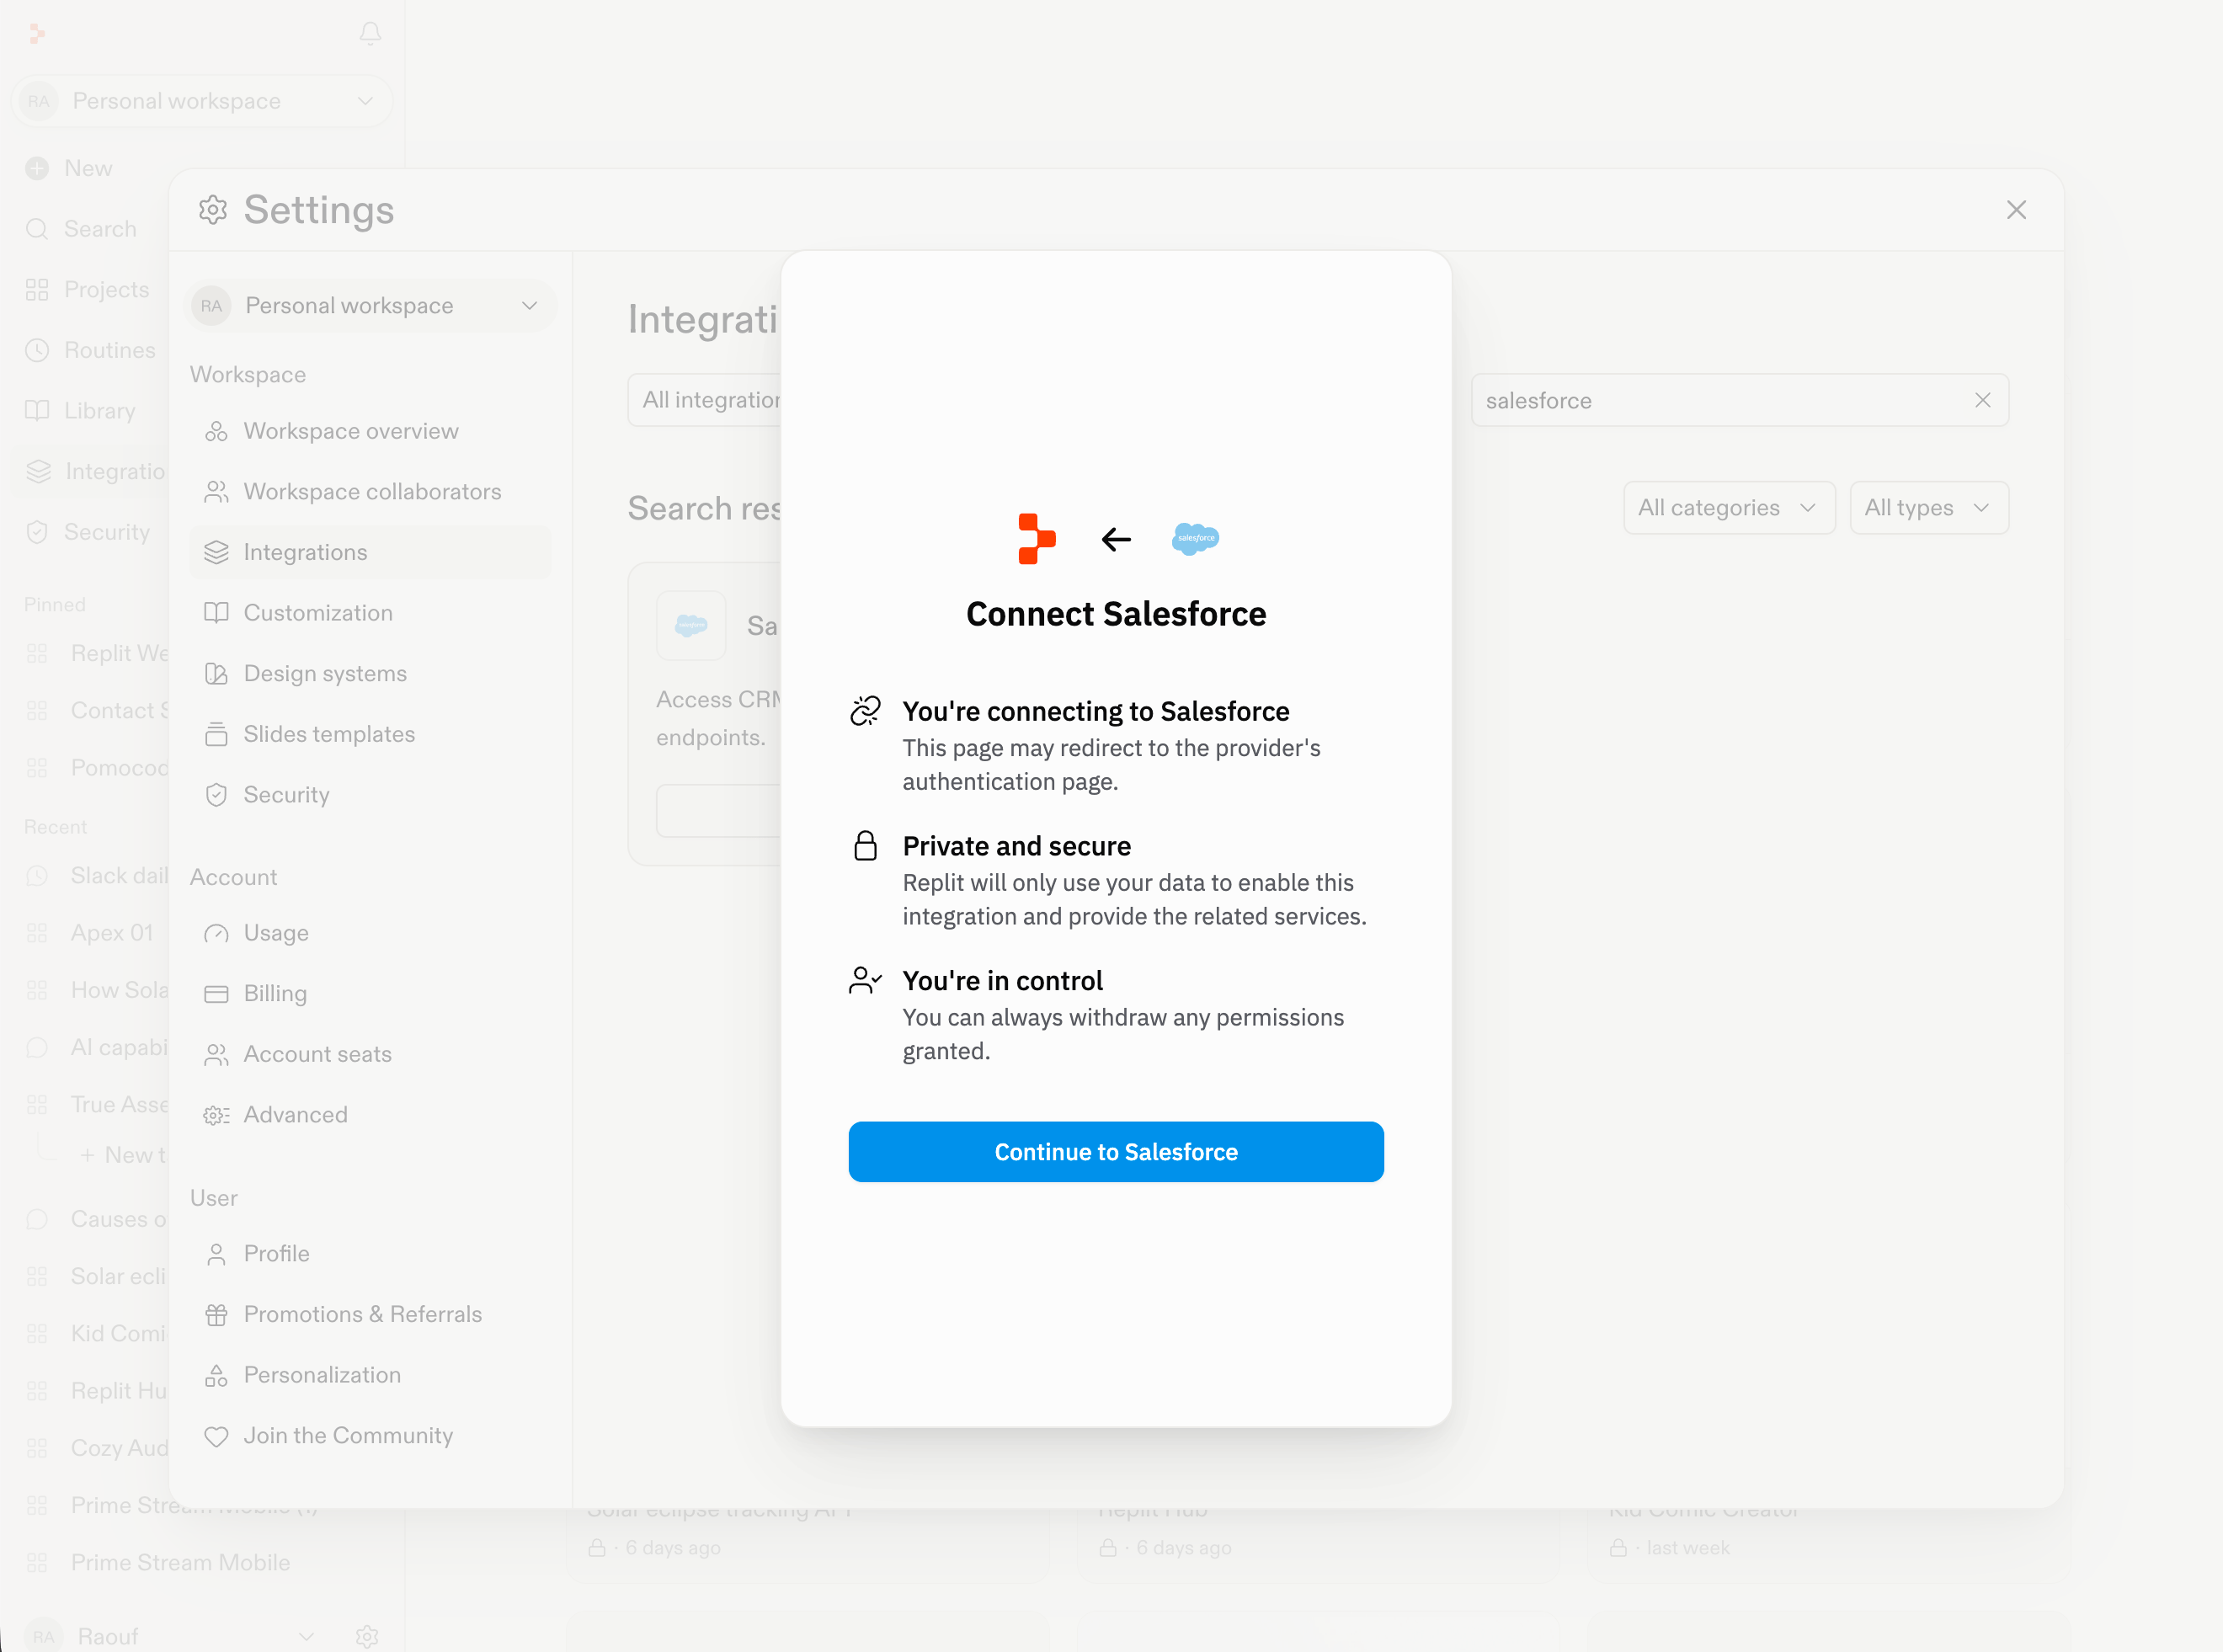
3. 필요하면 활성화한 다음 **Sign in**을 선택합니다.
4. 공급자 로그인 및 권한 부여 절차를 완료합니다.
 고객명과 준비해야 할 의사결정 또는 통화 결과를 하나의 완전한 요청으로
작성하세요.
Northstar 갱신 통화를 준비해 주세요. 연결된 Salesforce 계정 및 기회
레코드, 관련 Slack 스레드, Google Drive의 갱신 브리프를 검토하세요.
고객의 최근 성과, 갱신 위험, 답변되지 않은 질문을 요약해 주세요.
마지막으로 통화에서 다뤄야 할 다섯 가지 주제로 마무리하고, 각 발견
사항을 뒷받침하는 소스를 보여주세요.
중요한 발견 사항 뒤에 있는 소스 레코드, 메시지, 파일을 확인하세요.
Replit에게 확인된 사실과 미결 질문 또는 가정을 구분해 달라고 요청하세요.
후속 질문을 하거나, 강조점을 바꾸거나, 발견 사항을 통화를 위한 간결한
안건으로 만드세요.
## 필요할 때 맥락 추가하기
갱신 브리프가 연결된 Google Drive에 없다면, [Conversation에 업로드하세요](/ko/chat/upload-and-use-files).
현재의 공개 정보가 준비에 도움이 된다면 [웹을 검색할 수 있습니다](/ko/features/agent/web-search).
후속 질문은 같은 Conversation에서 계속하세요. 브리프가 정확해지면 발견
사항을 안건, 계획, 또는 작업 목록으로 전환할 수 있습니다.
## 다음 단계
* [Salesforce, Slack, Google Drive 연결하기](/ko/features/integrations/overview)
* [Conversation 시작하고 이어가기](/ko/chat/conversations)
* [Conversation에서 계속하기](/ko/chat/conversations-and-projects)
고객명과 준비해야 할 의사결정 또는 통화 결과를 하나의 완전한 요청으로
작성하세요.
Northstar 갱신 통화를 준비해 주세요. 연결된 Salesforce 계정 및 기회
레코드, 관련 Slack 스레드, Google Drive의 갱신 브리프를 검토하세요.
고객의 최근 성과, 갱신 위험, 답변되지 않은 질문을 요약해 주세요.
마지막으로 통화에서 다뤄야 할 다섯 가지 주제로 마무리하고, 각 발견
사항을 뒷받침하는 소스를 보여주세요.
중요한 발견 사항 뒤에 있는 소스 레코드, 메시지, 파일을 확인하세요.
Replit에게 확인된 사실과 미결 질문 또는 가정을 구분해 달라고 요청하세요.
후속 질문을 하거나, 강조점을 바꾸거나, 발견 사항을 통화를 위한 간결한
안건으로 만드세요.
## 필요할 때 맥락 추가하기
갱신 브리프가 연결된 Google Drive에 없다면, [Conversation에 업로드하세요](/ko/chat/upload-and-use-files).
현재의 공개 정보가 준비에 도움이 된다면 [웹을 검색할 수 있습니다](/ko/features/agent/web-search).
후속 질문은 같은 Conversation에서 계속하세요. 브리프가 정확해지면 발견
사항을 안건, 계획, 또는 작업 목록으로 전환할 수 있습니다.
## 다음 단계
* [Salesforce, Slack, Google Drive 연결하기](/ko/features/integrations/overview)
* [Conversation 시작하고 이어가기](/ko/chat/conversations)
* [Conversation에서 계속하기](/ko/chat/conversations-and-projects)