> ## Documentation Index
> Fetch the complete documentation index at: https://docs.replit.com/llms.txt
> Use this file to discover all available pages before exploring further.
# 협업자 추가
> Replit 워크스페이스에 협업자를 초대하세요. 워크스페이스 협업자를 열고, Member, Guest, Viewer 역할 중 하나를 선택한 다음, 여러 이메일 주소로 초대를 보내세요.
협업자를 팀 워크스페이스에 초대하여 함께 빌드할 수 있도록 하세요. 필요한 액세스 권한을 선택한 다음, 한 명 또는 여러 명을 한 번에 초대하세요.
조직에서 identity provider를 통해 멤버십을 관리하는 경우, 내부 팀원에게는 해당 provider의 프로비저닝 프로세스를 사용하세요. [SCIM 프로비저닝](/ko/teams/identity-and-access-management/scim)을 참고하세요. Enterprise Guest는 조직의 SSO 도메인 외부의 이메일 주소를 사용해야 합니다.
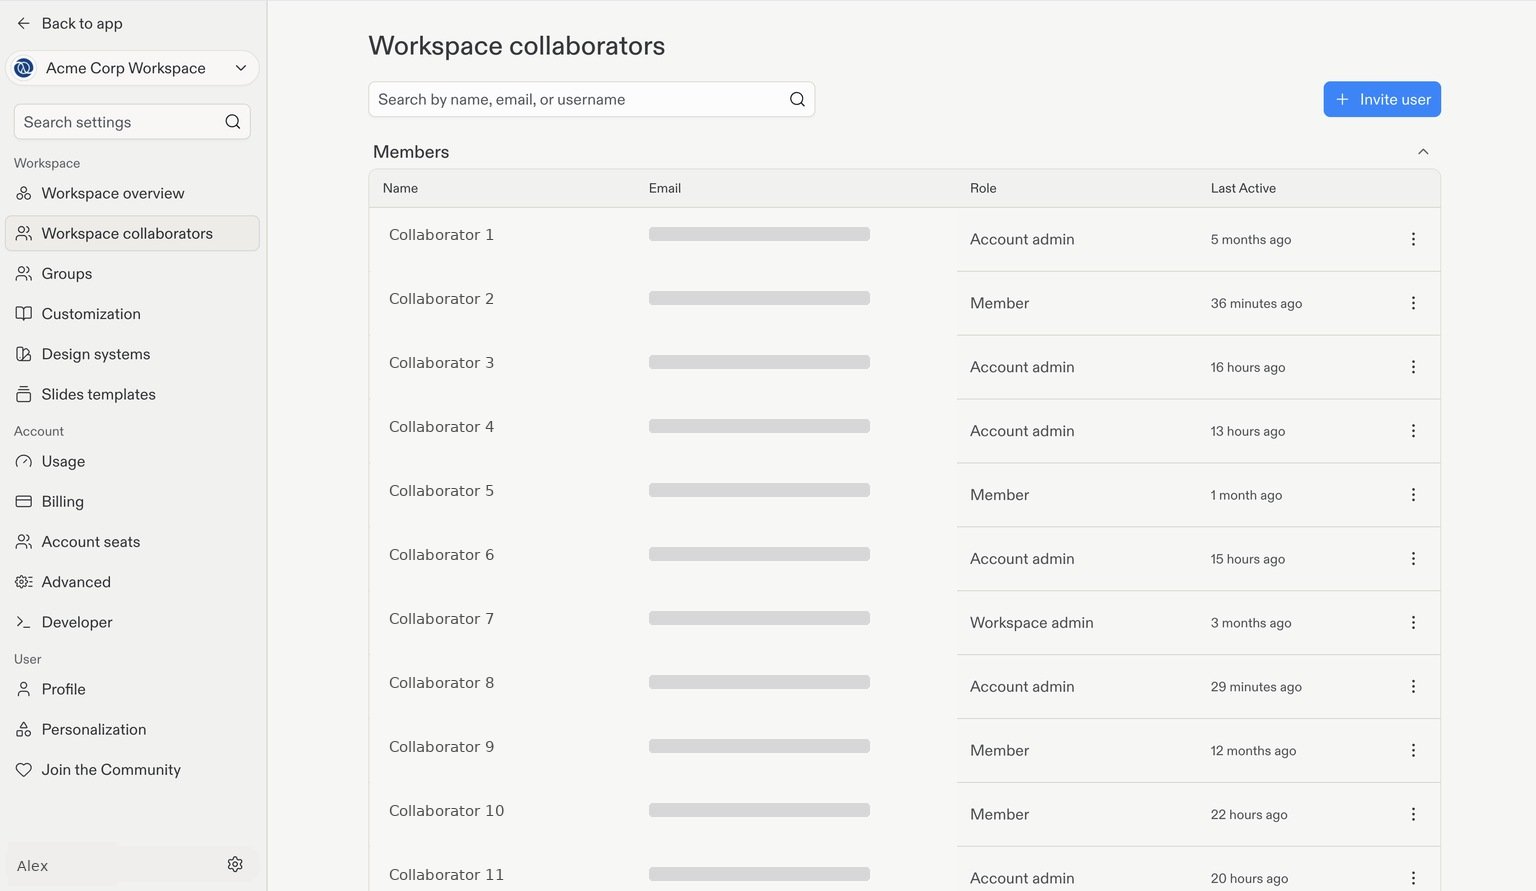
팀 워크스페이스를 선택한 다음, 왼쪽 하단의 **설정** 톱니바퀴 아이콘을 선택하세요. **워크스페이스** 아래에서 **워크스페이스 협업자**를 선택하세요.
이 페이지에는 현재 협업자와 역할이 표시됩니다. 오른쪽 상단의 **+ 사용자 초대**를 선택하세요.
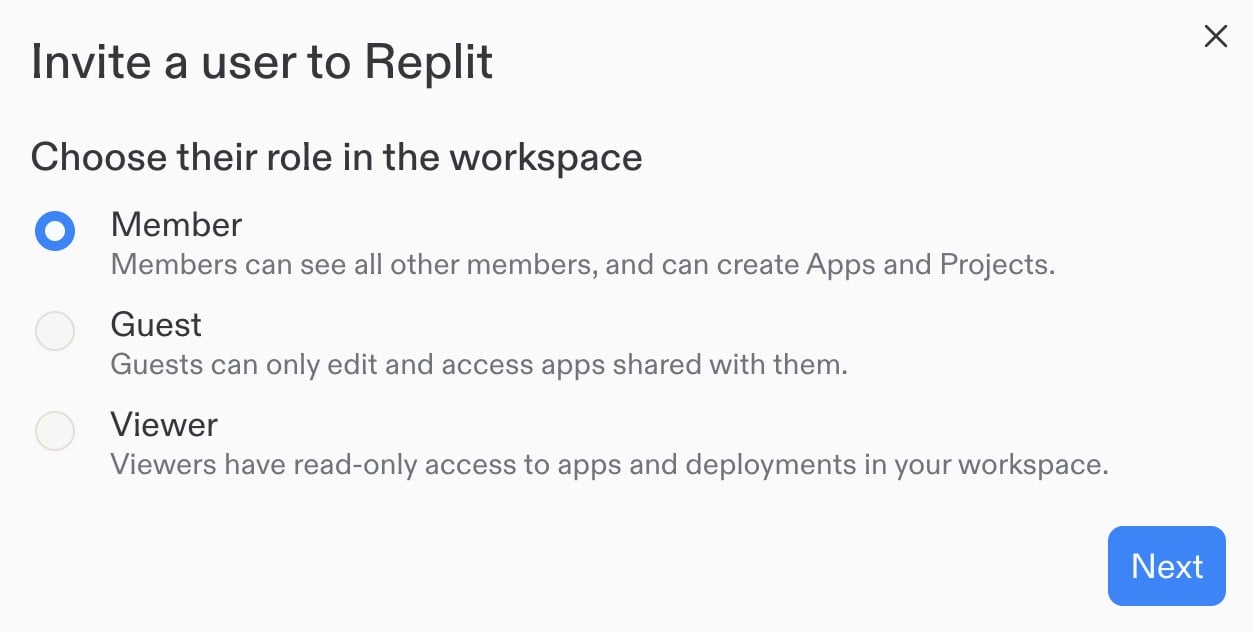
 초대할 사람들의 역할을 선택하세요.
* **Member**: 다른 멤버를 볼 수 있고 앱과 프로젝트를 만들 수 있습니다.
* **Guest**: 자신과 공유된 앱에만 액세스하고 편집할 수 있습니다.
* **Viewer**: 워크스페이스의 앱과 배포에 읽기 전용으로 액세스할 수 있습니다.
**다음**을 선택하세요.
초대할 사람들의 역할을 선택하세요.
* **Member**: 다른 멤버를 볼 수 있고 앱과 프로젝트를 만들 수 있습니다.
* **Guest**: 자신과 공유된 앱에만 액세스하고 편집할 수 있습니다.
* **Viewer**: 워크스페이스의 앱과 배포에 읽기 전용으로 액세스할 수 있습니다.
**다음**을 선택하세요.
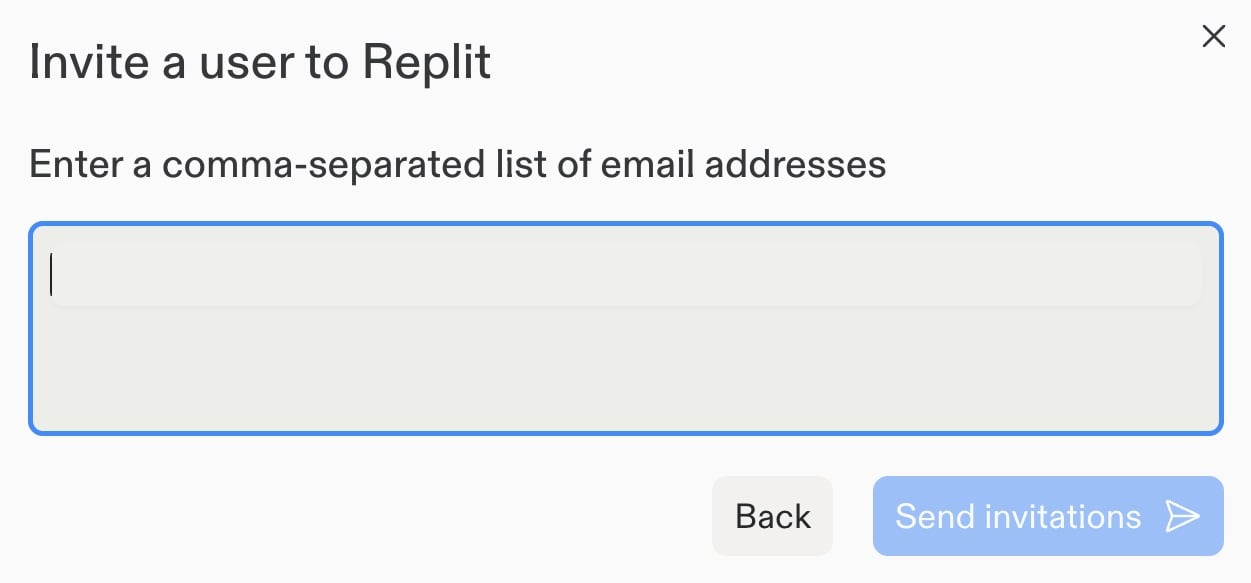
 이메일 주소를 하나 이상 입력하세요. 선택한 역할로 여러 사람을 초대하려면 주소를 쉼표로 구분하세요. 예: `alex@example.com, sam@example.com, jordan@example.com`.
주소를 검토한 다음 **초대 보내기**를 선택하세요.
이메일 주소를 하나 이상 입력하세요. 선택한 역할로 여러 사람을 초대하려면 주소를 쉼표로 구분하세요. 예: `alex@example.com, sam@example.com, jordan@example.com`.
주소를 검토한 다음 **초대 보내기**를 선택하세요.
 다른 협업자에게 다른 액세스 권한이 필요하다면 다른 역할로 이 과정을 반복하세요.
액세스 및 초대에 대해 자세히 알아보려면 [멤버 관리](/ko/teams/identity-and-access-management/managing-members)를 참조하세요.
## 다음 단계
팀이 애플리케이션을 빌드하는 데 필요한 서비스를 연결하세요.
다른 협업자에게 다른 액세스 권한이 필요하다면 다른 역할로 이 과정을 반복하세요.
액세스 및 초대에 대해 자세히 알아보려면 [멤버 관리](/ko/teams/identity-and-access-management/managing-members)를 참조하세요.
## 다음 단계
팀이 애플리케이션을 빌드하는 데 필요한 서비스를 연결하세요.