> ## Documentation Index
> Fetch the complete documentation index at: https://docs.replit.com/llms.txt
> Use this file to discover all available pages before exploring further.
# Autoscale 배포
> Autoscale 배포가 앱의 트래픽에 따라 자동으로 용량을 조절하는 방법을 알아보세요.
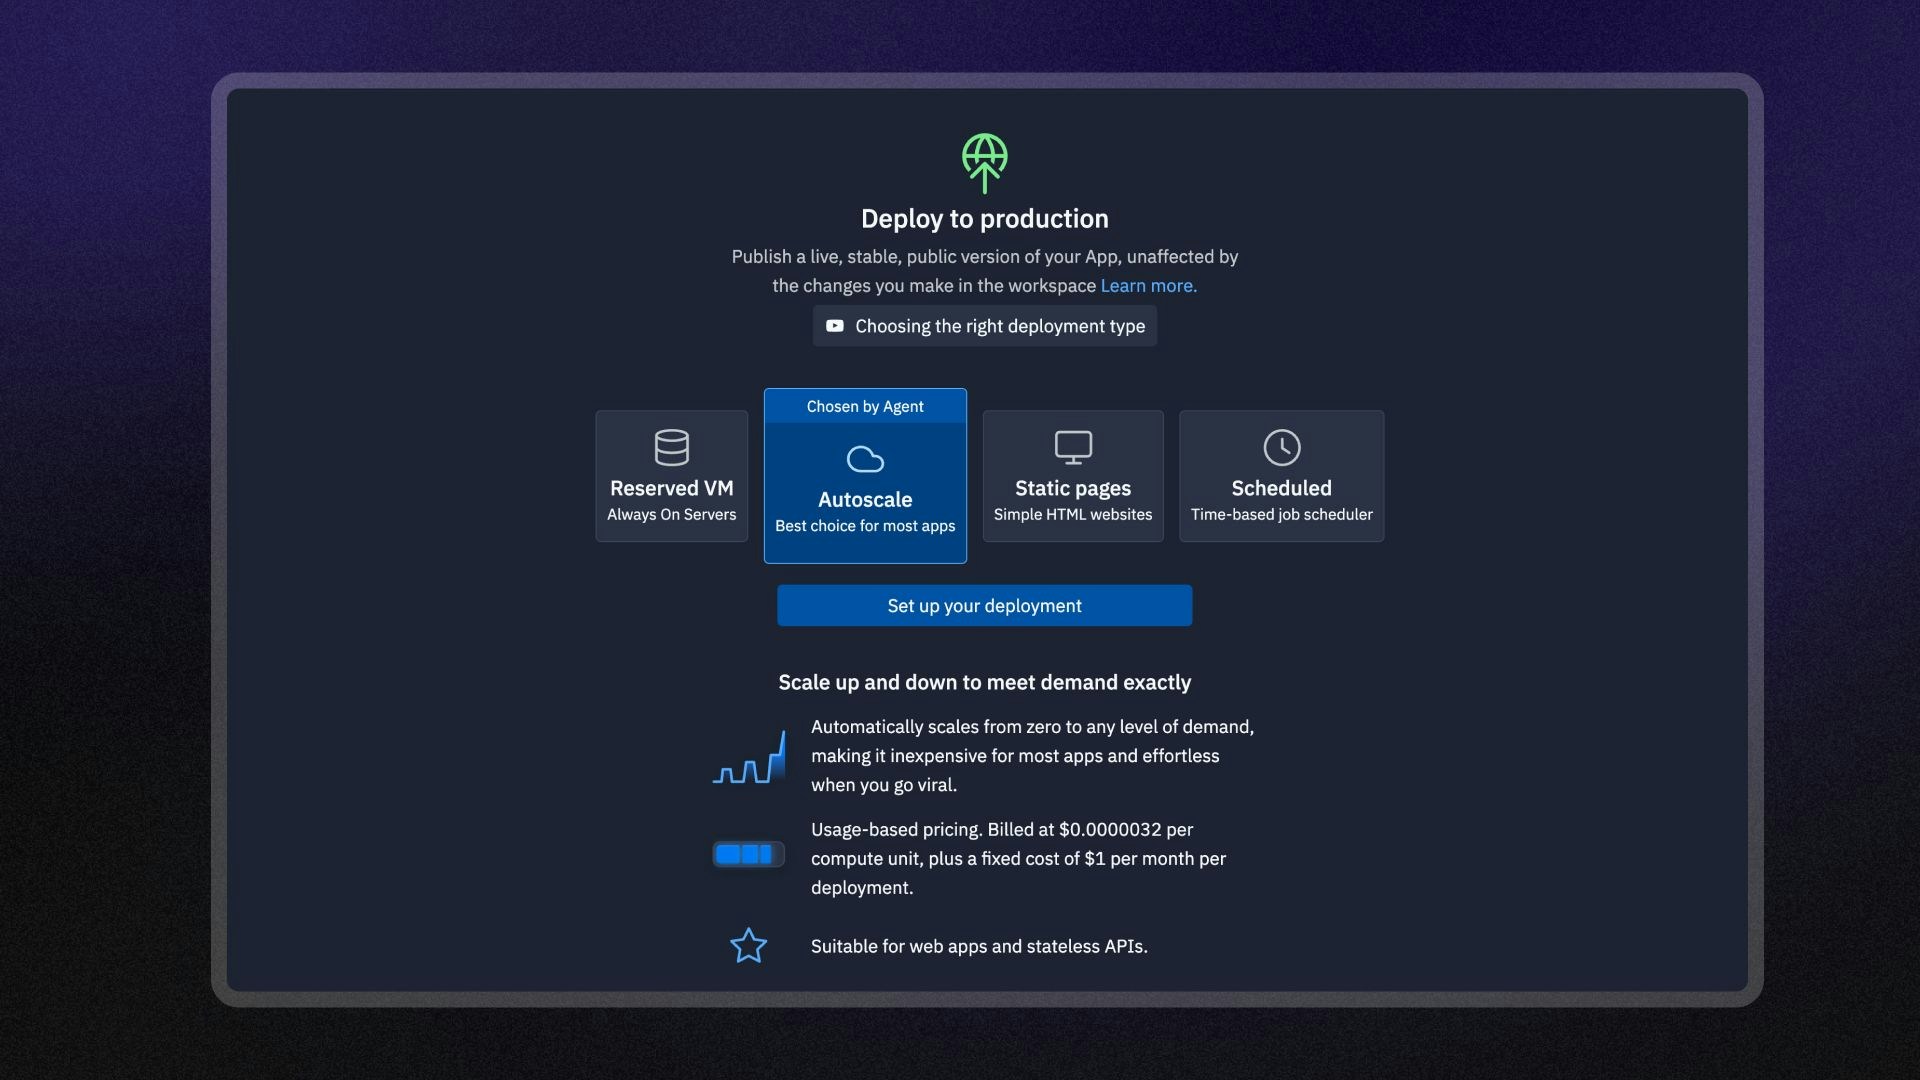
Autoscale 배포는 Replit App의 네트워크 트래픽과 작업량을 효율적으로 처리하기 위해 확장 및 축소되는 클라우드 컴퓨팅 리소스에서 실행됩니다. 앱이 바쁠 때는 서버를 추가해 부하를 관리합니다. 앱이 유휴 상태일 때는 비용을 절감하기 위해 서버 수를 최소 0까지 줄입니다.
Autoscale 배포는 다음과 같은 사용 사례에 적합합니다.
* 이커머스 사이트처럼 워크로드와 트래픽이 가변적인 웹 애플리케이션
* API 및 서비스
 ## 기능
Autoscale 배포에는 다음과 같은 기능이 포함됩니다.
* **자동 리소스 확장**: 트래픽 패턴에 따라 리소스를 자동으로 조절하여 비용을 최적화합니다.
* **커스텀 도메인**: 커스텀 도메인을 구성하거나 `.replit.app` URL을 사용해 앱에 접근할 수 있습니다.
* **구성 가능한 제한**: 게시된 앱이 확장될 수 있는 최대 인스턴스 수를 설정합니다.
* **유연한 머신 성능**: 앱에 필요한 CPU 및 RAM 구성을 선택합니다.
* **모니터링**: 로그를 확인하고 게시된 앱의 상태를 모니터링합니다.
## 사용법
프로젝트 편집기의 게시 도구에서 Autoscale 배포에 접근할 수 있습니다.
왼쪽 **도구 독**에서:
1.
## 기능
Autoscale 배포에는 다음과 같은 기능이 포함됩니다.
* **자동 리소스 확장**: 트래픽 패턴에 따라 리소스를 자동으로 조절하여 비용을 최적화합니다.
* **커스텀 도메인**: 커스텀 도메인을 구성하거나 `.replit.app` URL을 사용해 앱에 접근할 수 있습니다.
* **구성 가능한 제한**: 게시된 앱이 확장될 수 있는 최대 인스턴스 수를 설정합니다.
* **유연한 머신 성능**: 앱에 필요한 CPU 및 RAM 구성을 선택합니다.
* **모니터링**: 로그를 확인하고 게시된 앱의 상태를 모니터링합니다.
## 사용법
프로젝트 편집기의 게시 도구에서 Autoscale 배포에 접근할 수 있습니다.
왼쪽 **도구 독**에서:
1.  **모든 도구**를 선택해 프로젝트 편집기 도구 목록을 확인합니다.
2.
**모든 도구**를 선택해 프로젝트 편집기 도구 목록을 확인합니다.
2.  **게시**를 선택합니다.
3. **Autoscale** 옵션을 선택한 다음 **게시된 앱 설정하기**를 선택합니다.
**검색창**에서:
1. 상단의
**게시**를 선택합니다.
3. **Autoscale** 옵션을 선택한 다음 **게시된 앱 설정하기**를 선택합니다.
**검색창**에서:
1. 상단의  돋보기를 선택해 검색 도구를 엽니다
2. "게시"를 입력해 도구를 찾은 다음 검색 결과에서 선택합니다.
3. **Autoscale** 옵션을 선택한 다음 **게시된 앱 설정하기**를 선택합니다.
돋보기를 선택해 검색 도구를 엽니다
2. "게시"를 입력해 도구를 찾은 다음 검색 결과에서 선택합니다.
3. **Autoscale** 옵션을 선택한 다음 **게시된 앱 설정하기**를 선택합니다.
 ## 머신 성능
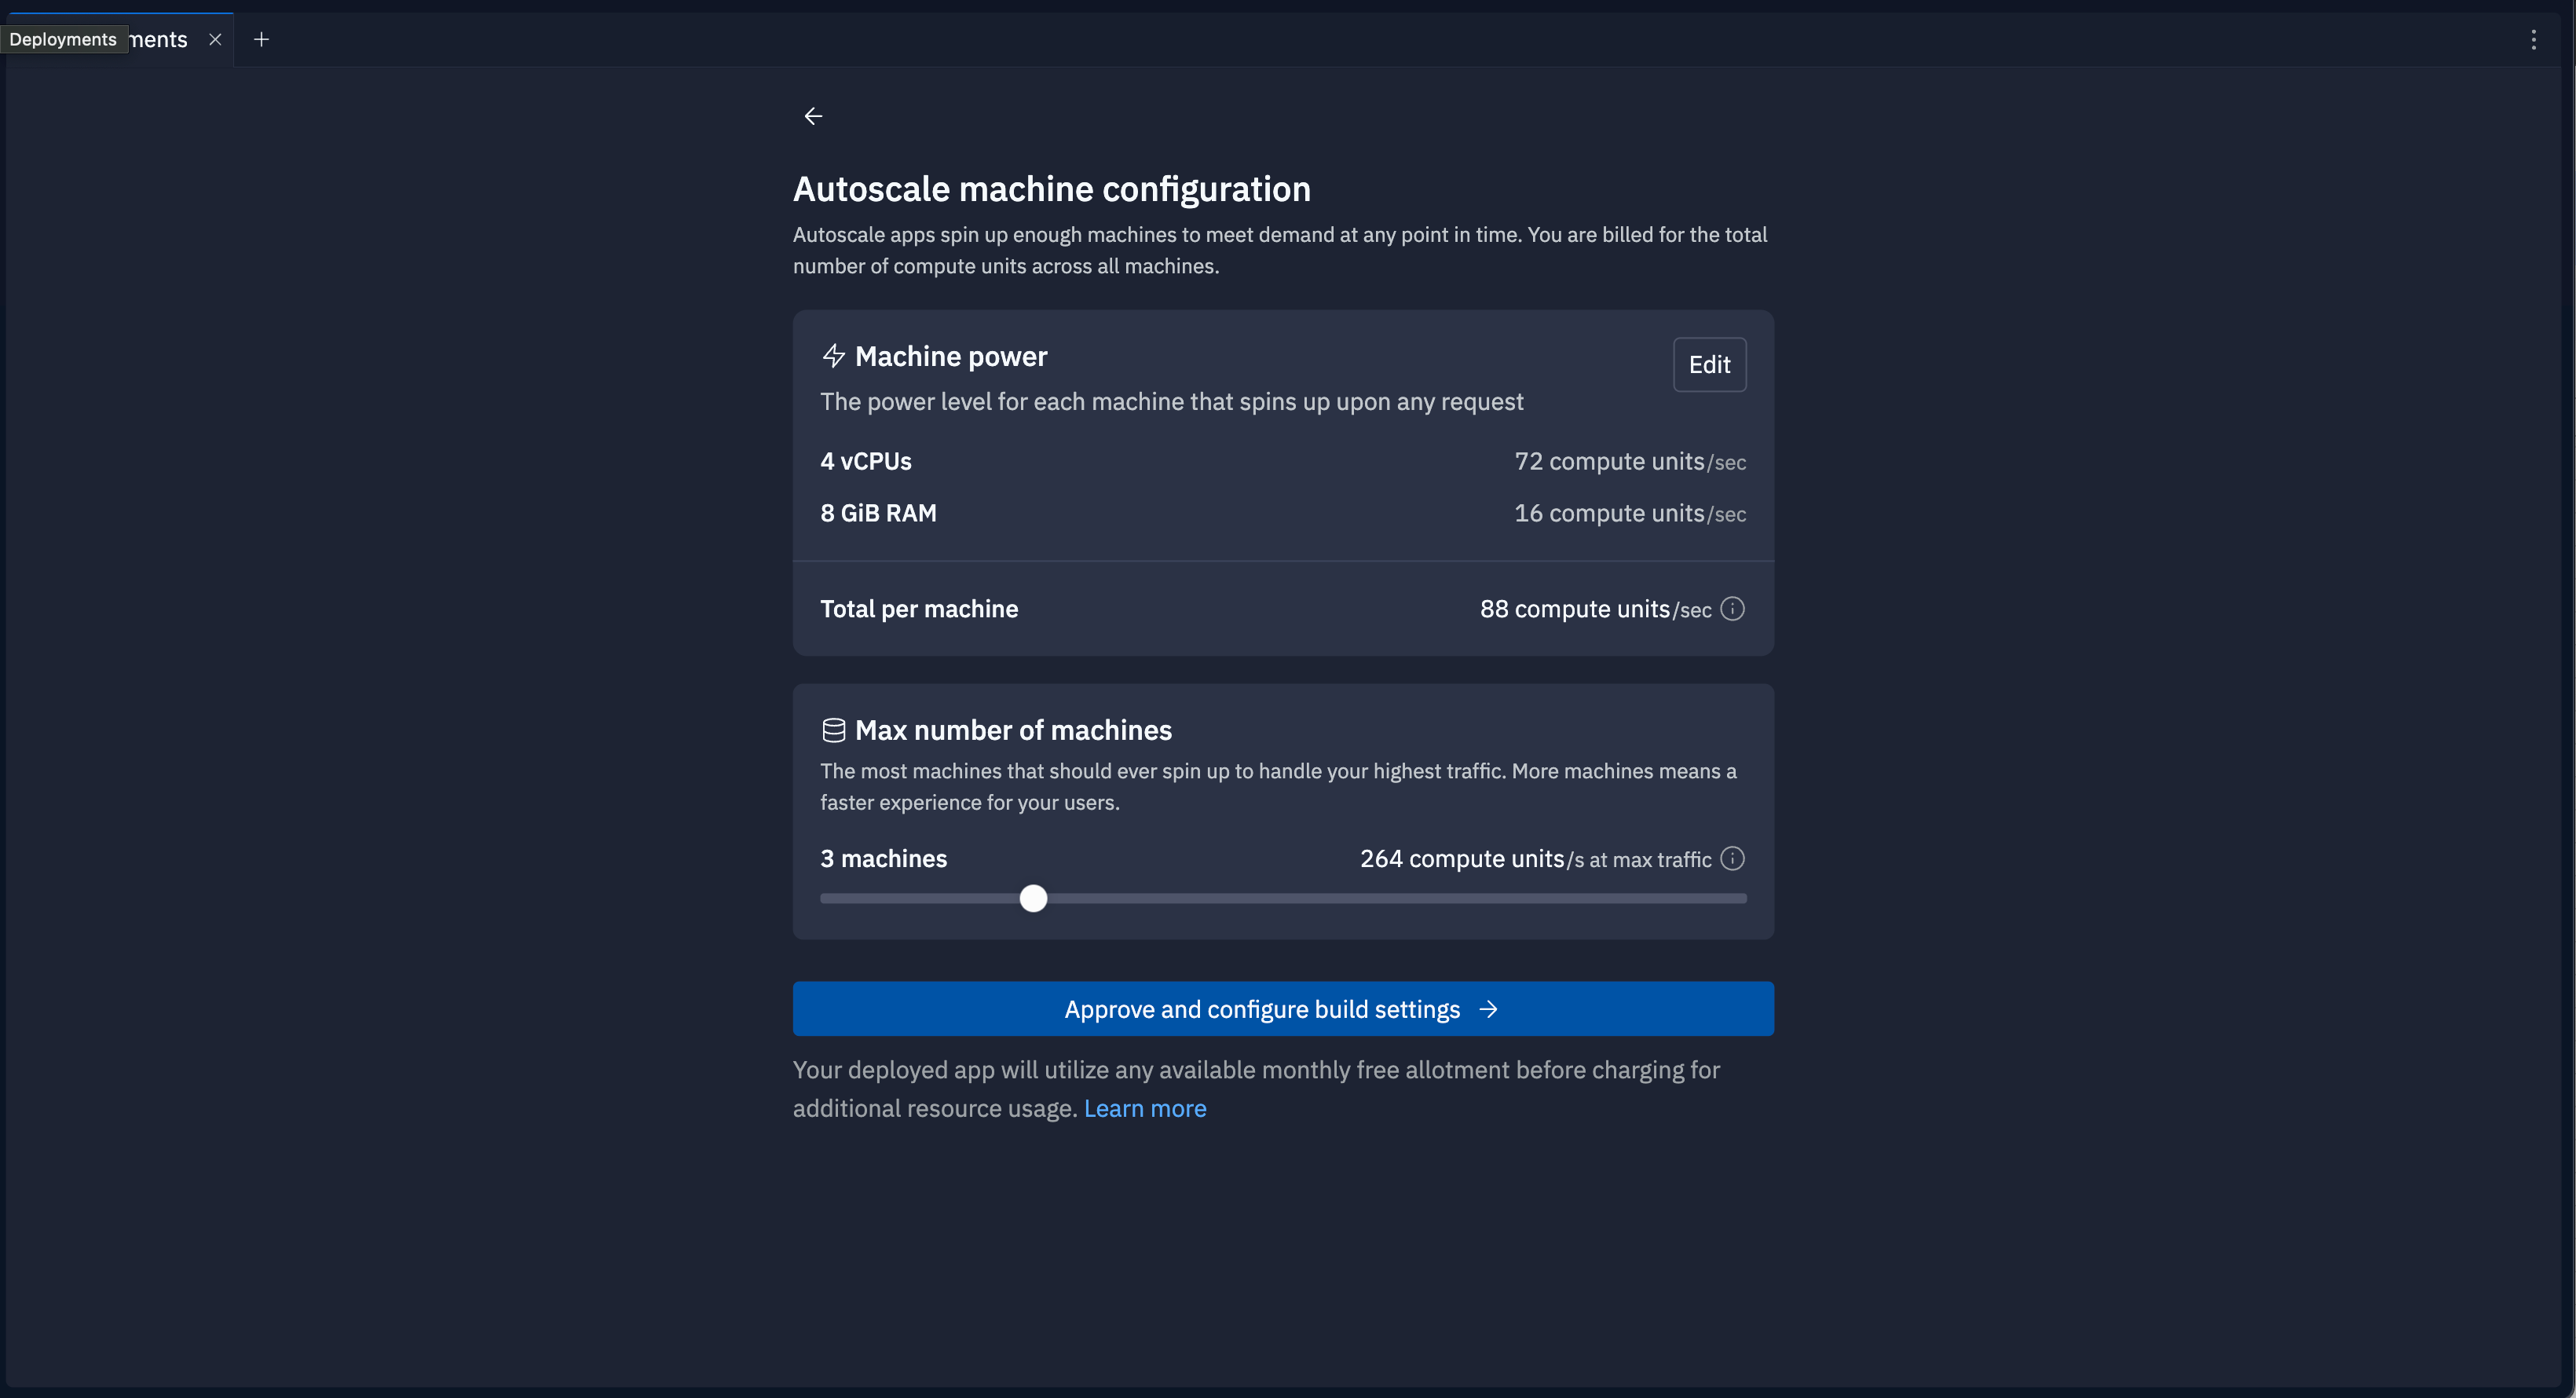
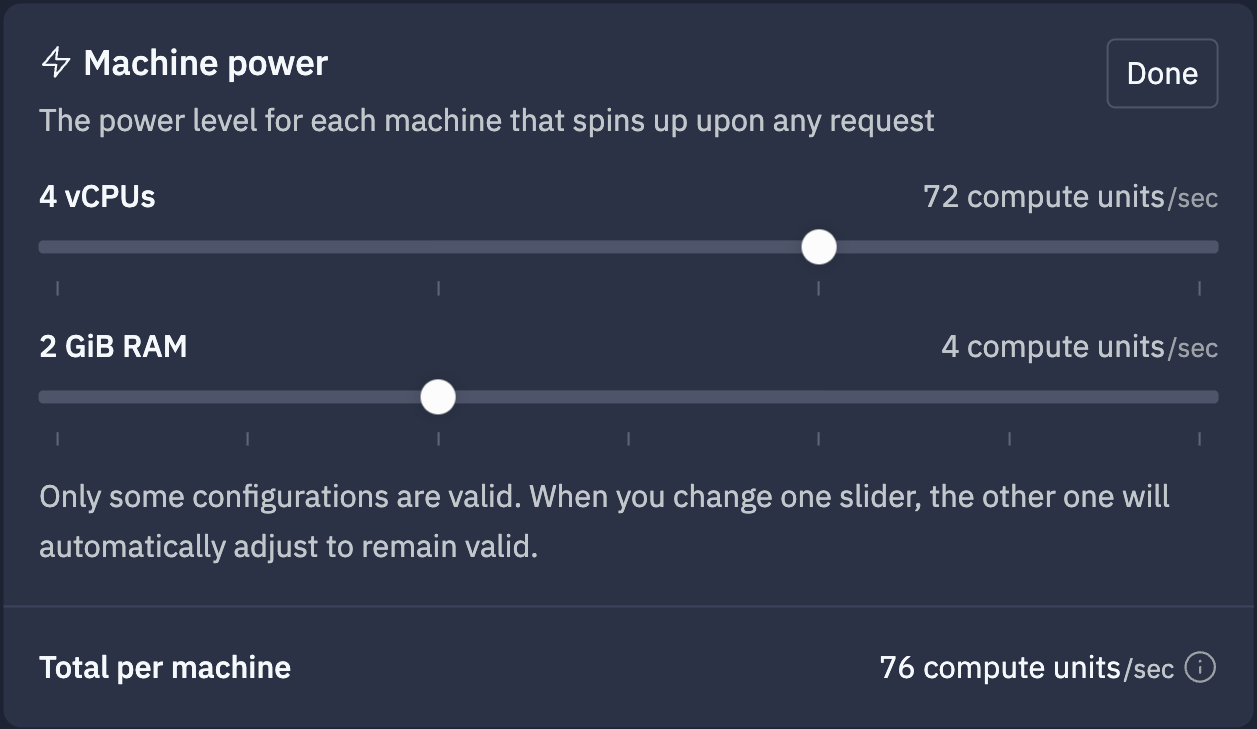
**편집**을 선택해 머신 성능 옵션을 확인하고 설정하세요. 슬라이더를 사용해 게시된 앱의 각 서버 인스턴스에 대한 CPU 및 RAM 구성을 선택합니다.
**머신당 총합** 행에서 해당 구성의 **컴퓨트 유닛** 비용을 확인하세요.
컴퓨트 유닛은 머신의 메모리와 CPU 구성을 기반으로 한 클라우드 컴퓨팅 리소스의 측정 단위입니다.
컴퓨트 유닛을 기준으로 비용을 계산하는 방법에 대해 더 알아보려면 [컴퓨트 유닛](/ko/billing/about-usage-based-billing#2-compute-units)을 참조하세요.
## 머신 성능
**편집**을 선택해 머신 성능 옵션을 확인하고 설정하세요. 슬라이더를 사용해 게시된 앱의 각 서버 인스턴스에 대한 CPU 및 RAM 구성을 선택합니다.
**머신당 총합** 행에서 해당 구성의 **컴퓨트 유닛** 비용을 확인하세요.
컴퓨트 유닛은 머신의 메모리와 CPU 구성을 기반으로 한 클라우드 컴퓨팅 리소스의 측정 단위입니다.
컴퓨트 유닛을 기준으로 비용을 계산하는 방법에 대해 더 알아보려면 [컴퓨트 유닛](/ko/billing/about-usage-based-billing#2-compute-units)을 참조하세요.
 ## 최대 머신 수
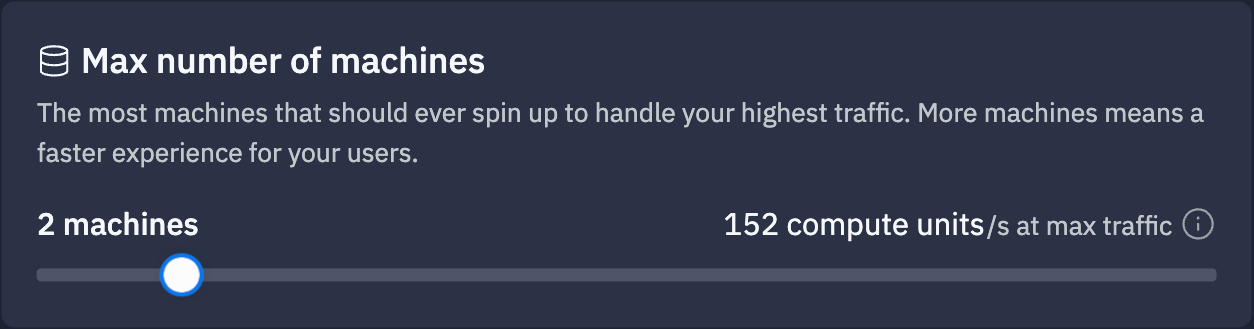
슬라이더를 사용해 최대 머신 수를 조절하세요. 이 수치는 오토스케일링 기능이 앱이 바쁘다고 판단할 때 할당할 수 있는 서버 인스턴스의 상한선입니다.
하단 행에는 다음 공식으로 계산된 해당 컴퓨트 유닛 값이 표시됩니다.
`머신 수 * 머신당 컴퓨트 유닛`
## 최대 머신 수
슬라이더를 사용해 최대 머신 수를 조절하세요. 이 수치는 오토스케일링 기능이 앱이 바쁘다고 판단할 때 할당할 수 있는 서버 인스턴스의 상한선입니다.
하단 행에는 다음 공식으로 계산된 해당 컴퓨트 유닛 값이 표시됩니다.
`머신 수 * 머신당 컴퓨트 유닛`
 ## 다음 단계
* [게시된 앱 모니터링](/ko/features/publishing/monitoring-a-deployment/): 로그를 확인하고 게시된 앱을 모니터링하는 방법을 알아보세요.
* [게시 비용](/ko/billing/deployment-pricing): 게시와 관련된 비용을 확인하세요.
* [가격](https://replit.com/pricing/): 각 플랜 유형의 가격과 허용량을 확인하세요.
* [사용량 허용치](/ko/billing/about-usage-based-billing/): 예약된 배포 사용량 한도와 청구 단위에 대해 알아보세요.
## 다음 단계
* [게시된 앱 모니터링](/ko/features/publishing/monitoring-a-deployment/): 로그를 확인하고 게시된 앱을 모니터링하는 방법을 알아보세요.
* [게시 비용](/ko/billing/deployment-pricing): 게시와 관련된 비용을 확인하세요.
* [가격](https://replit.com/pricing/): 각 플랜 유형의 가격과 허용량을 확인하세요.
* [사용량 허용치](/ko/billing/about-usage-based-billing/): 예약된 배포 사용량 한도와 청구 단위에 대해 알아보세요.