> ## Documentation Index
> Fetch the complete documentation index at: https://docs.replit.com/llms.txt
> Use this file to discover all available pages before exploring further.

# 앱 리믹스하기

> 기존 Replit 프로젝트에서 앱을 시작하는 방법을 배우세요. **리믹스**는 현재 접근 가능한 앱에서 만드는 새로운 Replit 앱입니다.

export const AiPrompt = ({children}) => {
  return <CodeBlock className="relative block font-sans whitespace-pre-wrap break-words">
      <div className="pr-7">
        {children}
      </div>
    </CodeBlock>;
};

export const RemixButton = ({replUrl = "https://replit.com/@sarahxli/Digital-Piano-Keys?v=1", label = "Remix this app", count = null}) => {
  if (typeof document !== 'undefined' && !document.getElementById('remix-button-styles')) {
    const style = document.createElement('style');
    style.id = 'remix-button-styles';
    style.textContent = `
      /* Button container */
      .remix-btn-container {
        --btn-bg: var(--replit-docs-bg-muted, #F1F1EE);
        --btn-bg-hover: var(--replit-docs-bg-elevated, #F1F1EE);
        --btn-text: var(--replit-docs-text, #1D1D1D);
        --btn-border: var(--replit-docs-border, #DEDAD5);
        --transition-duration: 120ms;
        display: flex;
        justify-content: center;
      }

      .dark .remix-btn-container,
      html.dark .remix-btn-container,
      [data-theme="dark"] .remix-btn-container {
        --btn-bg: var(--replit-docs-bg-elevated, #222223);
        --btn-bg-hover: var(--replit-docs-bg-muted, #222223);
        --btn-text: var(--replit-docs-text, #F5F5F5);
        --btn-border: var(--replit-docs-border, #39393D);
      }

      /* Button base styles - matching template page exactly */
      .remix-btn {
        /* Layout */
        display: inline-flex;
        align-items: center;
        justify-content: center;
        width: 50%;
        max-width: 400px;
        min-width: 200px;
        height: 36px;
        padding: 0 16px;
        gap: 8px;

        /* Typography */
        font-family: 'IBM Plex Sans', -apple-system, BlinkMacSystemFont, 'Segoe UI', Roboto, sans-serif;
        font-size: 14px;
        font-weight: 500;
        line-height: 1.5;
        text-decoration: none;
        white-space: nowrap;

        /* Visual */
        border-radius: 8px;
        border: none;
        background: var(--btn-bg);
        color: var(--btn-text);
        box-shadow: inset 0 0 0 1px var(--btn-border);

        /* Interaction */
        cursor: pointer;
        user-select: none;
        transition-property: background-color;
        transition-duration: var(--transition-duration);
        transition-timing-function: ease-out;
        -webkit-tap-highlight-color: transparent;
        -webkit-touch-callout: none;
      }

      /* Content (icon + label) - centered */
      .remix-btn-content {
        display: flex;
        align-items: center;
        justify-content: center;
        gap: 8px;
      }

      /* Hover state */
      @media (hover: hover) {
        .remix-btn:hover {
          background: var(--btn-bg-hover);
        }
      }

      /* Active/pressed state */
      .remix-btn:active {
        background: var(--btn-bg-hover);
        transform: scale(0.99);
      }

      /* Focus visible state */
      .remix-btn:focus-visible {
        outline: 2px solid #0079F2;
        outline-offset: 2px;
      }

      /* Icon styles */
      .remix-btn svg {
        flex-shrink: 0;
        width: 20px;
        height: 20px;
      }

      /* Label styles */
      .remix-btn span {
        font-weight: 600;
      }

      /* Animation */
      @keyframes remix-btn-fade-in {
        from { opacity: 0; transform: translateY(4px); }
        to { opacity: 1; transform: translateY(0); }
      }

      .remix-btn-container {
        animation: remix-btn-fade-in 300ms ease-out;
      }
    `;
    document.head.appendChild(style);
  }
  const handleClick = e => {
    e.preventDefault();
    const url = replUrl.includes('replit.com') ? replUrl : `https://replit.com${replUrl}`;
    window.open(url, '_blank');
  };
  const RemixIcon = () => <svg width="20" height="20" viewBox="0 0 24 24" fill="currentColor" preserveAspectRatio="xMidYMin">
      <path d="M17.47 13.47a.75.75 0 0 1 1.06 0l4 4a.745.745 0 0 1 .118.16c.016.027.032.054.044.083.007.016.01.032.016.049a.744.744 0 0 1 .042.238.743.743 0 0 1-.037.223c-.007.02-.012.042-.02.062a.748.748 0 0 1-.163.245l-4 4a.75.75 0 0 1-1.06-1.06l2.72-2.72H15.95a4.753 4.753 0 0 1-3.886-2.09l-.351-.442a.75.75 0 0 1 1.172-.936l.36.45.04.055a3.251 3.251 0 0 0 2.68 1.463h4.224l-2.72-2.72a.75.75 0 0 1 0-1.06ZM17.47 1.47a.75.75 0 0 1 1.06 0l4 4a.756.756 0 0 1 .162.816.749.749 0 0 1-.162.244l-4 4a.75.75 0 0 1-1.06-1.06l2.72-2.72H16.02a3.25 3.25 0 0 0-2.674 1.372l-5.44 8.58a4.75 4.75 0 0 1-3.934 2.047L2 18.75a.75.75 0 0 1 0-1.5h1.979a3.25 3.25 0 0 0 2.673-1.373l5.442-8.578.02-.03a4.751 4.751 0 0 1 3.913-2.018l4.162-.001-2.72-2.72a.75.75 0 0 1 0-1.06ZM3.972 5.25a4.75 4.75 0 0 1 4.27 2.612.751.751 0 0 1-1.34.675 3.252 3.252 0 0 0-2.698-1.781l-.226-.006H2a.75.75 0 0 1 0-1.5h1.972Z" />
    </svg>;
  return <div className="remix-btn-container" style={{
    margin: '16px 0'
  }}>
      <button onClick={handleClick} className="remix-btn" type="button" tabIndex={0}>
        <RemixIcon />
        <span>{label}</span>
      </button>
    </div>;
};

Replit에서 빌드를 시작하는 또 다른 방법을 찾고 계신가요? **리믹스**를 사용하면 커뮤니티가 만든 기존 앱에서 시작할 수 있습니다. 처음부터 빌드하는 것보다 빠르고 동작하는 코드에서 배우기 좋은 방법입니다.

<Tip>
  Replit이 처음이신가요? [첫 번째 앱 빌드하기](/build/your-first-app)에서 Agent가 처음부터 어떻게 작동하는지 배워보세요.
</Tip>

## 리믹스 만들기

⏰ *예상 시간: 5분*

이 가이드의 단계를 따라 대화형 디지털 피아노 앱의 리믹스를 만드세요:

<Frame>
  <img src="https://mintcdn.com/replit/CKgy3zbnPnUlDukQ/images/getting-started/quickstart_piano_complete.png?fit=max&auto=format&n=CKgy3zbnPnUlDukQ&q=85&s=76dbd6c44f768c4cb88bd7f1ee51699c" alt="건반이 있는 대화형 디지털 피아노" width="1820" height="1024" data-path="images/getting-started/quickstart_piano_complete.png" />
</Frame>

<Tip>
  [Digital Piano Keys](https://digital-piano-keys.replit.app)에서 게시된 앱을 사용해 보세요.
</Tip>

<Steps>
  <Step title="앱 리믹스하기">
    아래 **Remix this app** 버튼을 선택하여 Digital Piano 앱의 나만의 버전을 만들기 시작하세요.

    <RemixButton replUrl="https://replit.com/@sarahxli/Digital-Piano-Keys?v=1" label="Remix this app" />
  </Step>

  <Step title="앱 세부 정보 작성하기">
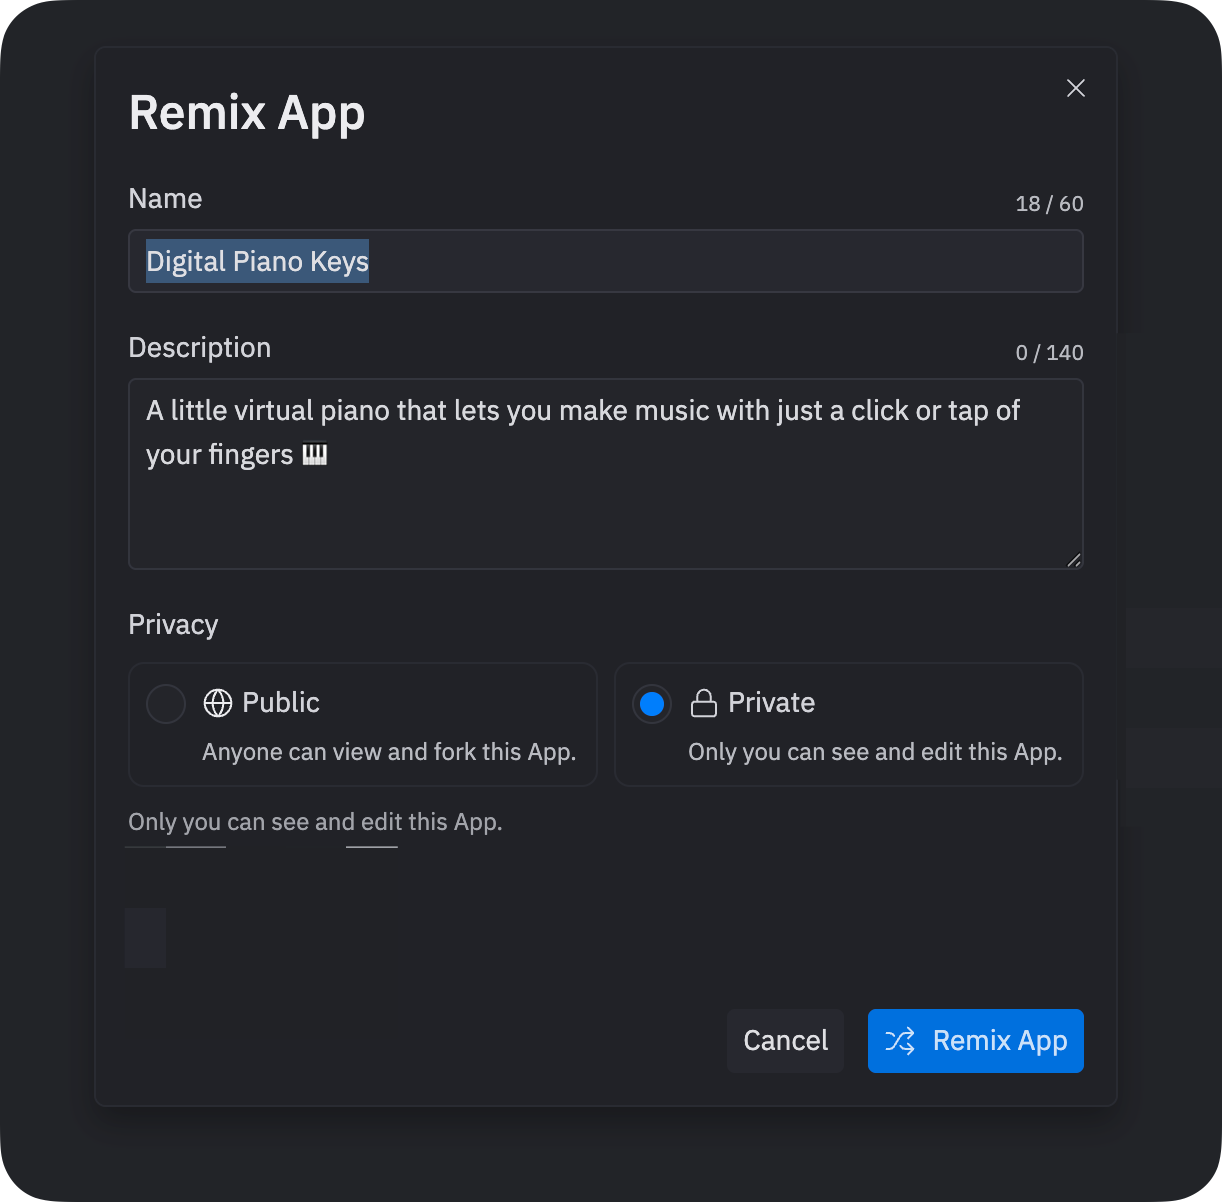
    버튼을 선택한 후 **Remix App** 대화 상자가 나타납니다. **Remix App**을 선택하여 계속하세요. 이 세부 정보는 나중에 수정할 수 있습니다.

    <Frame>
      <img src="https://mintcdn.com/replit/u7DyWVbaIRze6Cmd/images/getting-started/quickstart_remix_dialog.png?fit=max&auto=format&n=u7DyWVbaIRze6Cmd&q=85&s=d1d41a640ac0fc55679aa4081d5c5ff2" alt="앱 이름, 설명, 개인 정보 설정을 보여주는 Remix App 대화 상자" width="1222" height="1202" data-path="images/getting-started/quickstart_remix_dialog.png" />
    </Frame>
  </Step>

  <Step title="피아노 연주하기">
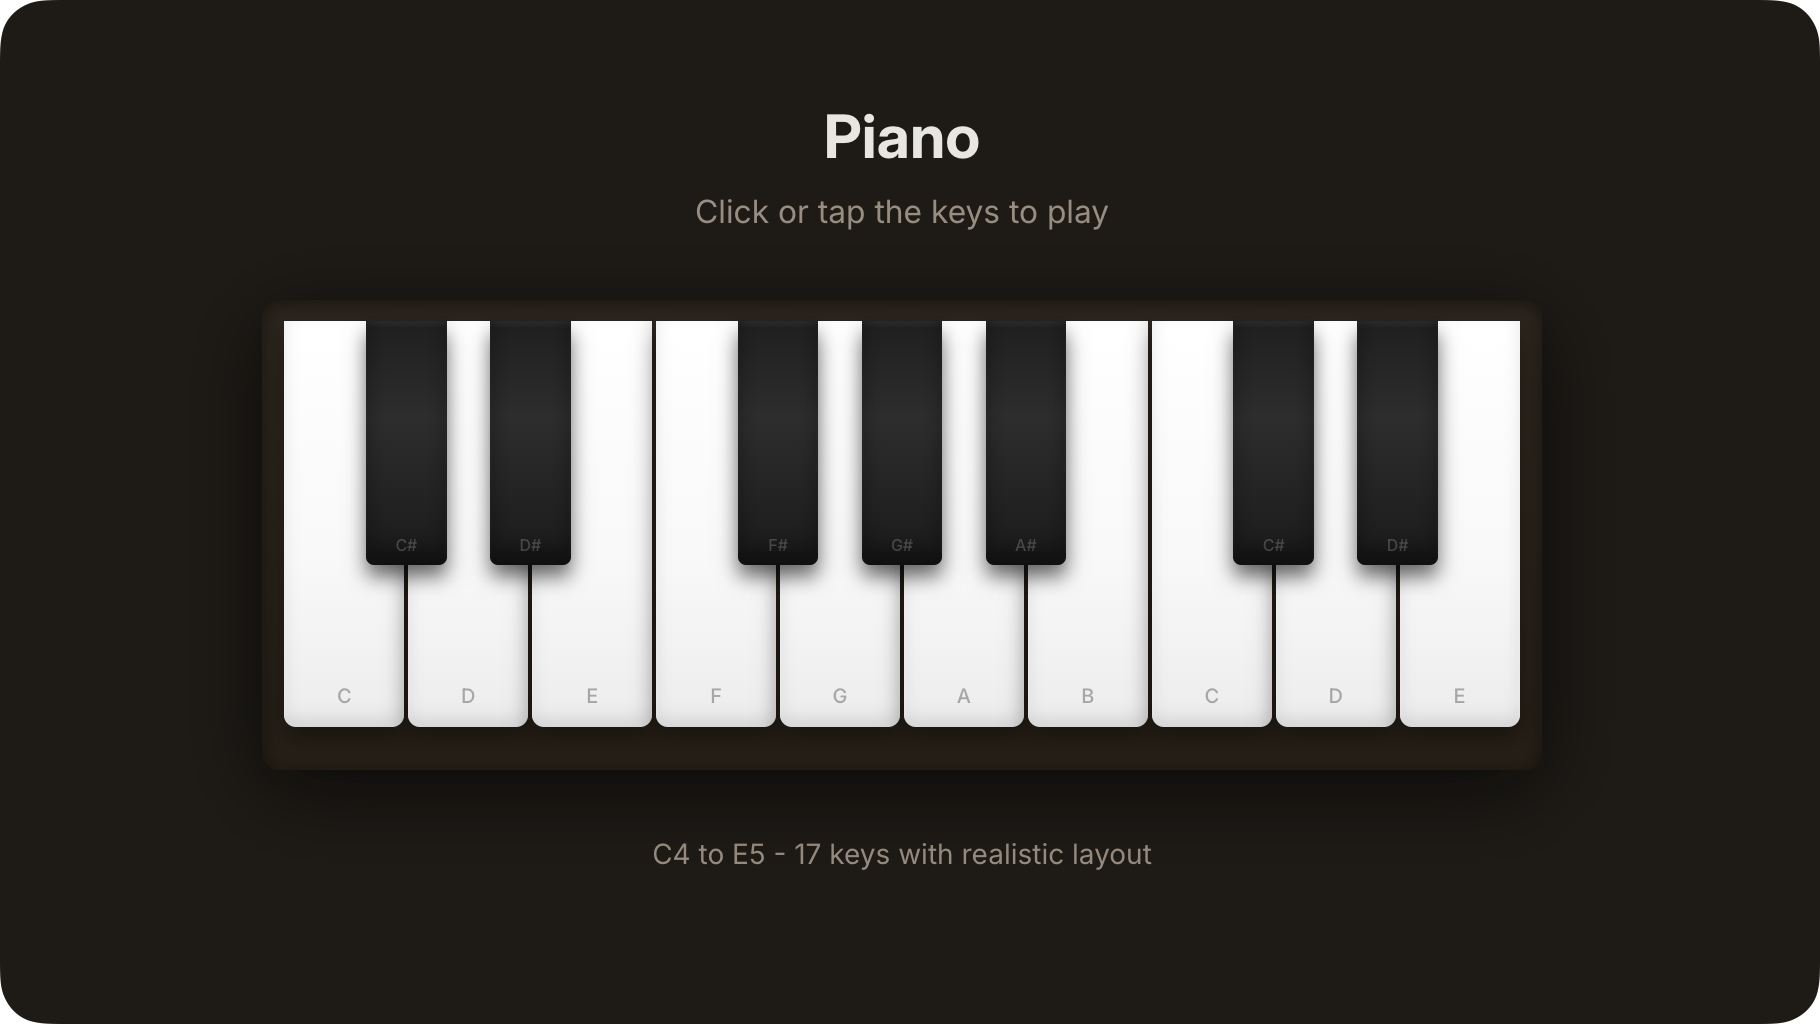
    앱이 자동으로 시작됩니다. **Preview** 탭으로 이동하여 피아노 인터페이스를 확인하세요.

    <Frame>
      <video autoPlay muted loop playsInline src="https://cdn.replit.com/sanity/quickstart-piano-demo.mp4" />
    </Frame>

    이제 상호 작용하고 반복적으로 개선할 수 있는 완전히 동작하는 리믹스를 갖게 되었습니다.

    피아노 건반을 클릭하여 음표를 연주하고 소리를 들어보세요. 간단한 멜로디를 연주하여 앱을 테스트해 보세요.
  </Step>
</Steps>

## 리믹스 개선하기

이제 동작하는 앱이 생겼으니, Agent를 사용하여 수정하고 확장해 보세요. 다음 섹션에서는 리믹스를 개선하는 실용적인 예시를 보여줍니다.

### Agent를 사용하여 기능 추가하기

Agent를 사용하여 리믹스에 복잡한 기능을 추가하세요:

<Steps>
  <Step title="프롬프트 작성하기">
    **Agent** 탭으로 이동하세요.

    텍스트 영역에 다음 프롬프트를 입력하세요:

    <AiPrompt>
      Add a tutorial mode that teaches you how to play simple songs. When tutorial mode is active, highlight the next key that should be played, wait for you to press the correct key before moving on, and display the song name at the top. Include a button to start the tutorial and pre-load at least two simple songs like "Mary Had a Little Lamb" or "Twinkle Twinkle Little Star."
    </AiPrompt>

    프롬프트를 제출한 후 Agent가 잠시 멈추고 명확한 설명이나 확인을 요청할 수 있습니다. 텍스트 영역에서 응답하세요.
  </Step>

  <Step title="기능 테스트하기">
    **Preview** 탭으로 이동하여 Agent가 피아노에 적용한 업데이트를 확인하세요.

    튜토리얼 모드를 시작하고 건반이 강조 표시되는 대로 따라 연주해 보세요.

    <Frame>
      <video autoPlay muted loop playsInline src="https://cdn.replit.com/sanity/quickstart-remix-piano-play.mp4" />
    </Frame>

    초기 프롬프트에 시각적 디자인에 대한 구체적인 세부 정보가 포함되지 않았기 때문에 결과가 정확한 기대에 맞지 않을 수 있습니다.
  </Step>

  <Step title="기능 다듬기">
    기능이 기대와 다르다면, **Agent** 텍스트 영역에 후속 프롬프트를 입력하여 대화를 계속하세요. 예:

    <AiPrompt>
      Make the highlighted key glow with a pulsing animation and add a progress indicator showing how far along in the song I am.
    </AiPrompt>

    이러한 변경을 취소하려면, **Agent** 탭에서 변경 계획이 시작된 직후 생성된 Checkpoint의 **Rollback to here**를 선택하세요.

    [Checkpoints 및 Rollbacks](/references/version-control/checkpoints-and-rollbacks)에 대해 자세히 알아보세요.
  </Step>
</Steps>

### Lite 모드를 사용하여 기능 추가하기

다음 단계를 따라 [Lite 모드](/references/agent/agent-modes)를 사용하여 리믹스에 빠른 개선 사항을 추가하세요:

<Steps>
  <Step title="프롬프트 작성하기">
    [Lite 모드](/references/agent/agent-modes)로 전환하고 다음 프롬프트를 입력하세요:

    <AiPrompt>
      Add record and playback buttons to capture and replay piano performances.
    </AiPrompt>

    프롬프트를 제출한 후, Agent는 변경하려는 사항을 설명하고 진행하기 전에 코드 변경 사항을 검토할 수 있게 해줍니다.
    **Preview code changes**를 선택하여 현재 코드와 업데이트의 비교를 확인하세요.
  </Step>

  <Step title="기능 테스트하기">
    **Apply all**을 선택하고 이어지는 확인 사항을 승인하여 계속하세요.

    **Preview** 탭으로 이동하여 결과를 확인하세요. 이제 피아노 연주를 녹음하고 재생할 수 있는 녹음 및 재생 버튼이 보여야 합니다.

    이러한 변경을 취소하려면 **Agent** 탭의 Rollback 기능을 사용하세요.
  </Step>
</Steps>

## 계속 이어가기

이 튜토리얼을 완료했으니, 리믹스 관련 다음 단계를 확인해 보세요:

* **더 많은 리믹스 탐색하기**: [커뮤니티](https://replit.com/community/all)를 둘러보며 리믹스하고 배울 앱을 찾아보세요
* **처음부터 빌드하기**: Agent로 [나만의 앱 만들기](/build/your-first-app)를 시도하여 경험을 비교해 보세요
* **리믹스 가능하게 게시하기**: 개선된 버전을 공유하여 다른 사람들이 여러분의 작업 위에서 계속 빌드할 수 있게 하세요.
