> ## Documentation Index
> Fetch the complete documentation index at: https://docs.replit.com/llms.txt
> Use this file to discover all available pages before exploring further.

# 로그인 추가하기

> Clerk를 사용해 플레이어가 PixelGames에 로그인할 수 있도록 해보세요.

export const AiPrompt = ({children}) => {
  return <CodeBlock className="relative block font-sans whitespace-pre-wrap break-words">
      <div className="pr-7">
        {children}
      </div>
    </CodeBlock>;
};

export const loginPrompt = "Add sign-in to PixelGames using Clerk. Anyone can still play without an account, signing in is only for players who want one.";
export const appleSignInPrompt = "Add Sign in with Apple to PixelGames, but only show it on iOS. Keep the Android version as email and Google only.";

저장할 것이 아직 없더라도, 지금 PixelGames에 로그인 기능을 추가하세요. 플레이어가 계정을 가지면
나중에 최고 점수, 잠금 해제된 게임 등 다음에 만들 무엇이든 그 계정에 연결할 수 있습니다.

로그인에는 Replit의 내장 통합 기능인 [Clerk Auth](/features/auth-and-identity/clerk-auth)를
사용하세요. Agent가 자동으로 프로비저닝하고 PixelGames만의 브랜드화된 로그인 화면을
제공합니다.

<AiPrompt>
  {loginPrompt}
</AiPrompt>

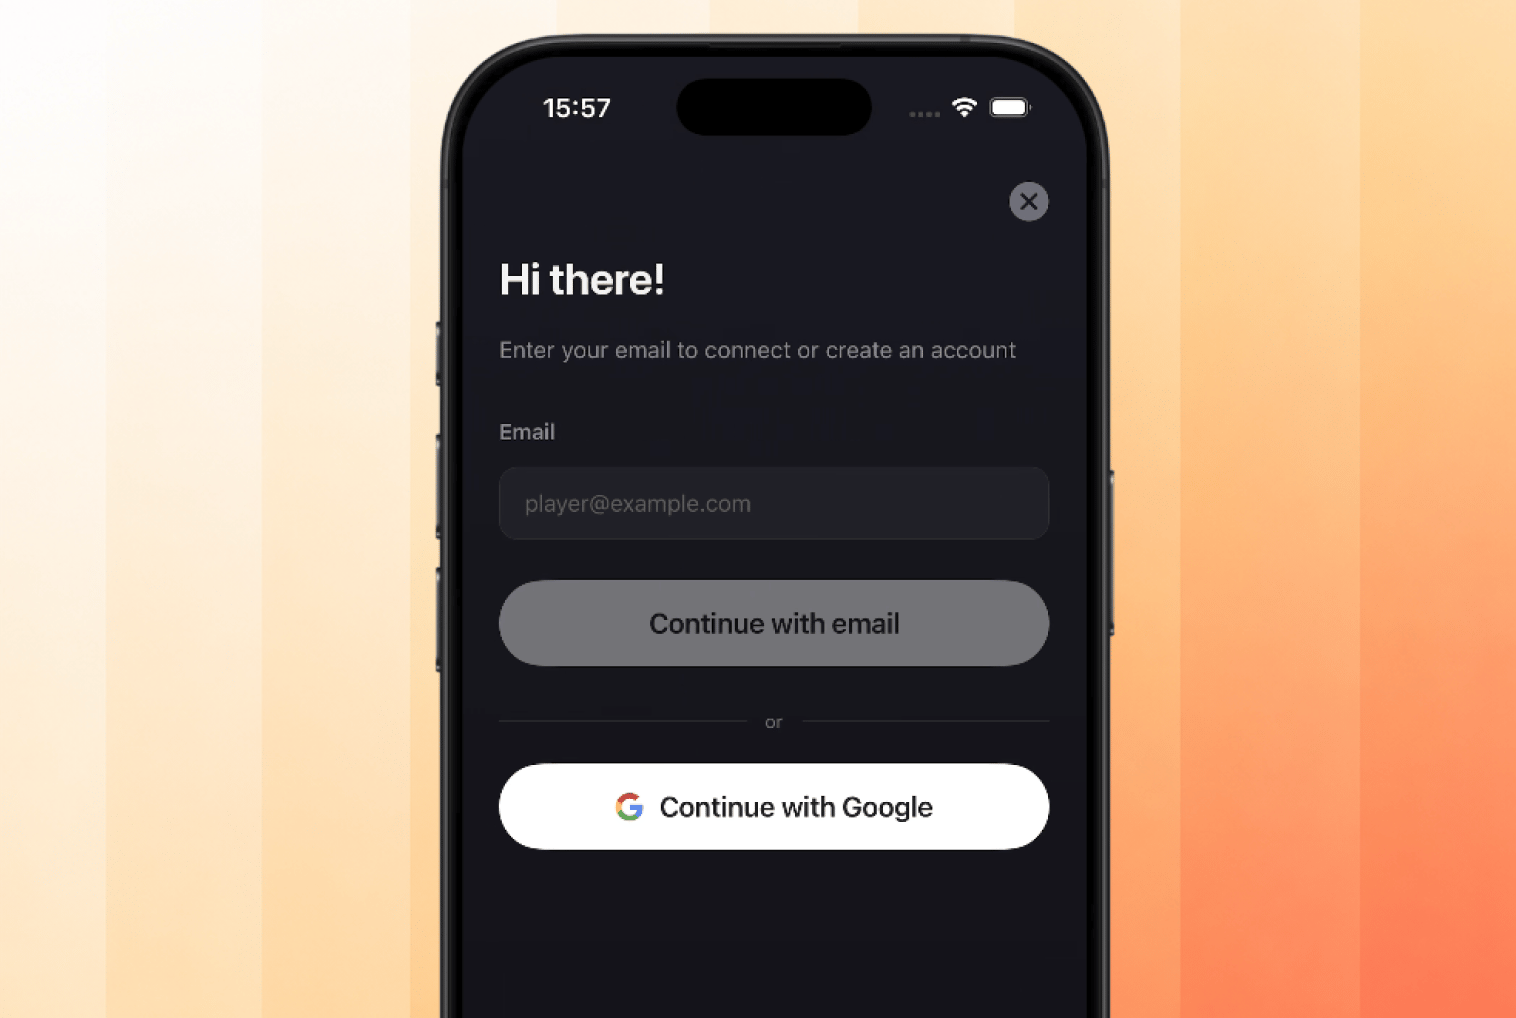
<Frame caption="PixelGames의 Clerk 로그인 화면, 이메일 또는 Google.">
  <img src="https://mintcdn.com/replit/WuaQIOfW5oxRlxex/images/pixelgames/mobile/mobile-signin.png?fit=max&auto=format&n=WuaQIOfW5oxRlxex&q=85&s=f8e1a438d8295ae53f75638579f5b5e9" alt="Continue with email과 Continue with Google이 있는 PixelGames 로그인 모달" data-path="images/pixelgames/mobile/mobile-signin.png" width="1516" height="1018" data-path="images/pixelgames/mobile/mobile-signin.png" />
</Frame>

## Sign in with Apple 추가하기

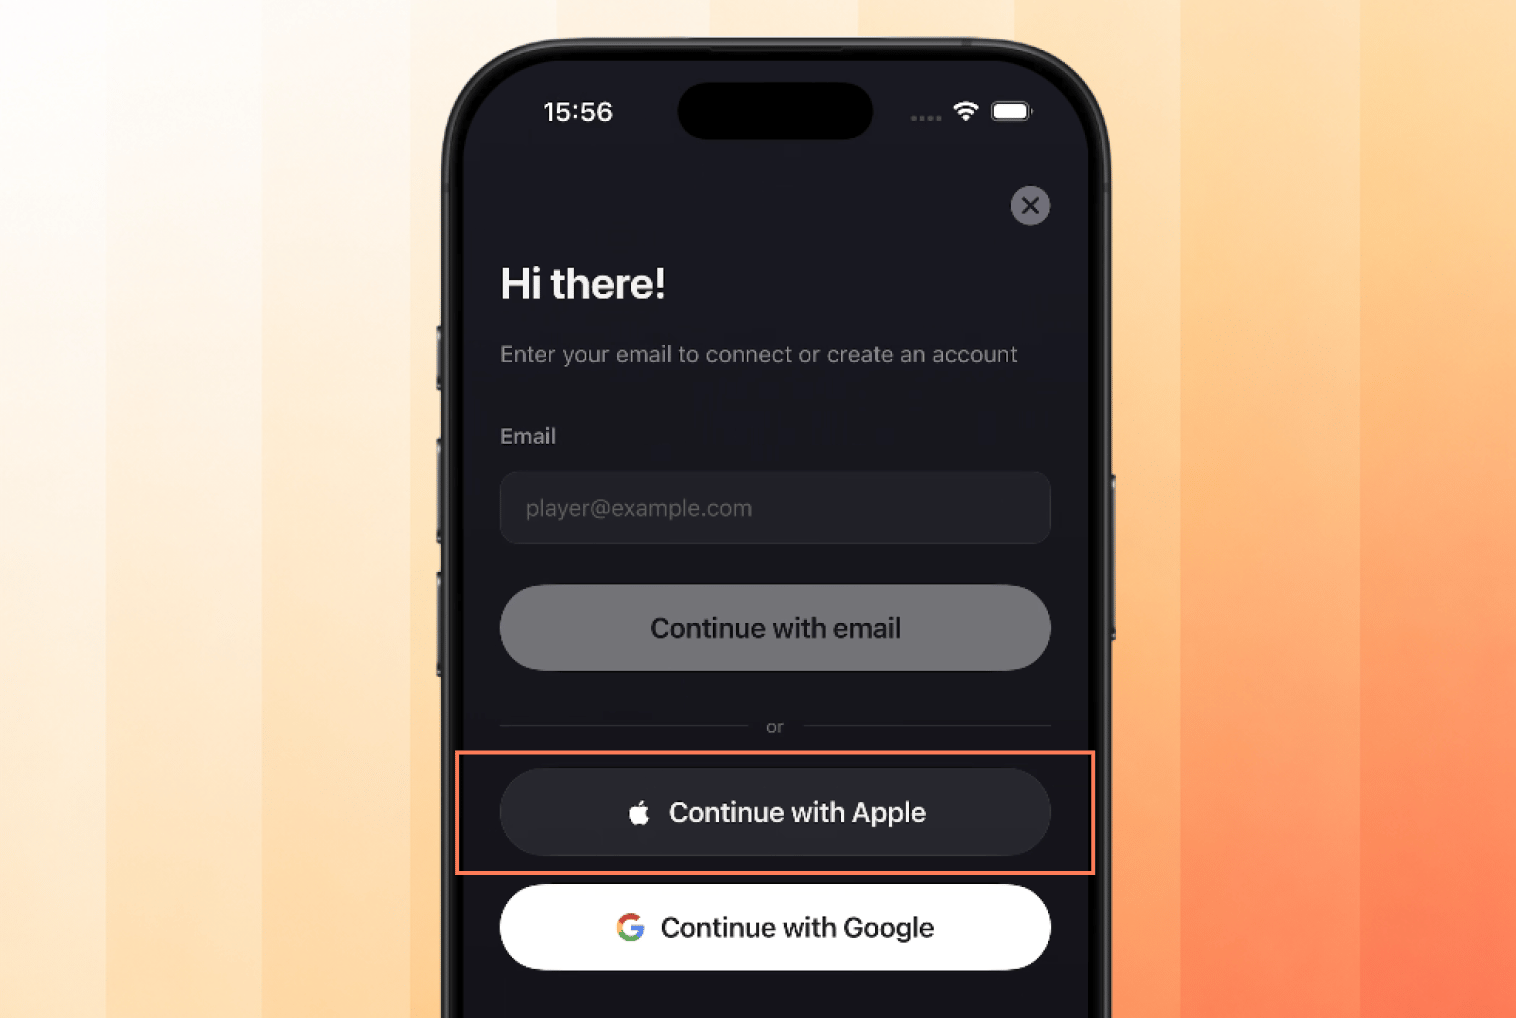
Apple의 App Store 심사에서는 Google과 같은 다른 소셜 로그인을 제공할 때마다 **Sign in with
Apple**을 동등한 옵션으로 제공하도록 요구하지만, iOS에서만 그렇습니다. Android에는 이러한
요구사항이 없습니다.
<AiPrompt>
  {appleSignInPrompt}
</AiPrompt>

<Frame caption="이메일 및 Google과 함께 추가된 Sign in with Apple, iOS 전용.">
  <img src="https://mintcdn.com/replit/WuaQIOfW5oxRlxex/images/pixelgames/mobile/apple-mobile-signin.png?fit=max&auto=format&n=WuaQIOfW5oxRlxex&q=85&s=4e16862df7d8a1e2aa2454cc5d43793d" alt="Continue with Google 위에 Continue with Apple이 추가된 PixelGames 로그인 모달" data-path="images/pixelgames/mobile/apple-mobile-signin.png" width="1516" height="1018" data-path="images/pixelgames/mobile/apple-mobile-signin.png" />
</Frame>

## 제공자 활성화하기

코드에 제공자를 추가하는 것만으로는 충분하지 않으며, 각 제공자를 앱의 인증 설정에서도 켜야
합니다. **Users & Auth → Configure → SSO providers → Production**을 열고 **Google**과
**Apple** 모두 Enabled로 표시되는지 확인하세요.
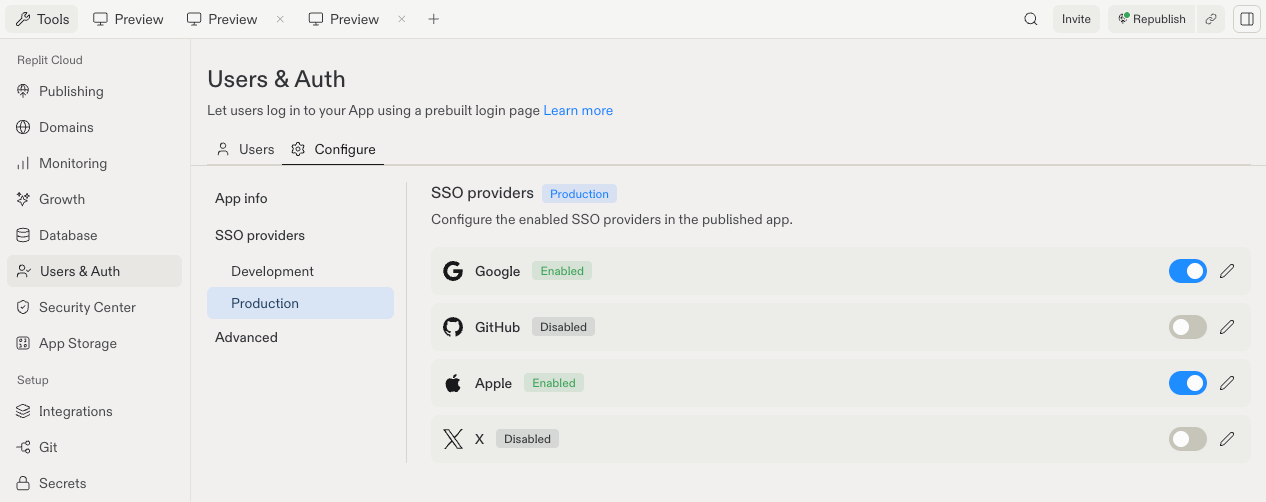
<Frame caption="Production 환경의 SSO providers에서 Google과 Apple이 활성화됨.">
  <img src="https://mintcdn.com/replit/wpDFPJulnZRpqmW6/images/pixelgames/mobile/sso-provider.png?fit=max&auto=format&n=wpDFPJulnZRpqmW6&q=85&s=815934835068ed80b4654da147285d29" alt="Google과 Apple이 활성화된 SSO providers를 보여주는 Replit Users and Auth 패널" data-path="images/pixelgames/mobile/sso-provider.png" width="1266" height="502" data-path="images/pixelgames/mobile/sso-provider.png" />
</Frame>

<Note>
  **Development**와 **Production**은 각각 별도의 제공자 목록을 가집니다. 한쪽을 활성화해도
  다른 쪽은 활성화되지 않으므로, 게시하기 전에 Production을 확인하세요.
</Note>

## 테스트하기

계정 하나로는 부족합니다. PixelGames가 플레이어를 구별한다는 것을 증명하려면 두 개가
필요합니다.

1. 로그인하지 않고 한 라운드를 플레이하세요. PixelGames는 계속 작동해야 합니다.
2. 자신의 계정으로 로그인하세요.
3. 로그아웃한 다음 다른 계정으로 로그인하고, 첫 번째 계정이 아닌 별도의 세션에 있는지
   확인하세요.
4. 첫 번째 계정으로 다시 로그인하고 해당 계정으로 돌아오는지 확인하세요.
5. iOS에서는 **Continue with Apple**이 Google 위에 표시되는지 확인하세요. Android에서는
   전혀 표시되지 않는지 확인하세요.

## 다음 단계

<CardGroup cols={2}>
  <Card title="모바일 앱에서 이미지 저장하기" icon="image" href="/ko/build/mobile-store-images">
    플레이어가 로그인하면 프로필 사진을 저장해보세요.
  </Card>

  <Card title="네이티브 기기 기능 추가하기" icon="camera" href="/ko/build/mobile-camera">
    PixelGames에 더 많은 기능을 추가해보세요.
  </Card>
</CardGroup>

## 관련 항목

* [모바일 앱에서 이미지 저장하기](/ko/build/mobile-store-images)
* [인앱 결제 추가하기](/ko/build/mobile-payments)
* [로그인 제공자 설정하기](/features/auth-and-identity/sign-in-providers)
