> ## Documentation Index
> Fetch the complete documentation index at: https://docs.replit.com/llms.txt
> Use this file to discover all available pages before exploring further.
# 랜딩 페이지 만들기
> 하나의 명확한 제안, 하나의 행동 유도, 반응을 수집하는 동작하는 양식으로 랜딩 페이지를 빌드하고 게시하세요.
export const PromptActions = ({prompt = "", campaign = "docs-prompt-actions"}) => {
const LZ_SRC = "https://cdnjs.cloudflare.com/ajax/libs/lz-string/1.5.0/lz-string.min.js";
const ensureLZString = () => {
if (typeof document === "undefined") return;
if (window.LZString) return;
if (document.querySelector(`script[src="${LZ_SRC}"]`)) return;
const s = document.createElement("script");
s.src = LZ_SRC;
s.async = true;
document.head.appendChild(s);
};
const handleCopy = async e => {
const btn = e.currentTarget;
if (!prompt) return;
try {
await navigator.clipboard.writeText(prompt);
} catch {
const ta = document.createElement("textarea");
ta.value = prompt;
document.body.appendChild(ta);
ta.select();
try {
document.execCommand("copy");
} catch {}
document.body.removeChild(ta);
}
const original = btn.dataset.label || btn.innerText;
btn.dataset.label = original;
btn.innerText = "Copied!";
setTimeout(() => {
if (btn.isConnected) btn.innerText = original;
}, 1500);
};
const handleBuild = () => {
if (!prompt || typeof window === "undefined") return;
const utm = `utm_source=replit-docs&utm_medium=docs&utm_campaign=${encodeURIComponent(campaign)}&utm_content=prompt-actions`;
let url;
if (window.LZString) {
const encoded = window.LZString.compressToEncodedURIComponent(prompt);
url = `https://replit.com/?prompt=${encoded}&referrer=replit-docs&${utm}`;
} else {
url = `https://replit.com/?prompt=${encodeURIComponent(prompt)}&referrer=replit-docs&${utm}`;
}
window.open(url, "_blank", "noopener,noreferrer");
};
ensureLZString();
const baseButtonStyle = {
display: "inline-flex",
alignItems: "center",
gap: "6px",
padding: "8px 16px",
borderRadius: "8px",
fontSize: "14px",
fontWeight: 500,
cursor: "pointer",
lineHeight: 1.2,
fontFamily: "inherit",
textDecoration: "none"
};
return
;
};
export const RACHEL_JONES_PROMPT = `Build me a one-page website for an online fitness coach named Rachel Jones. It should feel premium, like a magazine ad — dark, moody, and luxurious, with black and warm gold as the only colors. Big bold headlines, lots of empty space, and elegant serif accents. No bright colors, no rounded "tech startup" vibes.
Here's what should be on the page, top to bottom:
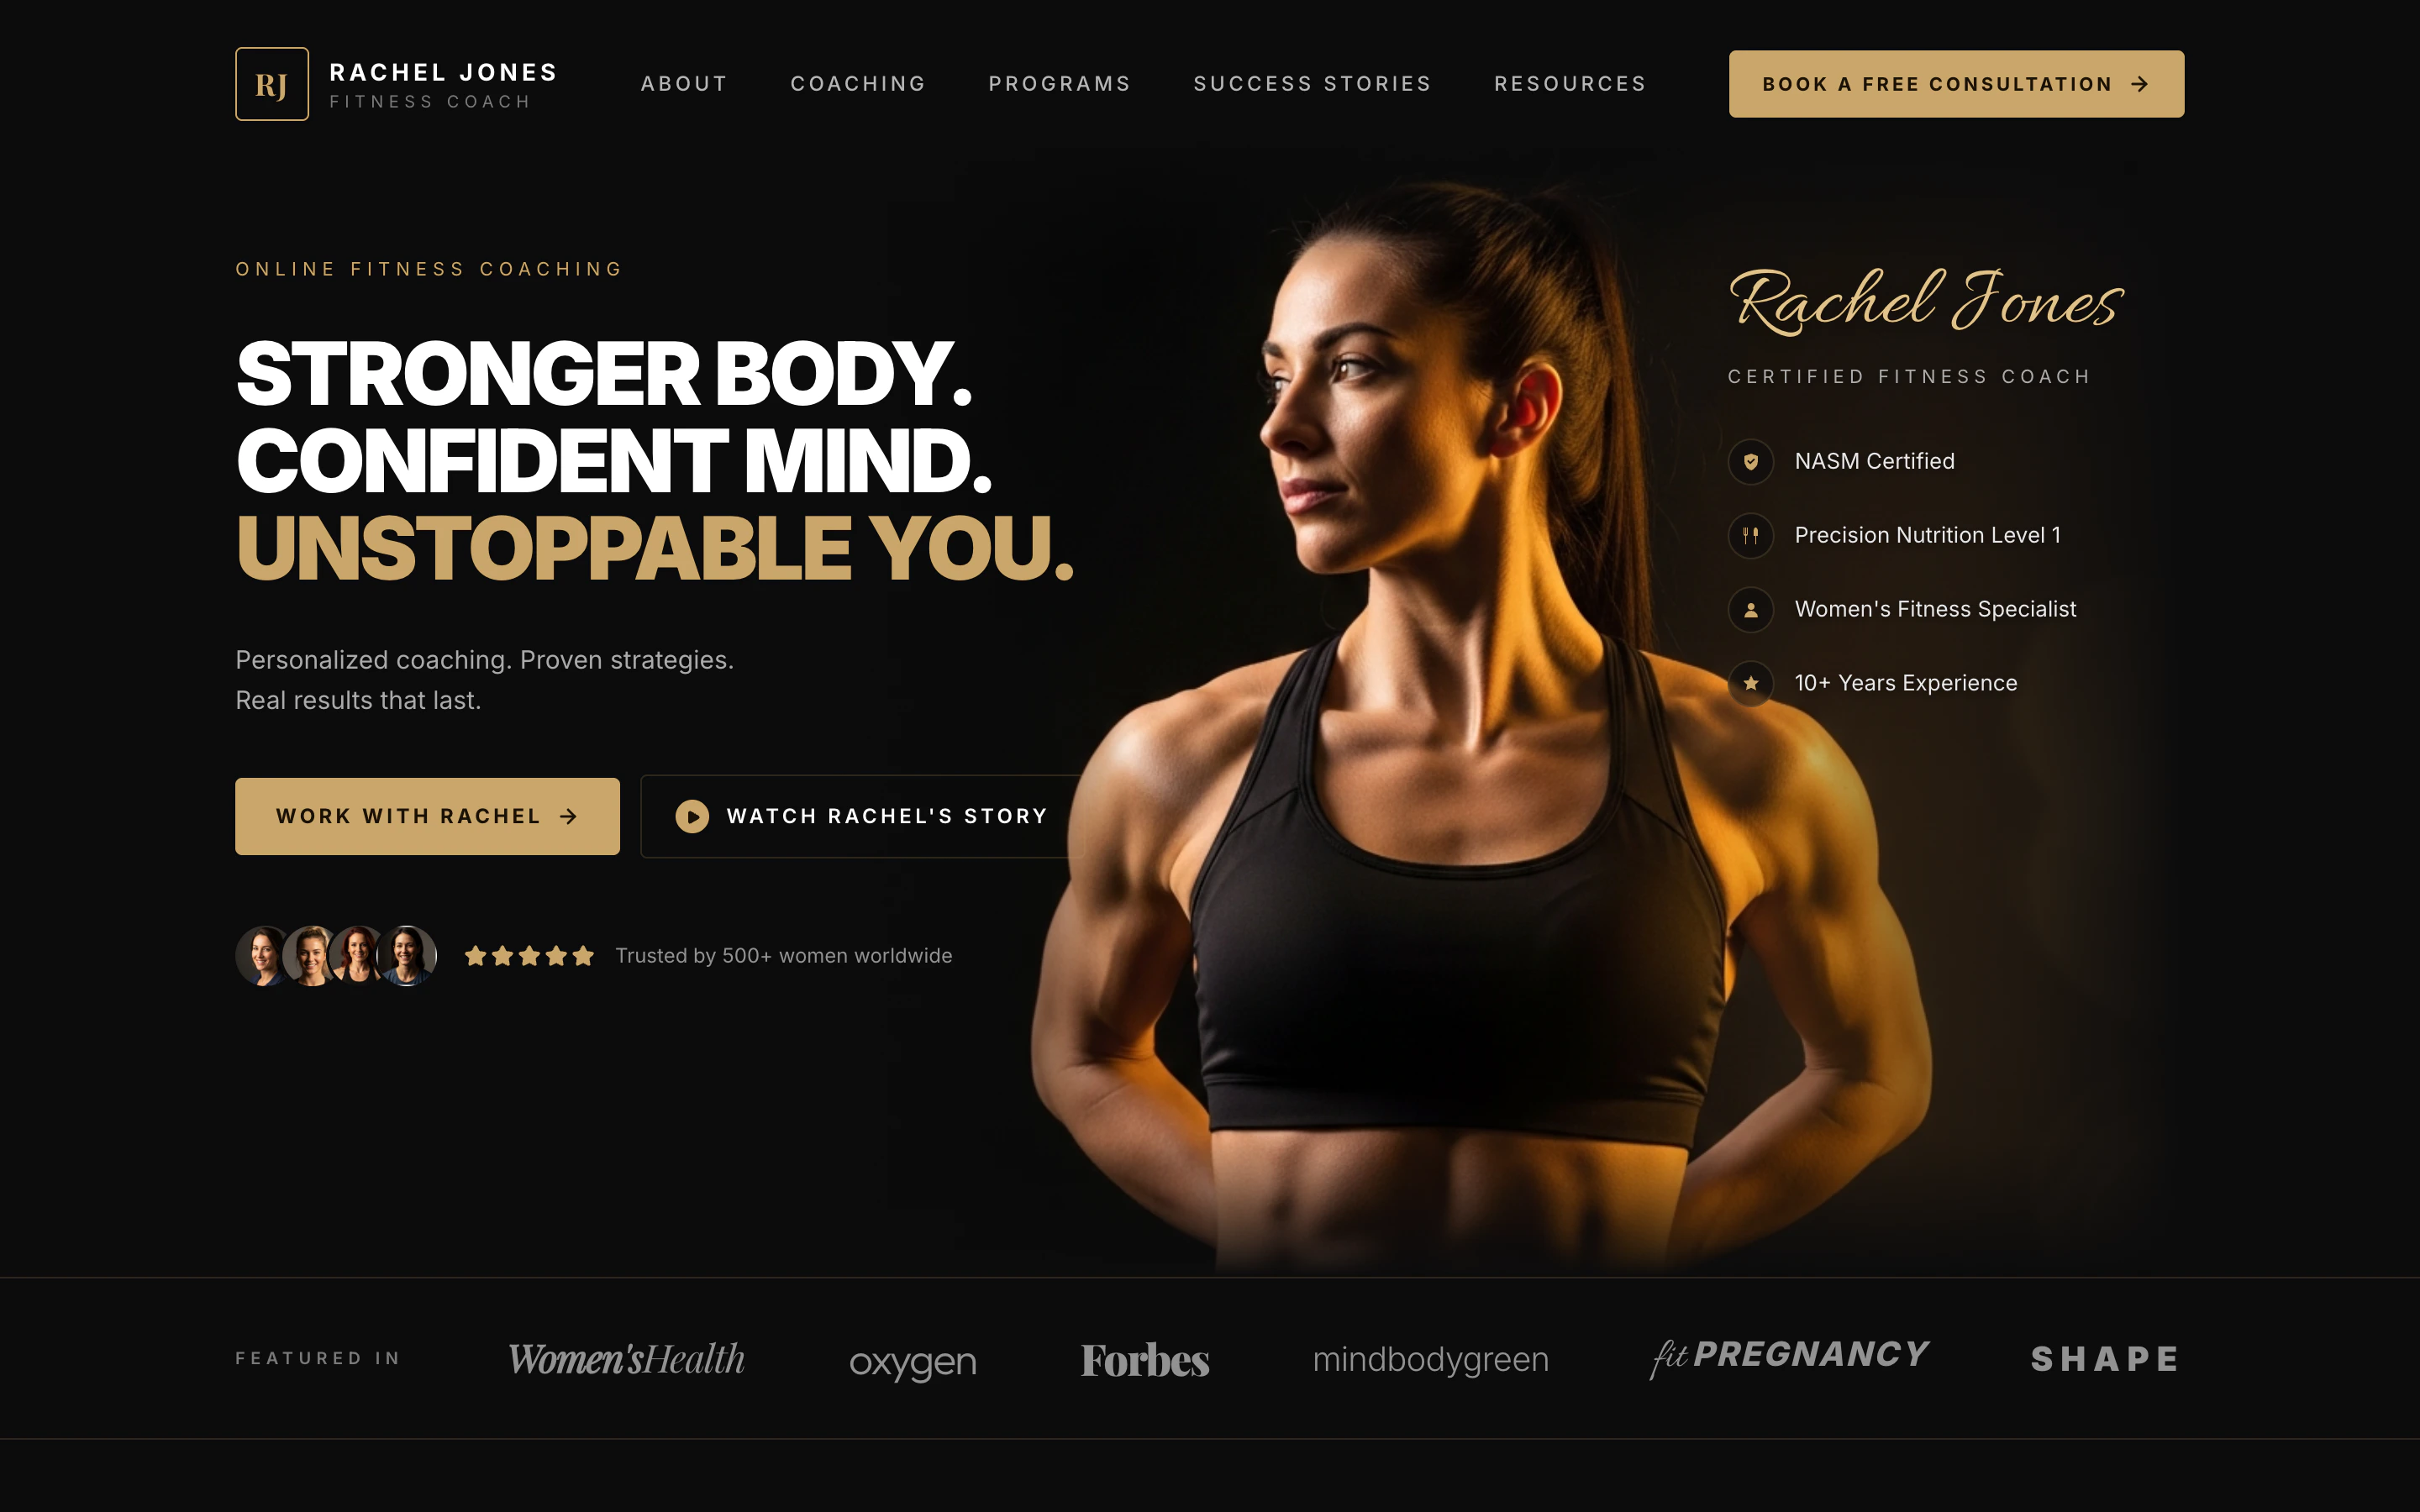
A header bar with a small gold "RJ" logo on the left, the words "RACHEL JONES — FITNESS COACH" next to it, a few menu links across the middle (About, Coaching, Programs, Success Stories, Resources), and a gold "Book a Free Consultation" button on the right.
A huge hero section with a dramatic close-up photo of a strong, fit woman lit with warm gold light against a black background. On the left side over the dark area, put a giant three-line headline:
"STRONGER BODY. CONFIDENT MIND. UNSTOPPABLE YOU." — with the last line in gold.
Underneath: "Personalized coaching. Proven strategies. Real results that last." Then two buttons: a gold "Work With Rachel" and an outlined "Watch Rachel's Story" with a play icon. Below that, show 4 little circular client photos and 5 gold stars with the line "Trusted by 500+ women worldwide."
On the right side, layered on the photo, write "Rachel Jones" in a fancy gold script font, with "CERTIFIED FITNESS COACH" underneath, and a list of credentials with little gold icons: NASM Certified, Precision Nutrition Level 1, Women's Fitness Specialist, 10+ Years Experience.
A "Featured In" strip — a thin row showing fake magazine logos written in different fancy fonts: Women's Health, Oxygen, Forbes, mindbodygreen, Fit Pregnancy, Shape.
A "Holistic Approach" section — centered headline "A Holistic Approach. Real Results." in an elegant serif. Below it, four columns side by side, each with a small gold icon, a title, and a one-line description: Custom Training, Nutrition Guidance, Mindset Coaching, Accountability.
A "Success Stories" section — on the left, the headline "Stronger on the Outside. Stronger on the Inside." with a "See More Success Stories" button. On the right, three before/after transformation photos of women, each with a big gold result number underneath ("−24 LBS in 16 weeks", "+18 LBS of muscle", "−20% body fat in 14 weeks"), a short italic quote, and the client's first name.
A final call-to-action panel — a wide dark card split into three parts. Left: a friendly portrait of Rachel. Middle: headline "You Don't Need More Motivation. You Need the Right Plan." with a gold "Book Your Free Consultation" button. Right: three small benefits with icons — "1:1 Strategy Call", "Personalized Plan", "Start Your Transformation".
For the photos, generate them — I want a fit woman with warm gold dramatic lighting on a black background, very cinematic. The before/after photos should be full-body in the same dark studio style.
Make it look like a real, professional coaching brand — not a template. Don't add forms, signups, or extra pages — just this one beautiful landing page.`;
랜딩 페이지는 아이디어, 캠페인, 웨이트리스트, 이벤트, 또는 제안에 하나의 집중된 공간을 제공합니다.
## 배울 내용
다음을 배우게 됩니다:
* 대상, 제안, 행동 유도를 페이지로 전환하는 방법.
* 페이지 카피, 레이아웃, 양식 동작을 Agent에게 요청하는 방법.
* 공유하기 전에 페이지가 명확한지 확인하는 방법.
* 게시된 URL에서 양식을 테스트하는 방법.
* 응답 품질을 기반으로 페이지를 개선하는 방법.
## Canvas에서 다듬고 대안 탐색하기
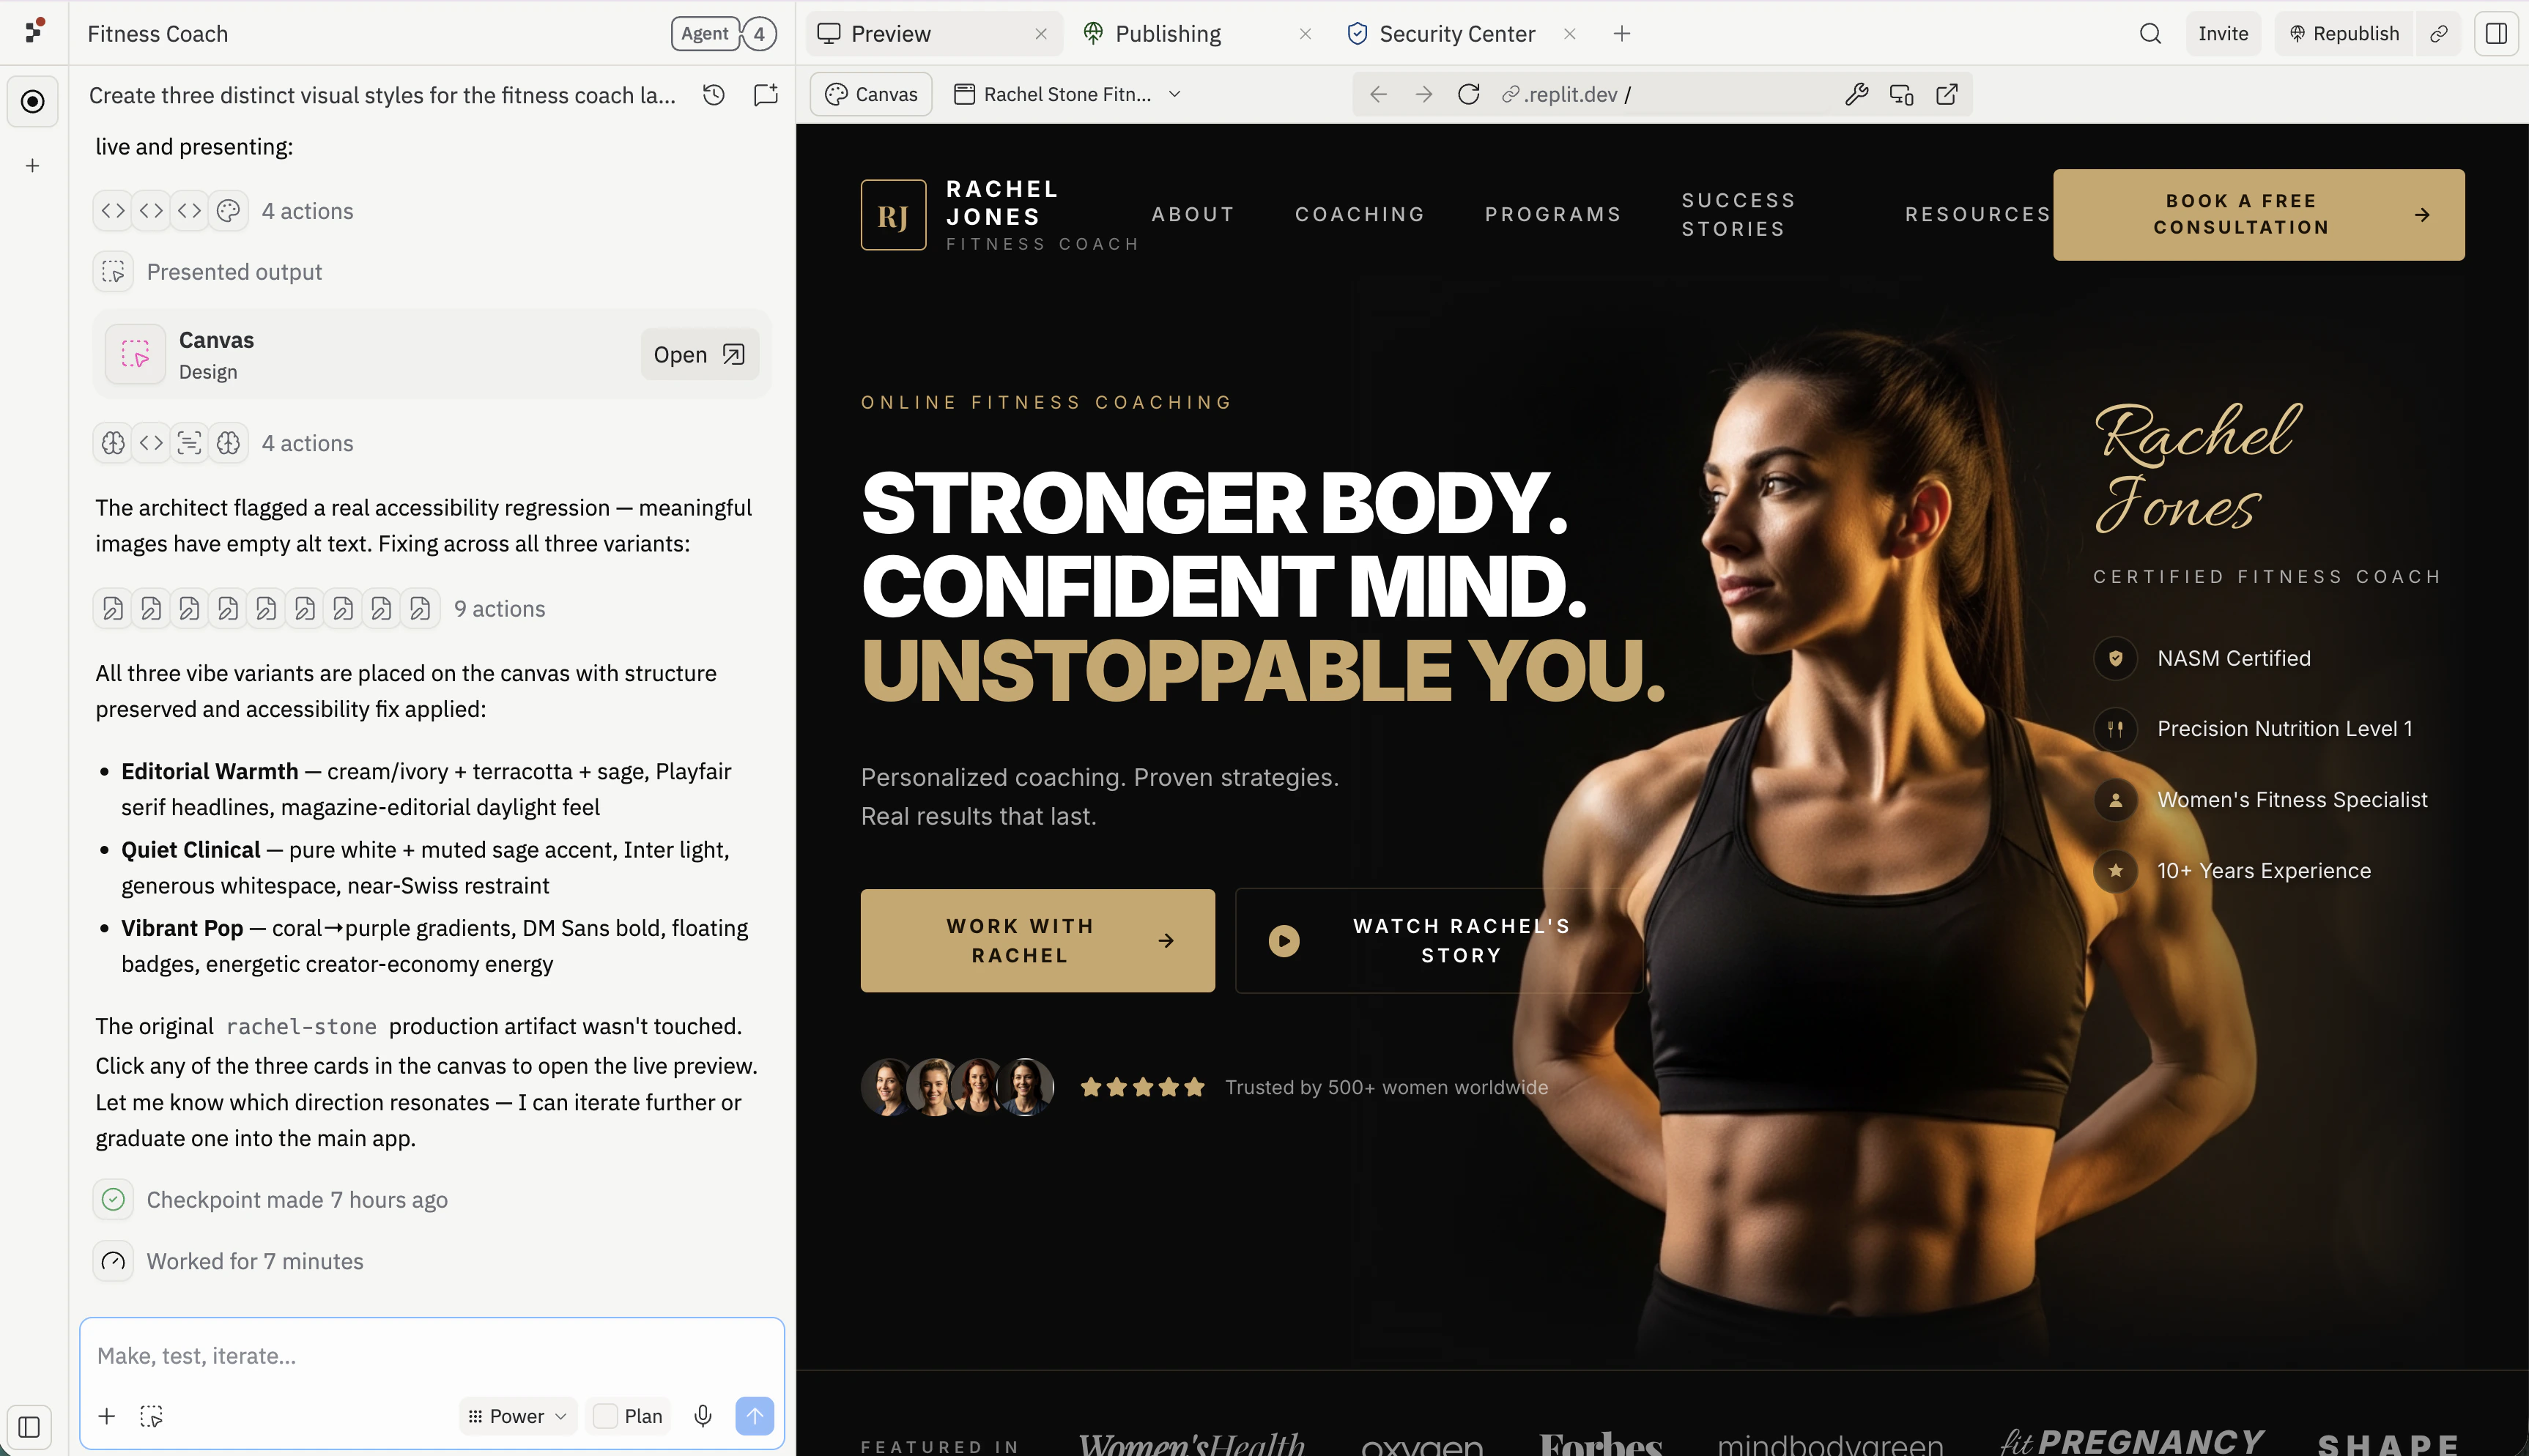
Agent가 첫 번째 빌드를 완료하면, Canvas를 열어 프롬프트를 다시 작성하지 않고도 시각적 피드백을 주고 Agent에게 대안적인 방향을 요청하세요.
프롬프트를 복사하여 [replit.com](https://replit.com)의 프롬프트 박스에 붙여넣거나, **Build on Replit**을 클릭하여 프롬프트가 미리 채워진 상태로 Replit을 여세요.
Agent가 완료되면 오른쪽 창이 **Preview**로 전환되어 랜딩 페이지와 실시간으로 상호 작용할 수 있습니다. 히어로를 스크롤하고, 행동 유도 버튼을 클릭하고, 다듬기 시작하기 전에 카피와 이미지가 요청한 것과 일치하는지 확인하세요.
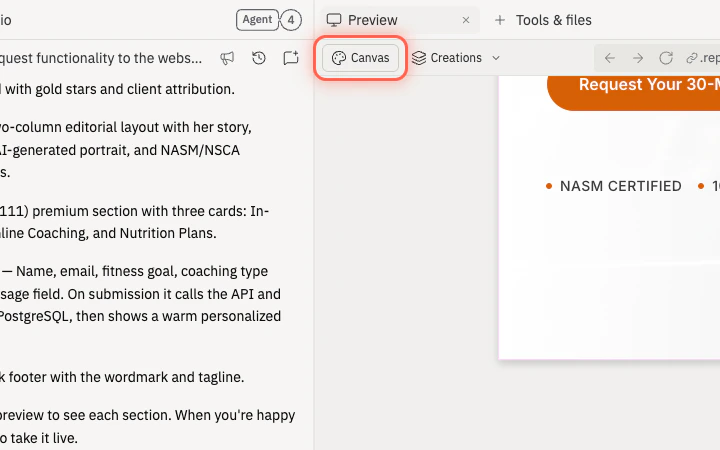
Preview 및 Tools 탭 아래의 **Canvas** 버튼을 선택하여 오른쪽 창을 Preview에서 Canvas로 전환하세요.
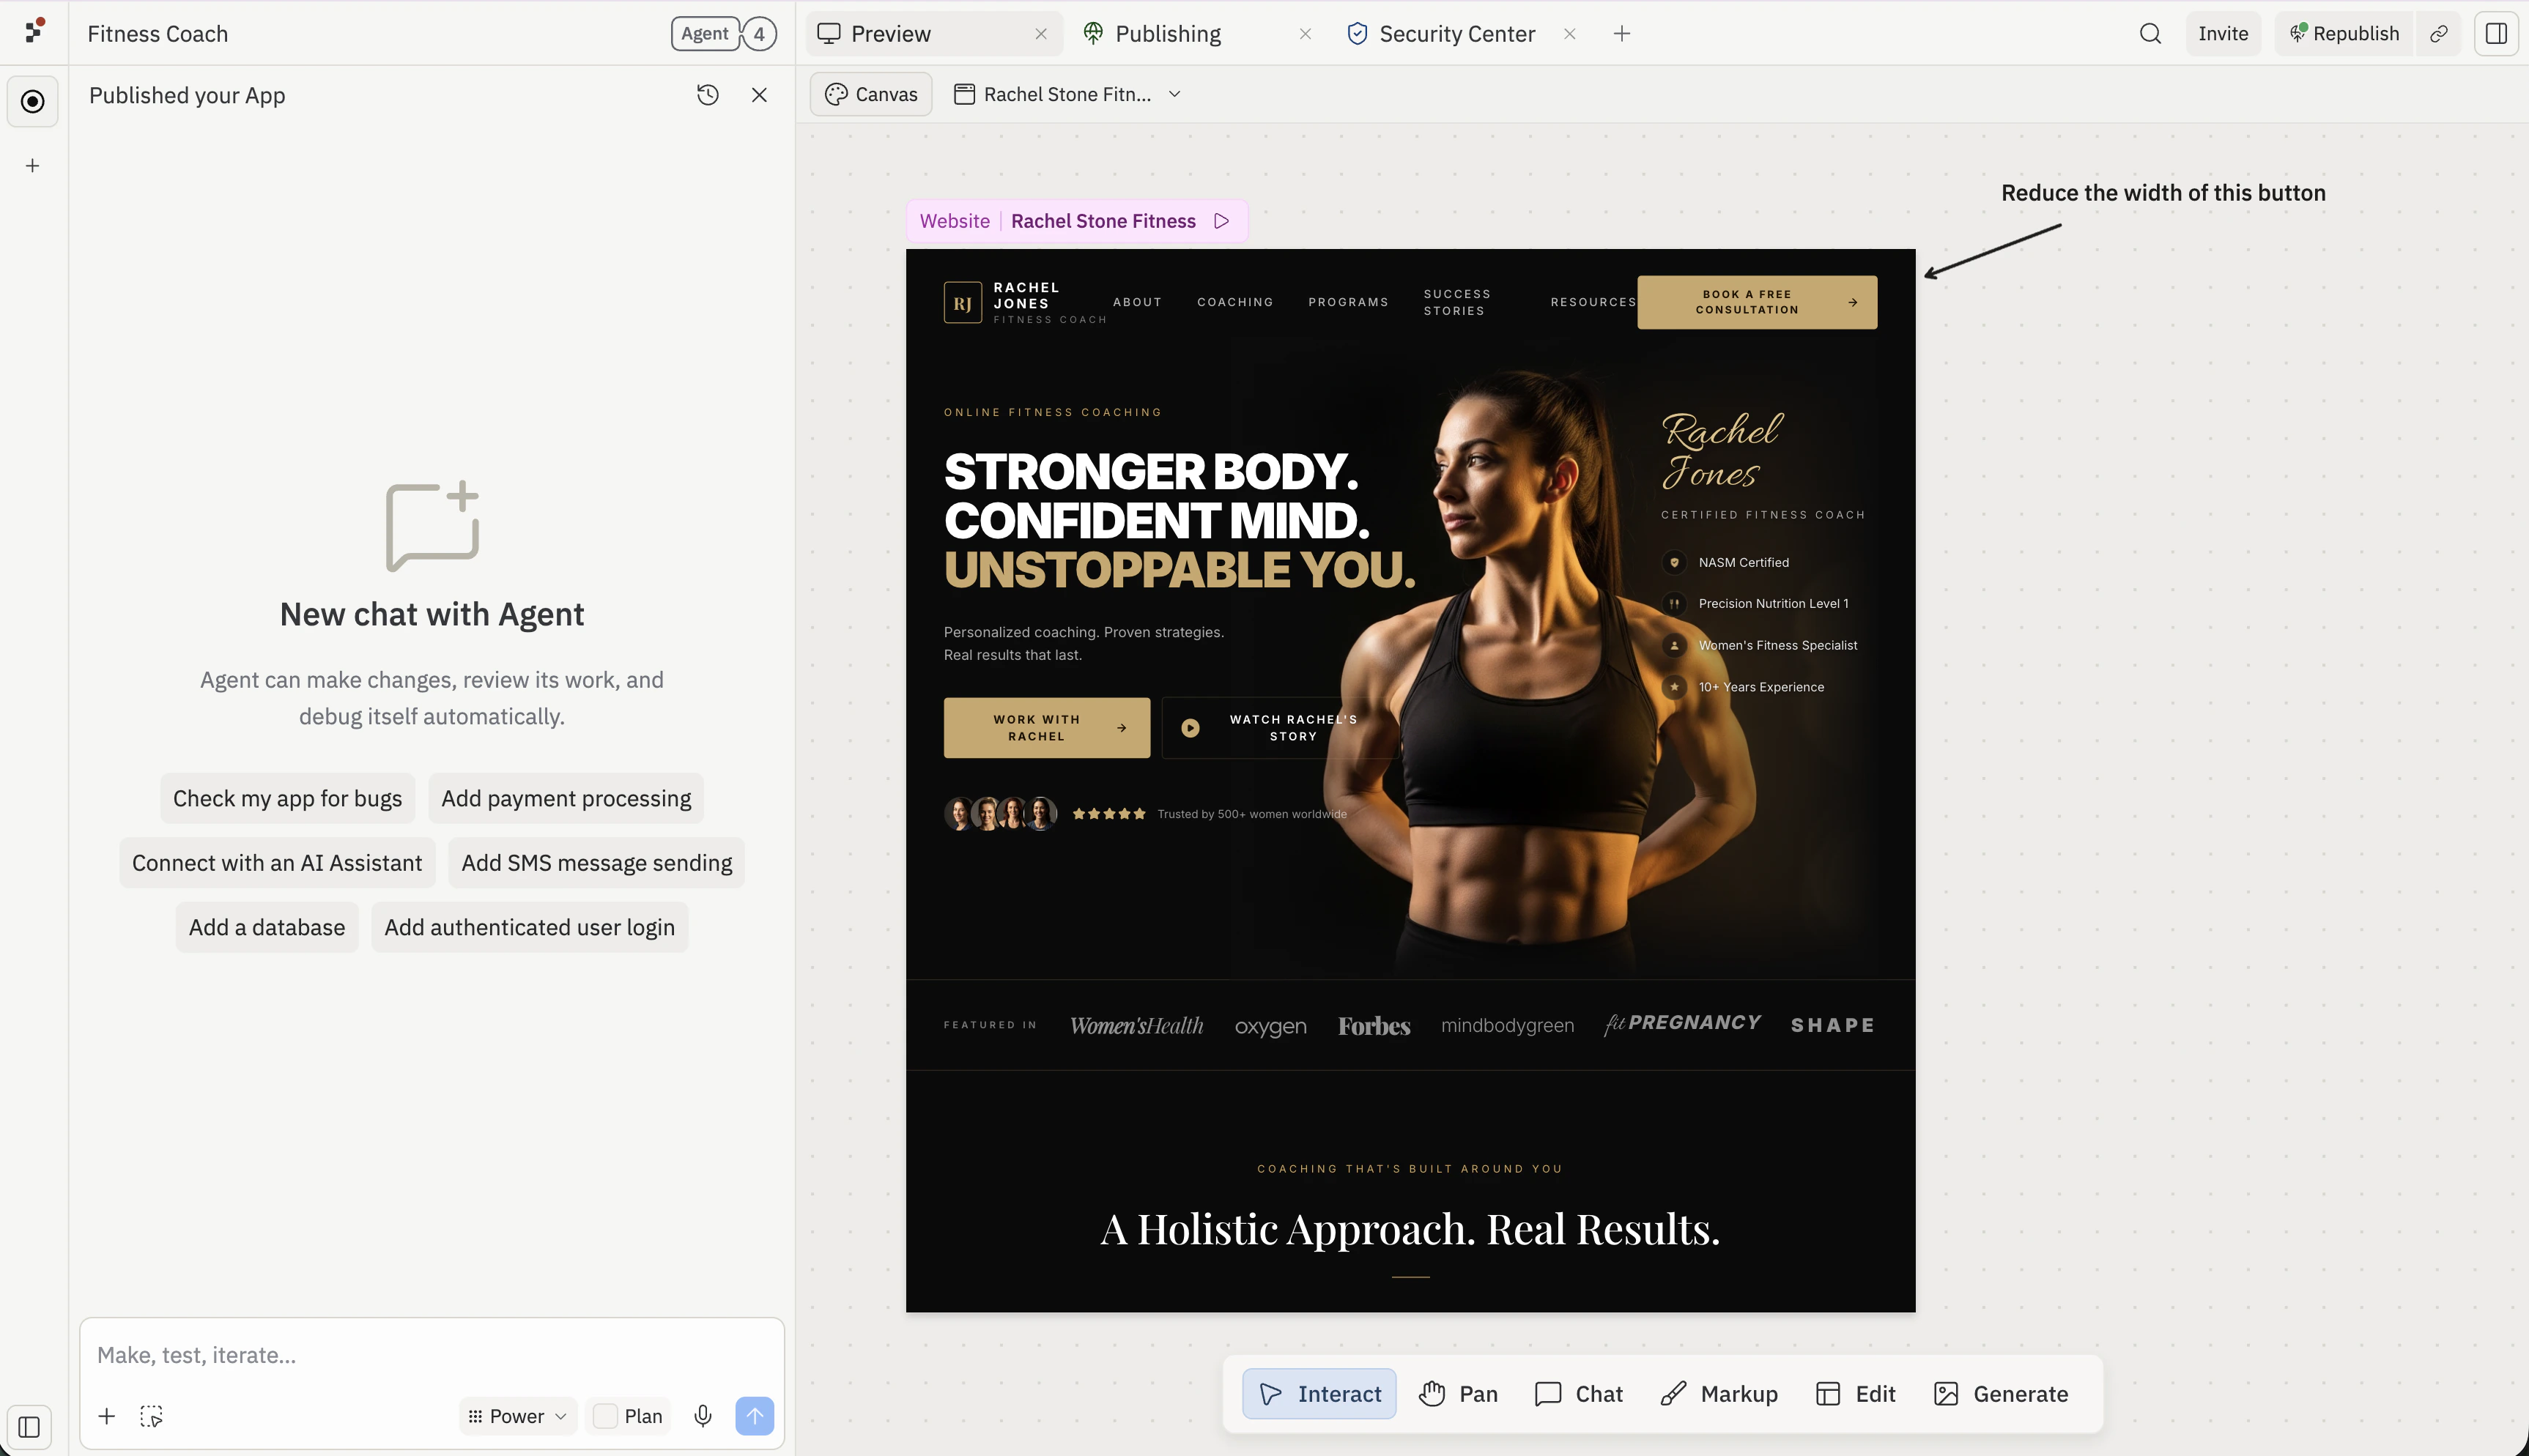
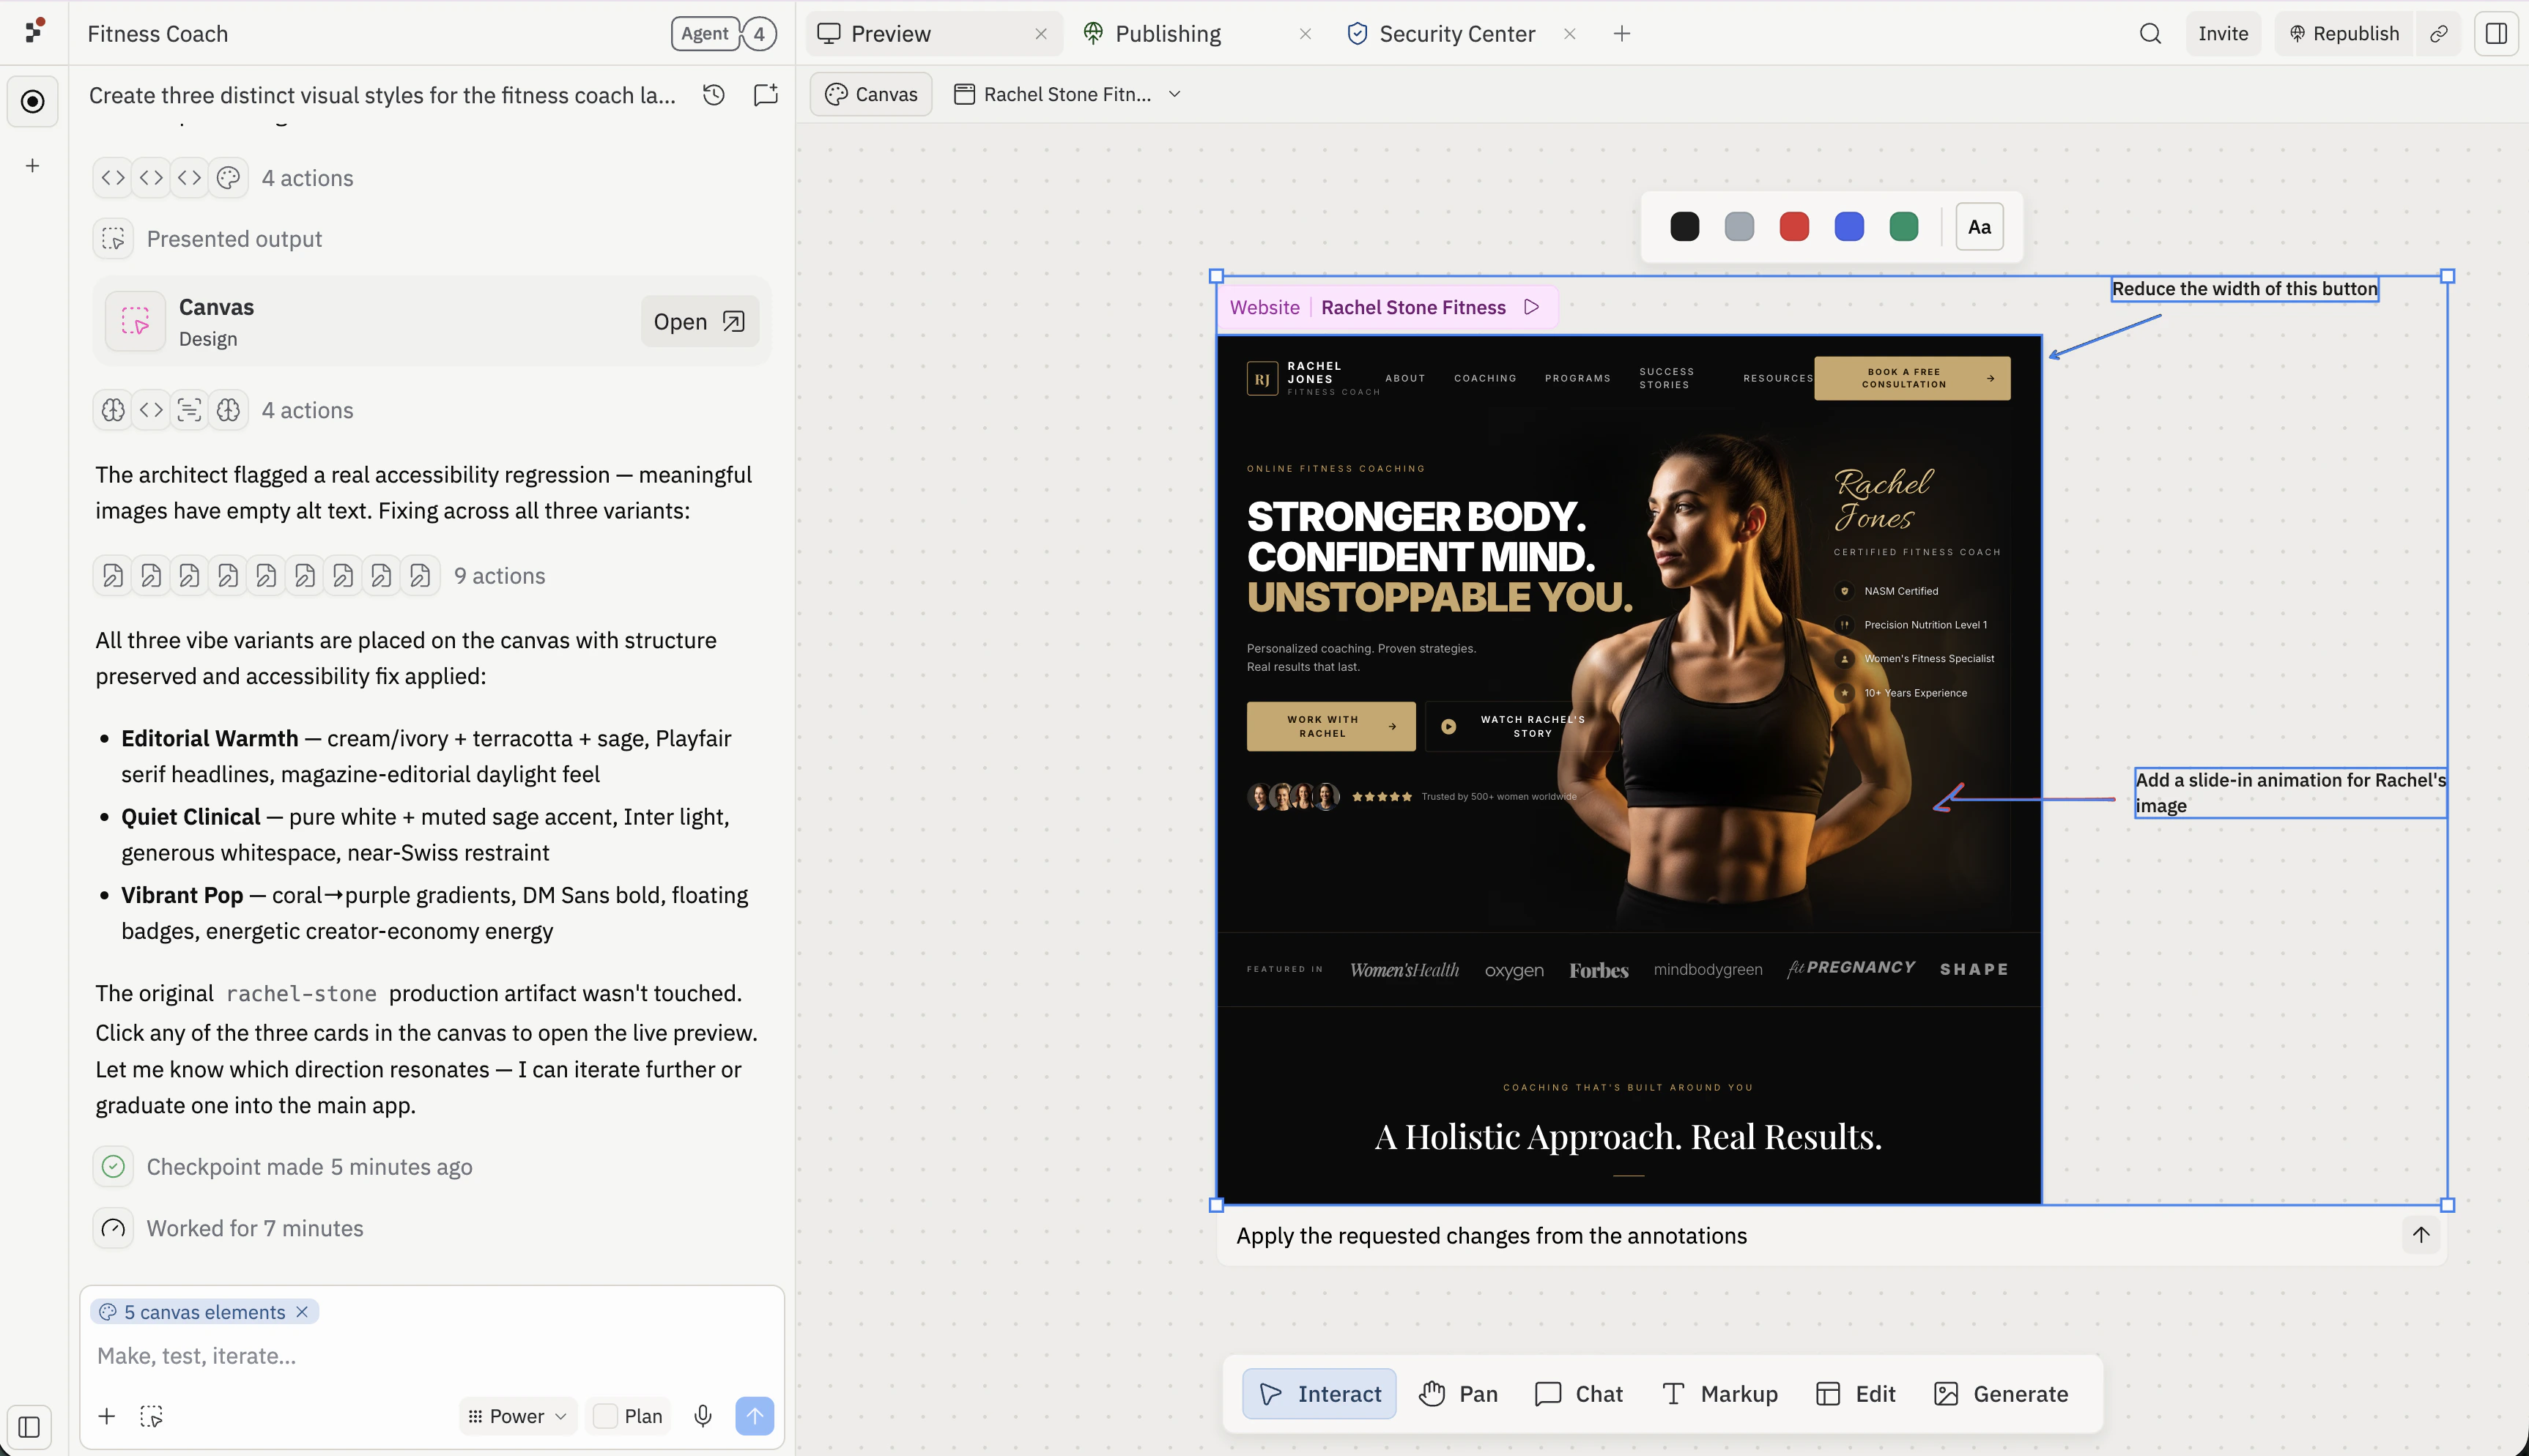
Canvas **Text** 및 **Draw** 도구를 사용하여 목업 주변의 빈 공간에 메모와 화살표를 추가한 다음, Agent가 변경하기를 원하는 특정 요소를 가리키세요. 미리보기 외부 — 캔버스에 배치된 주석은 Agent가 디자인과 함께 읽을 수 있도록 피드백에 연결된 상태로 유지됩니다.
각 주석을 하나의 변경에 집중하세요. 짧고 구체적인 메모("이 버튼의 너비를 줄여줘")가 열린 피드백보다 더 효과적입니다.
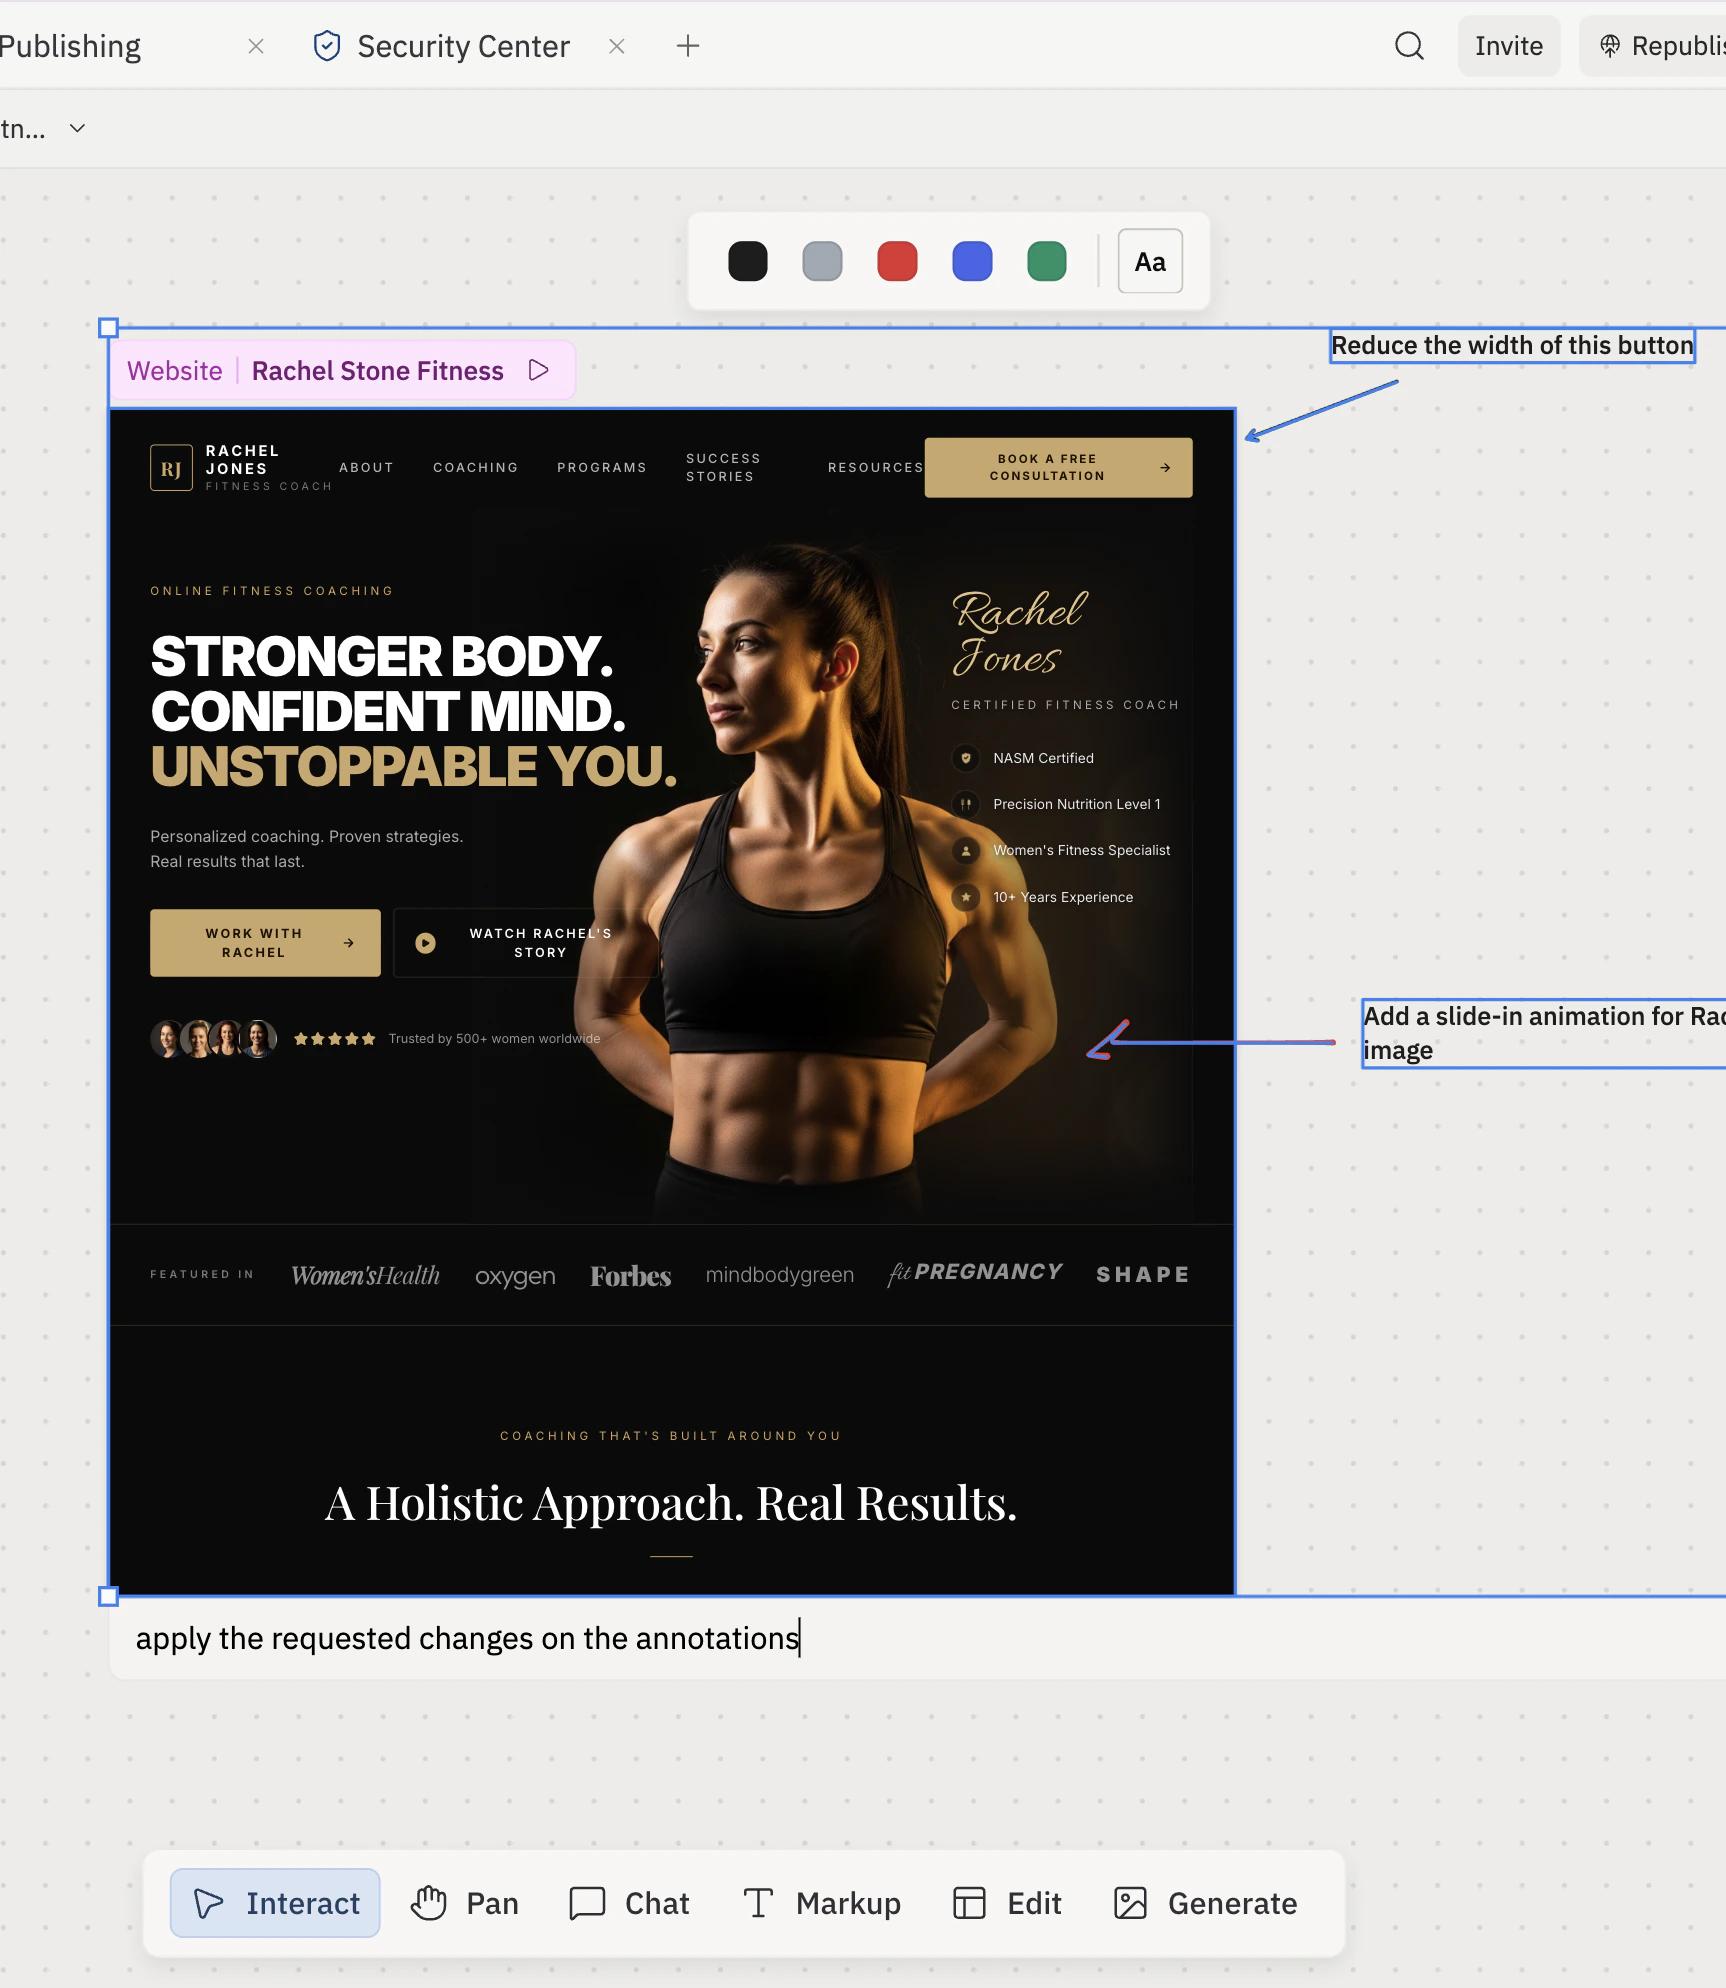
주석을 미리보기 프레임과 함께 마르키 선택하고, **Chat about selected items**에 짧은 프롬프트를 입력하여 보내세요. Agent는 주석과 디자인을 하나의 맥락으로 읽으므로, 각 메모가 어떤 요소를 가리키는지 알 수 있습니다.
채팅 메시지를 일반적으로 유지하세요 — "주석에서 변경 사항을 적용해줘." 같은 내용으로. 구체적인 내용은 주석에 담으세요.
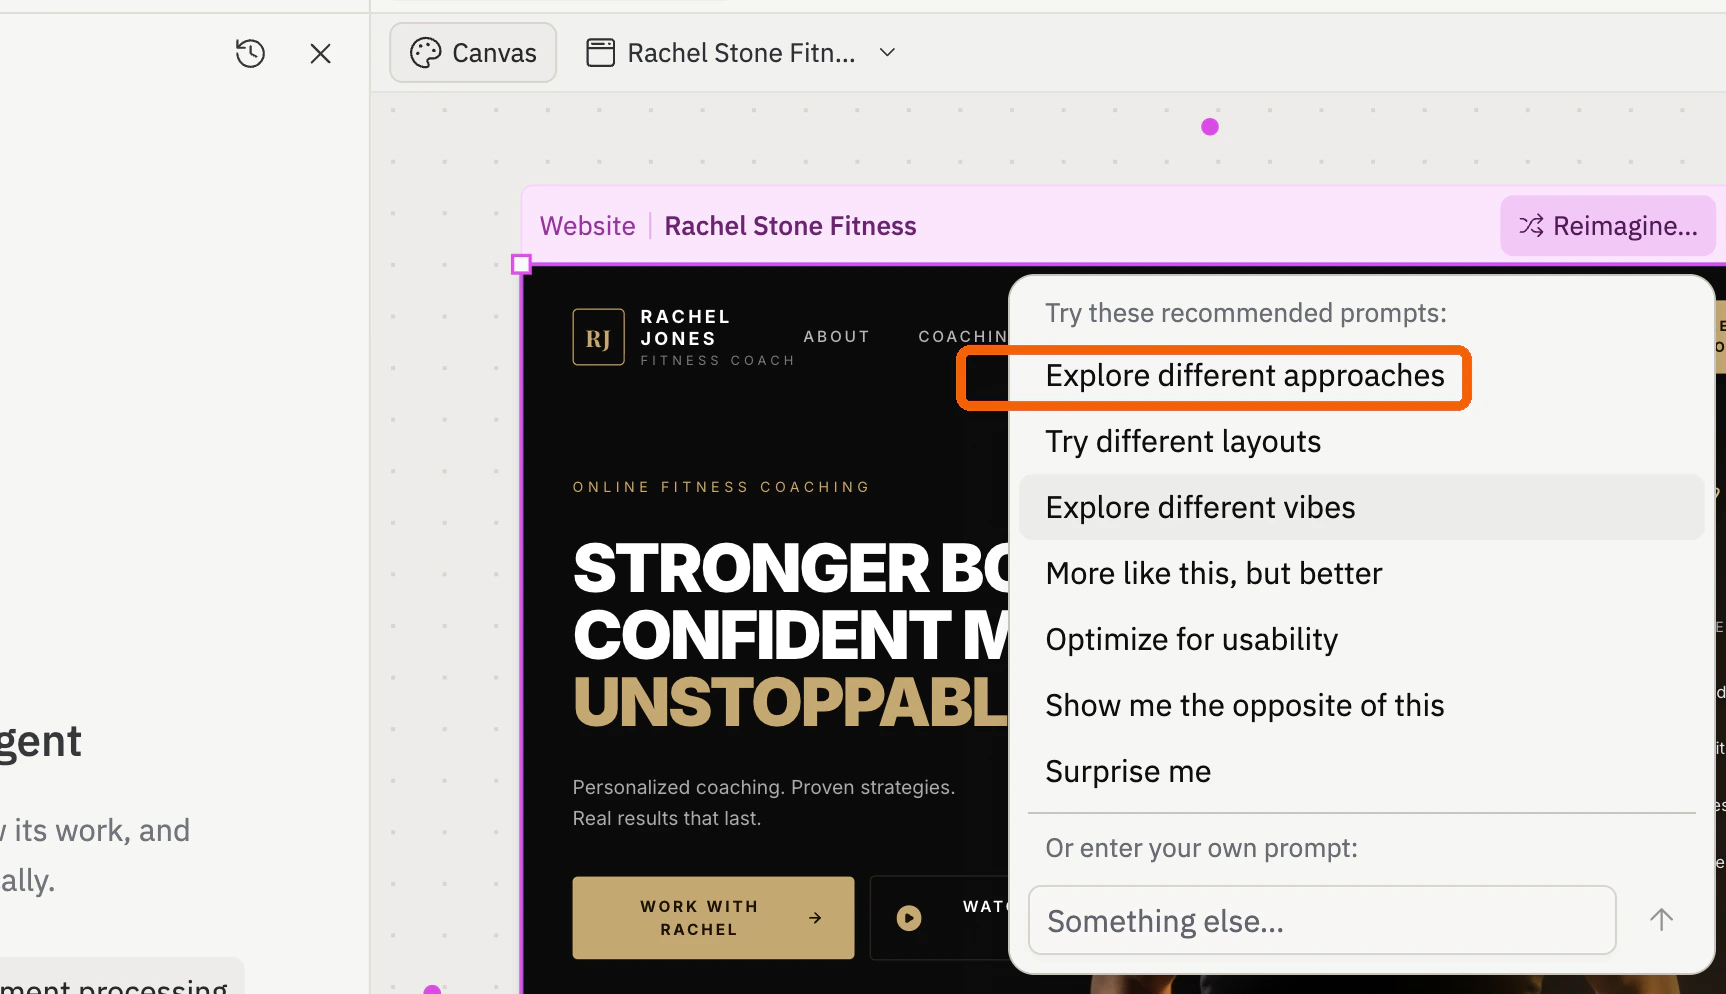
Canvas에서 디자인을 클릭하고, **Reimagine**을 선택한 다음, **Explore different approaches**를 선택하여 Agent에게 대안적인 시각적 방향을 요청하세요.
Agent가 생성을 마칠 때까지 기다리세요. **Explore different approaches**는 새로운 변형으로 동일한 아티팩트를 업데이트합니다 — 목업 위의 아티팩트 드롭다운에서 전환하세요. **Explore different vibes**는 원본 옆에 캔버스에 나타나는 별도의 시각적 목업을 생성합니다.
변형이 나타나면 방향을 선택하고 계속 반복하세요. 선택한 프레임에 또 다른 주석을 추가하고, 디자인과 함께 마르키 선택하고, 새 요청을 보내세요 — 예: "주석에서 요청한 변경 사항을 적용해줘." Agent는 변형 맥락과 새 주석을 하나의 프롬프트로 사용합니다.
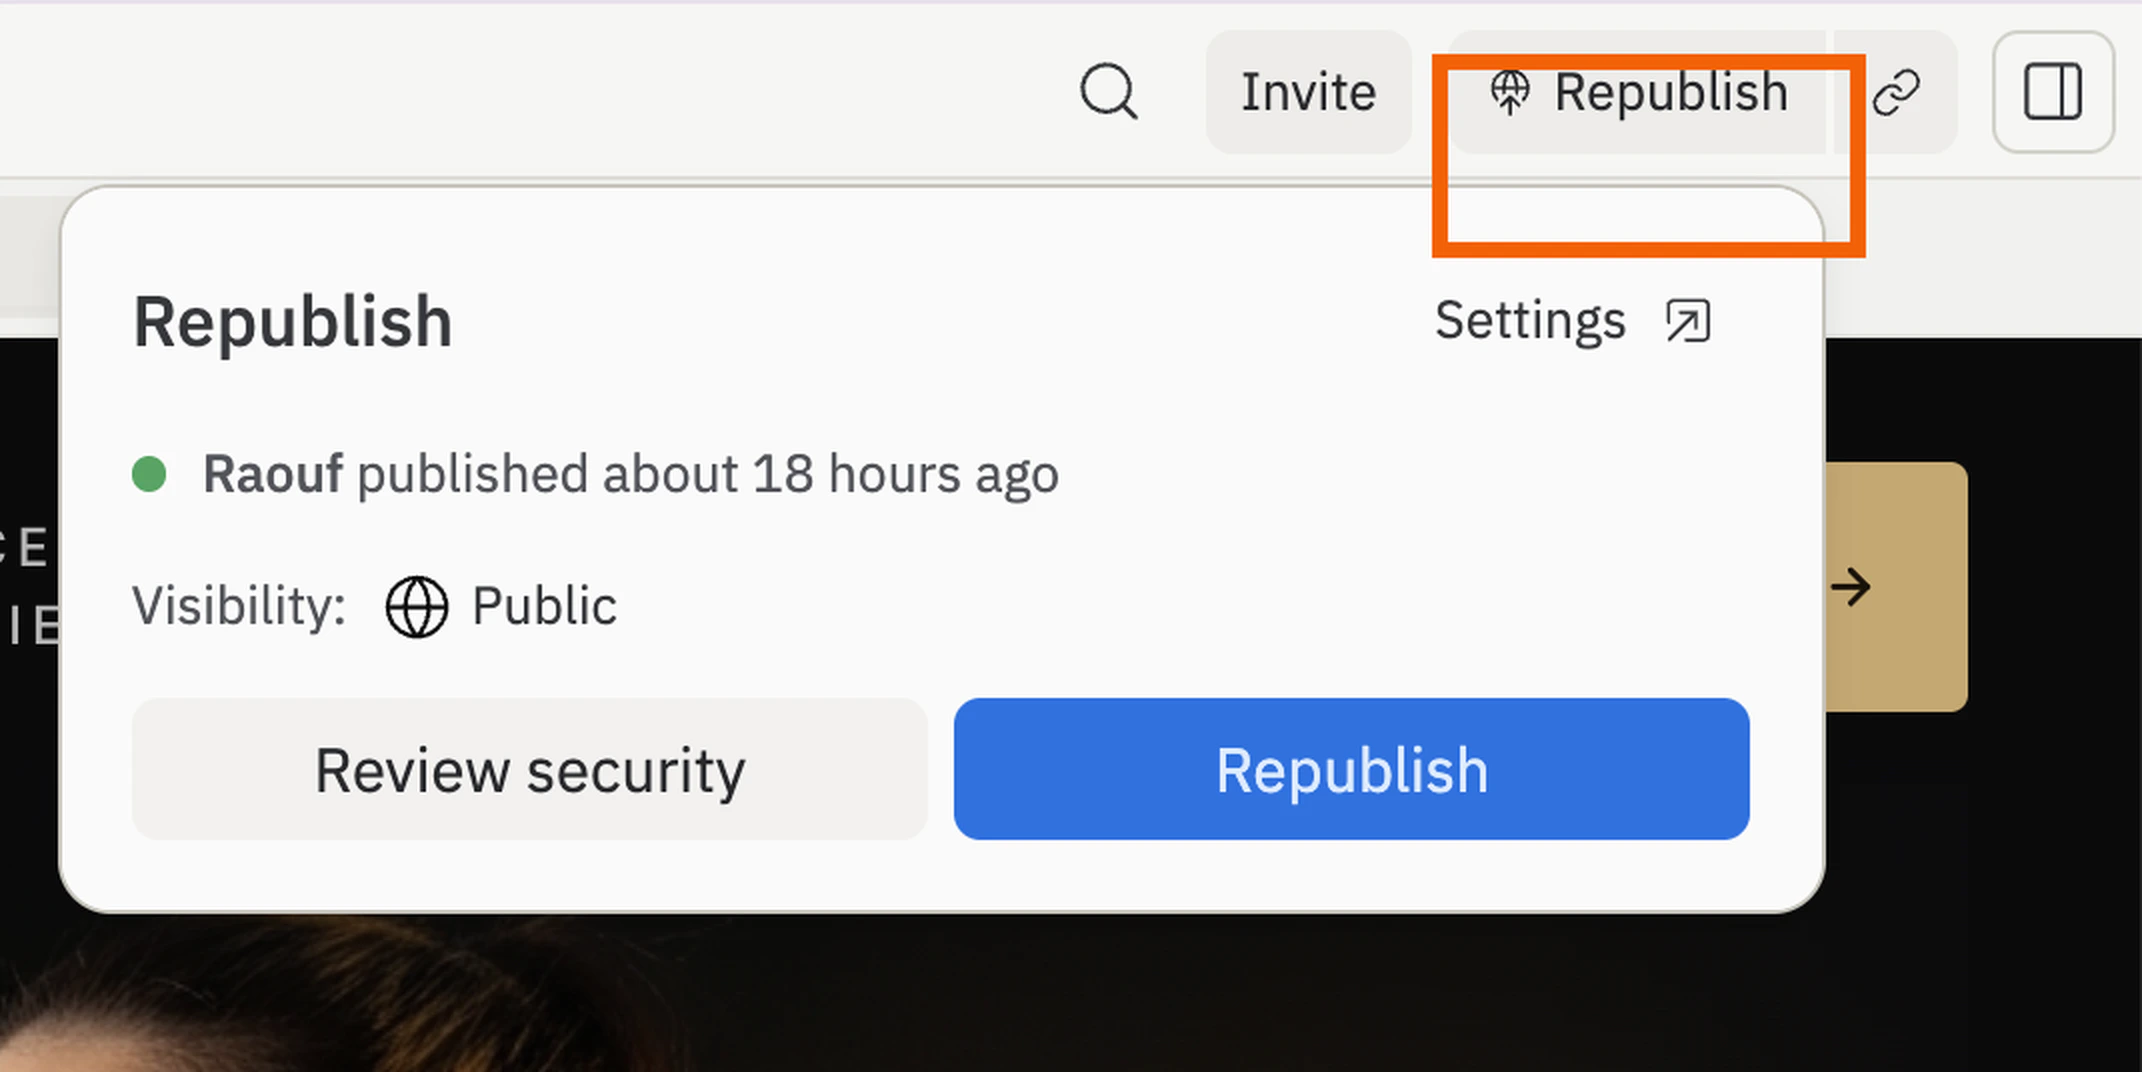
Preview에서 페이지가 작동하면 워크스페이스 오른쪽 상단의 **Publish**(또는 이후 배포 시 **Republish**)를 클릭하여 최신 버전을 공개 URL에 푸시하세요. 공유하기 전에 게시된 URL을 새 탭에서 열고 테스트 응답을 하나 제출하여 라이브 페이지가 수집하는지 확인하세요.
## 다음 단계
후속 이메일을 보내거나 응답을 CRM에 동기화하세요.
공유하기 전에 페이지에 브랜드 캠페인 URL을 제공하세요.
정렬하고 내보낼 수 있는 더 구조화된 응답을 저장하세요.
두 번째 변형을 만들고 메시지를 비교하세요 — 무엇이 차이를 만드는지 알 수 있도록 매 라운드 하나의 요소만 변경하세요.
## 관련 항목
* [통합 추가하기](/build/add-integrations)
* [커스텀 도메인 추가하기](/build/add-custom-domain)