> ## Documentation Index
> Fetch the complete documentation index at: https://docs.replit.com/llms.txt
> Use this file to discover all available pages before exploring further.
# Replit Enterprise
> Replit Enterprise는 SSO/SCIM, 거버넌스, 전담 지원, 무제한 시트를 추가합니다. Replit을 떠나거나 영업팀에 연락하지 않고 어떤 플랜에서도 업그레이드할 수 있습니다.
[Replit Enterprise](https://replit.com/pricing)는 기술팀이든 아니든 모든 팀에게 내부 도구, 프로토타입, 대시보드, 슬라이드 덱 등을 구축하고 배포할 수 있는 비공개 규정 준수 워크스페이스를 제공합니다. 엔터프라이즈 ID, 전담 지원, 심층 보안, 거버넌스, 데이터 제어로 뒷받침됩니다.
Replit 내에서 직접 Enterprise로 업그레이드할 수 있습니다. Free, Core, Pro 모든 플랜의 빌더가 제품을 떠나지 않고 Enterprise로 이동할 수 있습니다. 가이드 안내 또는 더 큰 커스텀 계약을 원한다면 [영업팀에 문의](https://replit.com/teams#inlineForm)하세요.
## 주요 기능
Enterprise는 Pro의 모든 기능에 조직 전체 ID, 거버넌스, 통합, 전담 지원 팀을 추가합니다:
* **SCIM 프로비저닝을 포함한 SSO 및 SAML**: ID 공급업체에 연결된 안전하고 자동화된 팀 액세스. [SAML SSO](/teams/identity-and-access-management/saml) 및 [SCIM 프로비저닝](/teams/identity-and-access-management/scim) 참조.
* **전용 안전 워크스페이스**: ID 공급업체의 그룹에 매핑된 역할 기반 액세스 제어, 조직에 격리. [그룹 및 권한](/teams/identity-and-access-management/groups-and-permissions) 참조.
* **SIEM을 통한 감사 로깅**: 기존 보안 및 모니터링 도구로 전체 감사 추적을 스트리밍합니다. [감사 로그](/teams/identity-and-access-management/audit-logs) 참조.
* **커스텀 스택 및 디자인 시스템**: 회사가 이미 사용하는 라이브러리, 언어, 컴포넌트, 패턴을 표준화합니다.
* **관리자 거버넌스 제어**: 비공개 배포 필수화, 공개 앱 금지, 보안 스캔 의무화, 배포 지역 고정.
* **Enterprise Security Center**: 모든 의존성의 CVE 감지, 심각도별 정리, 영향받은 앱 드릴다운 및 컴플라이언스를 위한 SBOM 다운로드.
* **커스텀 범위 1st 파티 통합**: 각 팀과 앱이 스택 내에서 연결할 수 있는 항목을 세밀하게 제한합니다. 자체 브랜딩을 원하는 경우 커넥터에 자체 OAuth 앱을 가져오세요. [Replit에서 OAuth 앱 설정](/references/integrations/overview#configuring-oauth-app-with-replit) 참조.
* **데이터 및 웨어하우스 통합**: Databricks, BigQuery, Microsoft Fabric, Hex, Snowflake에 대한 1st 파티 액세스. 웨어하우스에서 직접 분석 대시보드와 데이터 시각화 도구를 구축합니다.
* **전담 Product Advocate 및 Field Engineer**: Replit 팀이 팀의 도입, 확장, 블로커 해결을 지원합니다. 실습 온보딩 세션으로 모든 팀이 새 워크스페이스에서 생산적으로 빌드할 수 있도록 합니다.
* **무제한 시트**: 시트당 비용 없음. 전체 회사를 초대하세요.
Enterprise 기능 전체 목록은 [가격 페이지](https://replit.com/pricing)를 확인하거나, 커스텀 플랜 논의는 [영업팀에 문의](https://replit.com/teams#inlineForm)하세요.
## Enterprise로 업그레이드
어떤 플랜에서도 몇 단계만으로 Enterprise로 업그레이드할 수 있습니다. 업그레이드는 완전히 Replit 내에서 이루어집니다.
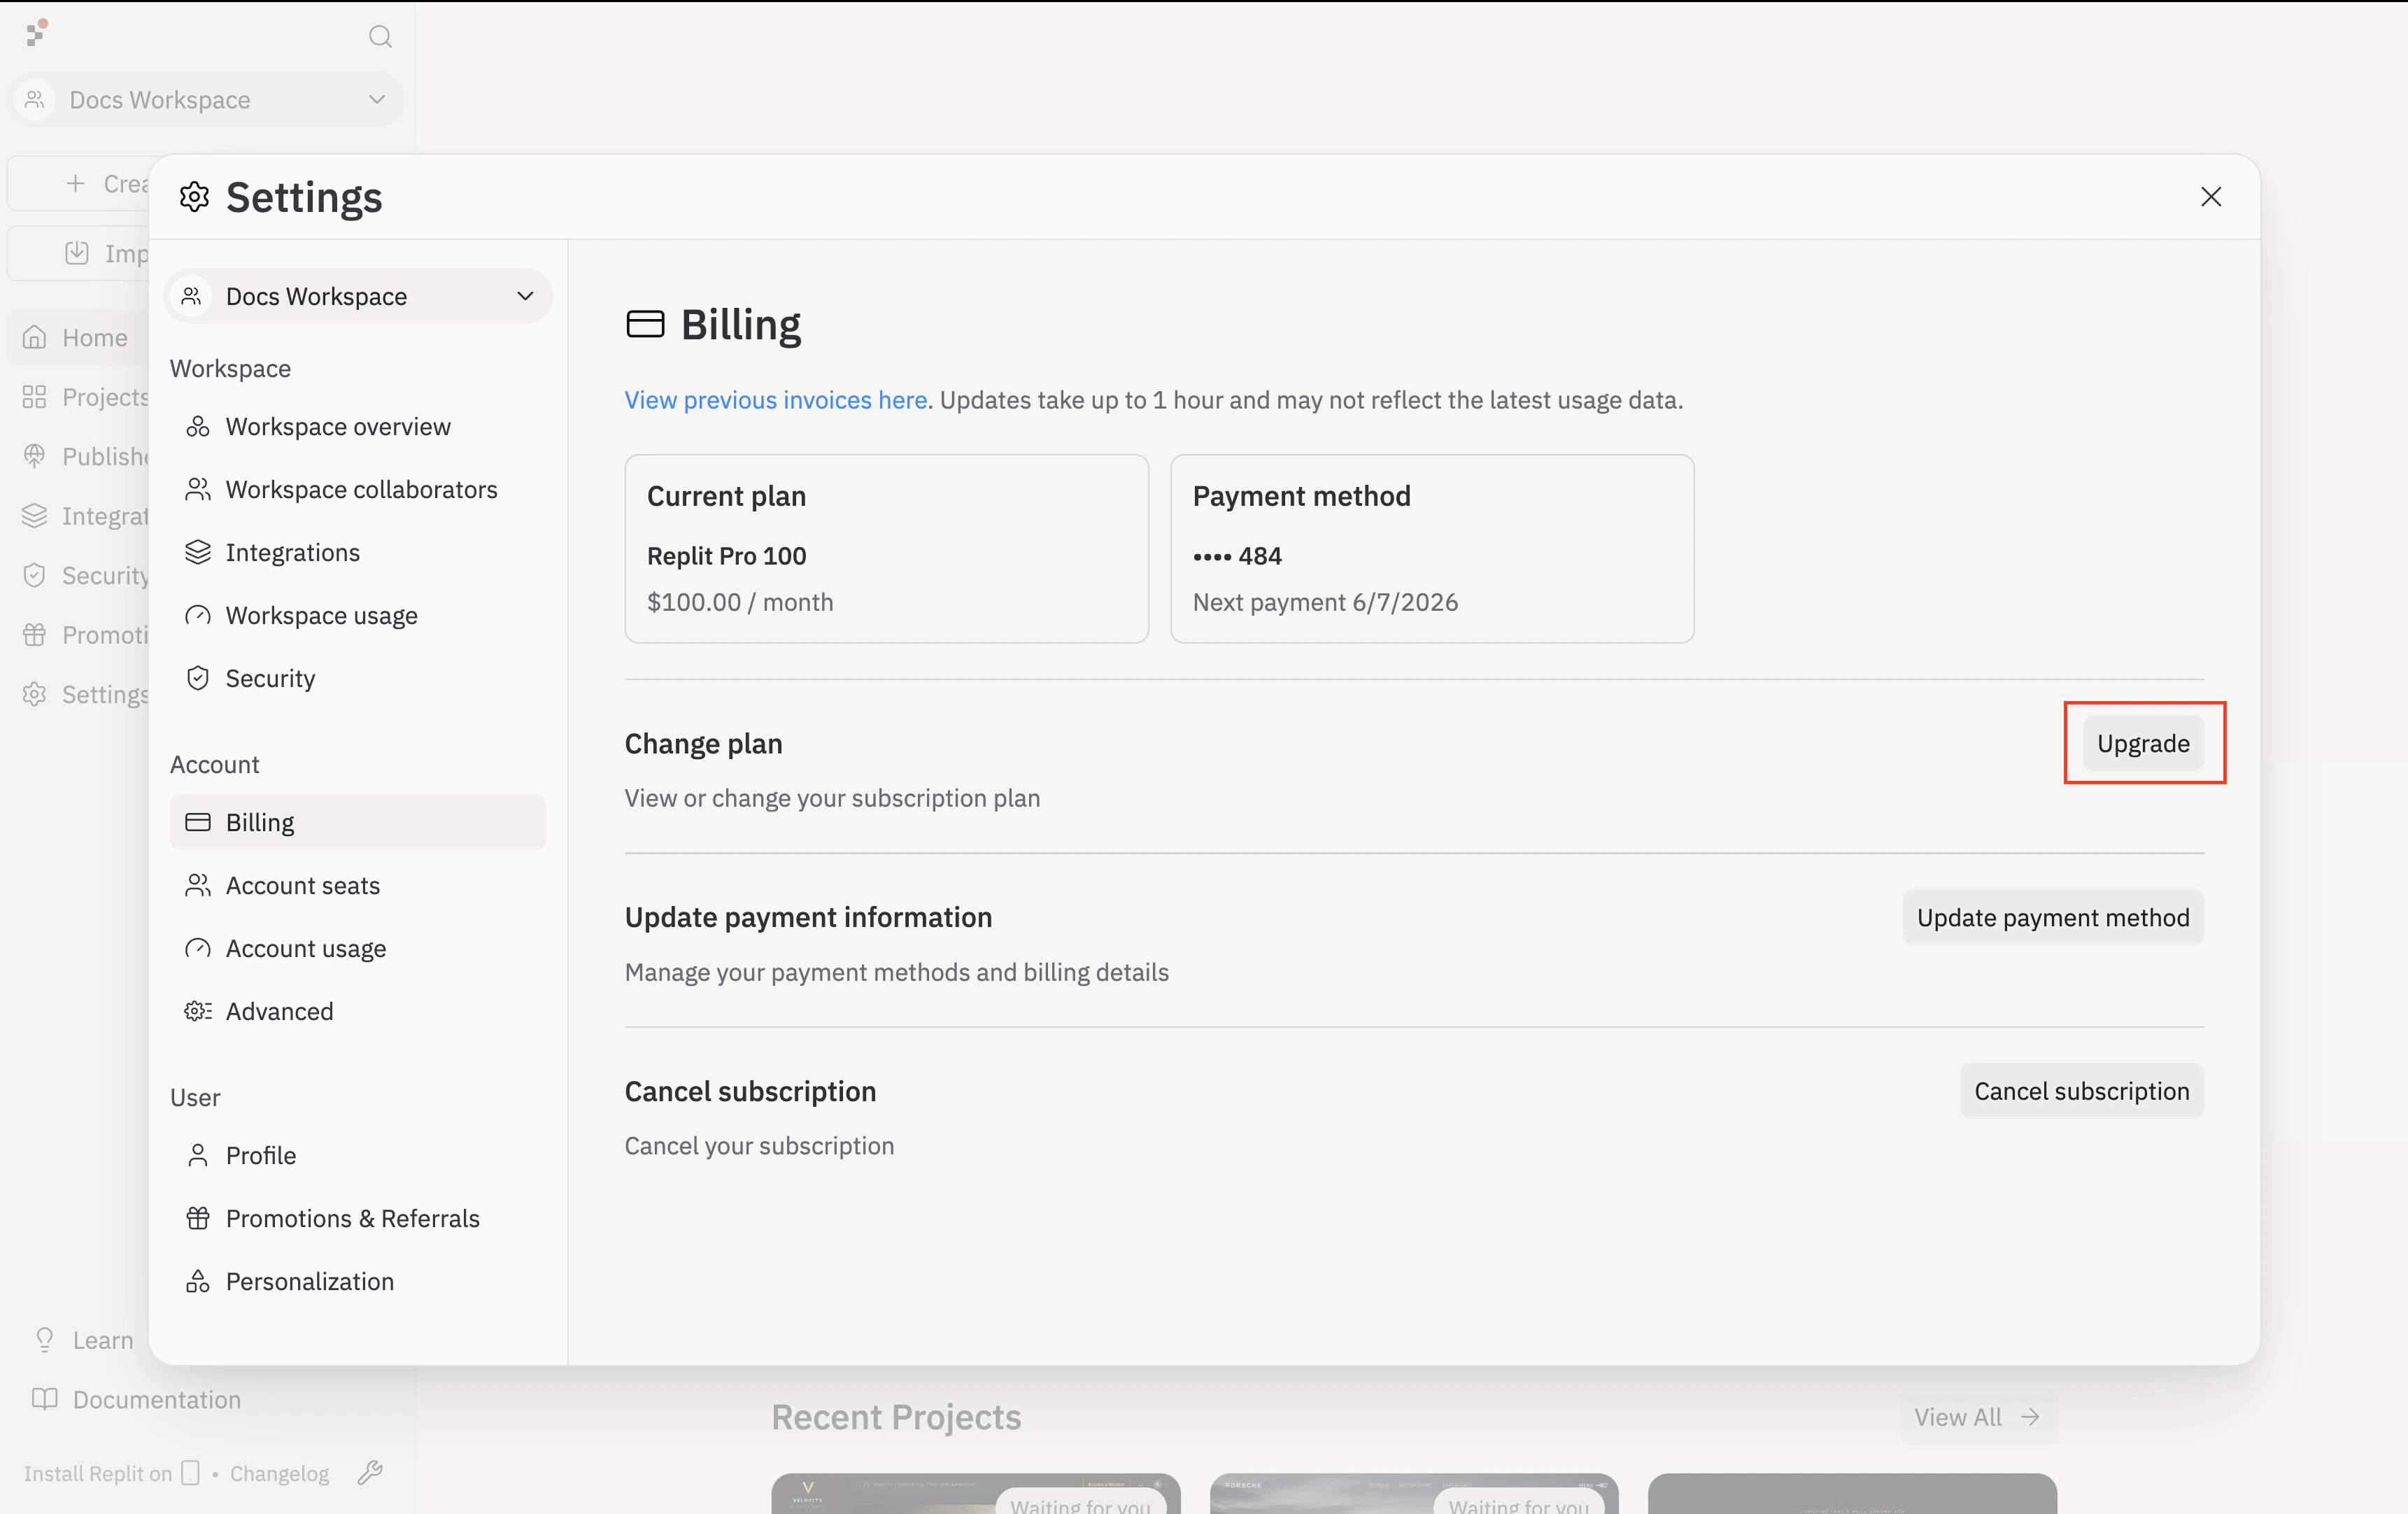
**Settings**를 열고 Account 아래의 **Billing**을 선택합니다. **Change plan** 옆의 **Upgrade**를 클릭합니다.
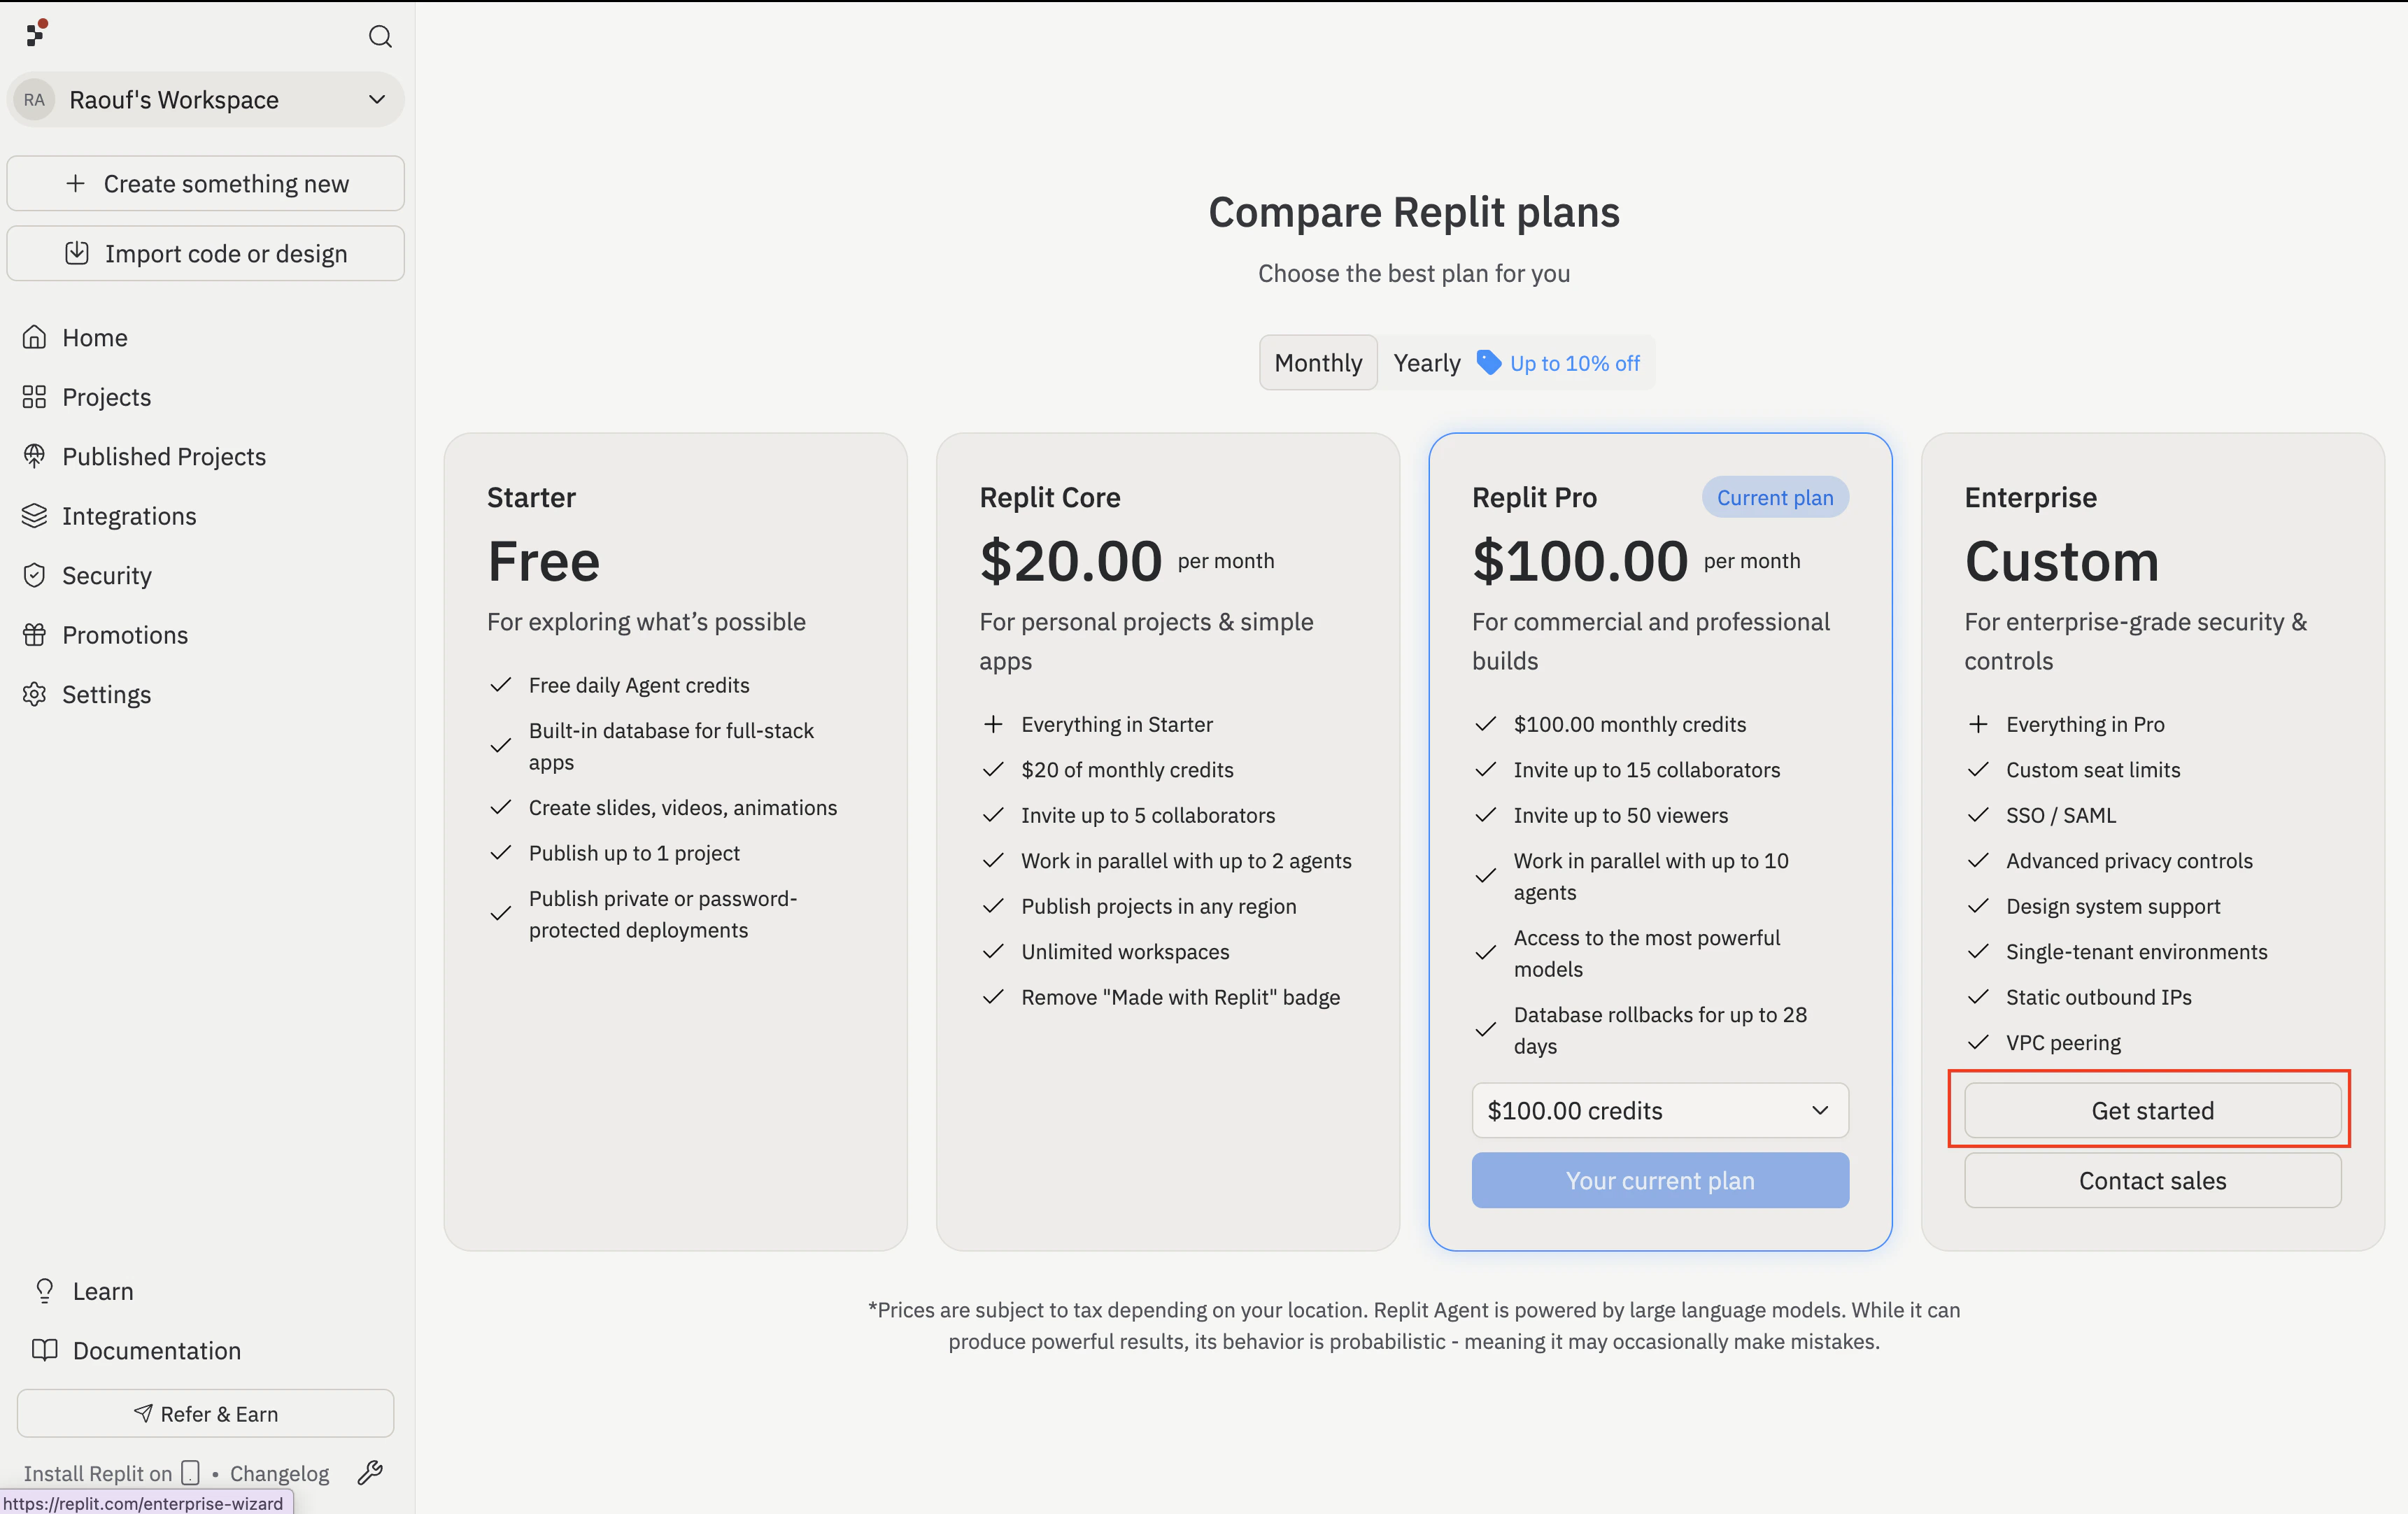
 **Replit 플랜 비교** 화면에서 **Enterprise / Custom** 열 아래의 **Get started**를 클릭합니다.
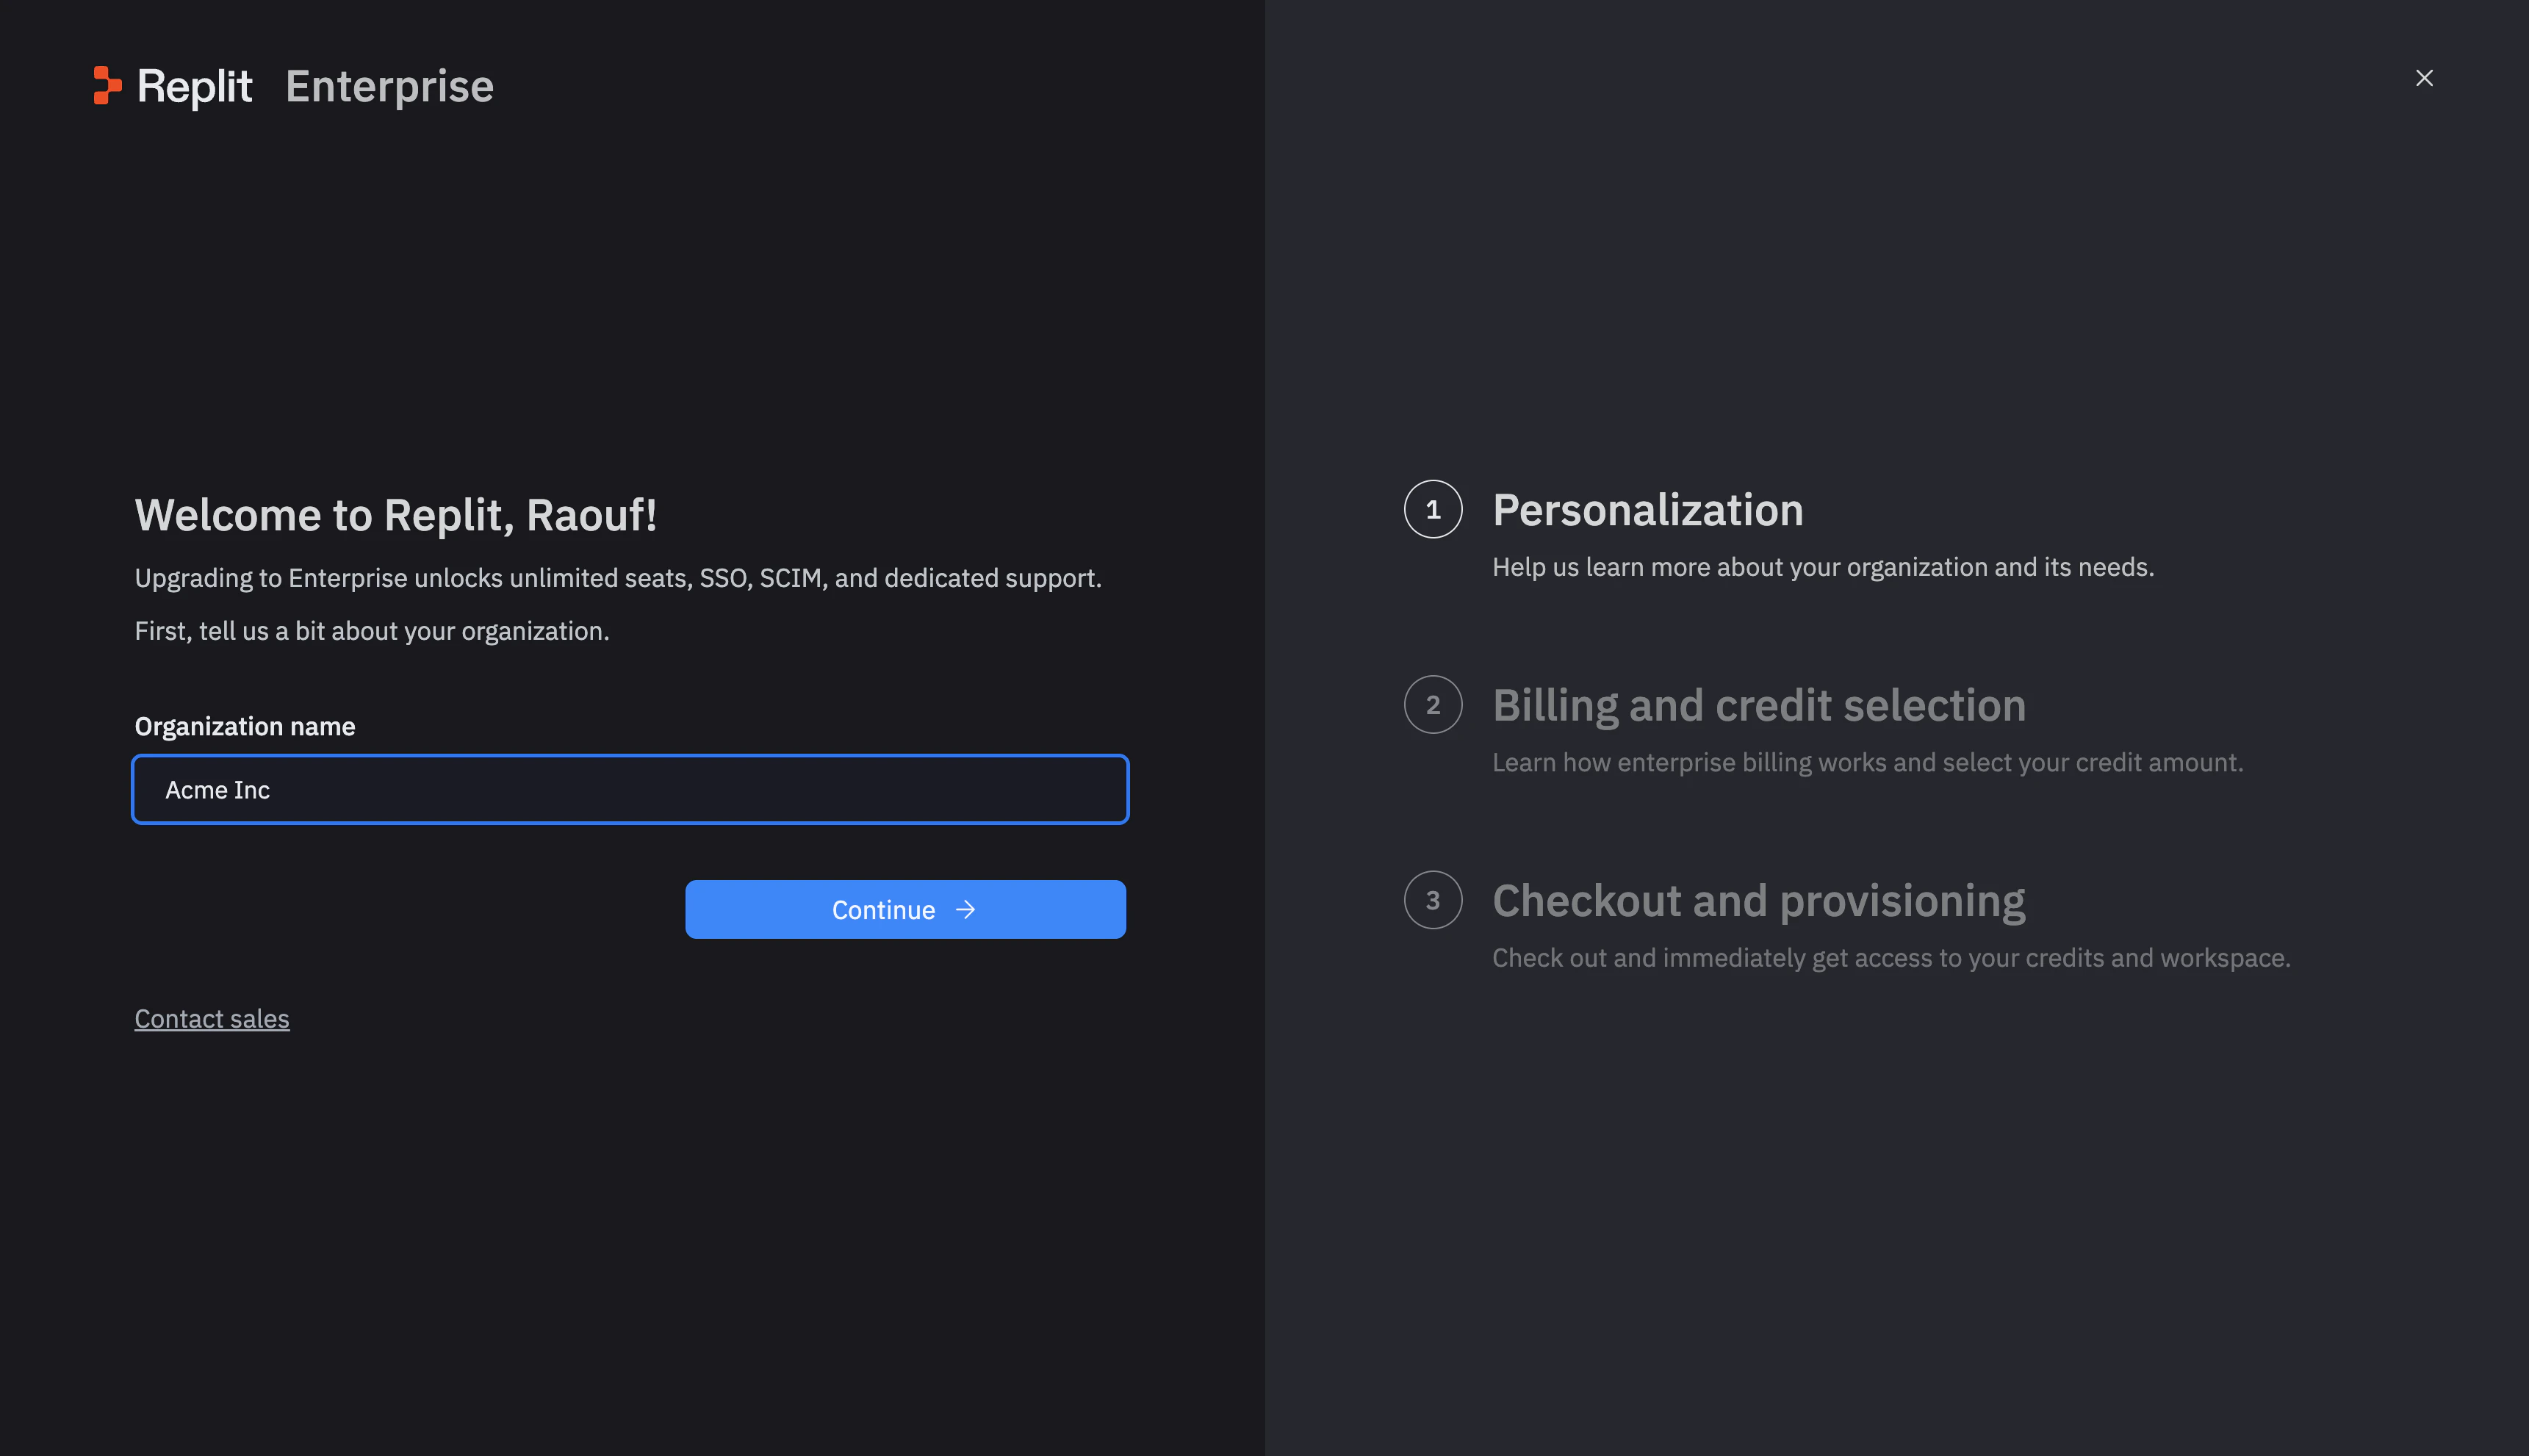
 마법사가 **개인화** 단계로 열립니다. **조직 이름**을 입력하고 **Continue**를 클릭합니다.
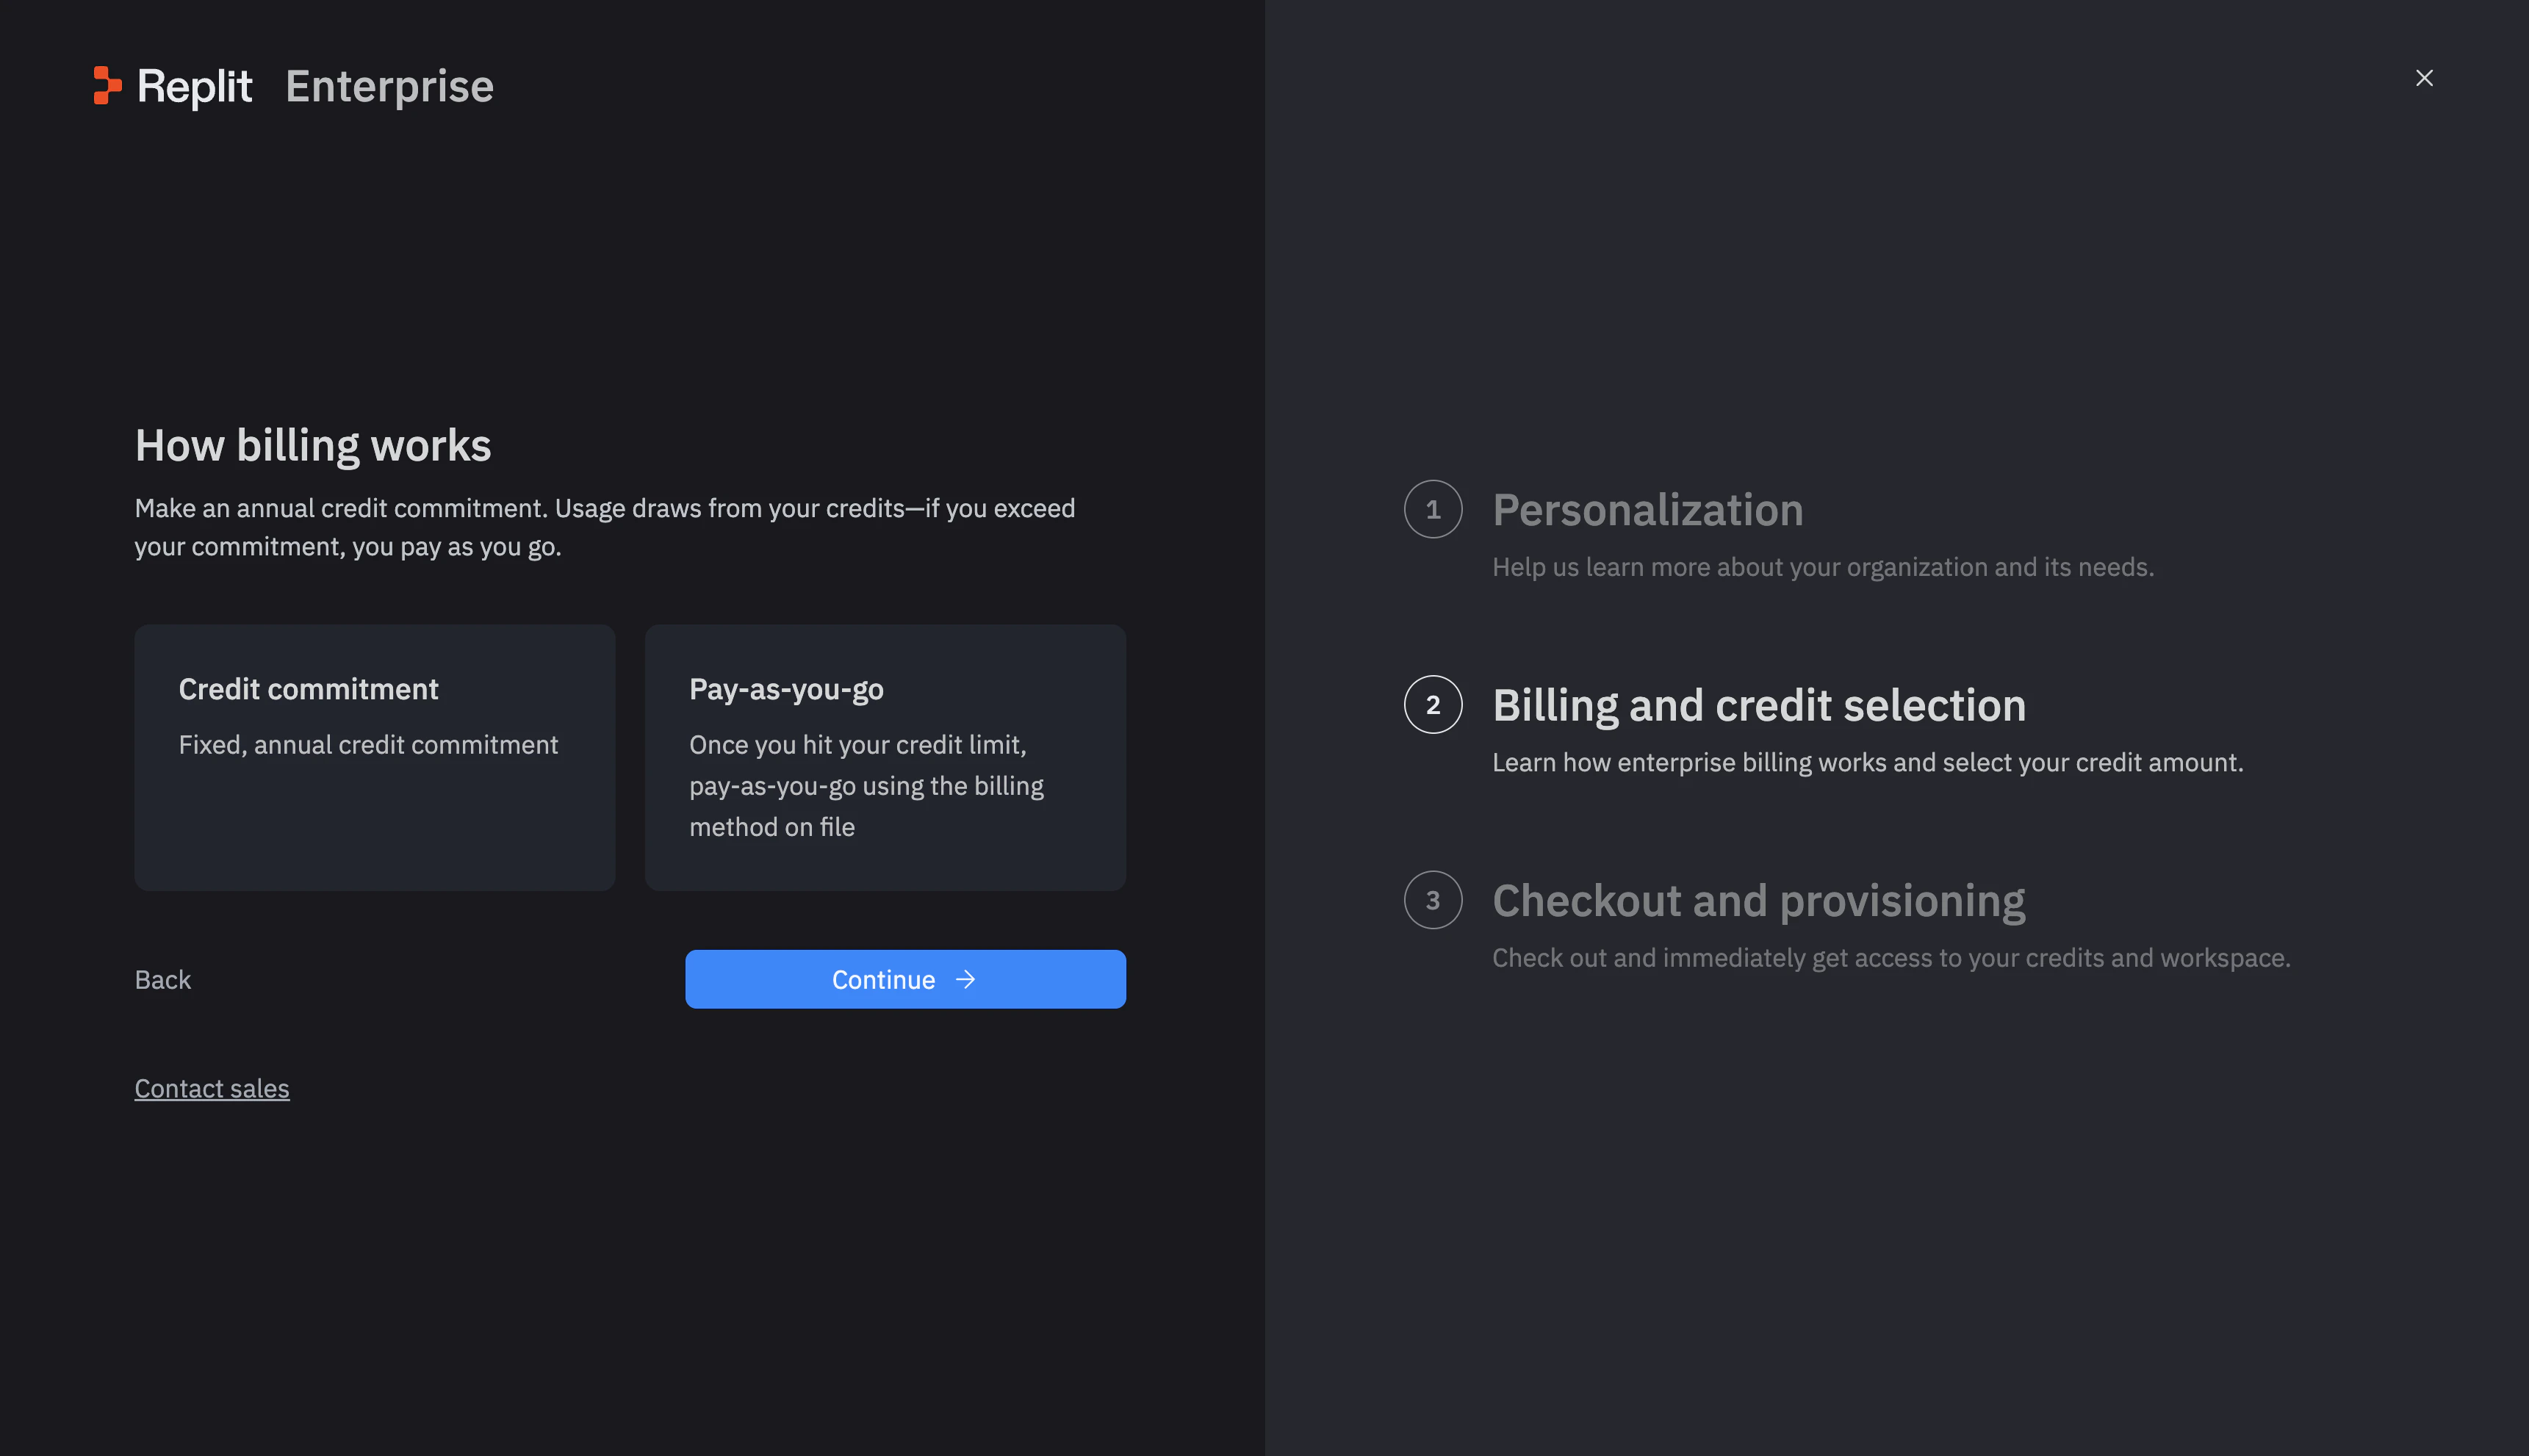
 **How billing works** 화면(오른쪽 레일의 **청구 및 크레딧 선택** 단계)에서 청구 모델을 선택합니다:
* **Credit commitment** — 고정 연간 크레딧 구매.
* **Pay-as-you-go** — 크레딧 한도 초과 시 등록된 결제 방법으로 청구됩니다.
**Continue**를 클릭합니다.
**How billing works** 화면(오른쪽 레일의 **청구 및 크레딧 선택** 단계)에서 청구 모델을 선택합니다:
* **Credit commitment** — 고정 연간 크레딧 구매.
* **Pay-as-you-go** — 크레딧 한도 초과 시 등록된 결제 방법으로 청구됩니다.
**Continue**를 클릭합니다.
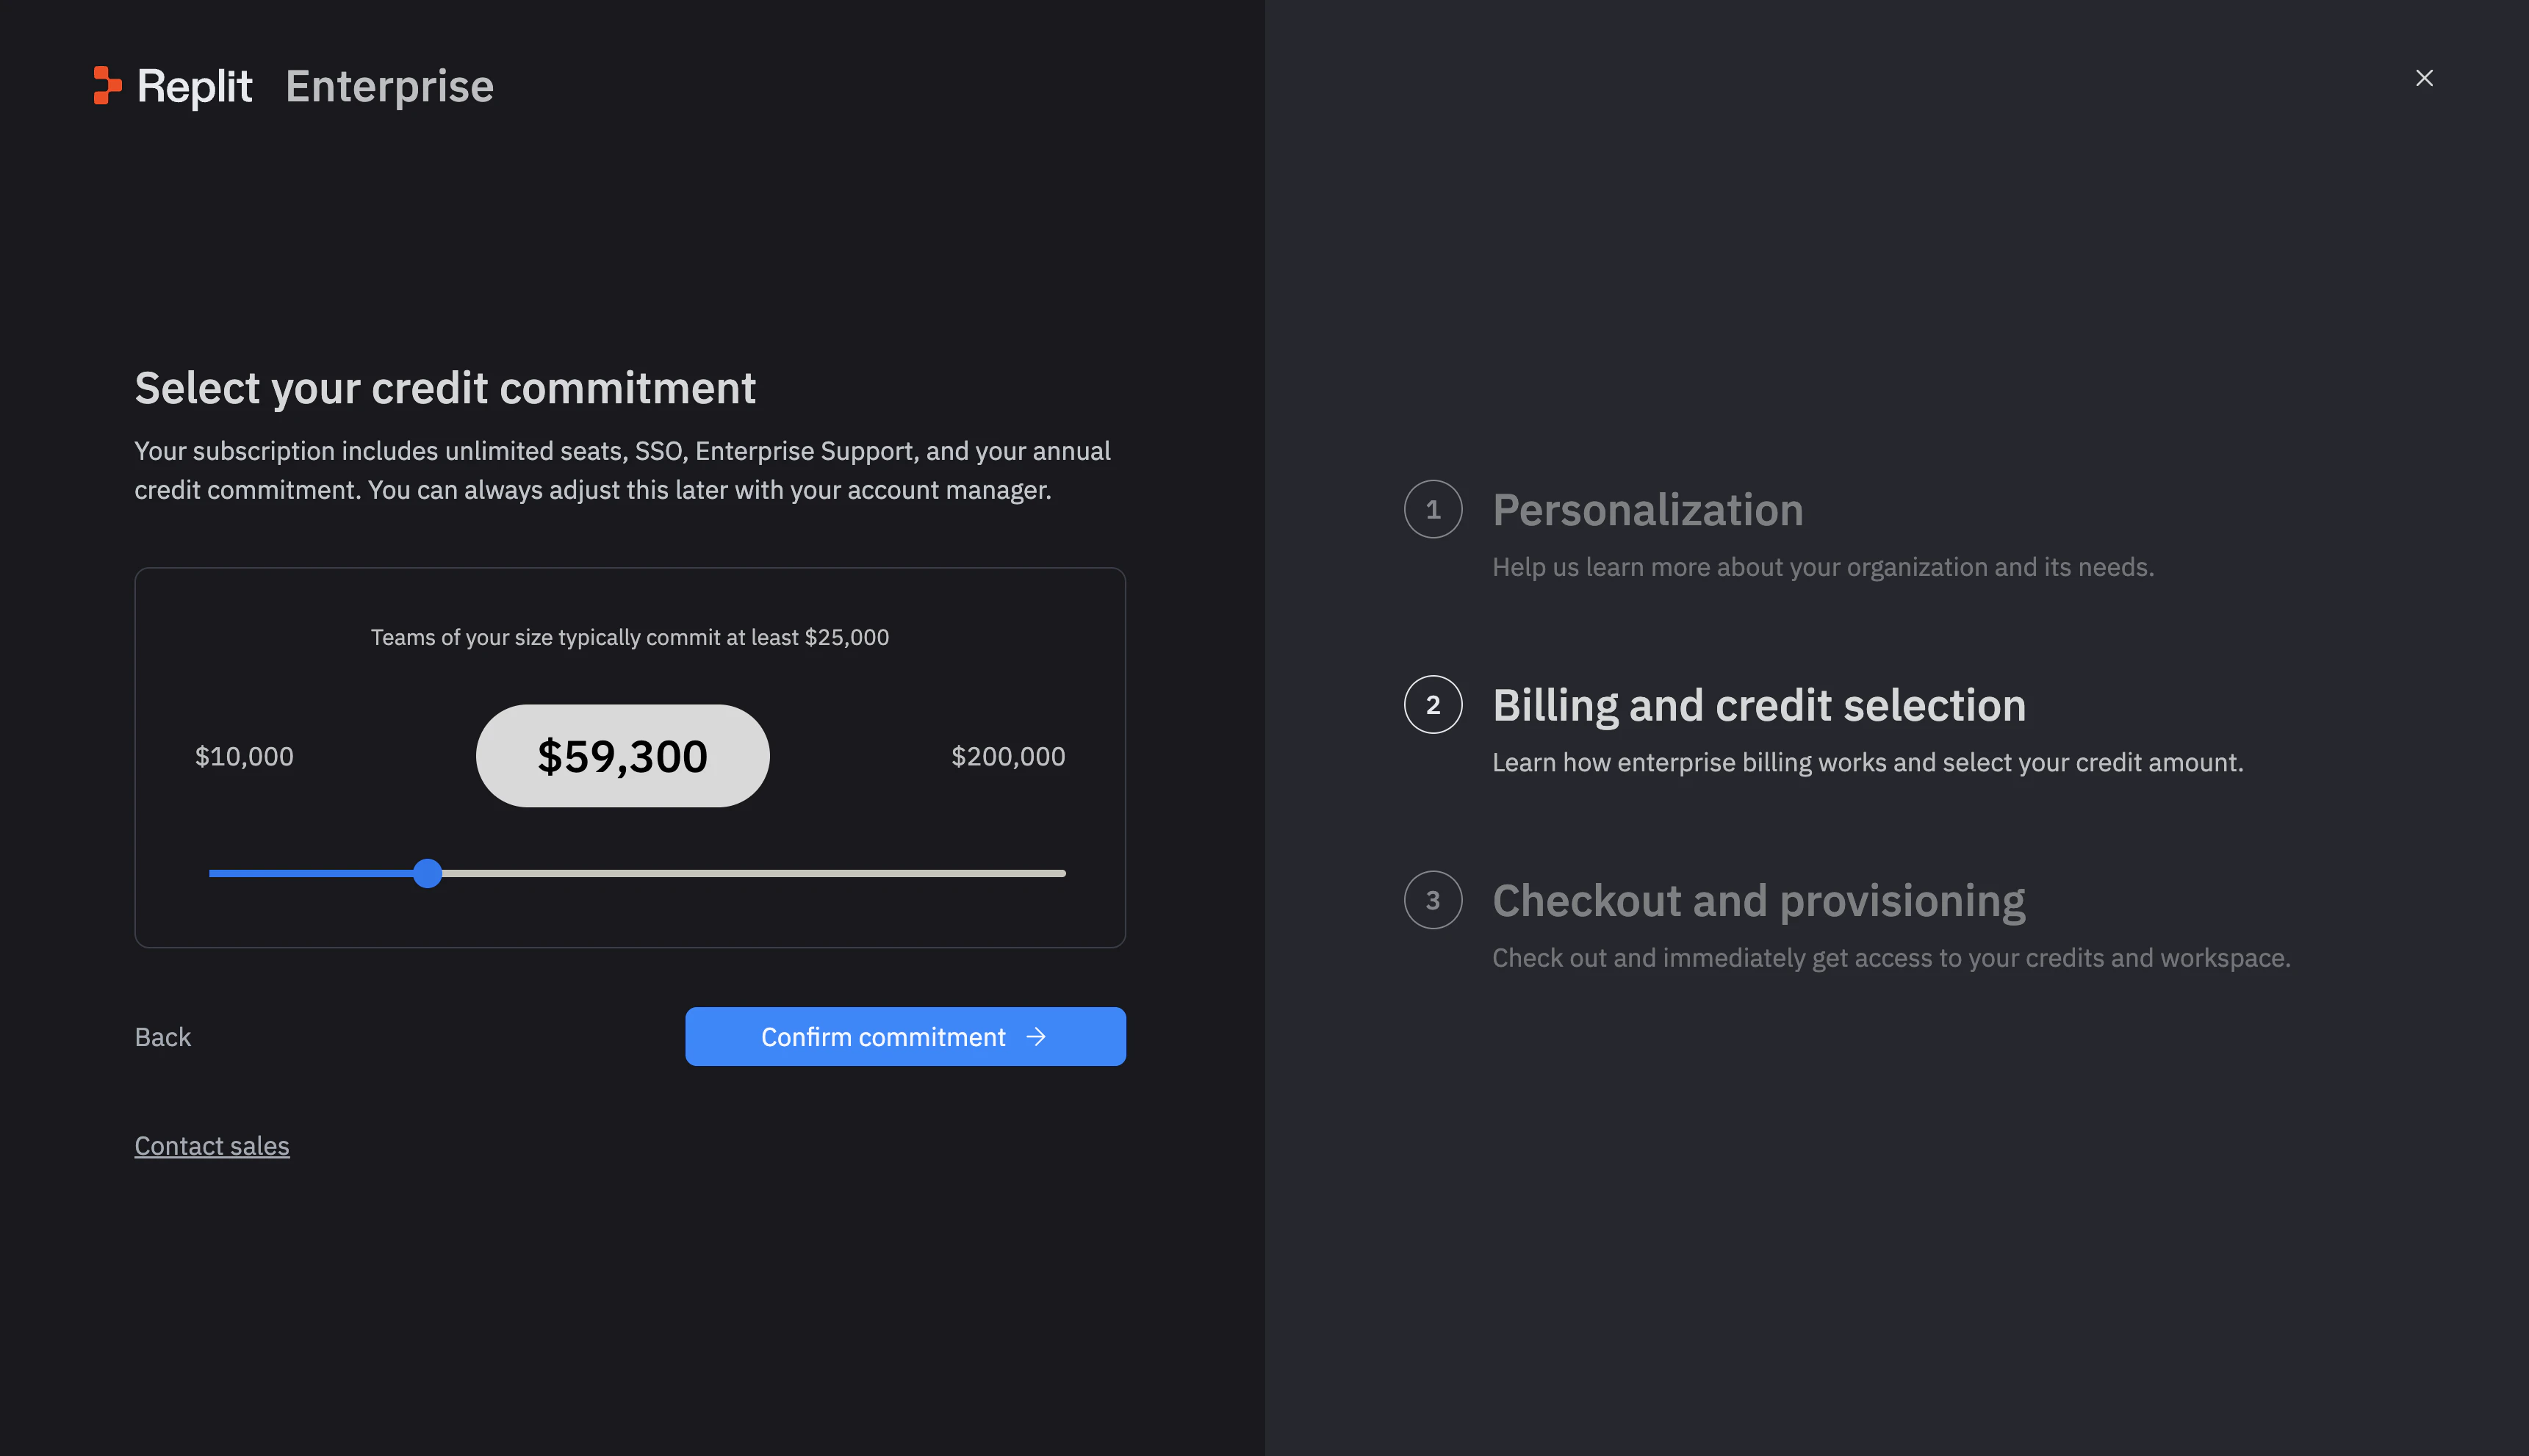
 크레딧 약정을 선택했다면 슬라이더를 원하는 연간 금액으로 조정한 후 **Confirm commitment**를 클릭합니다. 나중에 계정 담당자와 조정할 수 있습니다.
 **결제 및 프로비저닝** 화면에서 청구 정보를 입력합니다. Replit이 즉시 Enterprise 조직을 생성하고 크레딧을 프로비저닝합니다.
### 업그레이드 시 이전되는 것
협업 워크스페이스가 있는 경우 결제를 완료하면 Replit이 자동으로 새 Enterprise 조직으로 이동시킵니다. 게시된 앱은 이동 중에도 중단 없이 계속 실행됩니다.
* **이전됨**: 협업 팀 워크스페이스와 그 안의 앱.
* **이전되지 않음**: 개인 계정에 유지되는 개인 워크스페이스.
게시된 앱은 업그레이드 전반에 걸쳐 계속 실행됩니다. 이동 후 다시 게시하거나 재연결할 필요가 없습니다.
더 큰 계약을 위해 영업팀과 협력하시나요? 협업 워크스페이스는 동일한 방식으로 이전됩니다 — 이미 구축한 앱과 이력을 그대로 유지합니다.
## 다음 단계
Pro와 Enterprise를 비교하세요.
조직을 위한 SSO, SCIM, 그룹, 감사 로그를 설정하세요.
가이드 안내, 커스텀 가격, 또는 더 큰 계약을 받으세요.
**결제 및 프로비저닝** 화면에서 청구 정보를 입력합니다. Replit이 즉시 Enterprise 조직을 생성하고 크레딧을 프로비저닝합니다.
### 업그레이드 시 이전되는 것
협업 워크스페이스가 있는 경우 결제를 완료하면 Replit이 자동으로 새 Enterprise 조직으로 이동시킵니다. 게시된 앱은 이동 중에도 중단 없이 계속 실행됩니다.
* **이전됨**: 협업 팀 워크스페이스와 그 안의 앱.
* **이전되지 않음**: 개인 계정에 유지되는 개인 워크스페이스.
게시된 앱은 업그레이드 전반에 걸쳐 계속 실행됩니다. 이동 후 다시 게시하거나 재연결할 필요가 없습니다.
더 큰 계약을 위해 영업팀과 협력하시나요? 협업 워크스페이스는 동일한 방식으로 이전됩니다 — 이미 구축한 앱과 이력을 그대로 유지합니다.
## 다음 단계
Pro와 Enterprise를 비교하세요.
조직을 위한 SSO, SCIM, 그룹, 감사 로그를 설정하세요.
가이드 안내, 커스텀 가격, 또는 더 큰 계약을 받으세요.