> ## Documentation Index
> Fetch the complete documentation index at: https://docs.replit.com/llms.txt
> Use this file to discover all available pages before exploring further.
# August 21, 2026
> 3分で読めます
## 新機能
* [Free Modeで作業する](#work-in-free-mode)
* [Conversationsで始める](#start-with-conversations)
* [Routinesで定型業務を自動化する](#automate-recurring-work-with-routines)
* [作業中のAgentを操作する](#steer-agent-while-working)
* [Skillsを共有・インポートする](#share-and-import-skills)
* [ワークスペース間でAgentモデルを管理する](#control-agent-models-across-workspaces)
* [ブラックボックスペネトレーションテストを実行する](#run-black-box-pen-tests)
## Agent
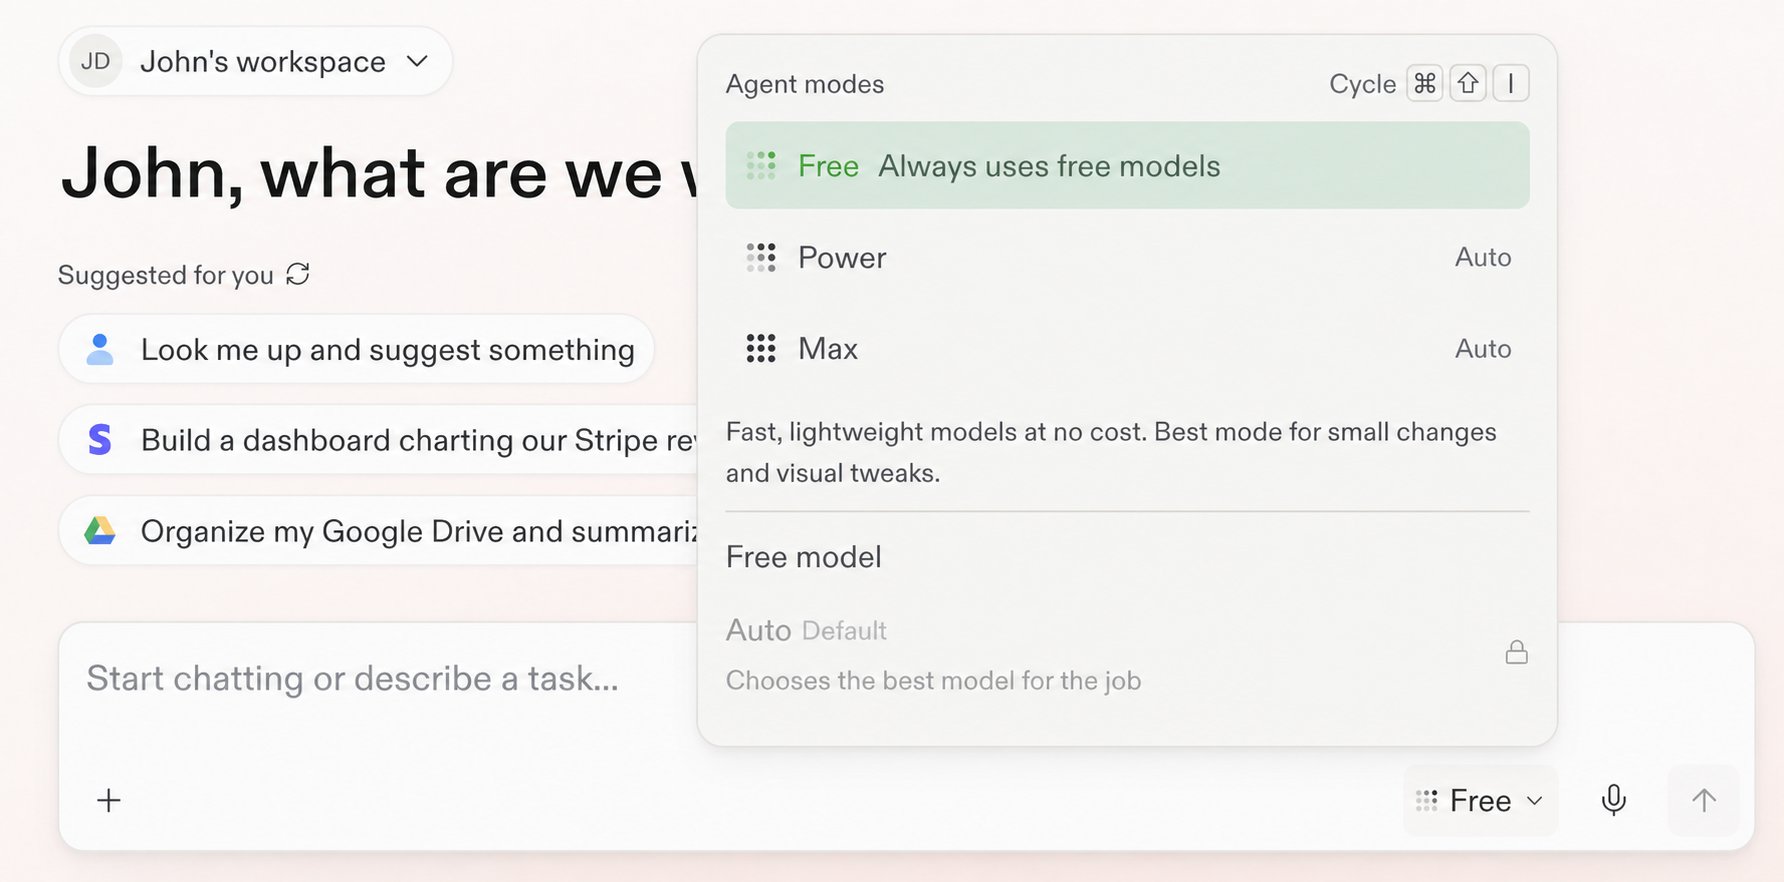
### Free Modeで作業する
Free Modeを使うと、Power ModeやMax Modeのクレジットを使わずにチャット、アイデアの検討、作成、構築ができます。Free ModeはAutoを使ってモデルを選択し、その上限はプランによって異なります。残りの利用可能量とリセットのタイミングは**Settings** > **Usage**で確認してください。
 [Free Modeを最大限に活用する方法](/ja/chat/free-mode)をご覧ください。
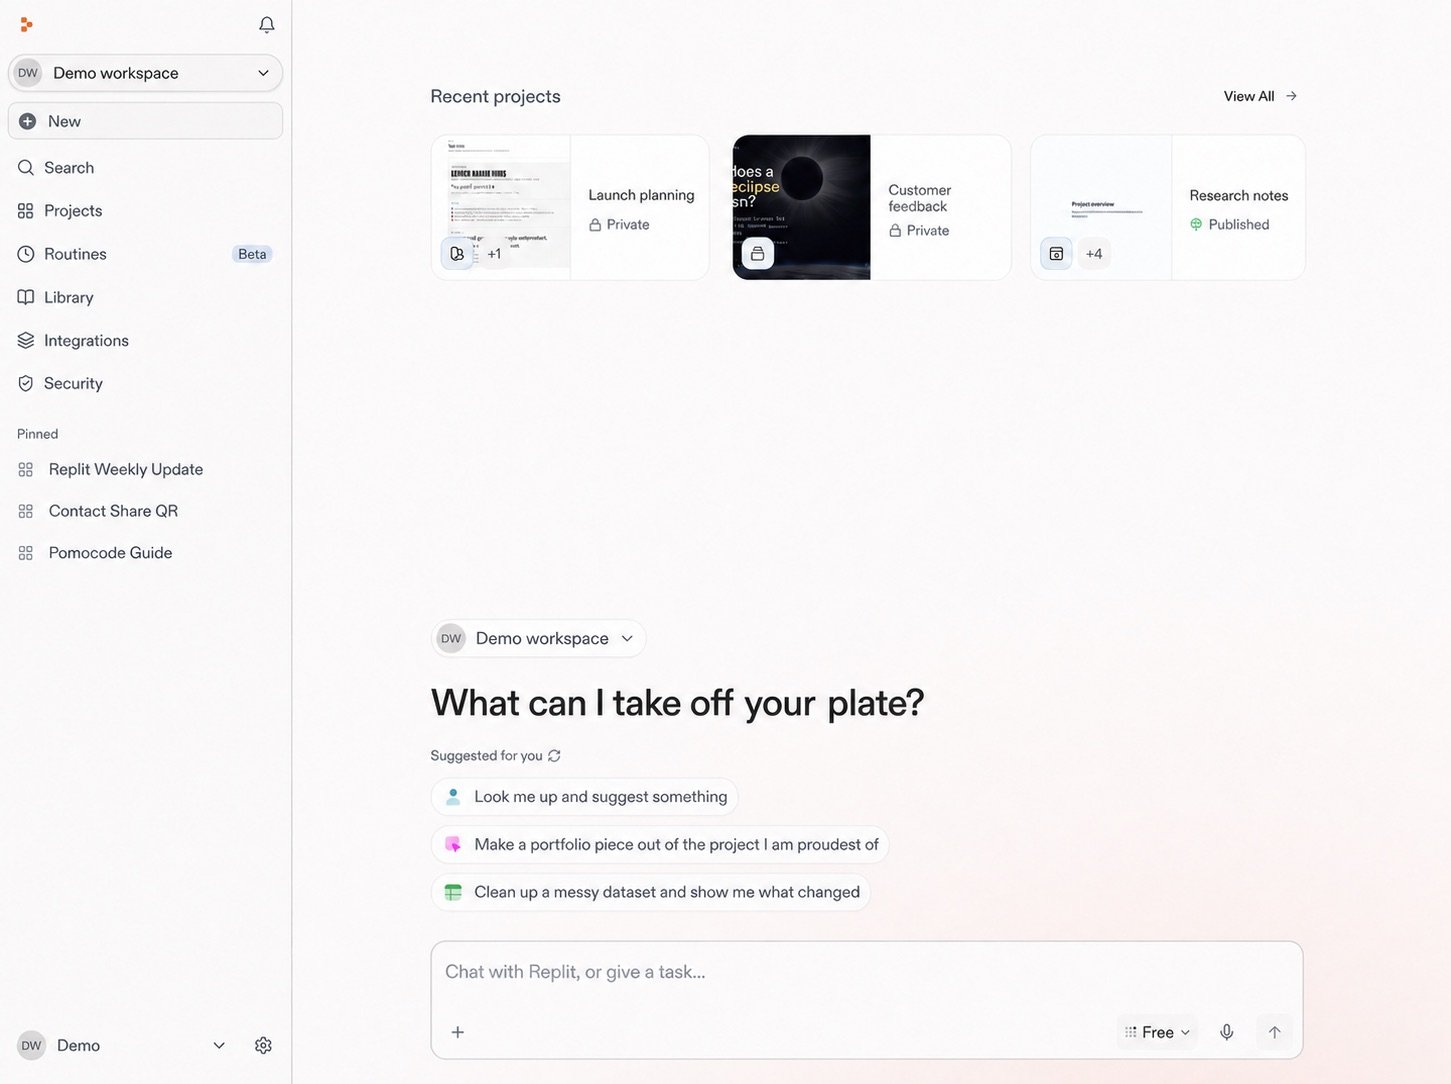
### Conversationsで始める
非公開のConversationから始めて、質問したり、情報を調べたり、コンテキストを添付したり、Routineを実行したり、望む結果を説明したりできます。作業が本格的になったら、ReplitにConversationをProjectへ変換するよう依頼してください。コンテキストとファイルはそのまま引き継がれます。
[Free Modeを最大限に活用する方法](/ja/chat/free-mode)をご覧ください。
### Conversationsで始める
非公開のConversationから始めて、質問したり、情報を調べたり、コンテキストを添付したり、Routineを実行したり、望む結果を説明したりできます。作業が本格的になったら、ReplitにConversationをProjectへ変換するよう依頼してください。コンテキストとファイルはそのまま引き継がれます。
 [Conversations](/ja/chat/conversations)について詳しく見る。
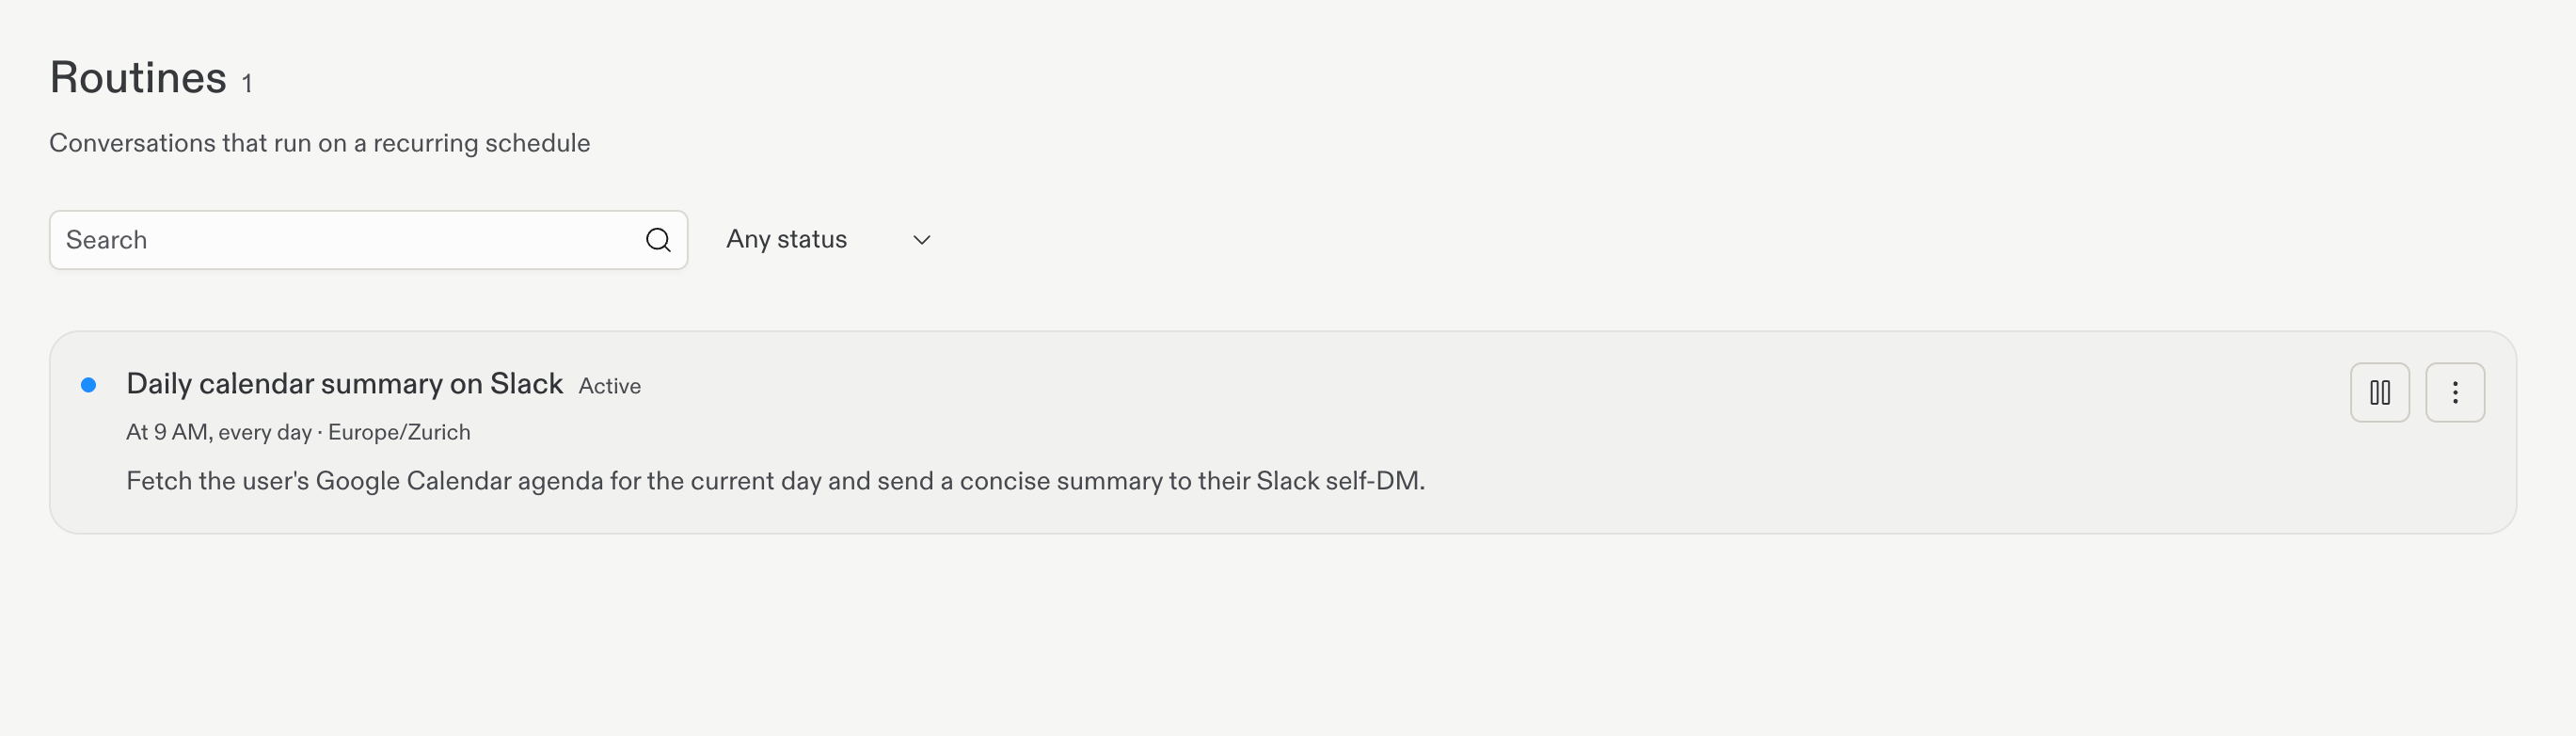
### Routinesで定型業務を自動化する
Conversation内で繰り返す作業をReplitにスケジュールさせます。各実行結果は同じConversationに戻ってくるため、そこで確認し、作業を続けられます。RoutinesはPower ModeまたはMax Modeで実行され、実行ごとに予算が必要です。
[Conversations](/ja/chat/conversations)について詳しく見る。
### Routinesで定型業務を自動化する
Conversation内で繰り返す作業をReplitにスケジュールさせます。各実行結果は同じConversationに戻ってくるため、そこで確認し、作業を続けられます。RoutinesはPower ModeまたはMax Modeで実行され、実行ごとに予算が必要です。
 [Routines](/ja/chat/routines)について詳しく見る。
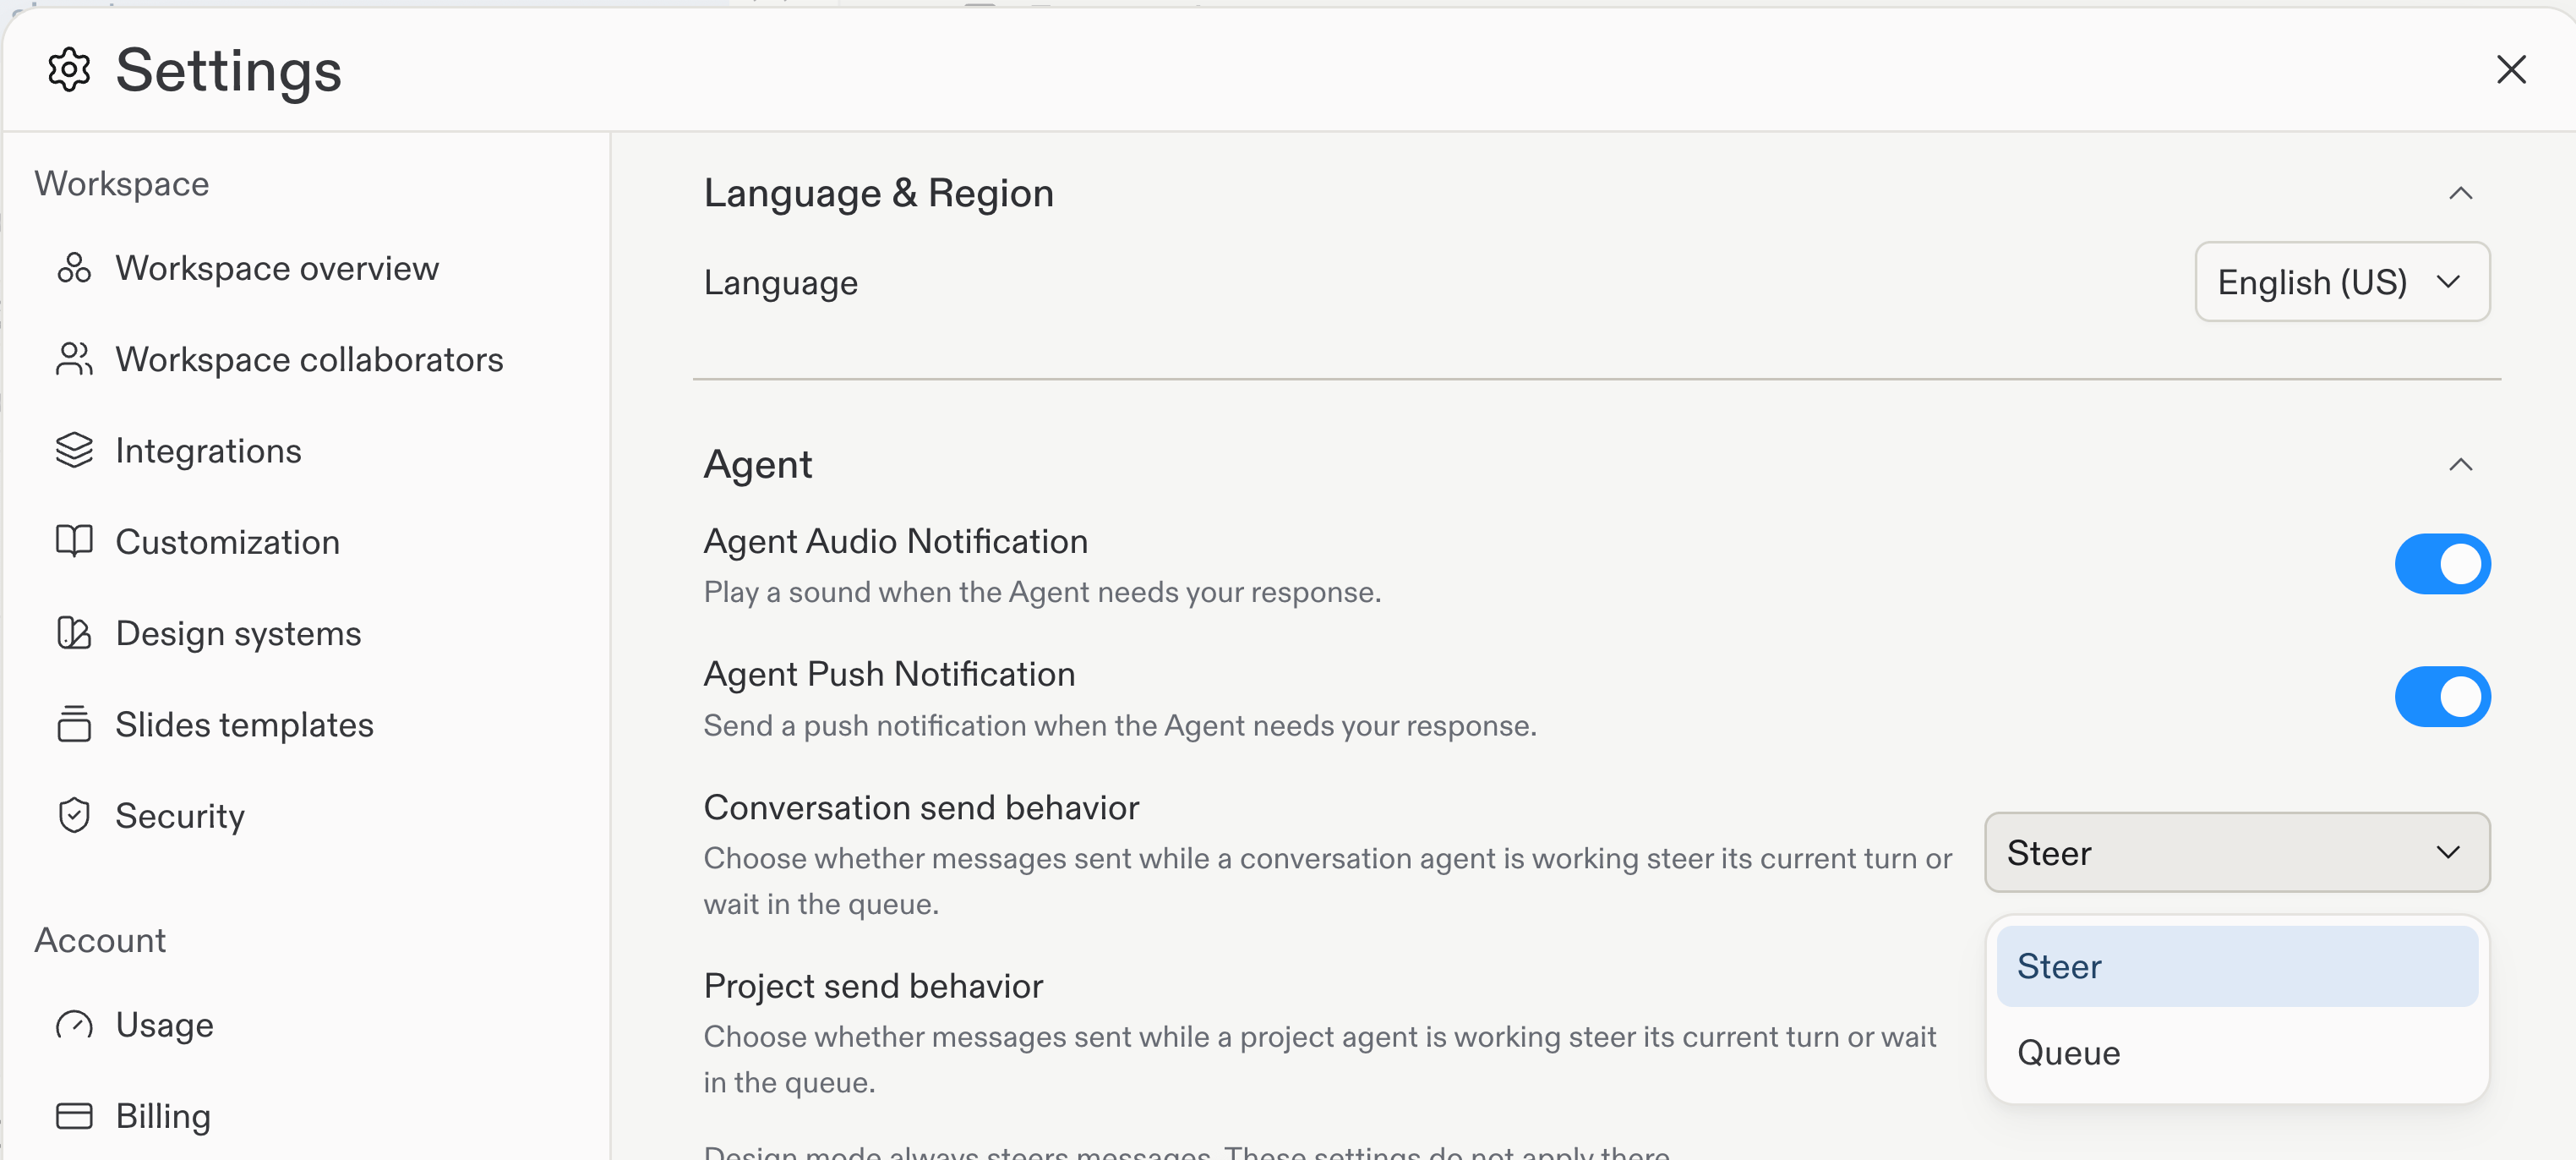
### 作業中のAgentを操作する
Agentが作業している間にフォローアップを送信すると、進行中のターンに新しいコンテキストを追加できます。SteerはConversationsとProjectsのデフォルトの動作で、それぞれの設定を**Settings** > **Personalization**でQueueに変更できます。1件のメッセージだけ逆の動作にするには、MacではCmd+Enter、WindowsとLinuxではCtrl+Enterを押してください。
[Routines](/ja/chat/routines)について詳しく見る。
### 作業中のAgentを操作する
Agentが作業している間にフォローアップを送信すると、進行中のターンに新しいコンテキストを追加できます。SteerはConversationsとProjectsのデフォルトの動作で、それぞれの設定を**Settings** > **Personalization**でQueueに変更できます。1件のメッセージだけ逆の動作にするには、MacではCmd+Enter、WindowsとLinuxではCtrl+Enterを押してください。
 [メッセージのsteerとqueue](/ja/features/agent/steer-and-queue-messages)について詳しく見る。
### GitHubからSkillsをインポートする
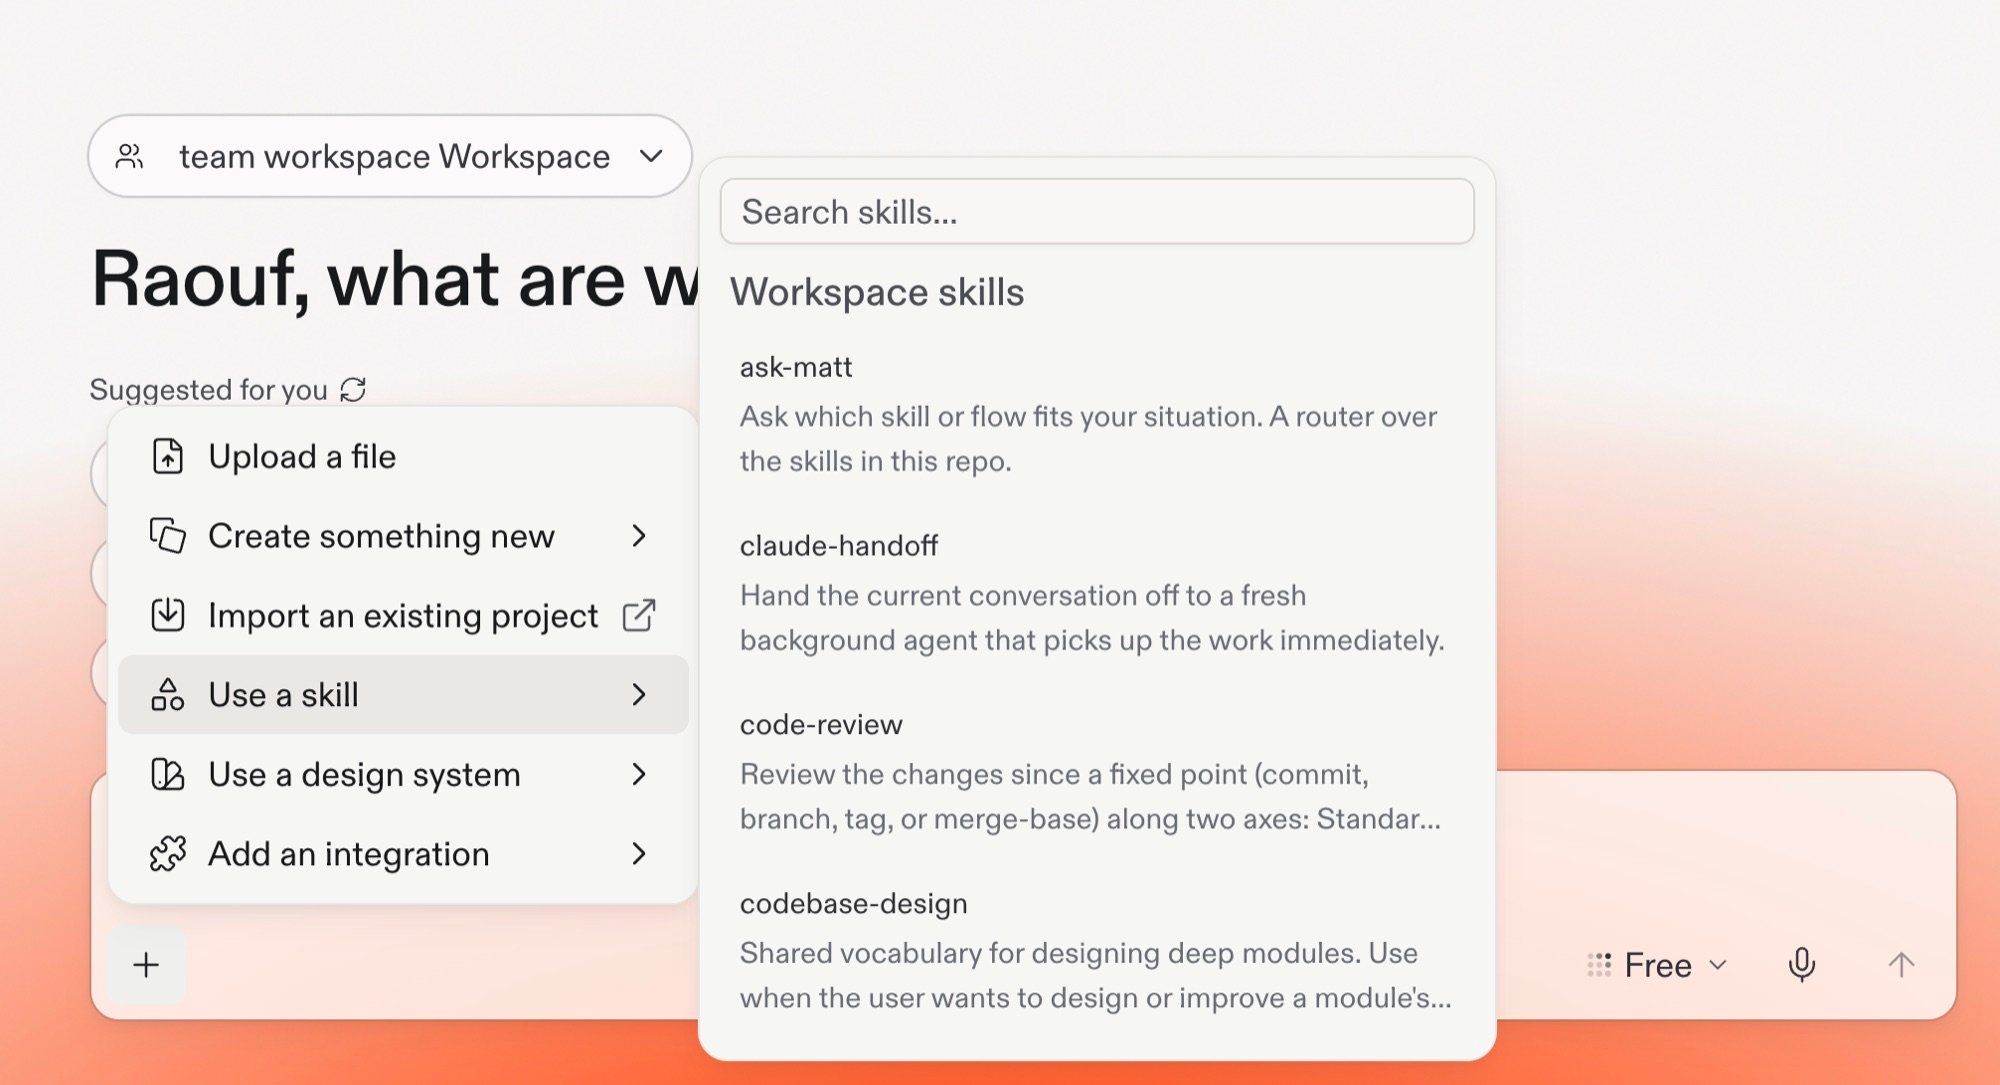
公開GitHubリポジトリ、フォルダ、またはファイルURLからSkillsをインポートし、追加する前にSkillファイルをプレビューできます。保存済みのProject Skillsは、メンバーのアクセスレベルとして**Required**、**Available**、**No access**にも対応します。
[メッセージのsteerとqueue](/ja/features/agent/steer-and-queue-messages)について詳しく見る。
### GitHubからSkillsをインポートする
公開GitHubリポジトリ、フォルダ、またはファイルURLからSkillsをインポートし、追加する前にSkillファイルをプレビューできます。保存済みのProject Skillsは、メンバーのアクセスレベルとして**Required**、**Available**、**No access**にも対応します。
 [Agent Skillsの共有とインポート](/ja/features/agent/skills#share-project-skills)について詳しく見る。
## チームとエンタープライズ
### ワークスペース間でAgentモデルを管理する
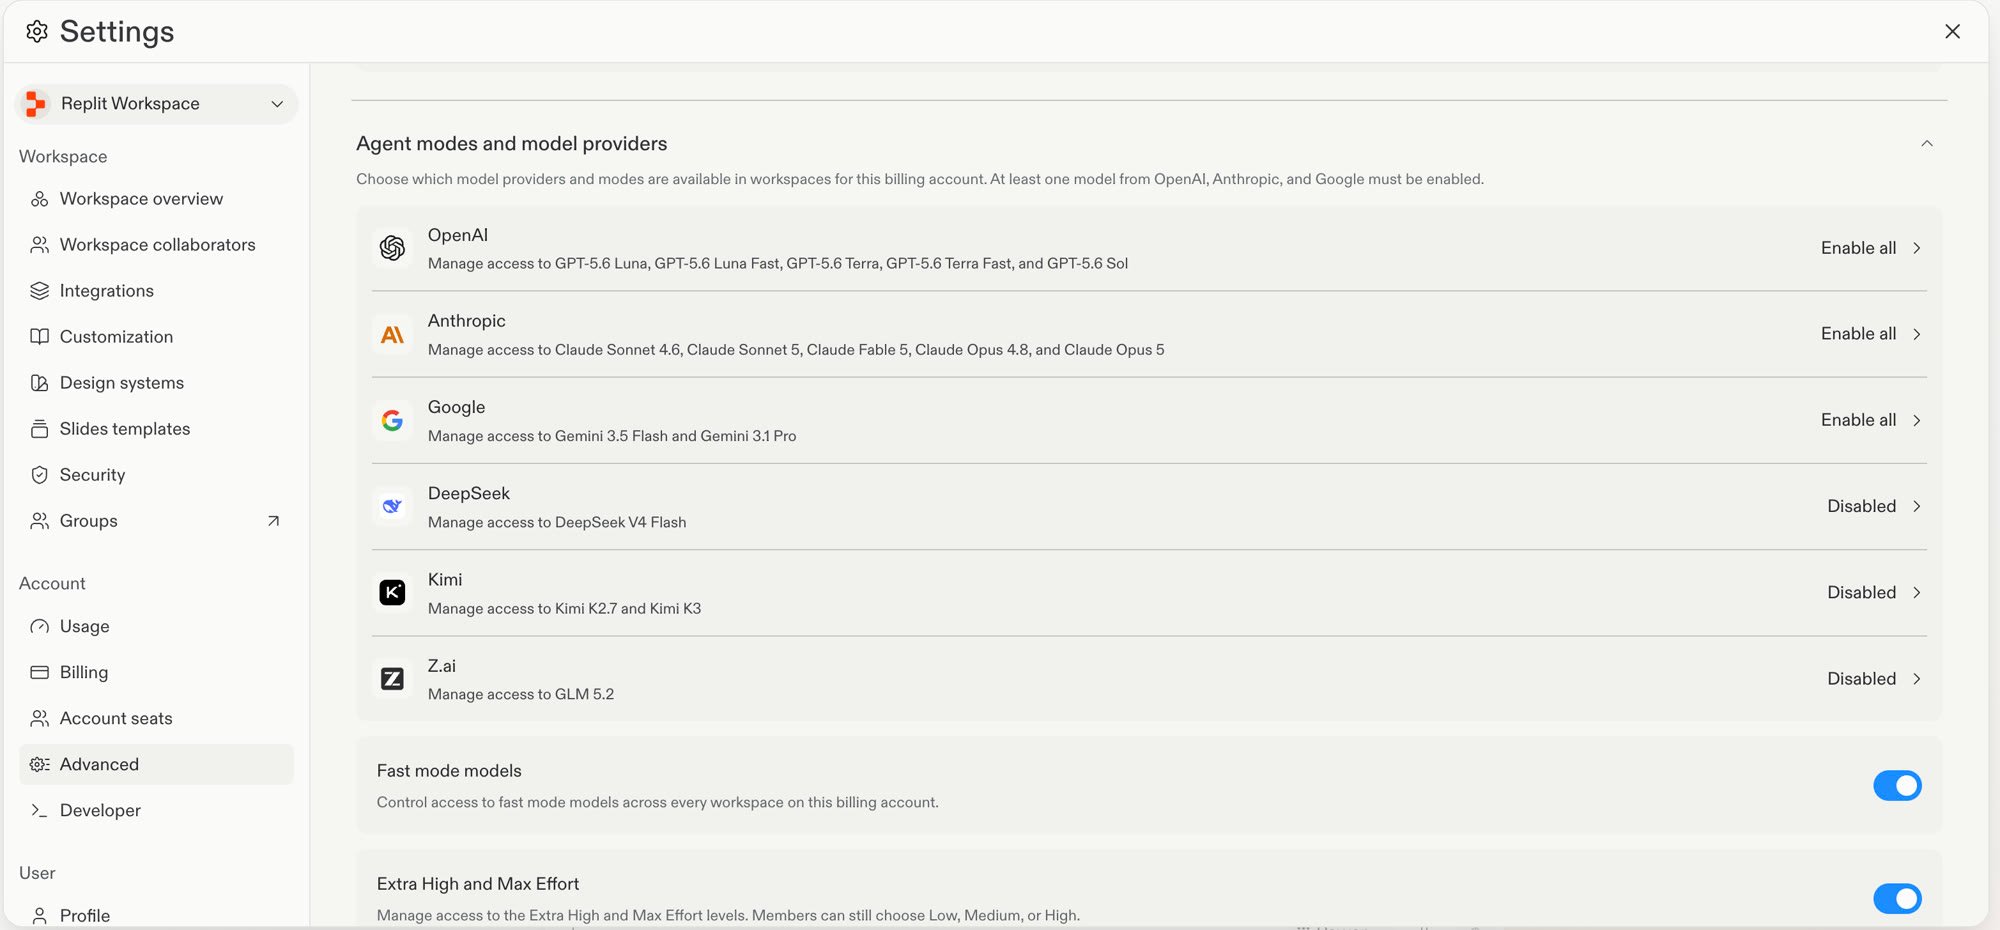
Enterpriseアカウントの管理者は、モデルプロバイダーごとにアカウントポリシーを設定し、個々のワークスペースで利用できるモデルを選択できるようになりました。組織のポリシーに合わせて**Enable all**、**Enable selected**、**Disabled**を使用してください。
[Agent Skillsの共有とインポート](/ja/features/agent/skills#share-project-skills)について詳しく見る。
## チームとエンタープライズ
### ワークスペース間でAgentモデルを管理する
Enterpriseアカウントの管理者は、モデルプロバイダーごとにアカウントポリシーを設定し、個々のワークスペースで利用できるモデルを選択できるようになりました。組織のポリシーに合わせて**Enable all**、**Enable selected**、**Disabled**を使用してください。
 [Enterpriseモデル管理](/ja/features/collaboration/enterprise-model-controls)について詳しく見る。
## プラットフォーム
### ブラックボックスペネトレーションテストを実行する
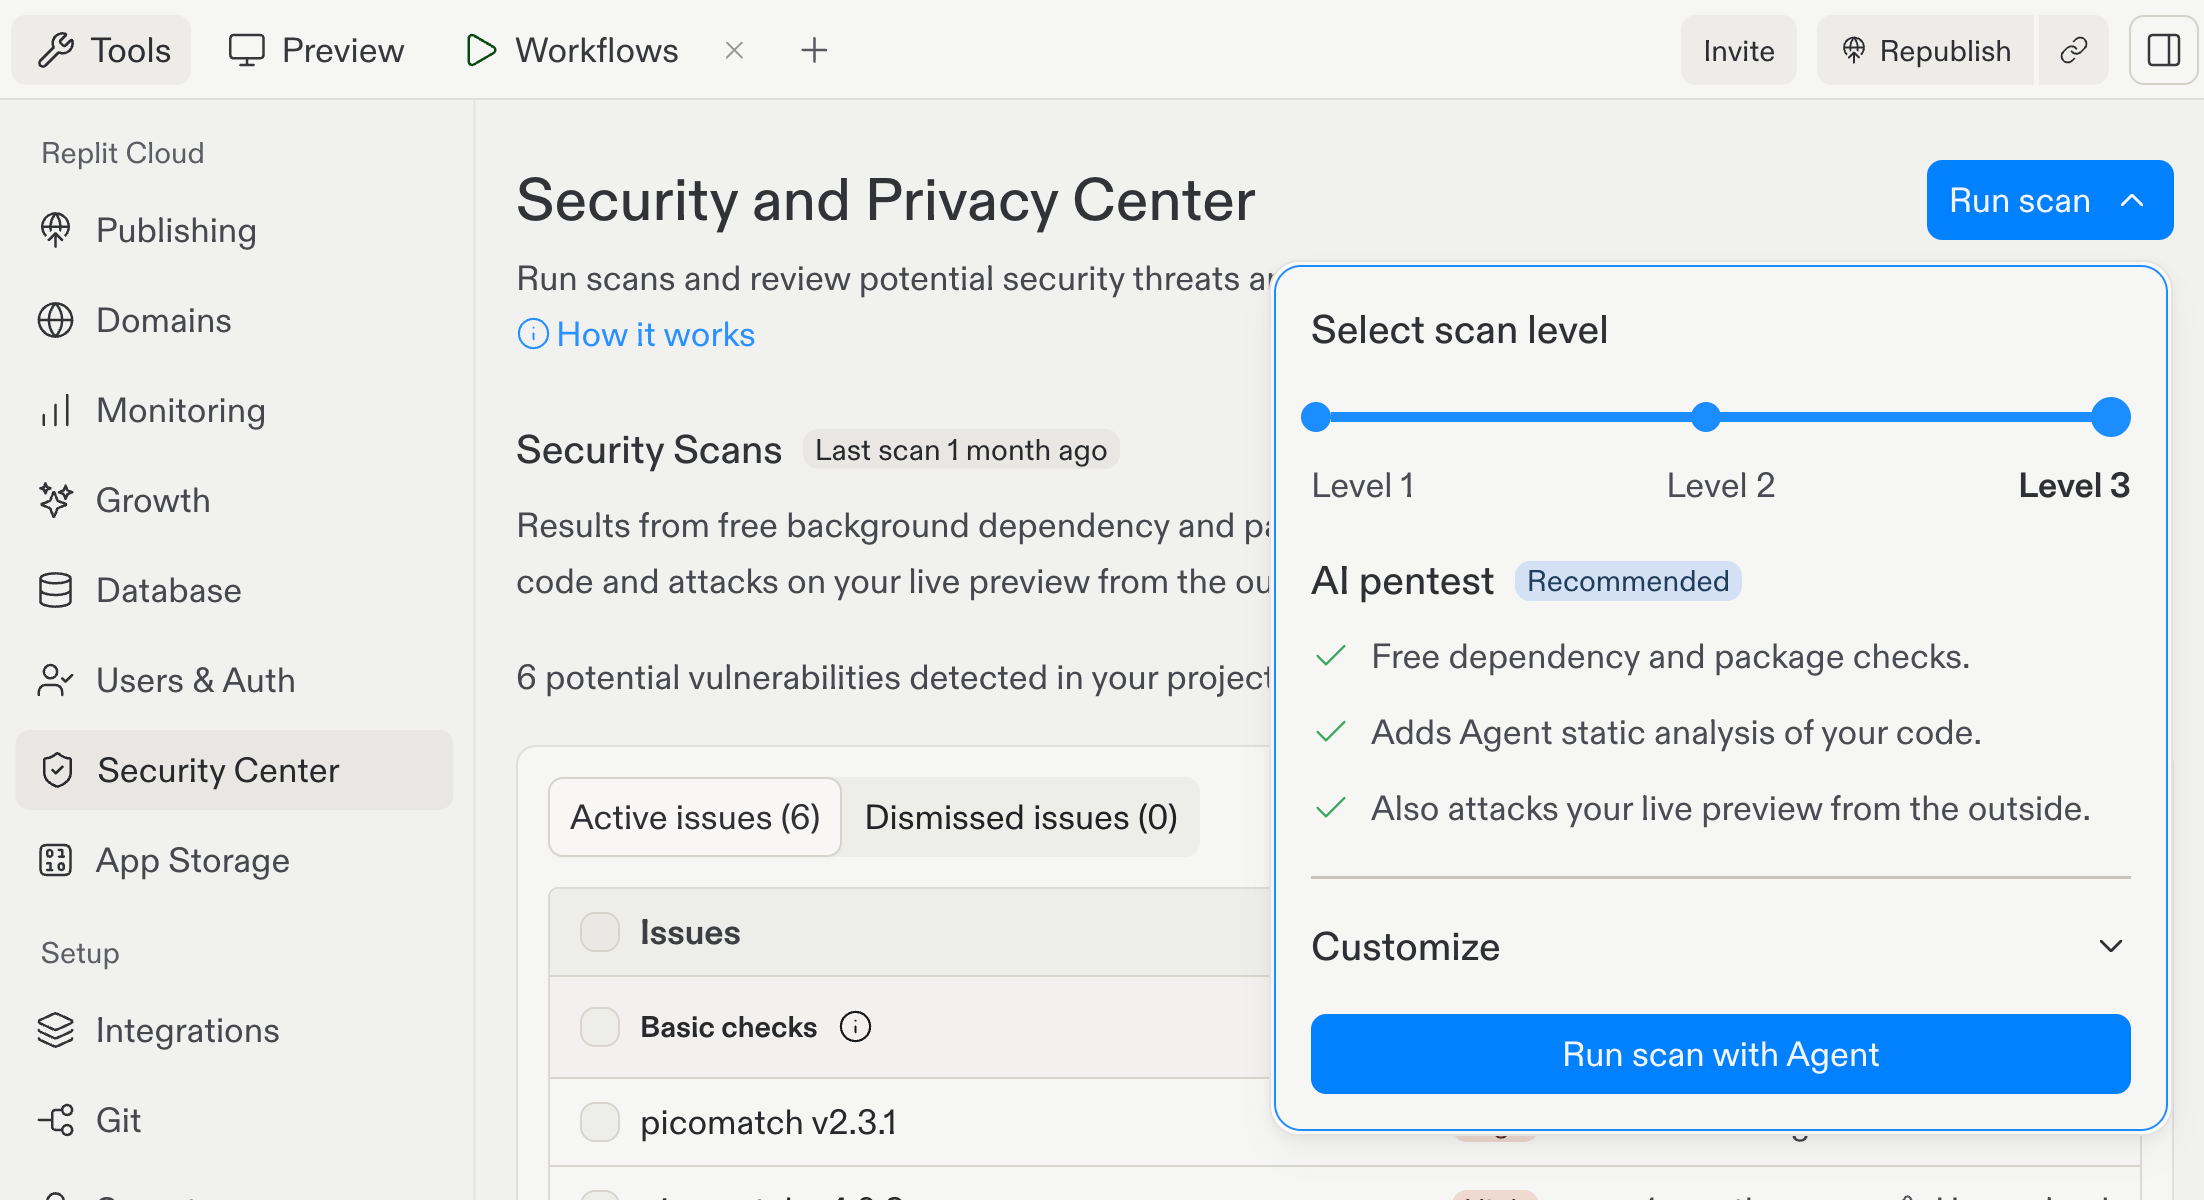
3つのチェックを組み合わせたLevel 3のセキュリティスキャンを実行します。無料の依存関係およびパッケージチェック、ソースコードに対するAgentの静的解析、稼働中のPreviewに対する外部ブラックボックステストを実行します。Replitはソースコードレビューと外部テストを並行して実行します。
[Enterpriseモデル管理](/ja/features/collaboration/enterprise-model-controls)について詳しく見る。
## プラットフォーム
### ブラックボックスペネトレーションテストを実行する
3つのチェックを組み合わせたLevel 3のセキュリティスキャンを実行します。無料の依存関係およびパッケージチェック、ソースコードに対するAgentの静的解析、稼働中のPreviewに対する外部ブラックボックステストを実行します。Replitはソースコードレビューと外部テストを並行して実行します。
 [ブラックボックスペネトレーションテスト](/ja/features/security/black-box-pen-tests)について詳しく見る。