> ## Documentation Index
> Fetch the complete documentation index at: https://docs.replit.com/llms.txt
> Use this file to discover all available pages before exploring further.
# Workspaceを作成する
> Replit EnterpriseでチームWorkspaceを作成し、その概要を開いて新しい共有スペースを確認し、名前とロゴをカスタマイズします。
Replitに初めてサインインすると、まず個人のWorkspaceから始まります。チームで開発するには、コラボレーターを招待して共同作業を管理できるチームWorkspaceを作成します。
## Workspaceとは?
Workspaceは、あなたのプロジェクトが存在する場所です。プロジェクト、人、設定、統合、共有リソースを一箇所にまとめます。
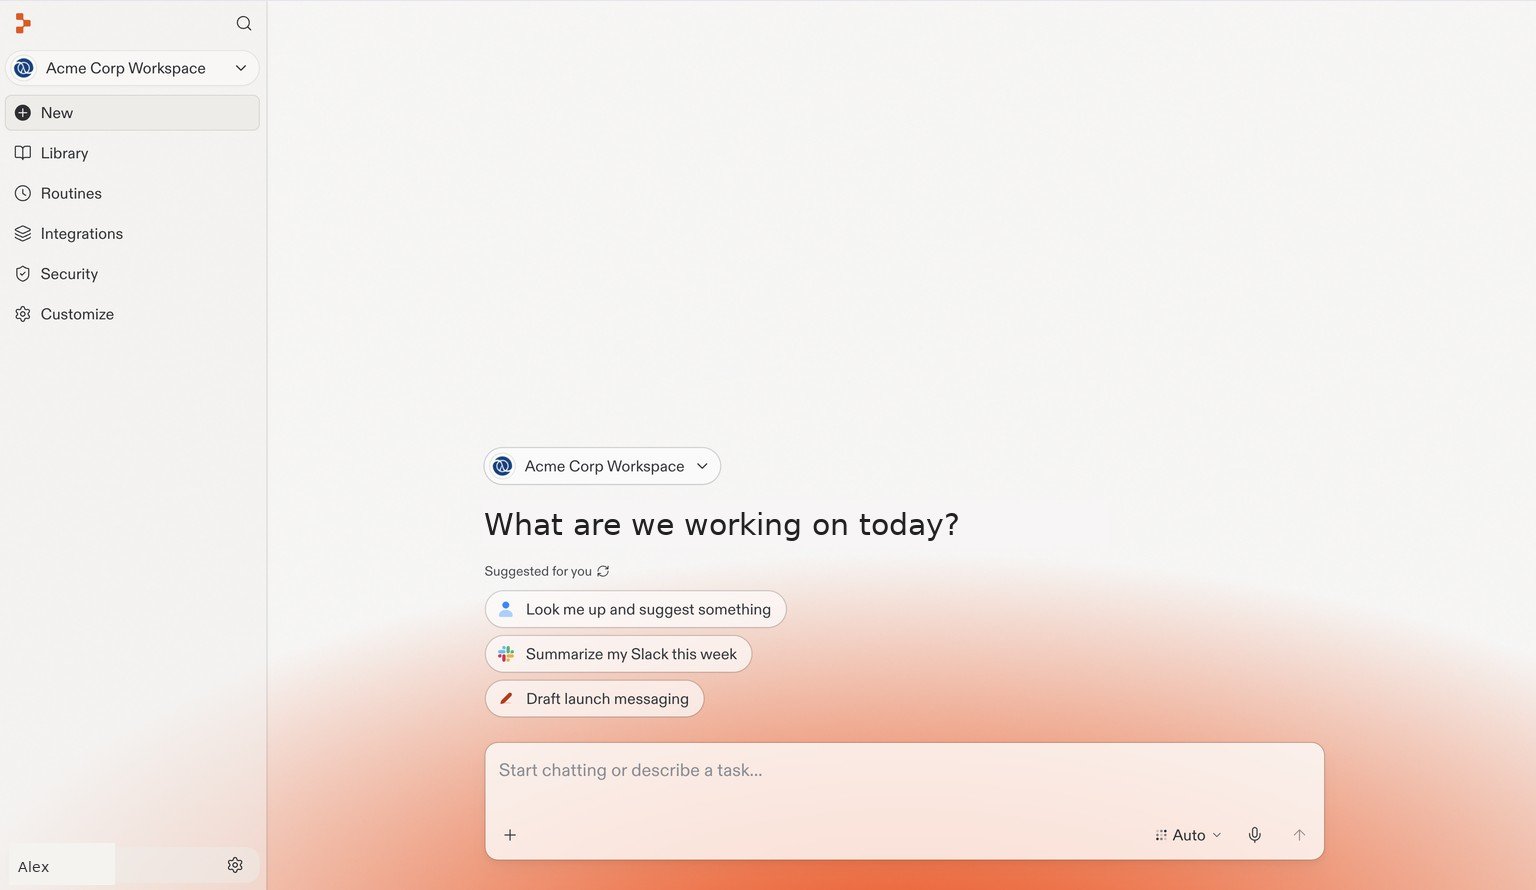 現在のWorkspaceは左上隅に表示されます。ページ中央で会話を開始するか、左側のナビゲーションからLibrary、Routines、Integrationsを探せます。
**個人のWorkspace**は自分自身のプロジェクト用です。**チームWorkspace**は、コラボレーターが一緒に開発するための共有スペースを提供します。管理者として、プロジェクトごとに個別に招待するのではなく、Workspaceに人を招待して一元的にアクセスを管理できます。
詳細については、[Workspace](/ja/features/collaboration/workspaces)を参照してください。
## チームWorkspaceを作成する
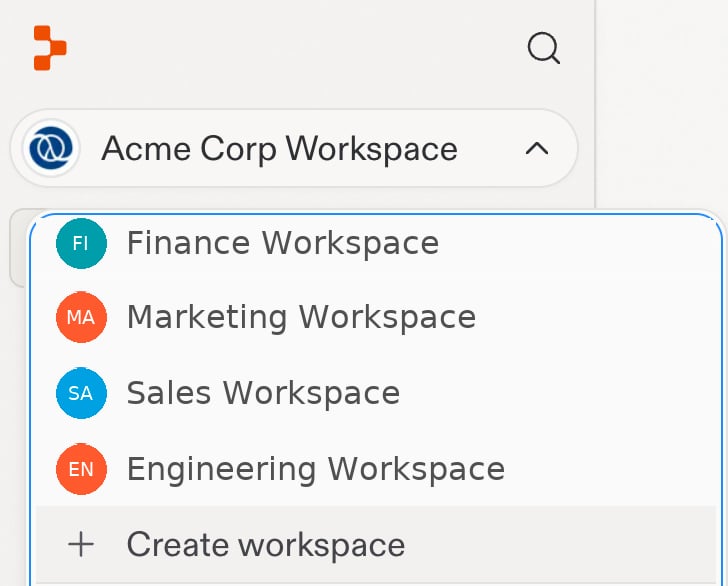
左上隅のWorkspace名を選択してWorkspaceメニューを開きます。メニュー下部の\*\*+ Create workspace\*\*を選択します。
現在のWorkspaceは左上隅に表示されます。ページ中央で会話を開始するか、左側のナビゲーションからLibrary、Routines、Integrationsを探せます。
**個人のWorkspace**は自分自身のプロジェクト用です。**チームWorkspace**は、コラボレーターが一緒に開発するための共有スペースを提供します。管理者として、プロジェクトごとに個別に招待するのではなく、Workspaceに人を招待して一元的にアクセスを管理できます。
詳細については、[Workspace](/ja/features/collaboration/workspaces)を参照してください。
## チームWorkspaceを作成する
左上隅のWorkspace名を選択してWorkspaceメニューを開きます。メニュー下部の\*\*+ Create workspace\*\*を選択します。
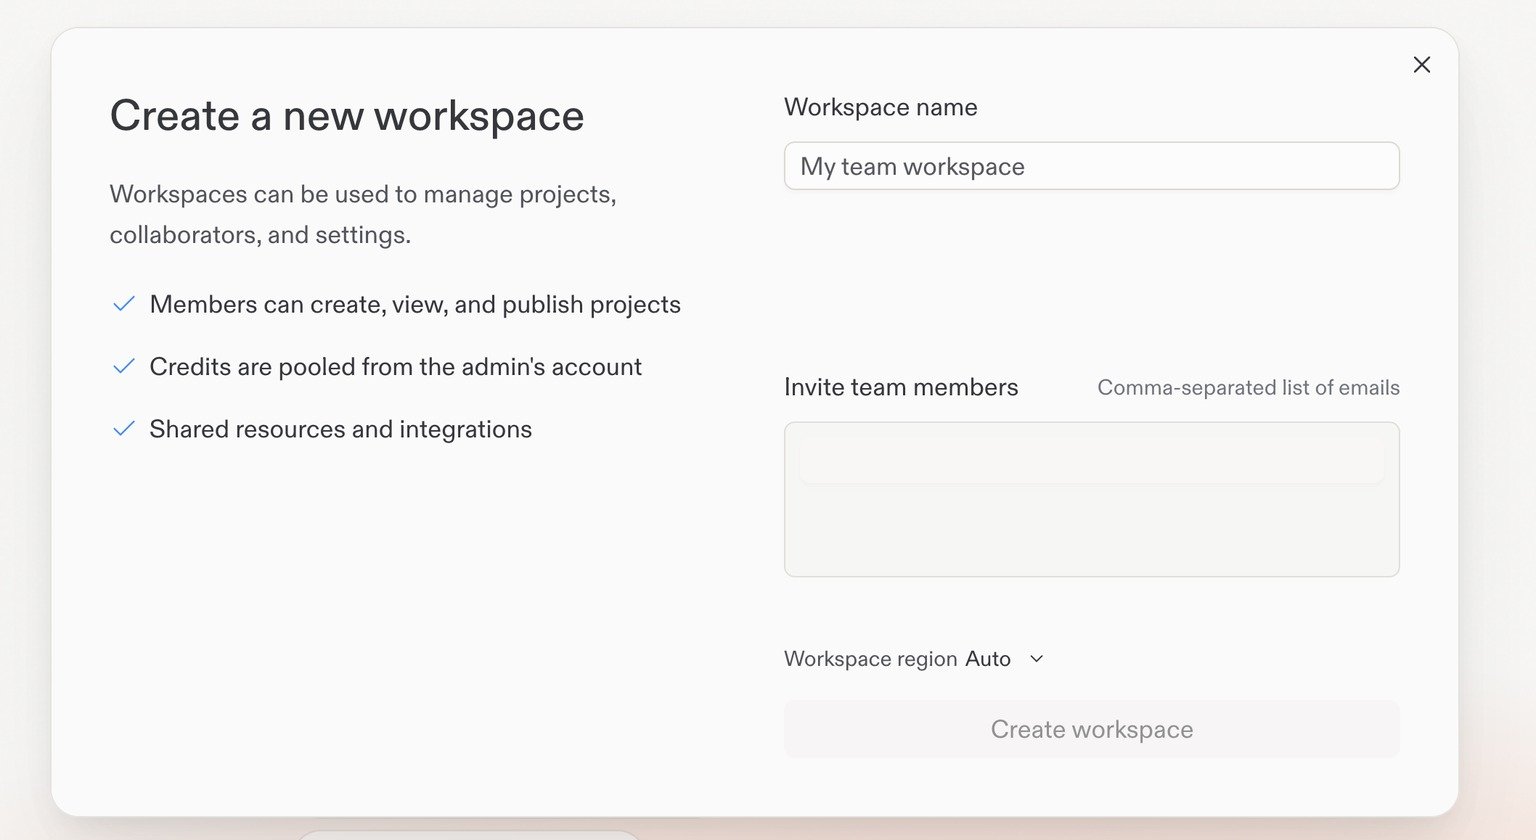
 チームWorkspaceの名前を入力し、**Create workspace**を選択します。
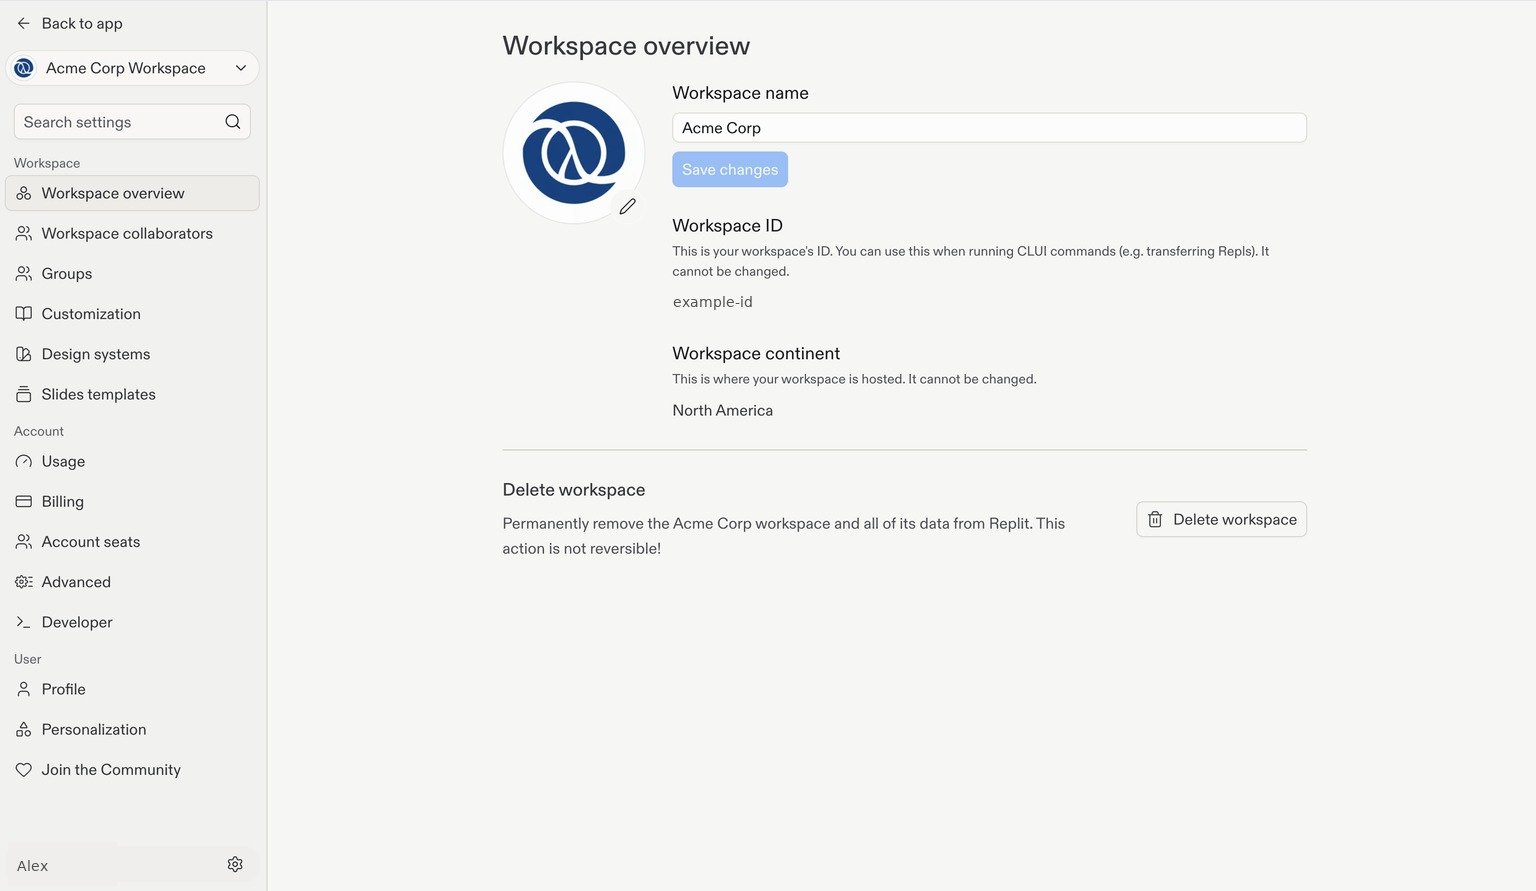
 新しいWorkspaceで、Replitの左下隅にある**設定**の歯車アイコンを選択します。**Workspace**の下にある**Workspace概要**を選択します。
ここでWorkspaceの名前とロゴを変更できます。**Workspace name**を編集して**Save changes**を選択すると名前を変更でき、現在のロゴの横にある鉛筆アイコンを選択すると画像を変更できます。
新しいWorkspaceで、Replitの左下隅にある**設定**の歯車アイコンを選択します。**Workspace**の下にある**Workspace概要**を選択します。
ここでWorkspaceの名前とロゴを変更できます。**Workspace name**を編集して**Save changes**を選択すると名前を変更でき、現在のロゴの横にある鉛筆アイコンを選択すると画像を変更できます。
 ## 次のステップ
IDプロバイダーを接続して、チームが会社の認証情報でサインインできるようにします。
## 次のステップ
IDプロバイダーを接続して、チームが会社の認証情報でサインインできるようにします。