> ## Documentation Index
> Fetch the complete documentation index at: https://docs.replit.com/llms.txt
> Use this file to discover all available pages before exploring further.
# Replit AuthからClerkに移行する
> Agentを使用して、アプリのユーザーデータを保持したまま既存のReplit AuthアプリをClerk Authに移行します。
このガイドを使用して、既存の[Replit Auth](/ja/features/auth-and-identity/authentication)アプリを[Clerk Auth](/ja/features/auth-and-identity/clerk-auth)に移行します。Agentが対象アプリの移行を処理するため、既存ユーザーは自分のデータへのアクセスを引き続き利用できます。
この自動移行は、Replit Authを使用しているアプリ向けです。アプリが別の認証システムを使用している場合は、このフローを使用しないでください。
## 移行を開始する
Agentの移行は常に新しいタスクで実行する必要があります。
移行は以下のいずれかの方法で開始できます。
### Agentから開始する
サイドバーの\*\*+**を選択するか、**Cmd+Shift+P**(Mac)または**Ctrl+Shift+P\*\*(Windows)を押して、新しいタスクを作成します。
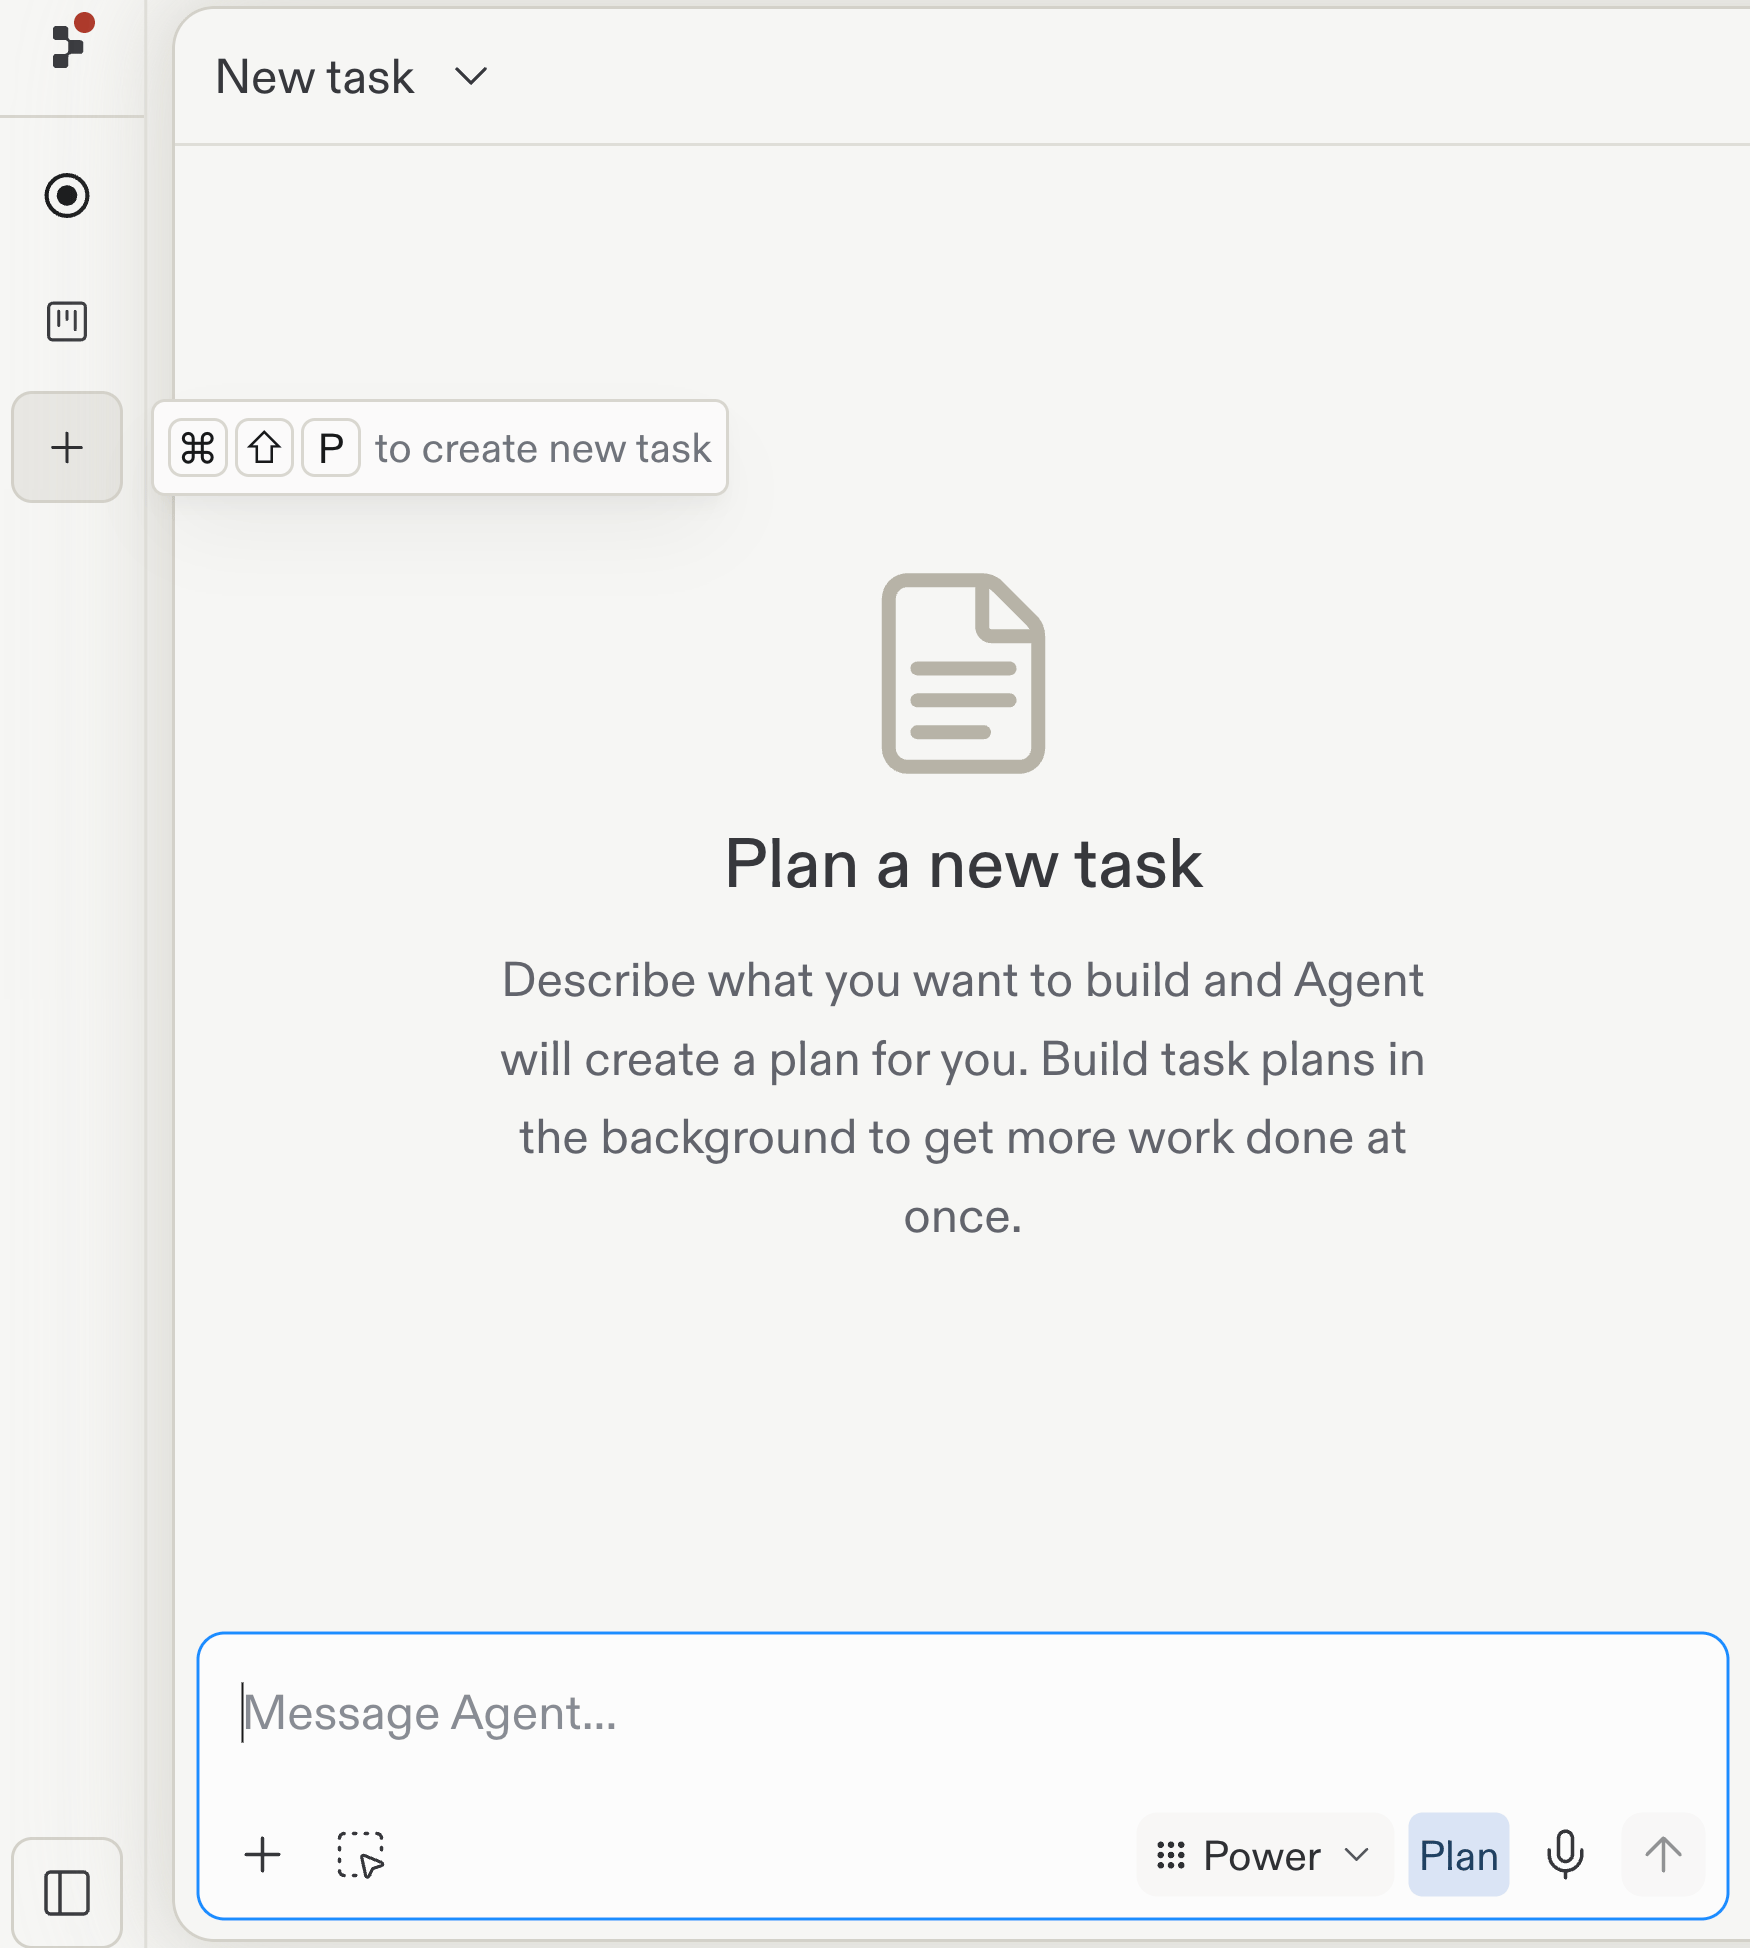 新しいタスクで、アプリをReplit AuthからClerkに移行するようAgentに依頼します。
### Authペインから開始する
Project Editorで**Tools**を開きます。
新しいタスクで、アプリをReplit AuthからClerkに移行するようAgentに依頼します。
### Authペインから開始する
Project Editorで**Tools**を開きます。
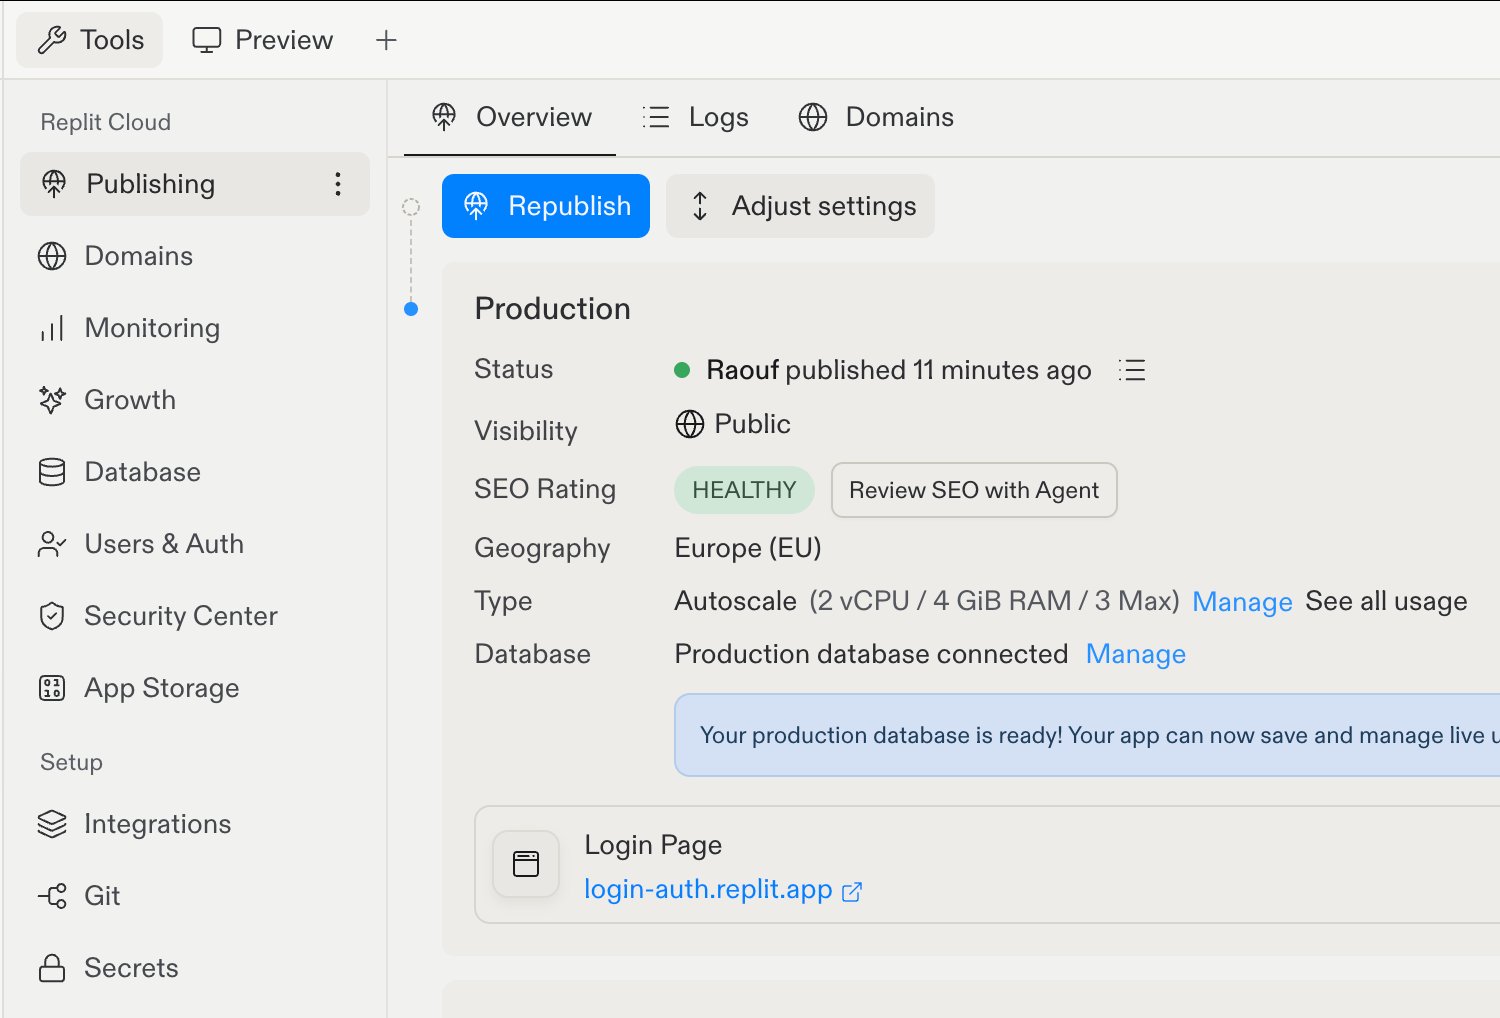
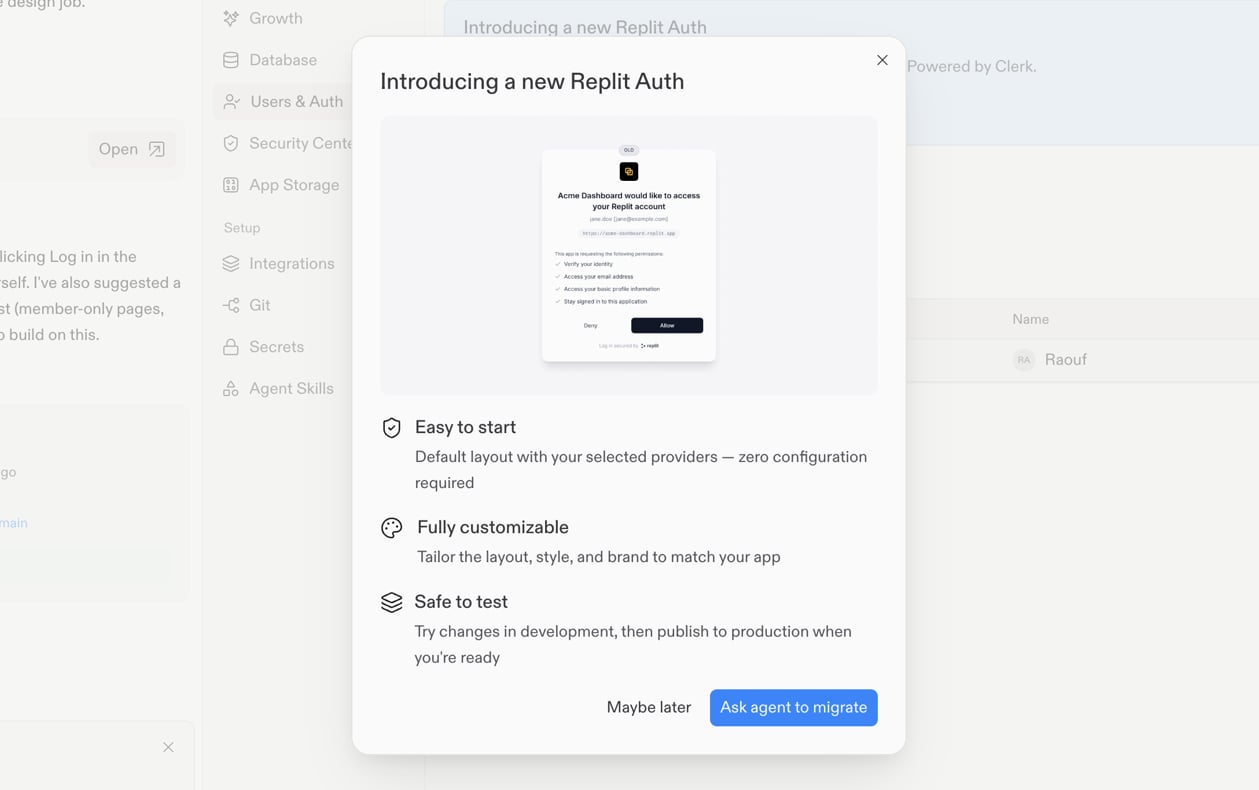
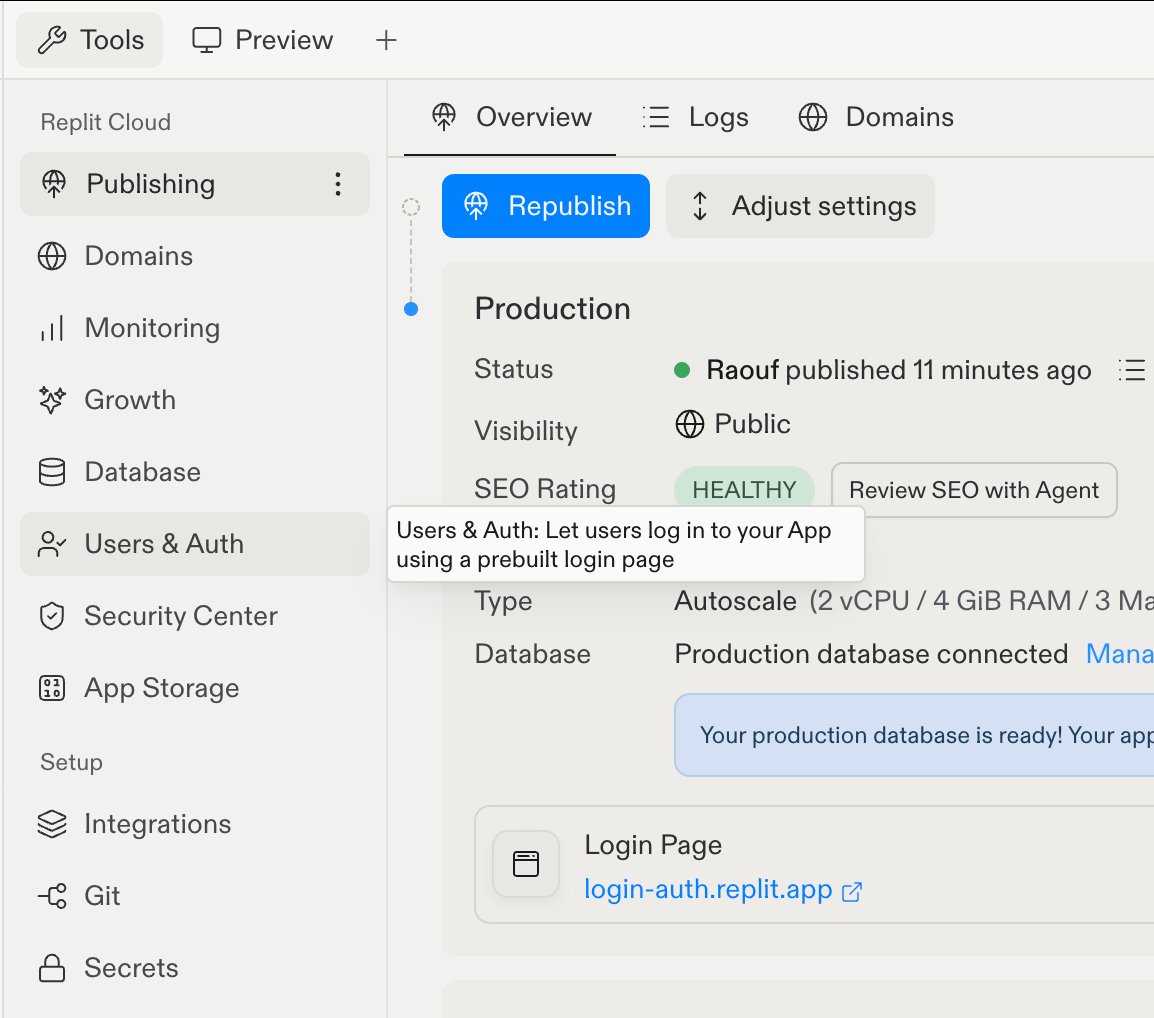 **Introducing a new Replit Auth**バナーで**Update now**を選択します。
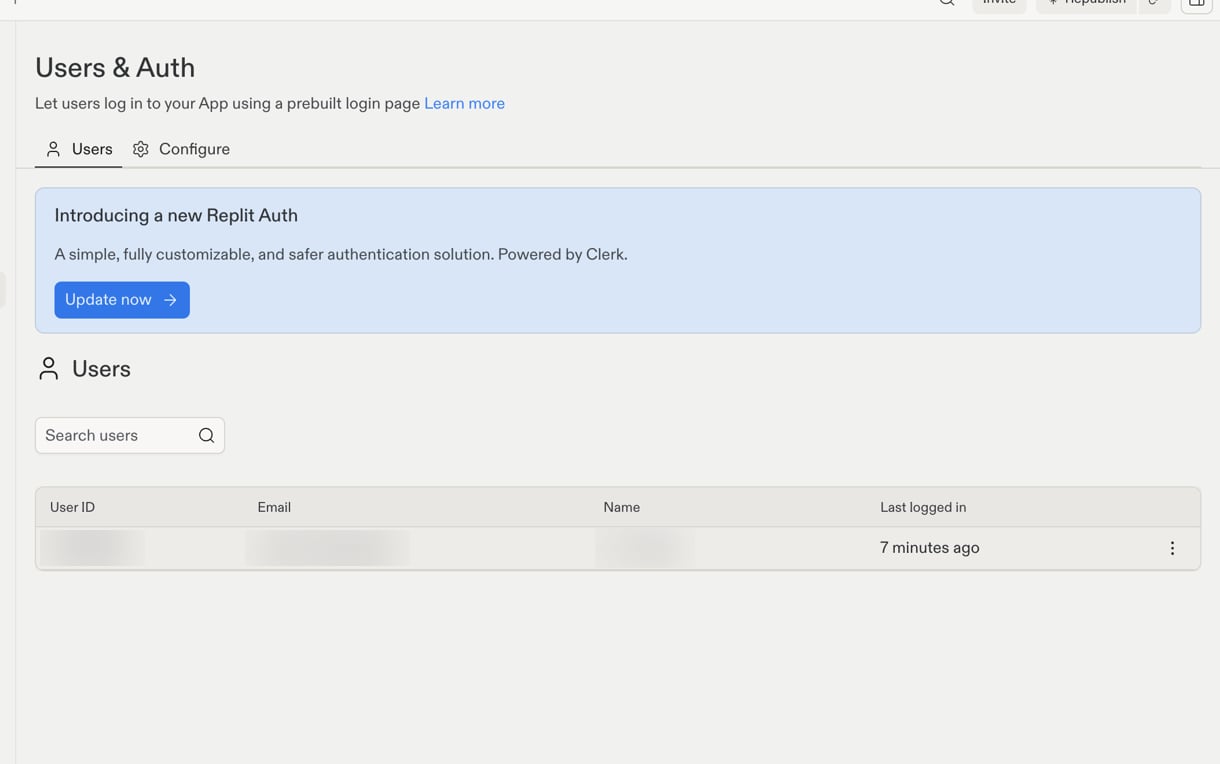 ダイアログで**Ask agent to migrate**を選択します。
 ### 移行プランを確認する
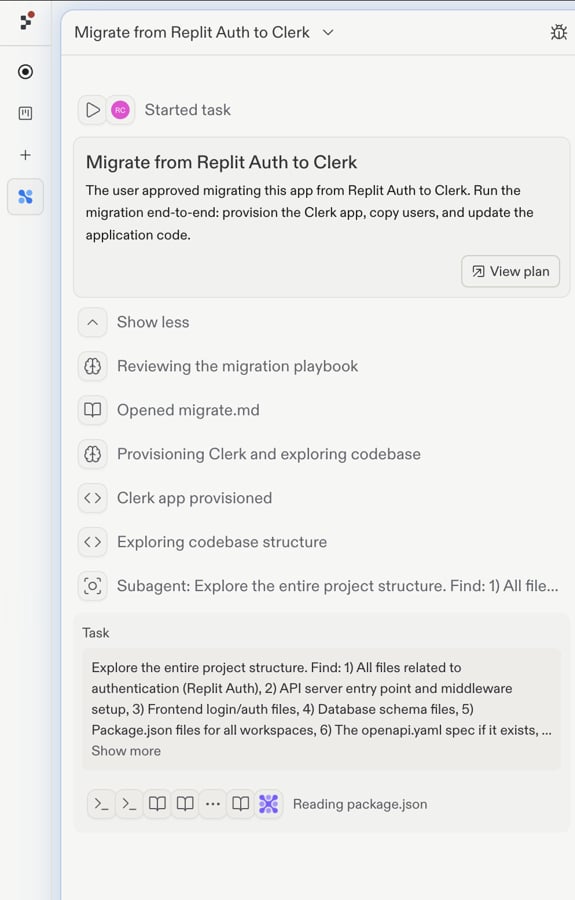
どちらの方法で開始しても、Agentは**Migrate from Replit Auth to Clerk**タスクを作成し、移行プランを準備します。タスクが進む前に**View plan**を選択してプランを確認してください。
### 移行プランを確認する
どちらの方法で開始しても、Agentは**Migrate from Replit Auth to Clerk**タスクを作成し、移行プランを準備します。タスクが進む前に**View plan**を選択してプランを確認してください。
 Agentが作業している間は、アプリの認証コードやClerkの認証情報を変更しないでください。
## Agentが行うこと
Agentは以下の順序で移行を完了します。
1. アカウントのアイデンティティ情報やサポートされているサインイン認証情報を含む、Replit Authのユーザーデータを Clerk に移動します。
2. アプリを変更する前に、データ移行が完了するのを待ちます。
3. アプリのサインインとセッションロジックを更新し、アプリを再起動して、利用可能な自動チェックを実行します。
## アプリのデータはそのまま残ります
Agentが変更するのはアプリの認証コードのみです。アプリの既存のデータベースデータやスキーマは更新されません。テーブルとリレーションはそのまま維持されます。
既存のユーザーは、プロフィール、保存された作業内容、権限など、すでに所有しているレコードに引き続き紐付けられます。
## 所要時間
Agentの作業には10分から1時間程度かかると見込んでください。データ移行自体は、小規模なアプリでは数分、多数のユーザーを抱えるアプリでは最大数時間かかることがあります。Agentは、そのデータ移行が完了するまでアプリのコードの変更を開始しません。
## 移行後
公開する前に、Developmentで更新されたアプリをテストしてください。
1. 既存のアカウントでサインインし、保存されたデータが利用できることを確認します。
2. サインアウトして再度サインインします。
3. 新しいテストアカウントを作成し、想定どおりにアプリを使用できることを確認します。
## 追加リソース
* [Clerk Auth概要](/ja/features/auth-and-identity/clerk-auth) — ReplitでのClerk Authの仕組み
* [カスタム認証移行を計画する](/ja/features/auth-and-identity/custom-auth-migration) — カスタム認証システムからの移行を計画する
Agentが作業している間は、アプリの認証コードやClerkの認証情報を変更しないでください。
## Agentが行うこと
Agentは以下の順序で移行を完了します。
1. アカウントのアイデンティティ情報やサポートされているサインイン認証情報を含む、Replit Authのユーザーデータを Clerk に移動します。
2. アプリを変更する前に、データ移行が完了するのを待ちます。
3. アプリのサインインとセッションロジックを更新し、アプリを再起動して、利用可能な自動チェックを実行します。
## アプリのデータはそのまま残ります
Agentが変更するのはアプリの認証コードのみです。アプリの既存のデータベースデータやスキーマは更新されません。テーブルとリレーションはそのまま維持されます。
既存のユーザーは、プロフィール、保存された作業内容、権限など、すでに所有しているレコードに引き続き紐付けられます。
## 所要時間
Agentの作業には10分から1時間程度かかると見込んでください。データ移行自体は、小規模なアプリでは数分、多数のユーザーを抱えるアプリでは最大数時間かかることがあります。Agentは、そのデータ移行が完了するまでアプリのコードの変更を開始しません。
## 移行後
公開する前に、Developmentで更新されたアプリをテストしてください。
1. 既存のアカウントでサインインし、保存されたデータが利用できることを確認します。
2. サインアウトして再度サインインします。
3. 新しいテストアカウントを作成し、想定どおりにアプリを使用できることを確認します。
## 追加リソース
* [Clerk Auth概要](/ja/features/auth-and-identity/clerk-auth) — ReplitでのClerk Authの仕組み
* [カスタム認証移行を計画する](/ja/features/auth-and-identity/custom-auth-migration) — カスタム認証システムからの移行を計画する