> ## Documentation Index
> Fetch the complete documentation index at: https://docs.replit.com/llms.txt
> Use this file to discover all available pages before exploring further.

# アプリをリミックスする

> 既存の Replit プロジェクトからアプリを始める方法を学びましょう。**Remix** とは、現在アクセスできるアプリから作成する新しい Replit App です。

export const AiPrompt = ({children}) => {
  return <CodeBlock className="relative block font-sans whitespace-pre-wrap break-words">
      <div className="pr-7">
        {children}
      </div>
    </CodeBlock>;
};

export const RemixButton = ({replUrl = "https://replit.com/@sarahxli/Digital-Piano-Keys?v=1", label = "Remix this app", count = null}) => {
  if (typeof document !== 'undefined' && !document.getElementById('remix-button-styles')) {
    const style = document.createElement('style');
    style.id = 'remix-button-styles';
    style.textContent = `
      /* Button container */
      .remix-btn-container {
        --btn-bg: var(--replit-docs-bg-muted, #F1F1EE);
        --btn-bg-hover: var(--replit-docs-bg-elevated, #F1F1EE);
        --btn-text: var(--replit-docs-text, #1D1D1D);
        --btn-border: var(--replit-docs-border, #DEDAD5);
        --transition-duration: 120ms;
        display: flex;
        justify-content: center;
      }

      .dark .remix-btn-container,
      html.dark .remix-btn-container,
      [data-theme="dark"] .remix-btn-container {
        --btn-bg: var(--replit-docs-bg-elevated, #222223);
        --btn-bg-hover: var(--replit-docs-bg-muted, #222223);
        --btn-text: var(--replit-docs-text, #F5F5F5);
        --btn-border: var(--replit-docs-border, #39393D);
      }

      /* Button base styles - matching template page exactly */
      .remix-btn {
        /* Layout */
        display: inline-flex;
        align-items: center;
        justify-content: center;
        width: 50%;
        max-width: 400px;
        min-width: 200px;
        height: 36px;
        padding: 0 16px;
        gap: 8px;

        /* Typography */
        font-family: 'IBM Plex Sans', -apple-system, BlinkMacSystemFont, 'Segoe UI', Roboto, sans-serif;
        font-size: 14px;
        font-weight: 500;
        line-height: 1.5;
        text-decoration: none;
        white-space: nowrap;

        /* Visual */
        border-radius: 8px;
        border: none;
        background: var(--btn-bg);
        color: var(--btn-text);
        box-shadow: inset 0 0 0 1px var(--btn-border);

        /* Interaction */
        cursor: pointer;
        user-select: none;
        transition-property: background-color;
        transition-duration: var(--transition-duration);
        transition-timing-function: ease-out;
        -webkit-tap-highlight-color: transparent;
        -webkit-touch-callout: none;
      }

      /* Content (icon + label) - centered */
      .remix-btn-content {
        display: flex;
        align-items: center;
        justify-content: center;
        gap: 8px;
      }

      /* Hover state */
      @media (hover: hover) {
        .remix-btn:hover {
          background: var(--btn-bg-hover);
        }
      }

      /* Active/pressed state */
      .remix-btn:active {
        background: var(--btn-bg-hover);
        transform: scale(0.99);
      }

      /* Focus visible state */
      .remix-btn:focus-visible {
        outline: 2px solid #0079F2;
        outline-offset: 2px;
      }

      /* Icon styles */
      .remix-btn svg {
        flex-shrink: 0;
        width: 20px;
        height: 20px;
      }

      /* Label styles */
      .remix-btn span {
        font-weight: 600;
      }

      /* Animation */
      @keyframes remix-btn-fade-in {
        from { opacity: 0; transform: translateY(4px); }
        to { opacity: 1; transform: translateY(0); }
      }

      .remix-btn-container {
        animation: remix-btn-fade-in 300ms ease-out;
      }
    `;
    document.head.appendChild(style);
  }
  const handleClick = e => {
    e.preventDefault();
    const url = replUrl.includes('replit.com') ? replUrl : `https://replit.com${replUrl}`;
    window.open(url, '_blank');
  };
  const RemixIcon = () => <svg width="20" height="20" viewBox="0 0 24 24" fill="currentColor" preserveAspectRatio="xMidYMin">
      <path d="M17.47 13.47a.75.75 0 0 1 1.06 0l4 4a.745.745 0 0 1 .118.16c.016.027.032.054.044.083.007.016.01.032.016.049a.744.744 0 0 1 .042.238.743.743 0 0 1-.037.223c-.007.02-.012.042-.02.062a.748.748 0 0 1-.163.245l-4 4a.75.75 0 0 1-1.06-1.06l2.72-2.72H15.95a4.753 4.753 0 0 1-3.886-2.09l-.351-.442a.75.75 0 0 1 1.172-.936l.36.45.04.055a3.251 3.251 0 0 0 2.68 1.463h4.224l-2.72-2.72a.75.75 0 0 1 0-1.06ZM17.47 1.47a.75.75 0 0 1 1.06 0l4 4a.756.756 0 0 1 .162.816.749.749 0 0 1-.162.244l-4 4a.75.75 0 0 1-1.06-1.06l2.72-2.72H16.02a3.25 3.25 0 0 0-2.674 1.372l-5.44 8.58a4.75 4.75 0 0 1-3.934 2.047L2 18.75a.75.75 0 0 1 0-1.5h1.979a3.25 3.25 0 0 0 2.673-1.373l5.442-8.578.02-.03a4.751 4.751 0 0 1 3.913-2.018l4.162-.001-2.72-2.72a.75.75 0 0 1 0-1.06ZM3.972 5.25a4.75 4.75 0 0 1 4.27 2.612.751.751 0 0 1-1.34.675 3.252 3.252 0 0 0-2.698-1.781l-.226-.006H2a.75.75 0 0 1 0-1.5h1.972Z" />
    </svg>;
  return <div className="remix-btn-container" style={{
    margin: '16px 0'
  }}>
      <button onClick={handleClick} className="remix-btn" type="button" tabIndex={0}>
        <RemixIcon />
        <span>{label}</span>
      </button>
    </div>;
};

Replit で別の方法でビルドを始めたいですか？**リミックス**を使えば、コミュニティが作成した既存のアプリから始められます。スクラッチからビルドするより速く、動作するコードから学ぶ優れた方法です。

<Tip>
  Replit が初めてですか？Agent がスクラッチからどのように動作するかを学ぶために、[最初のアプリをビルドする](/ja/build/your-first-app) を試してみてください。
</Tip>

## リミックスを作成する

⏰ *所要時間: 約5分*

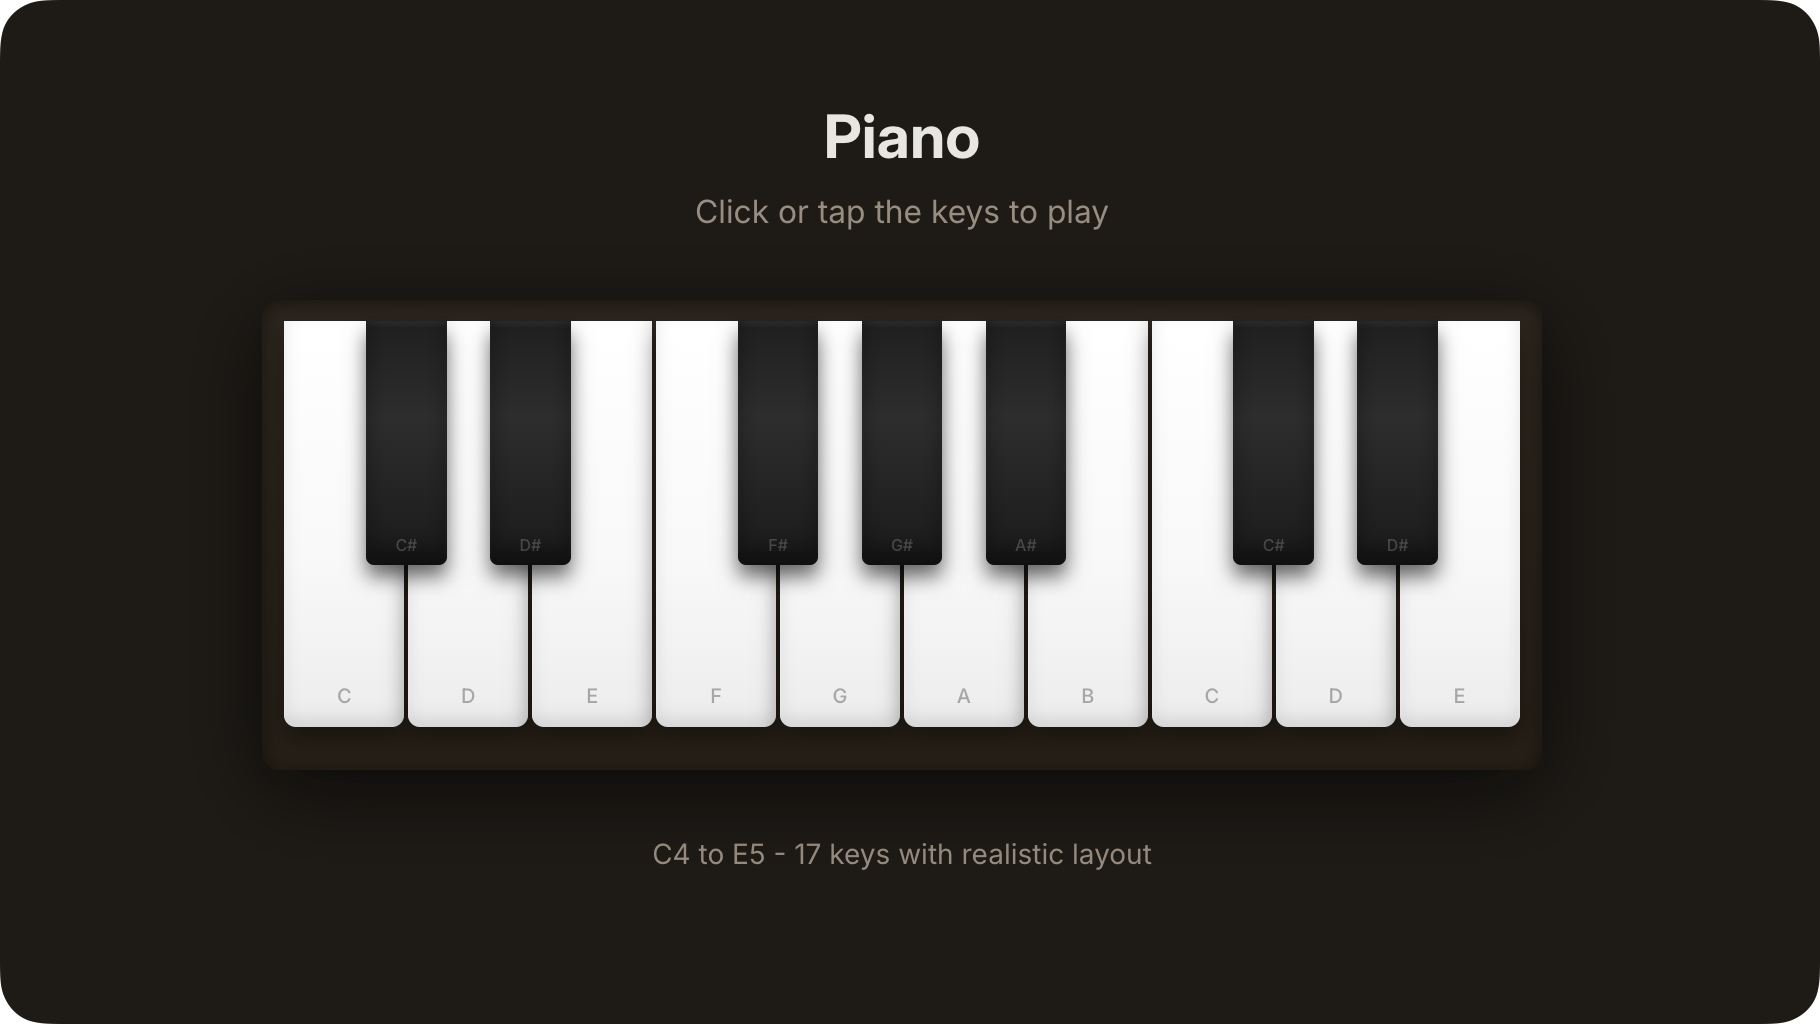
このガイドの手順に従って、インタラクティブなデジタルピアノアプリのリミックスを作成します:

<Frame>
  <img src="https://mintcdn.com/replit/CKgy3zbnPnUlDukQ/images/getting-started/quickstart_piano_complete.png?fit=max&auto=format&n=CKgy3zbnPnUlDukQ&q=85&s=76dbd6c44f768c4cb88bd7f1ee51699c" alt="鍵盤付きのインタラクティブなデジタルピアノ" width="1820" height="1024" data-path="images/getting-started/quickstart_piano_complete.png" />
</Frame>

<Tip>
  公開済みのアプリは [Digital Piano Keys](https://digital-piano-keys.replit.app) でお試しください。
</Tip>

<Steps>
  <Step title="アプリをリミックスする">
    以下の **Remix this app** ボタンを選択して、Digital Piano アプリの独自バージョンの作成を開始します。

    <RemixButton replUrl="https://replit.com/@sarahxli/Digital-Piano-Keys?v=1" label="Remix this app" />
  </Step>

  <Step title="アプリの詳細を入力する">
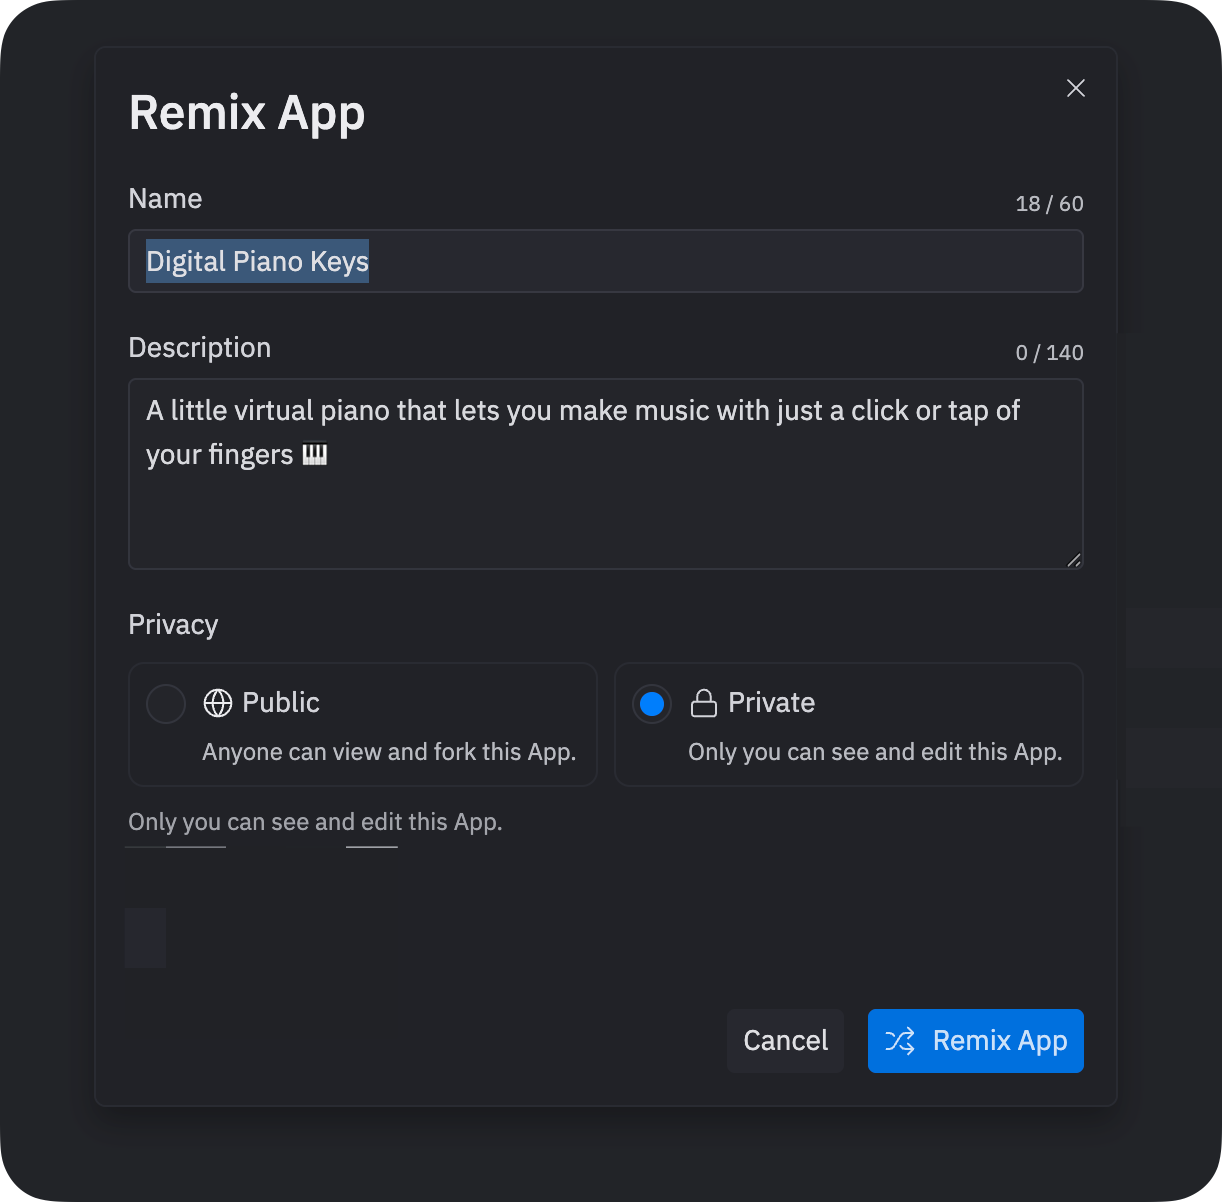
    ボタンを選択すると、**Remix App** ダイアログが表示されます。**Remix App** を選択して続行します。これらの詳細は後で編集できます。

    <Frame>
      <img src="https://mintcdn.com/replit/u7DyWVbaIRze6Cmd/images/getting-started/quickstart_remix_dialog.png?fit=max&auto=format&n=u7DyWVbaIRze6Cmd&q=85&s=d1d41a640ac0fc55679aa4081d5c5ff2" alt="アプリ名、説明、プライバシー設定が表示された Remix App ダイアログ" width="1222" height="1202" data-path="images/getting-started/quickstart_remix_dialog.png" />
    </Frame>
  </Step>

  <Step title="ピアノを演奏する">
    アプリが自動的に起動します。**Preview** タブに移動してピアノのインターフェースを確認します。

    <Frame>
      <video autoPlay muted loop playsInline src="https://cdn.replit.com/sanity/quickstart-piano-demo.mp4" />
    </Frame>

    これで、インタラクティブに操作して改良できる完全に機能するリミックスが完成しました。

    ピアノの鍵盤をクリックしてメモを演奏し、サウンドを聴いてみてください。アプリをテストするために簡単なメロディを演奏してみてください。
  </Step>
</Steps>

## リミックスを改良する

動作するアプリが完成したら、Agent を使って変更・拡張します。以下のセクションでは、リミックスを改良する実践的な例を紹介します。

### Agent を使って機能を追加する

Agent を使ってリミックスに複雑な機能を追加します:

<Steps>
  <Step title="プロンプトを作成する">
    **Agent** タブに移動します。

    テキストエリアに以下のプロンプトを入力します:

    <AiPrompt>
      Add a tutorial mode that teaches you how to play simple songs. When tutorial mode is active, highlight the next key that should be played, wait for you to press the correct key before moving on, and display the song name at the top. Include a button to start the tutorial and pre-load at least two simple songs like "Mary Had a Little Lamb" or "Twinkle Twinkle Little Star."
    </AiPrompt>

    プロンプトを送信すると、Agent が確認や説明を求めて一時停止することがあります。テキストエリアで返答してください。
  </Step>

  <Step title="機能をテストする">
    **Preview** タブに移動して、Agent によるピアノの更新を確認します。

    チュートリアルモードを開始して、鍵盤がハイライトされる通りに演奏してみてください。

    <Frame>
      <video autoPlay muted loop playsInline src="https://cdn.replit.com/sanity/quickstart-remix-piano-play.mp4" />
    </Frame>

    最初のプロンプトにビジュアルデザインの具体的な詳細が含まれていなかったため、結果が期待通りでない場合があります。
  </Step>

  <Step title="機能を改良する">
    機能が期待と異なる場合は、**Agent** テキストエリアにフォローアッププロンプトを入力して会話を続けます。例えば:

    <AiPrompt>
      Make the highlighted key glow with a pulsing animation and add a progress indicator showing how far along in the song I am.
    </AiPrompt>

    これらの変更を元に戻すには、**Agent** タブで変更のプランを開始した直後に作成されたチェックポイントの **Rollback to here** を選択してください。

    [チェックポイントとロールバック](/references/version-control/checkpoints-and-rollbacks) について詳しく学びましょう。
  </Step>
</Steps>

### Lite モードを使って機能を追加する

以下の手順で [Lite モード](/references/agent/agent-modes) を使ってリミックスに素早い改良を加えます:

<Steps>
  <Step title="プロンプトを作成する">
    [Lite モード](/references/agent/agent-modes) に切り替えて、以下のプロンプトを入力します:

    <AiPrompt>
      Add record and playback buttons to capture and replay piano performances.
    </AiPrompt>

    プロンプトを送信すると、Agent が加えたい変更を説明し、処理を続ける前にコードの変更を確認できるようにします。
    現在のコードと更新の比較を表示するには **Preview code changes** を選択してください。
  </Step>

  <Step title="機能をテストする">
    **Apply all** を選択して、その後の確認を承認して続行します。

    **Preview** タブに移動して結果を確認します。演奏した内容をキャプチャして再生できるレコードボタンと再生ボタンが表示されているはずです。

    これらの変更を元に戻すには、**Agent** タブのロールバック機能を使ってください。
  </Step>
</Steps>

## 旅を続ける

このチュートリアルを完了したので、次のリミックス固有のステップをご紹介します:

* **もっとリミックスを探索する**: [コミュニティ](https://replit.com/community/all) を閲覧して、リミックスして学べるアプリを見つけましょう
* **スクラッチからビルドする**: Agent で[自分のアプリを作成する](/ja/build/your-first-app)を試して、体験を比較しましょう
* **リミックス用に公開する**: 他の人があなたの作業の上に構築できるよう、改良したバージョンを共有しましょう。