> ## Documentation Index
> Fetch the complete documentation index at: https://docs.replit.com/llms.txt
> Use this file to discover all available pages before exploring further.

# Shopify ストアフロントを構築する

> Replit を使ってカスタム Shopify ストアフロントをデザインしてローンチする方法を学びましょう。

export const CANDLE_STORE_PROMPT = `Build me an online store that sells hand-poured soy candles for a brand called "Ember & Oak." Use Shopify as the backend for the store and its products.

It should feel warm, calm, and premium — like a boutique home-goods brand. Use a soft cream background, deep charcoal text, and a muted amber accent. Elegant serif headlines, generous spacing, and soft rounded product cards.

Top to bottom:

A simple header with a small "Ember & Oak" wordmark on the left, a few links in the middle (Shop, Scents, Our Story), and a cart icon on the right.

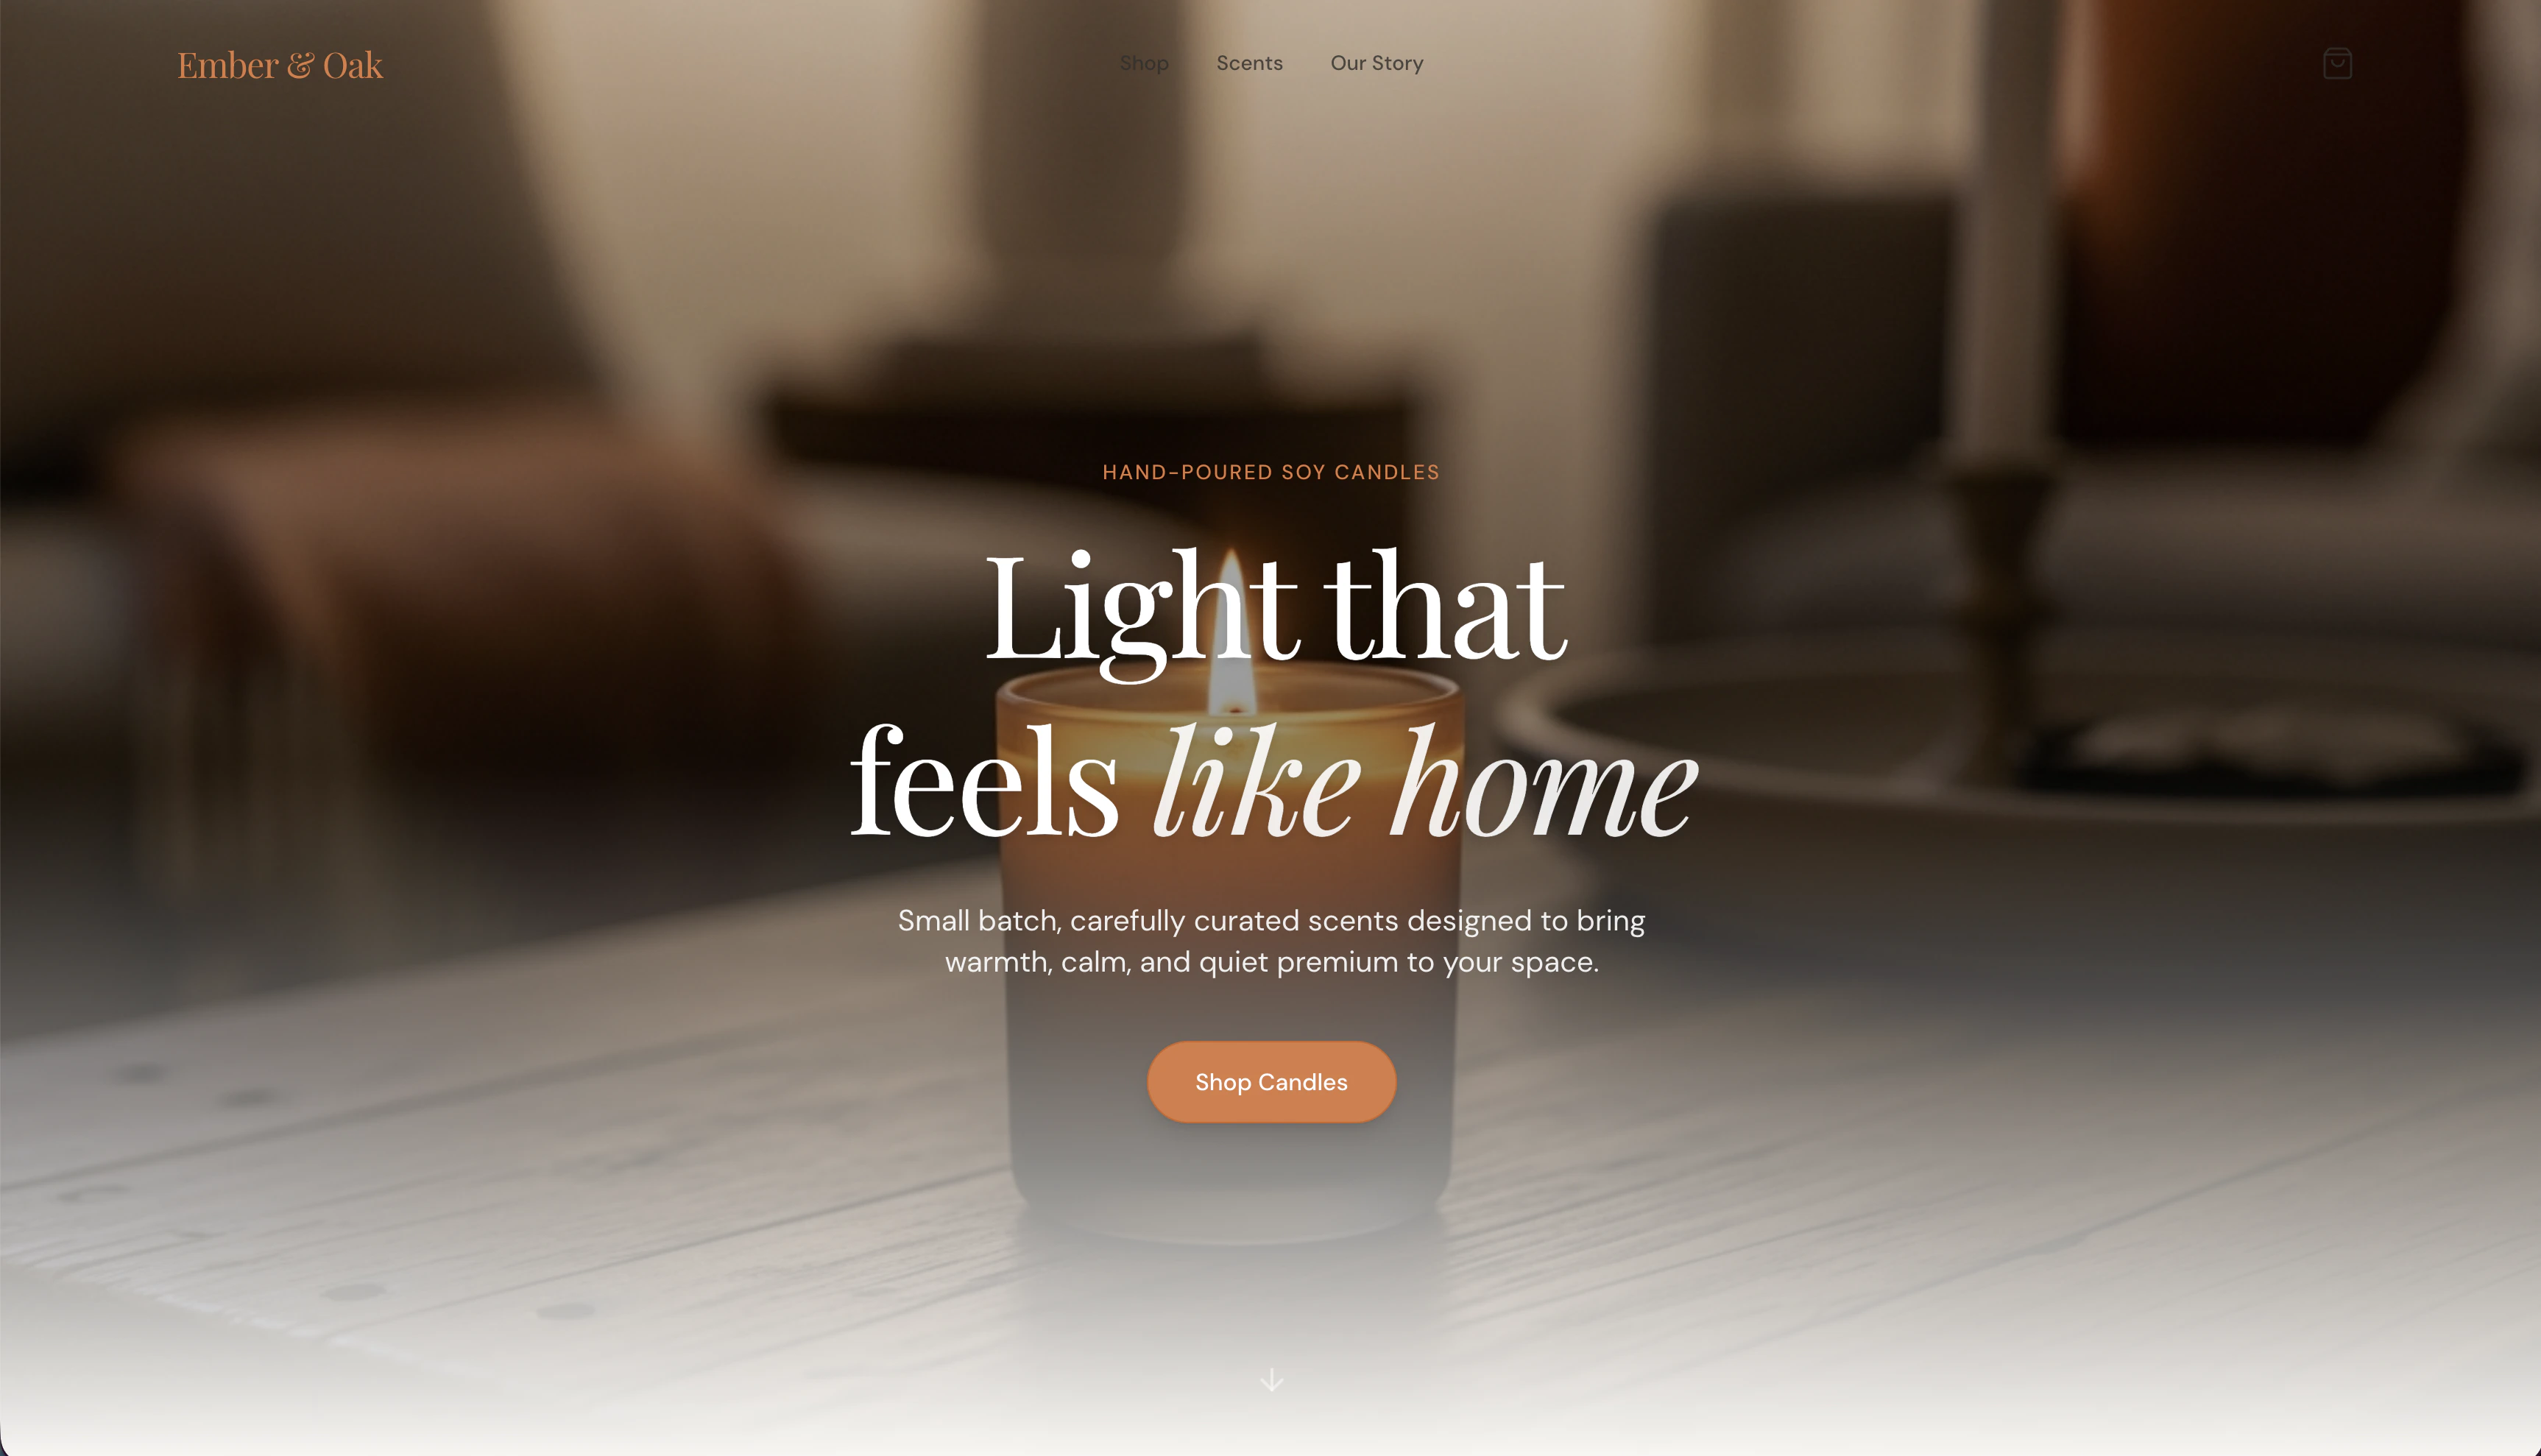
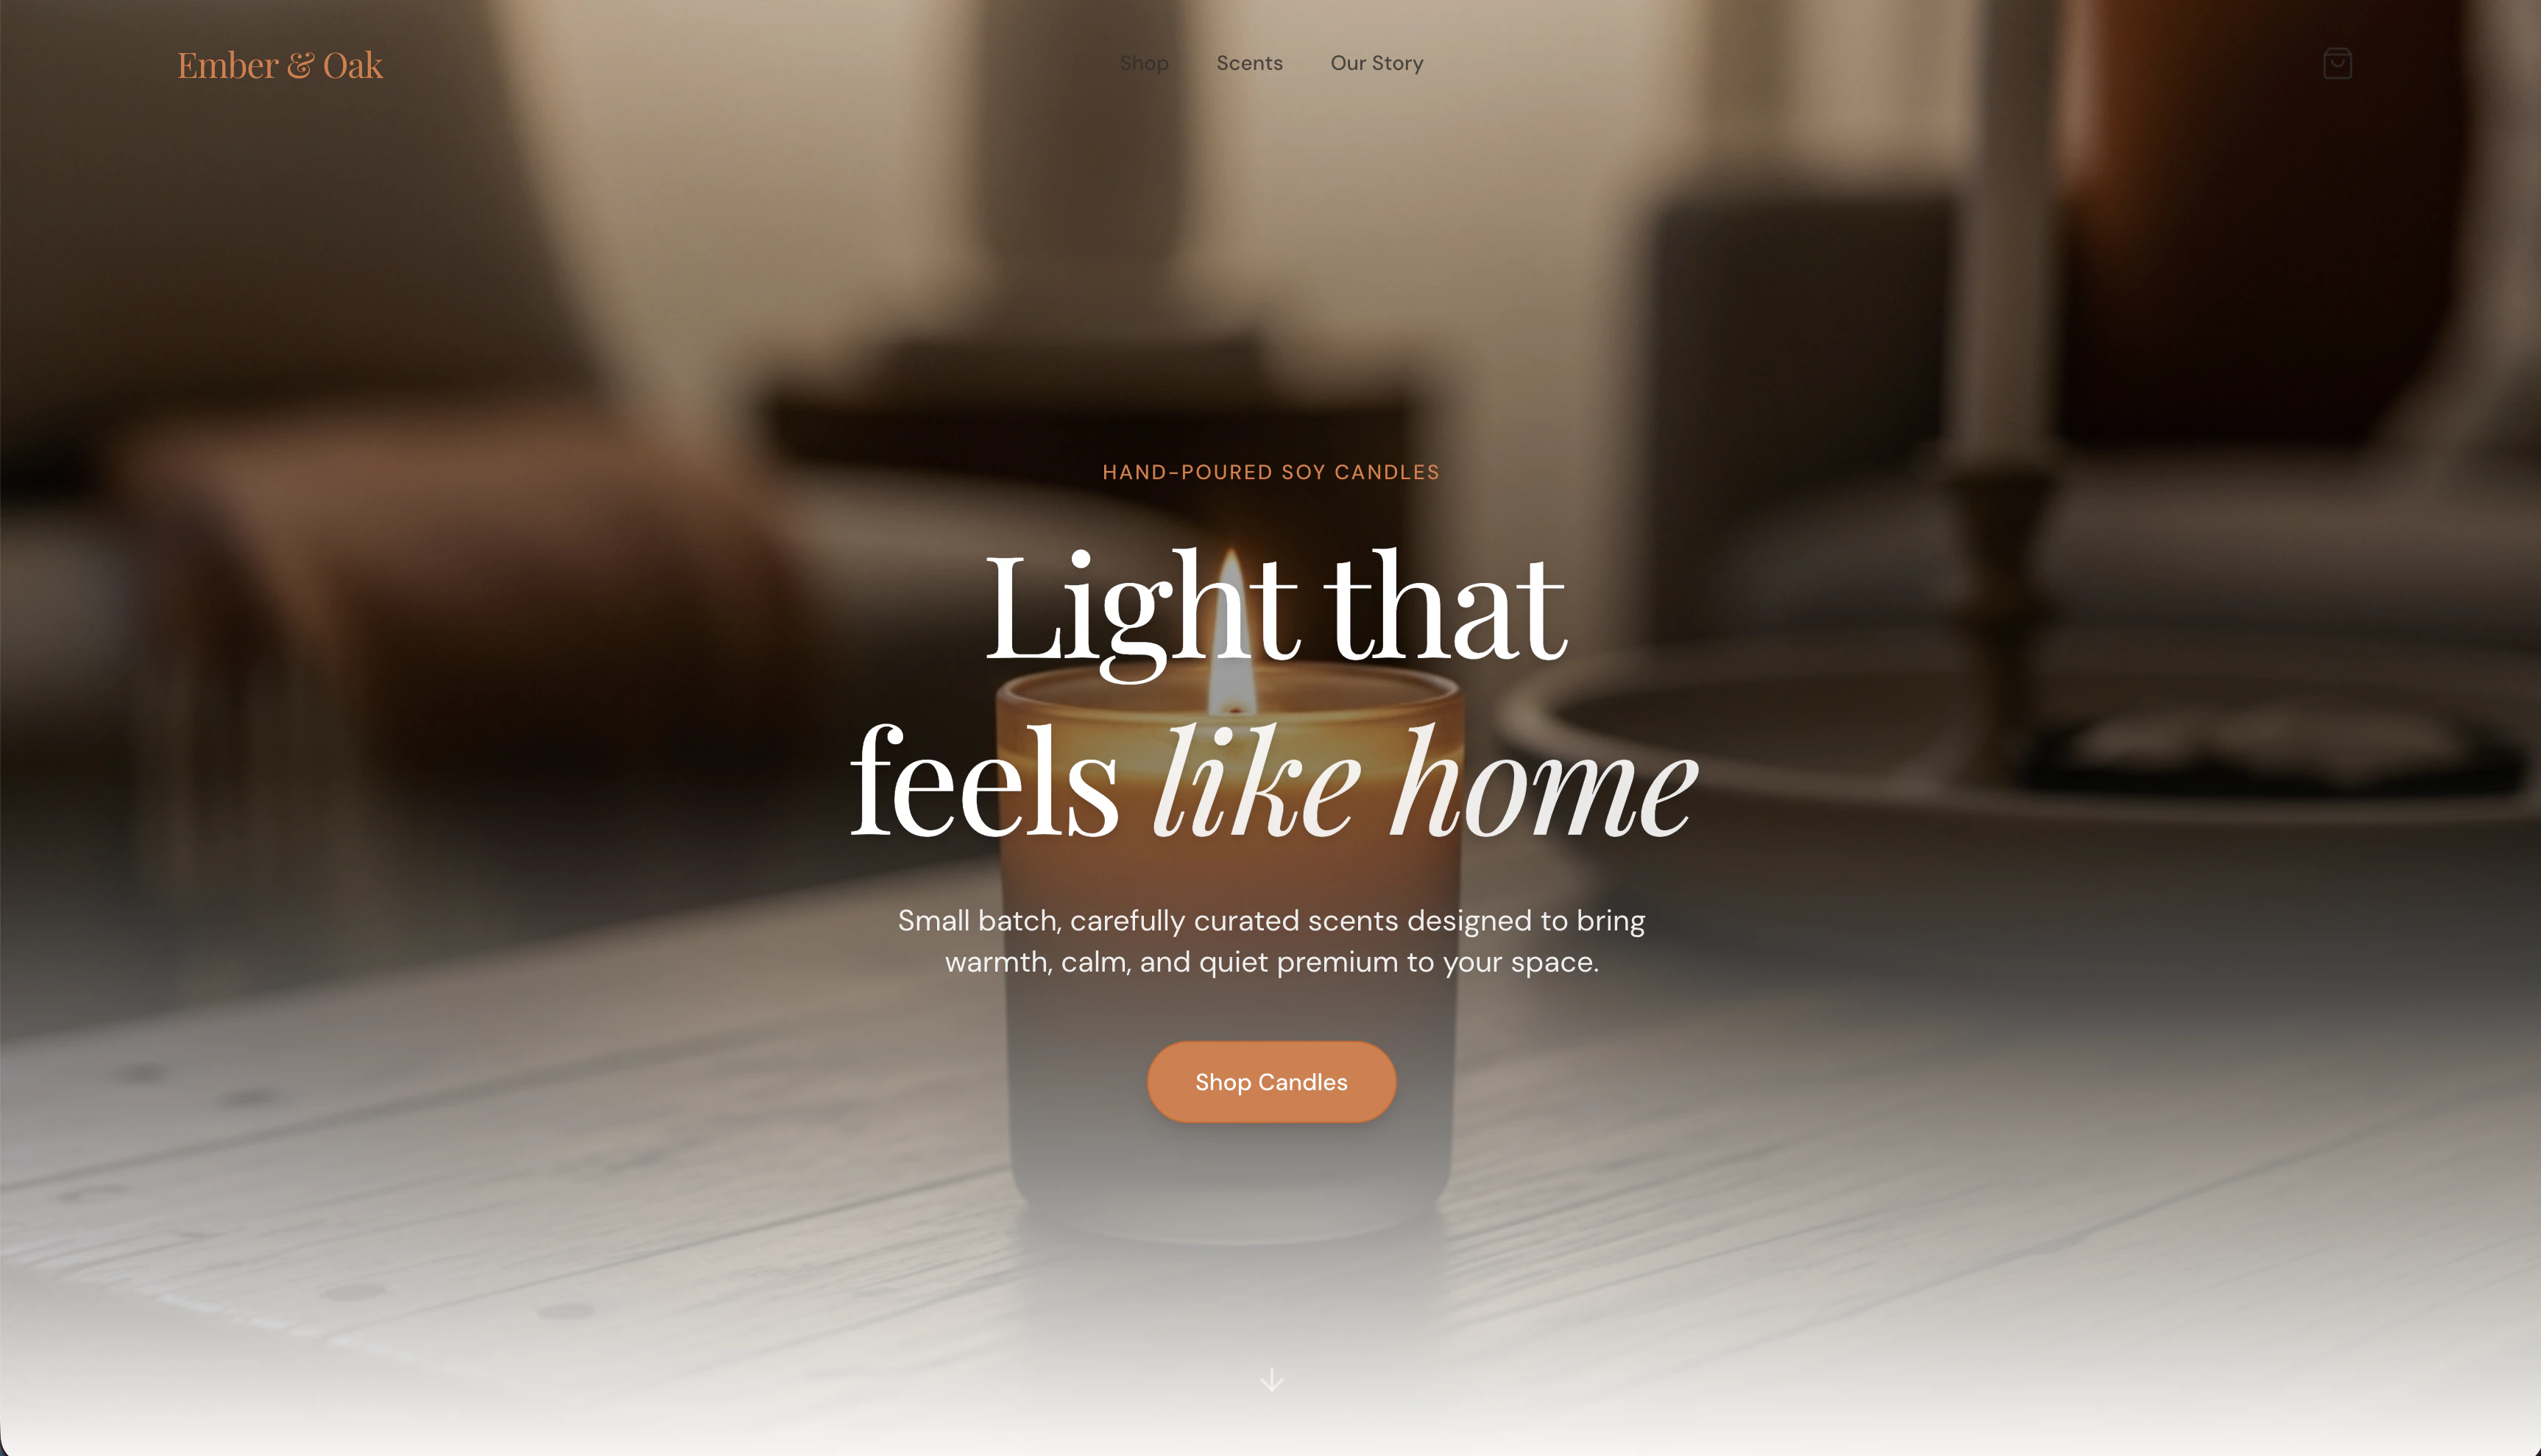
A hero section with a large lifestyle photo of a lit candle on a wooden table in warm light, a headline like "Light that feels like home," a one-line subhead, and a "Shop candles" button.

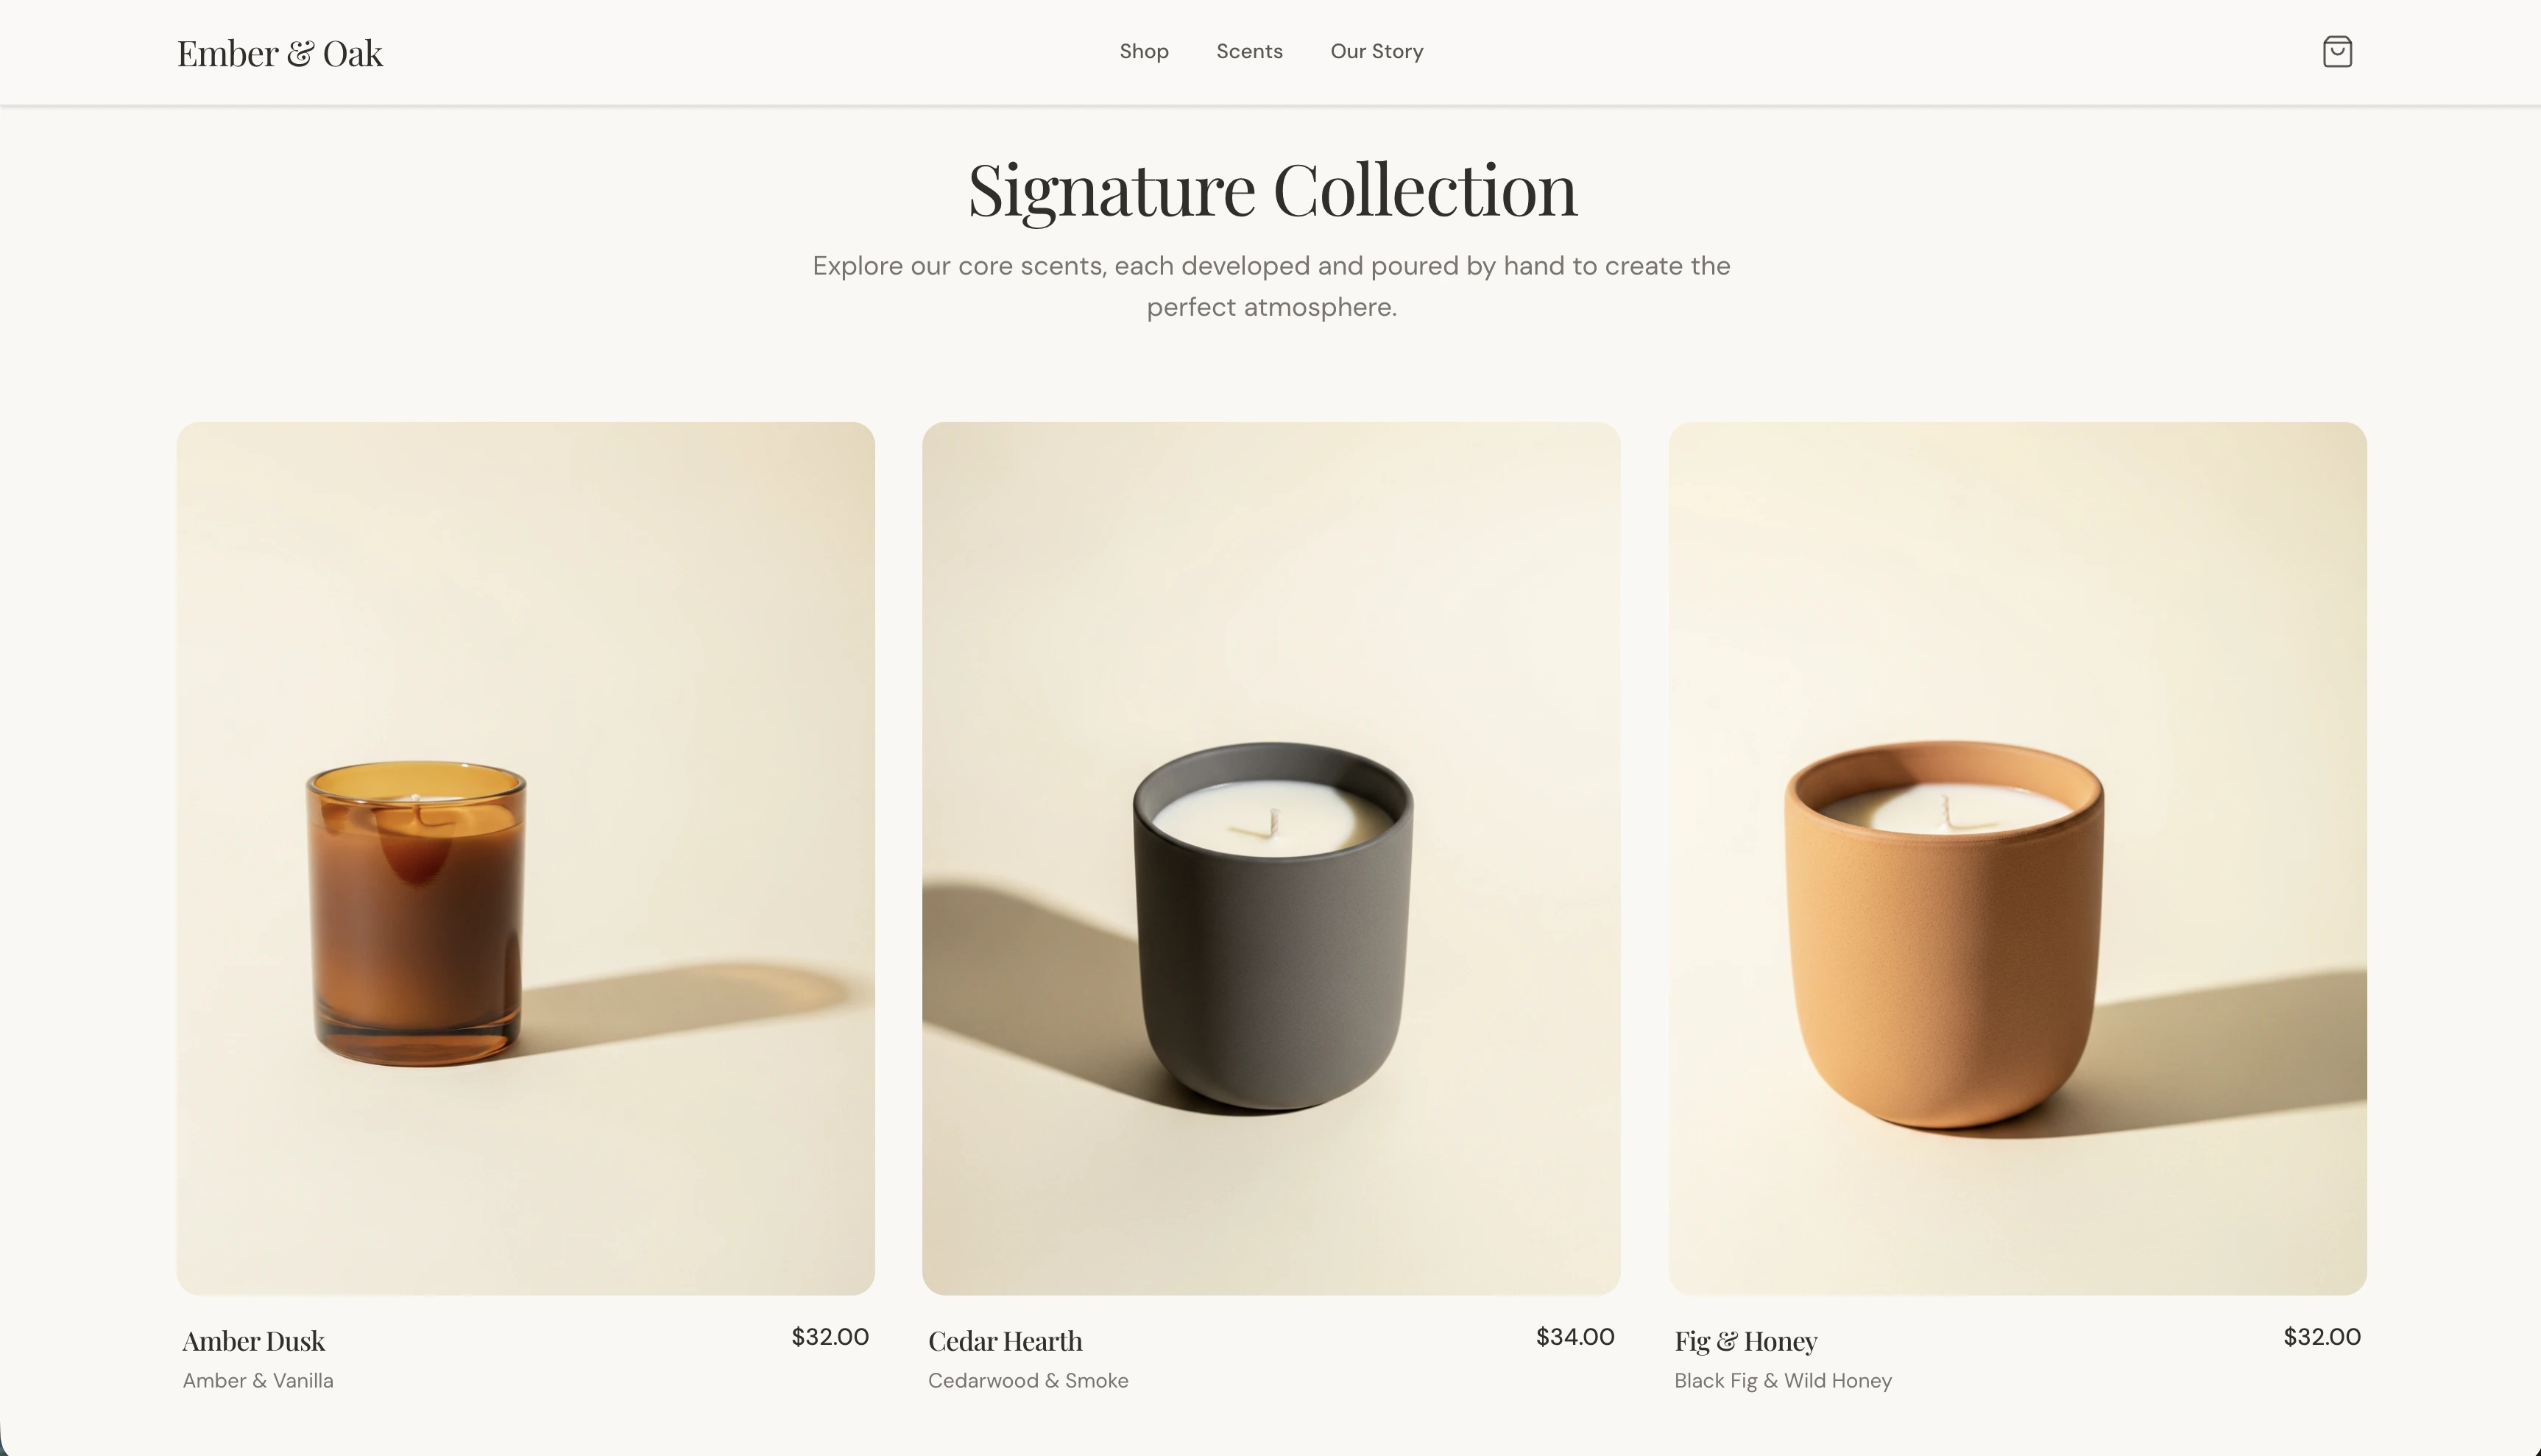
A product grid that shows each candle with its photo, name, scent, and price, with an "Add to cart" button on each card. Read the products from the connected Shopify store.

A short "Our Story" band with a sentence or two about small-batch, hand-poured candles.

A simple footer with the wordmark and the same links.

Generate warm, cozy candle and home photography. Make it look like a real boutique brand, not a template. Wire the product grid and cart to the Shopify store you set up — don't ask me for any Shopify API keys.`;

export const PromptActions = ({prompt = "", campaign = "docs-prompt-actions"}) => {
  const LZ_SRC = "https://cdnjs.cloudflare.com/ajax/libs/lz-string/1.5.0/lz-string.min.js";
  const ensureLZString = () => {
    if (typeof document === "undefined") return;
    if (window.LZString) return;
    if (document.querySelector(`script[src="${LZ_SRC}"]`)) return;
    const s = document.createElement("script");
    s.src = LZ_SRC;
    s.async = true;
    document.head.appendChild(s);
  };
  const handleCopy = async e => {
    const btn = e.currentTarget;
    if (!prompt) return;
    try {
      await navigator.clipboard.writeText(prompt);
    } catch {
      const ta = document.createElement("textarea");
      ta.value = prompt;
      document.body.appendChild(ta);
      ta.select();
      try {
        document.execCommand("copy");
      } catch {}
      document.body.removeChild(ta);
    }
    const original = btn.dataset.label || btn.innerText;
    btn.dataset.label = original;
    btn.innerText = "Copied!";
    setTimeout(() => {
      if (btn.isConnected) btn.innerText = original;
    }, 1500);
  };
  const handleBuild = () => {
    if (!prompt || typeof window === "undefined") return;
    const utm = `utm_source=replit-docs&utm_medium=docs&utm_campaign=${encodeURIComponent(campaign)}&utm_content=prompt-actions`;
    let url;
    if (window.LZString) {
      const encoded = window.LZString.compressToEncodedURIComponent(prompt);
      url = `https://replit.com/?prompt=${encoded}&referrer=replit-docs&${utm}`;
    } else {
      url = `https://replit.com/?prompt=${encodeURIComponent(prompt)}&referrer=replit-docs&${utm}`;
    }
    window.open(url, "_blank", "noopener,noreferrer");
  };
  ensureLZString();
  const baseButtonStyle = {
    display: "inline-flex",
    alignItems: "center",
    gap: "6px",
    padding: "8px 16px",
    borderRadius: "8px",
    fontSize: "14px",
    fontWeight: 500,
    cursor: "pointer",
    lineHeight: 1.2,
    fontFamily: "inherit",
    textDecoration: "none"
  };
  return <div style={{
    display: "flex",
    gap: "12px",
    margin: "16px 0",
    flexWrap: "wrap",
    alignItems: "center"
  }}>
      <button type="button" onClick={handleCopy} style={{
    ...baseButtonStyle,
    background: "transparent",
    color: "inherit",
    border: "1px solid rgba(127,127,127,0.4)"
  }}>
        Copy the prompt
      </button>
      <button type="button" onClick={handleBuild} style={{
    ...baseButtonStyle,
    background: "#F26207",
    color: "#FFFFFF",
    border: "1px solid #F26207"
  }}>
        Build on Replit ↗
      </button>
    </div>;
};

export const AiPrompt = ({children}) => {
  return <CodeBlock className="relative block font-sans whitespace-pre-wrap break-words">
      <div className="pr-7">
        {children}
      </div>
    </CodeBlock>;
};

ストアの説明を入力するだけで、カスタム Shopify ストアフロントをデザインしてローンチできます。Agent が Shopify ストアをプロビジョニングし、フロントエンドを構築して、1つの会話からすべての商品を追加します。販売を始める準備ができたら、Shopify にアクセスしてストアを申請し、支払いを有効にするだけです。

このガイドでは、プロンプトから公開済みストアフロントまで、小ロットキャンドルストアの **Ember & Oak** を構築します。

<Frame>
  <img src="https://mintcdn.com/replit/HIUZSogml1gclscE/images/build-examples/ember-and-oak-candles.png?fit=max&auto=format&n=HIUZSogml1gclscE&q=85&s=f22b2300c152ac6555dd5edb8dfbcc1f" alt="完成した Ember & Oak キャンドルストアフロント — 温かみのあるクリームとアンバーのブティックデザイン、点灯したキャンドルのヒーロー画像、「Light that feels like home」というヘッドライン、カートに追加ボタン付きの大豆キャンドル商品グリッド" width="3452" height="1978" data-path="images/build-examples/ember-and-oak-candles.png" />
</Frame>

<PromptActions prompt={CANDLE_STORE_PROMPT} campaign="docs-ecommerce-store" />

## 達成できること

このガイドを終えると、以下が完成します：

* 実際の Shopify ストアに支えられたカスタムデザインのキャンドルストアフロント。
* Shopify で作成されてストアフロントに表示された商品と価格。
* 購入者を Shopify チェックアウトに送るカート機能。
* ライブ公開への明確な道筋：ストアを申請し、支払いを有効にして、ローンチします。

## 学べること

以下の方法を学びます：

* Agent が Shopify を推奨してプロビジョニングするようにストアを説明する。
* API キーを扱わずに Shopify に接続する。
* Agent とのチャットで商品を追加して公開する。
* デザインと購入者フローを改良する。
* ストアを開発から公開済みの販売可能なストアフロントに移行する。

## Shopify に接続する

Shopify はすべてのビルダーがすべてのアプリで利用でき、会話の中で直接接続します。まず構築したいストアを説明しましょう。

<Steps>
  <Step title="ストアを説明する">
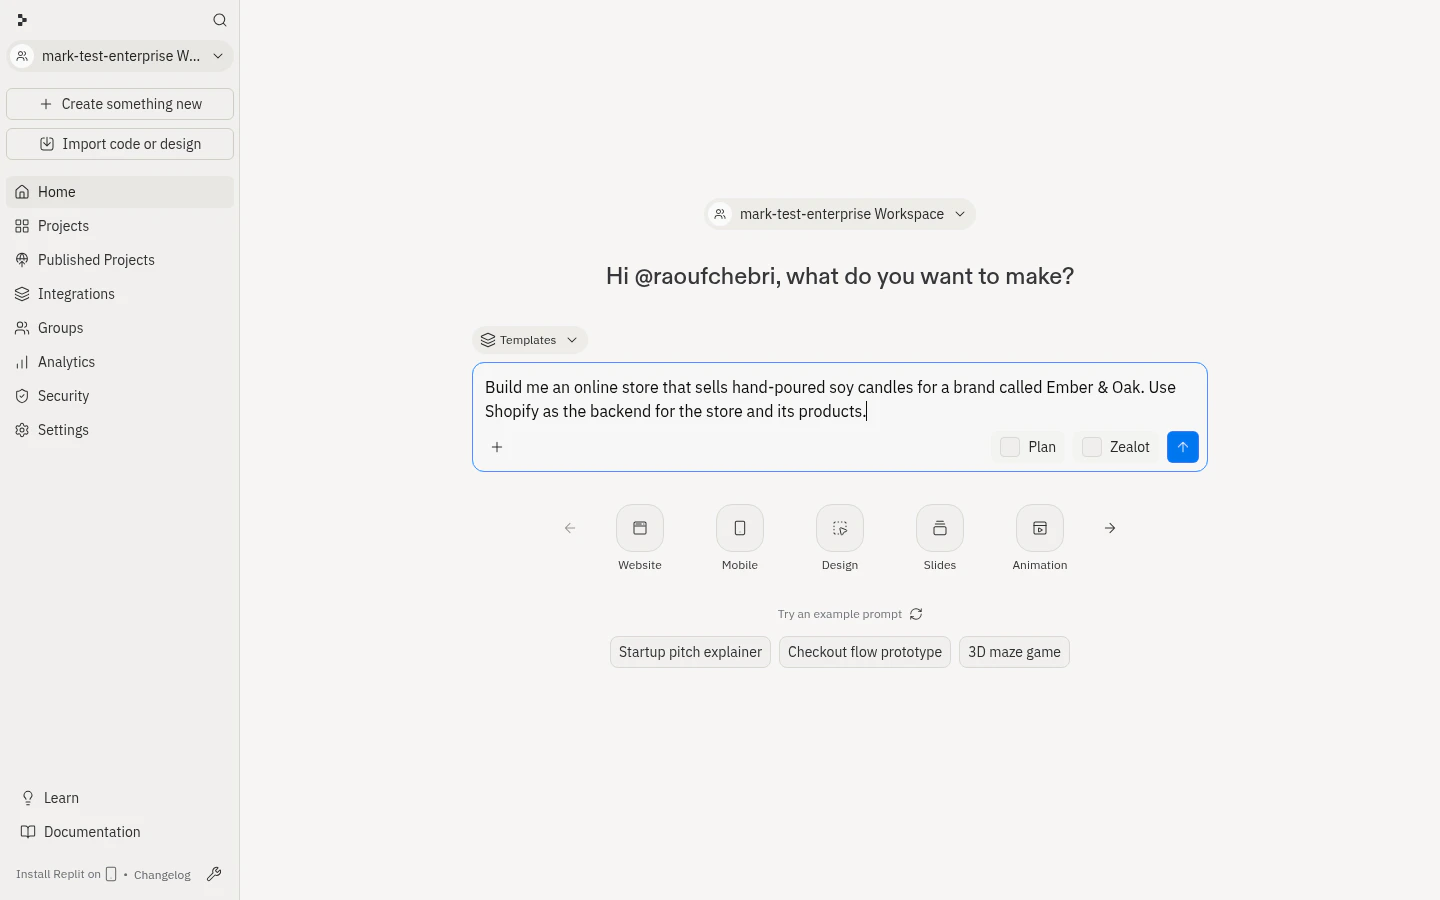
    プロンプトをコピーして [replit.com](https://replit.com) のプロンプトボックスに貼り付けるか、**Build on Replit** をクリックしてプロンプトが事前入力された状態で Replit を開きます。

    <Frame>
      <img src="https://mintcdn.com/replit/pRYYKFsTVxh8-e6X/images/replitai/shopify/describe-your-store.png?fit=max&auto=format&n=pRYYKFsTVxh8-e6X&q=85&s=b25c3bc8ff45c1bc509a10f60be294bd" alt="Ember & Oak キャンドルストアのプロンプトが入力された Replit ホームのプロンプトボックス（ビルド開始の準備完了）" width="1440" height="900" data-path="images/replitai/shopify/describe-your-store.png" />
    </Frame>

    <PromptActions prompt={CANDLE_STORE_PROMPT} campaign="docs-ecommerce-store" />

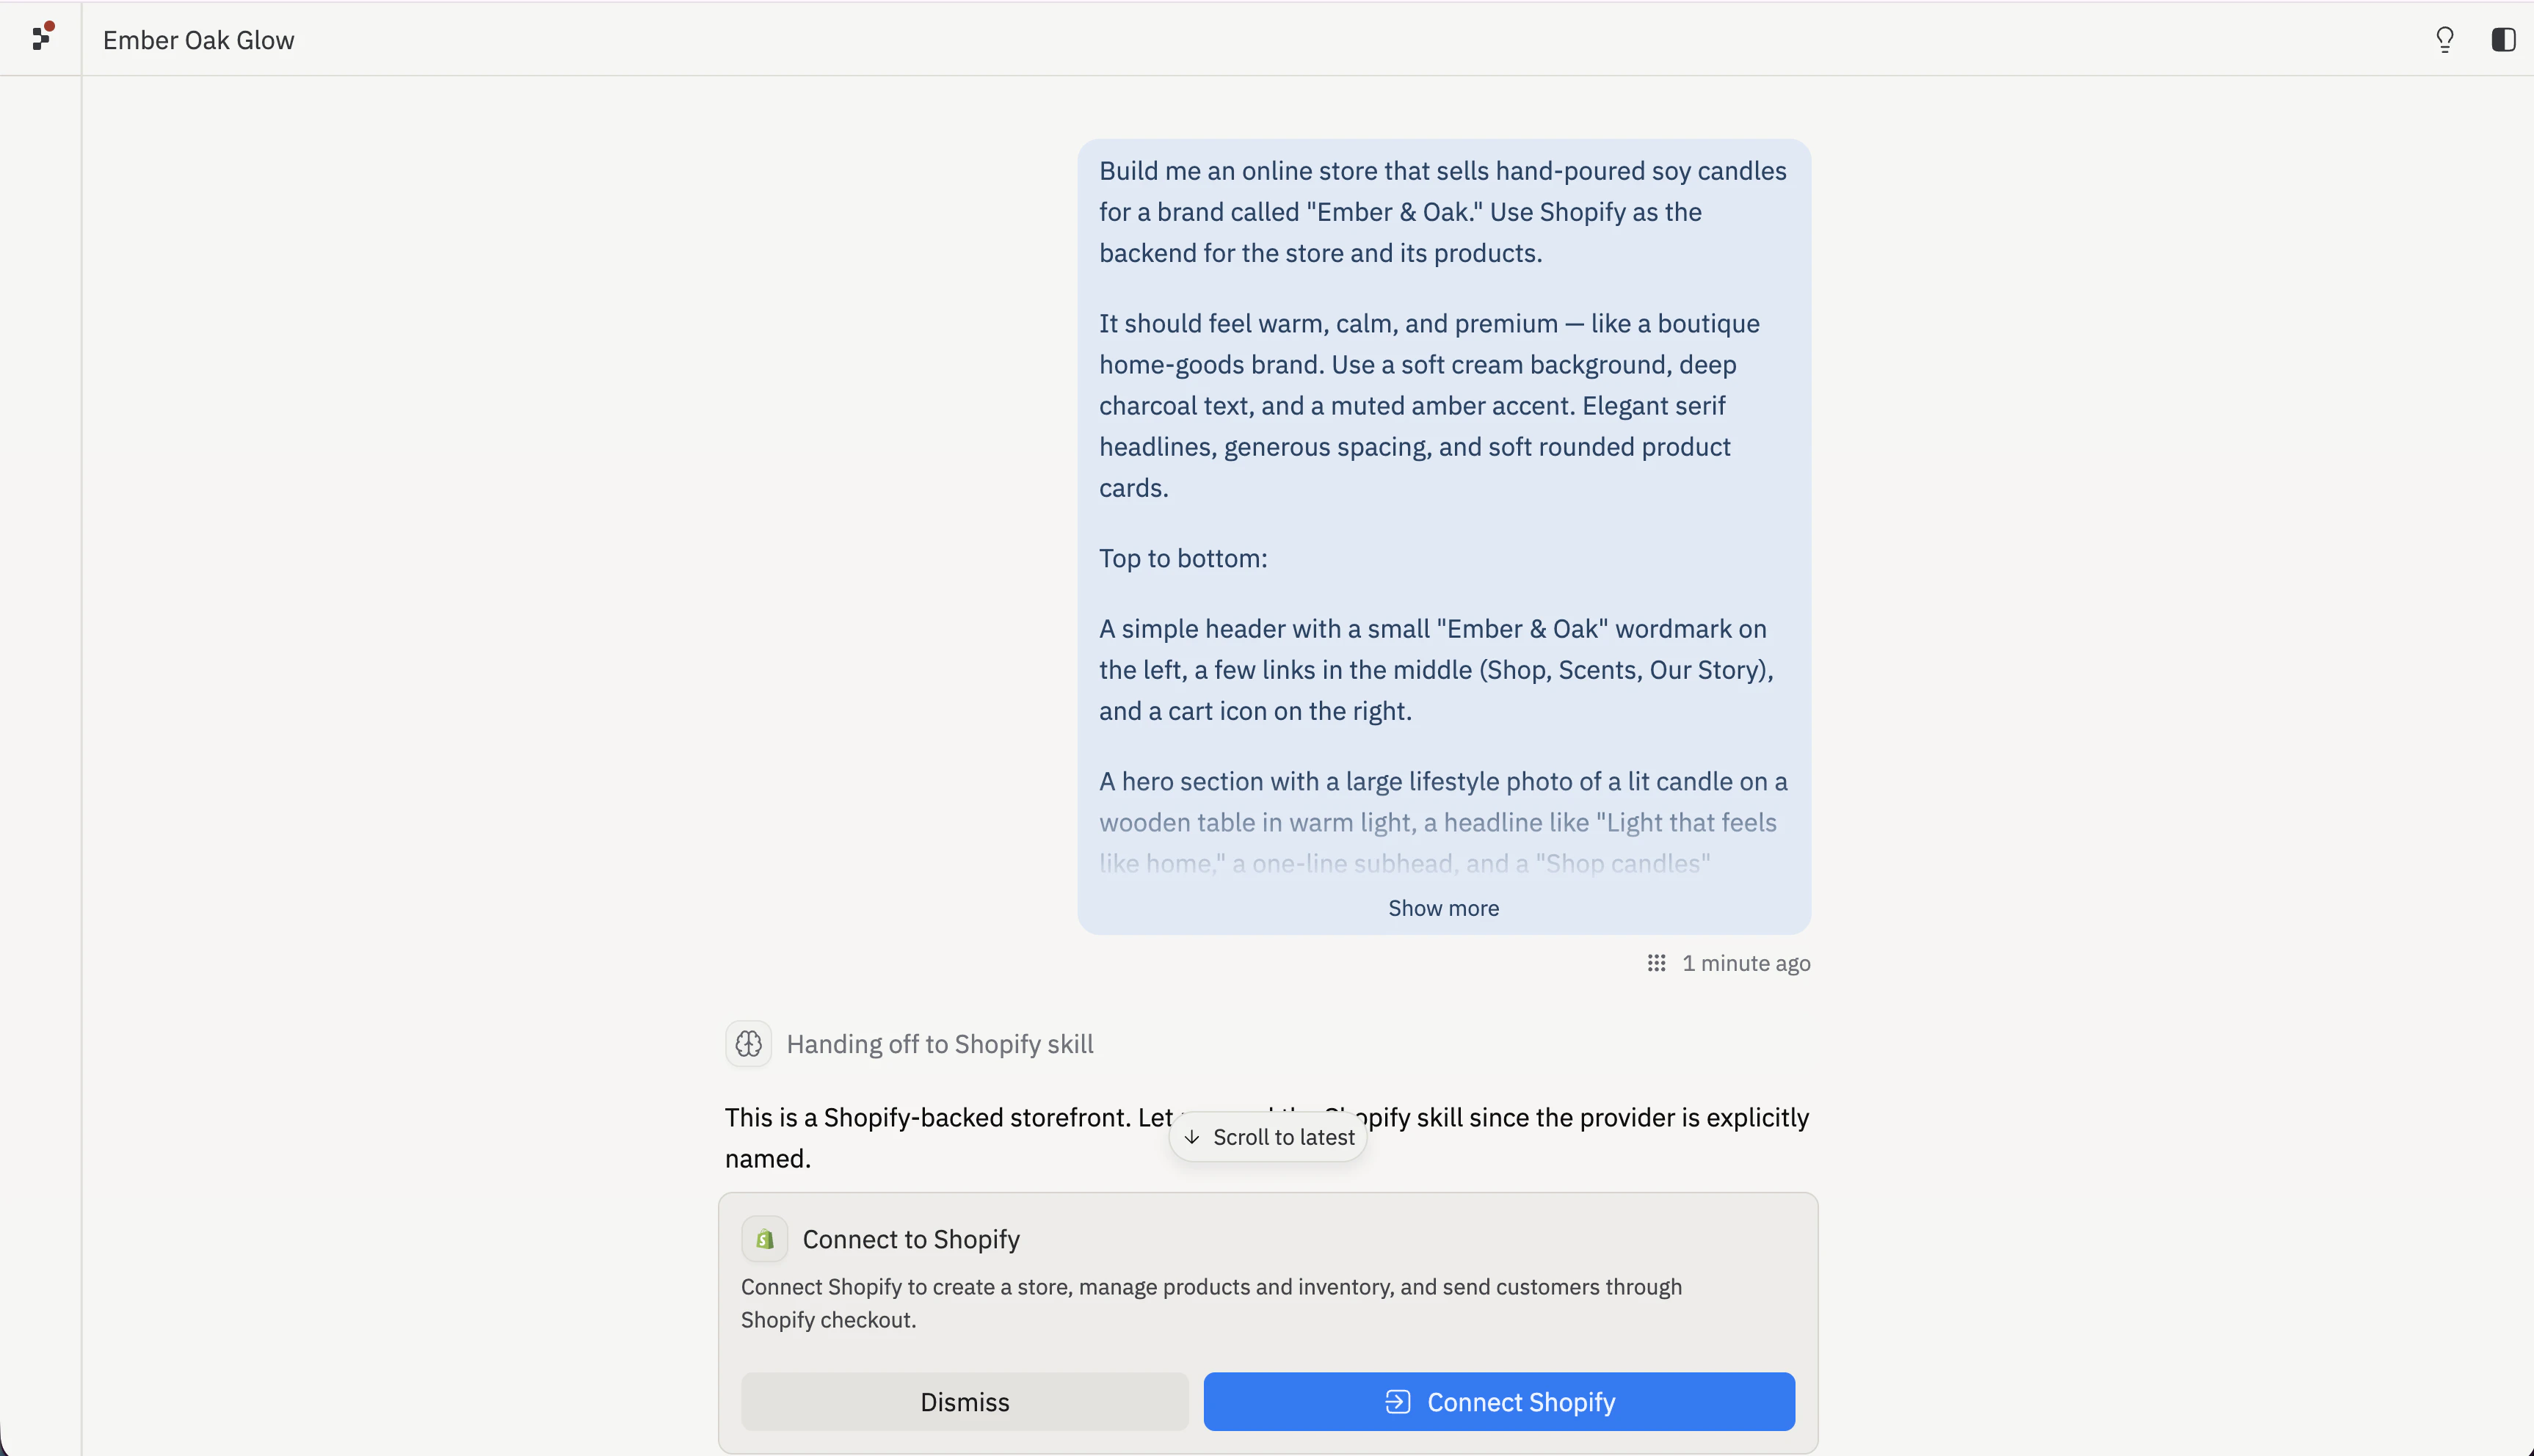
    Agent は物理的な商品を販売しようとしていることを認識し、ストアフロントのバックエンドとして Shopify を推奨します。

    <Frame>
      <img src="https://mintcdn.com/replit/pRYYKFsTVxh8-e6X/images/replitai/shopify/connect-shopify-store.png?fit=max&auto=format&n=pRYYKFsTVxh8-e6X&q=85&s=f10b41182863d7cb7afb5611d79bace1" alt="Ember & Oak キャンドルストアで Shopify スキルにハンドオフする Replit Agent。Connect Shopify ボタンのある「Connect to Shopify」カードが表示されている" width="3452" height="1984" data-path="images/replitai/shopify/connect-shopify-store.png" />
    </Frame>
  </Step>

  <Step title="Shopify ストアの作成を承認する">
    Agent がアプリ用の Shopify ストアを作成するよう求めます。承認すると、Agent が Replit 所有の開発ストアをプロビジョニングして接続します。追加の設定は不要です。
    後でストアを申請できるように、メールアドレスが Shopify と共有されます。

    ストアはパスワードで保護された状態で始まり、ライブ公開するまでは実際の支払いを受け付けられないため、リスクなく自由にビルドできます。
  </Step>
</Steps>

<Note>
  各 Shopify ストアは1つのアプリにスコープされています。後で2つ目のストアを構築する場合、Agent はそのアプリ用に新しい Shopify ストアをプロビジョニングします。コネクタの詳細については、[Shopify に接続する](/references/integrations/shopify) をご覧ください。
</Note>

## ストアフロントを構築する

Shopify に接続すると、Agent があなたのストアに対してストアフロントをデザインして構築します。

<Steps>
  <Step title="Agent にフロントエンドを構築させる">
    Agent がプロンプトからストアフロントを生成します — ヒーロー、商品グリッド、カート、サポートセクション。完成すると、右ペインが **Preview** に切り替わり、ページをスクロールしてデザインをクリックできます。

    <Frame>
      <img src="https://mintcdn.com/replit/pRYYKFsTVxh8-e6X/images/replitai/shopify/storefront-preview.png?fit=max&auto=format&n=pRYYKFsTVxh8-e6X&q=85&s=7cf0a4f4bd1fd28bbd9df320f1ad89a9" alt="Agent チャットの隣の Replit Preview ペインにレンダリングされた Ember & Oak ストアフロント。キャンドルのヒーローセクションと商品グリッドが表示されている" width="3452" height="1978" data-path="images/replitai/shopify/storefront-preview.png" />
    </Frame>
  </Step>

  <Step title="最初の商品を追加する">
    新しいストアは空のカタログから始まります。Agent に商品を追加するよう依頼すると、Shopify に商品を作成してストアフロントに公開します。

    <AiPrompt>
      ラベンダー大豆キャンドルを \$18 で、短い居心地の良い説明と一緒に追加して、ストアフロントに公開してください。
    </AiPrompt>

    商品が Shopify ストアに作成され、ストアフロントの商品グリッドに表示されます。

    <Frame>
      <img src="https://mintcdn.com/replit/pRYYKFsTVxh8-e6X/images/replitai/shopify/add-product.png?fit=max&auto=format&n=pRYYKFsTVxh8-e6X&q=85&s=5f7a254e82ae13c1770632a9db916005" alt="ラベンダー大豆キャンドル商品を追加する Agent チャット。新しい商品が Ember & Oak ストアフロントの商品グリッドに表示されている" width="3452" height="1978" data-path="images/replitai/shopify/add-product.png" />
    </Frame>
  </Step>

  <Step title="カタログを充実させる">
    商品を説明し続けて追加していきます。Agent が各商品を価格、説明、画像と一緒に Shopify に作成します。

    <AiPrompt>
      さらに3つのキャンドルを追加してください：Cedar & Sage を $20、Vanilla Bean を $16、Sea Salt を \$22。それぞれに短い説明をつけて公開してください。
    </AiPrompt>
  </Step>
</Steps>

<Tip>
  **レベルアップ：** Agent に商品をコレクションにグループ化するよう依頼しましょう（「ベストセラーキャンドル3つでホリデーコレクションを作成してください」）。サイズや香りなどの商品バリアントを追加したり、在庫を追跡してストアフロントに在庫状況を表示したりすることもできます。Shopify がすべての記録システムとして機能します。
</Tip>

## デザインとチェックアウトを改良する

ストアフロントのすべての部分は会話を通じて編集できます。見た目を改良してから、購入者のフローをエンドツーエンドで確認しましょう。

<Steps>
  <Step title="デザインを改良する">
    変更したいことを説明すると、Agent がストアフロントを更新します。

    <AiPrompt>
      ヒーローセクションをより編集的な感じにしてください — 大きなヘッドライン、より多くの余白、ボタンには柔らかいアンバーアクセントを使用してください。
    </AiPrompt>
  </Step>

  <Step title="カートとチェックアウトをテストする">
    Preview でキャンドルをカートに追加してチェックアウトを開始します。カートが購入者を Shopify のホスト型チェックアウトに送ります。開発中はストアにパスワードが設定されているため、チェックアウトのプレビューにパスワードページが表示される場合があります — これは想定内であり、何も壊れているわけではありません。
  </Step>
</Steps>

<Tip>
  **レベルアップ：** Agent に商品詳細ページ、カートドロワー、検索機能、またはフィーチャー商品セクションの追加を依頼しましょう。ストアフロントは実際の Replit プロジェクトなので、説明できるものであれば何でも拡張できます — ブログ、ウィッシュリスト、カスタムランディングページなど — Shopify がチェックアウトと注文を処理します。
</Tip>

## ライブ公開する

ライブ公開は Shopify 上で行います。Agent にライブ公開フローを開始するよう依頼してから、マーチャントが所有するステップを完了させます。

<Steps>
  <Step title="Shopify でストアを申請する">
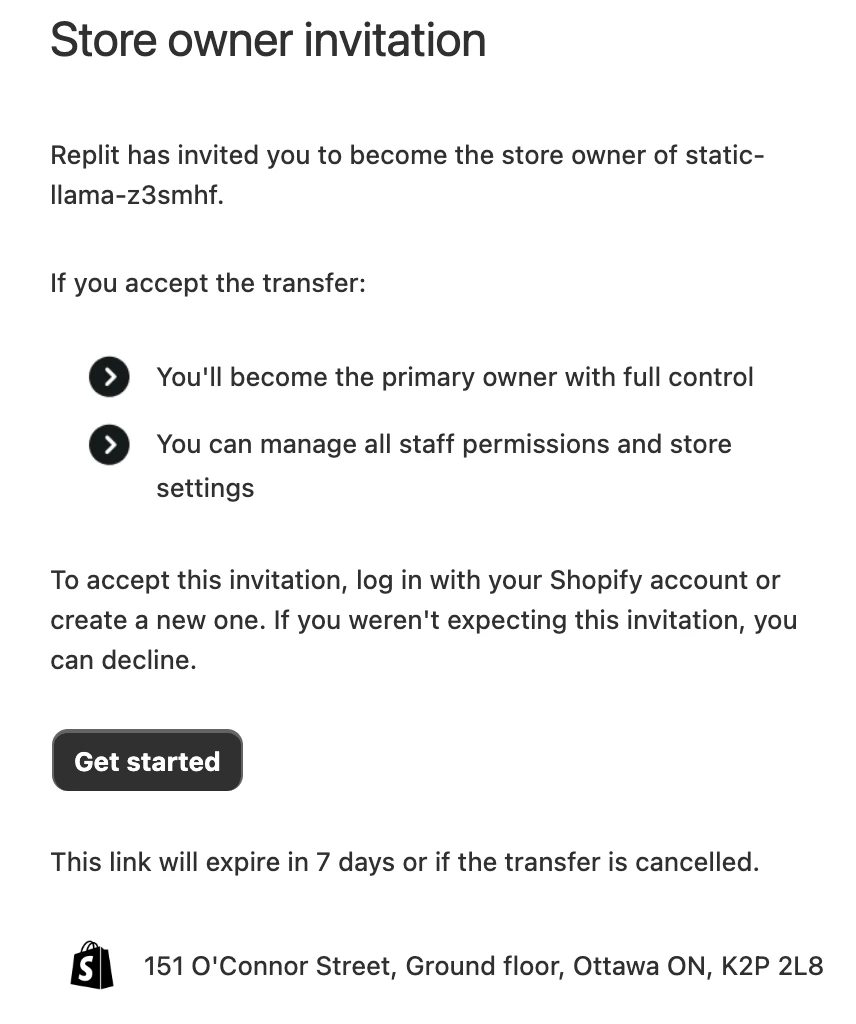
    申請は Shopify 上で行われ、Replit の外部で行われる唯一のステップです。ストアが作成されたときにメールアドレスが Shopify と共有されているため、Replit が提供するリンクまたは Shopify が送信するメールからストアを申請できます。

    Shopify から **ストアオーナーへの招待** メールが届き、手順が案内されます。メールを開いて **Get started** を選択してください。

    <Frame>
      <img src="https://mintcdn.com/replit/pRYYKFsTVxh8-e6X/images/replitai/shopify/claim-store-email.png?fit=max&auto=format&n=pRYYKFsTVxh8-e6X&q=85&s=df6acd8d6b8dd2168c4931a295025ef4" alt="ストアオーナーになるよう招待する Shopify の「Store owner invitation」メール。「Get started」ボタンが表示されている" width="856" height="1024" data-path="images/replitai/shopify/claim-store-email.png" />
    </Frame>

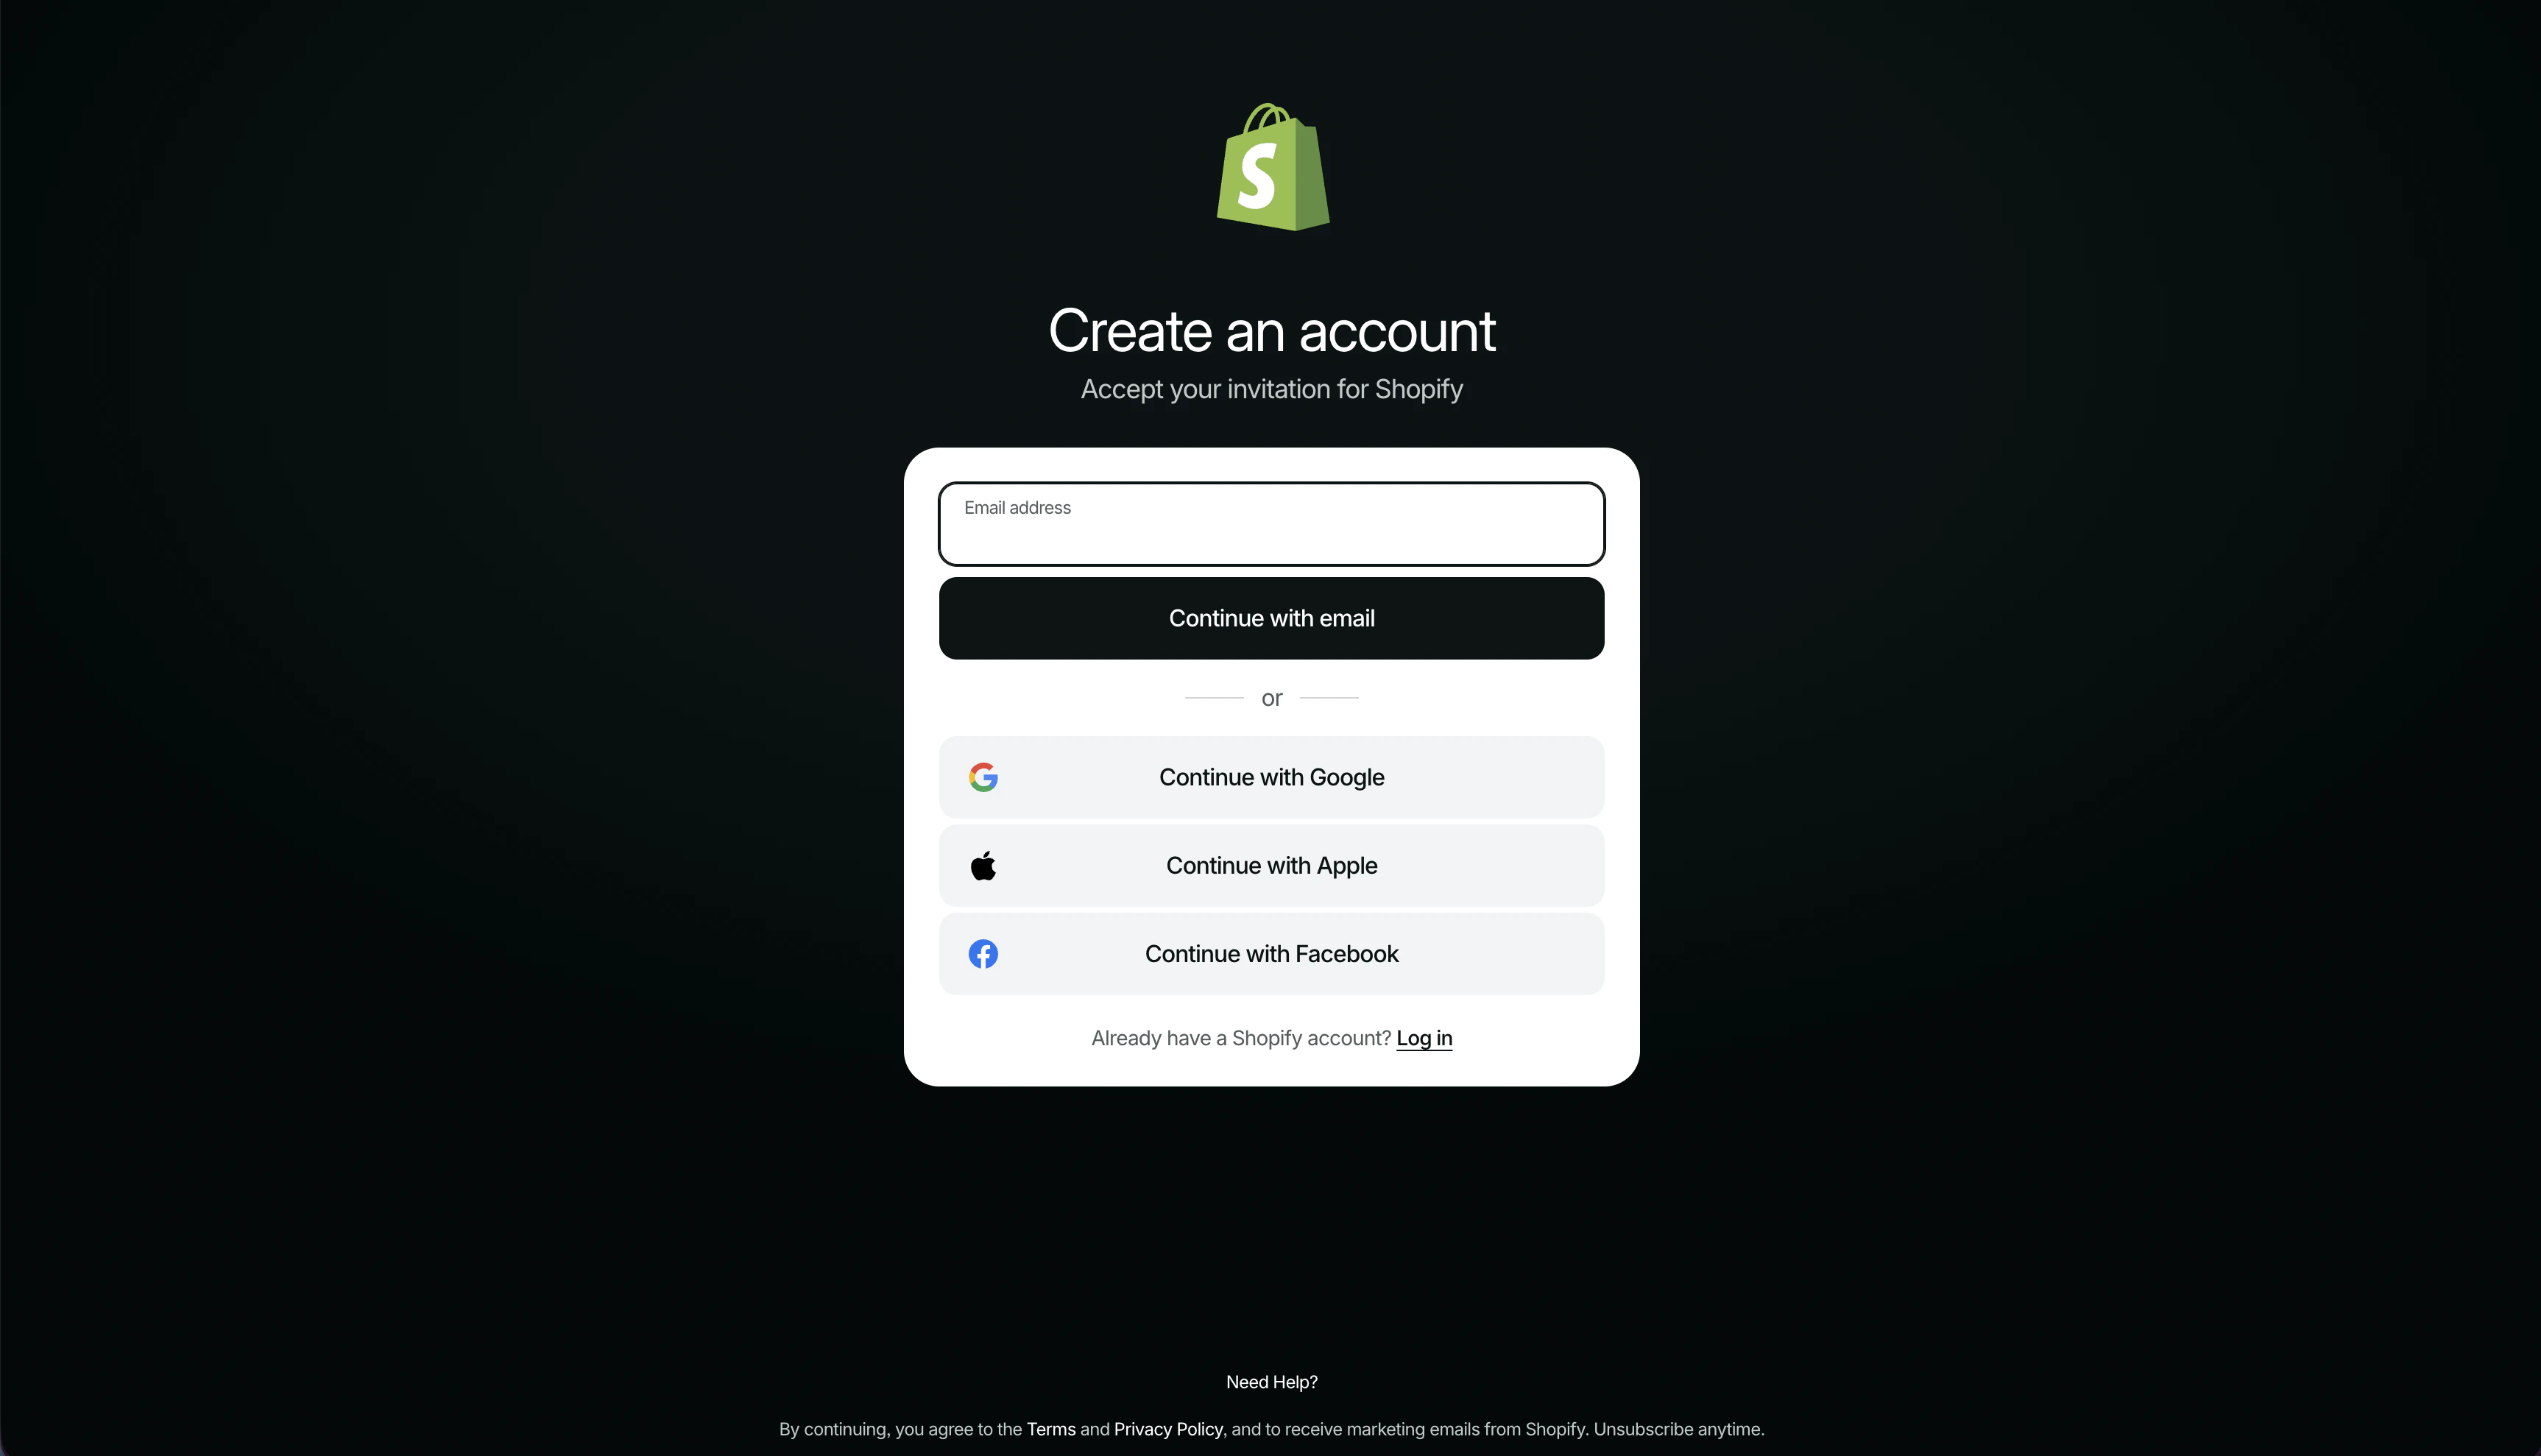
    既存の Shopify アカウントでログインするか、招待を承認するために新規アカウントを作成してください。
    <Frame>
      <img src="https://mintcdn.com/replit/pRYYKFsTVxh8-e6X/images/replitai/shopify/claim-store-create-account.png?fit=max&auto=format&n=pRYYKFsTVxh8-e6X&q=85&s=db61bb84a0b652f4f8bc36e00e8c7034" alt="招待を承認するための Shopify の「Create an account」画面。メール、Google、Apple、Facebook でのサインインオプションが表示されている" width="3452" height="1978" data-path="images/replitai/shopify/claim-store-create-account.png" />
    </Frame>

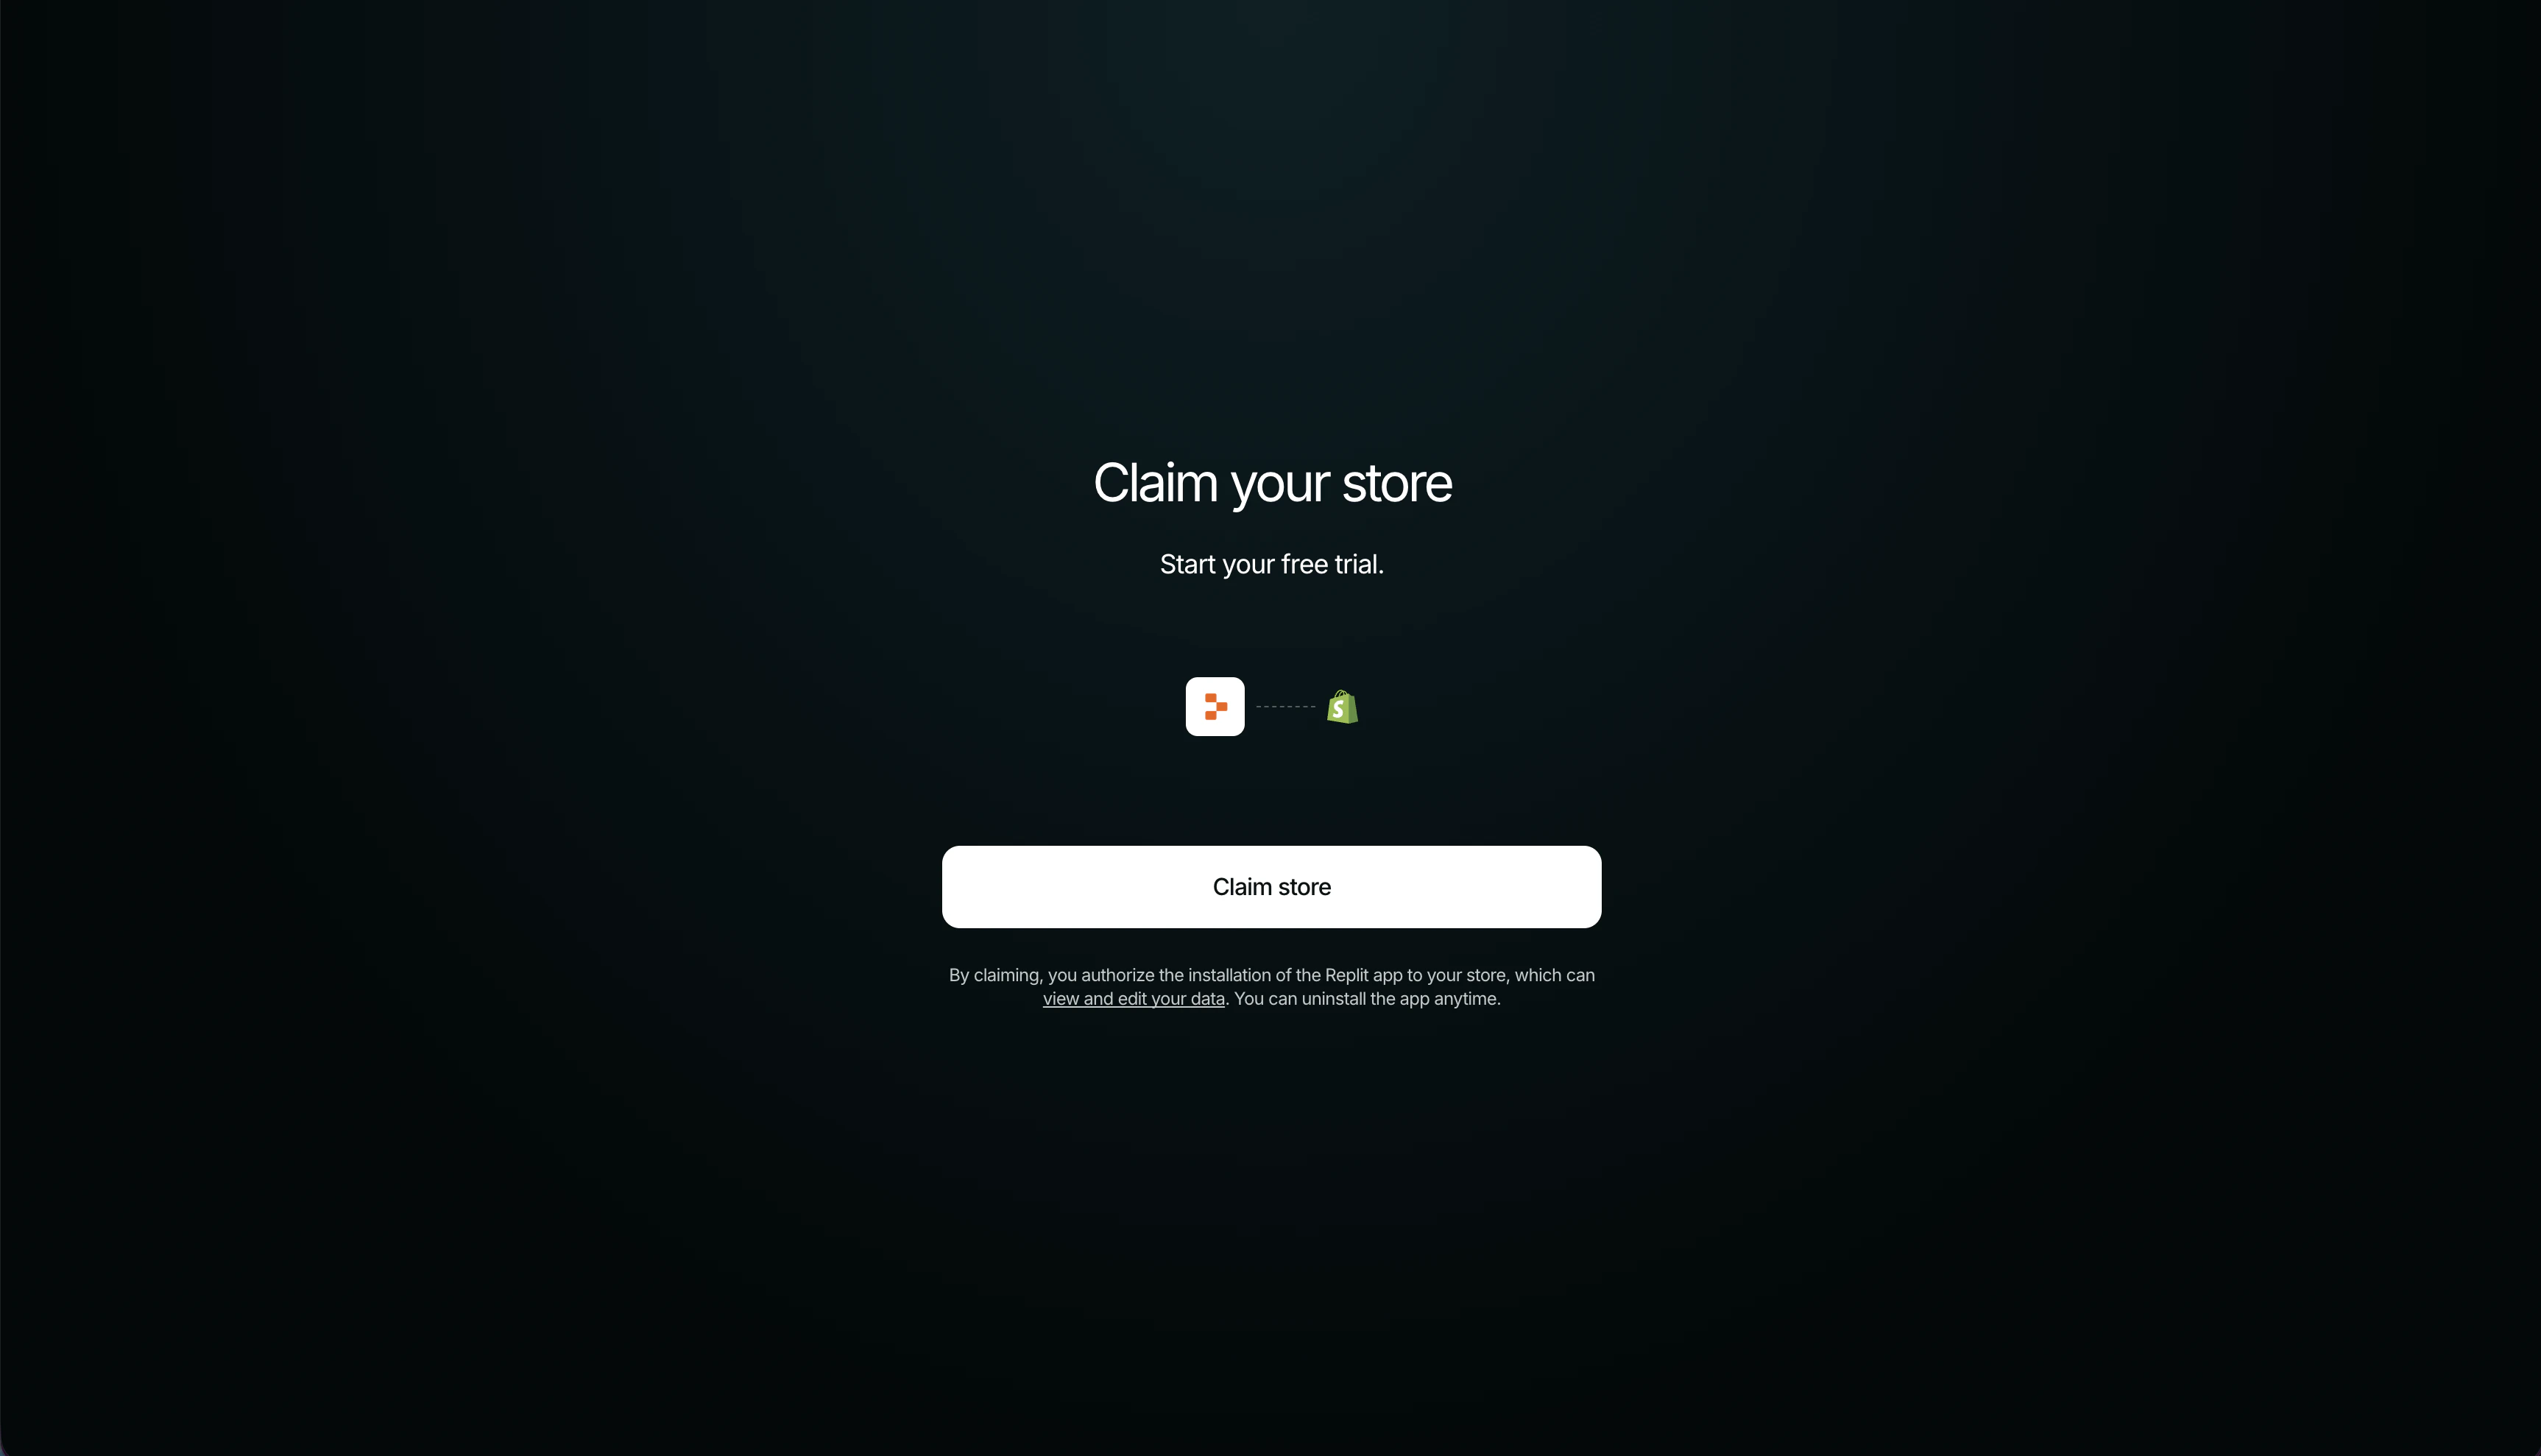
    **Claim store** を選択して、ストアの Replit アプリを承認し、無料トライアルを開始してください。その後、プライマリオーナーとして Shopify 管理画面に移動します。
    <Frame>
      <img src="https://mintcdn.com/replit/pRYYKFsTVxh8-e6X/images/replitai/shopify/claim-store.png?fit=max&auto=format&n=pRYYKFsTVxh8-e6X&q=85&s=317bdb5509beb15270c694087e3279fe" alt="Shopify の無料トライアルを開始するための「Claim store」ボタンがある Replit の「Claim your store」画面" width="3452" height="1978" data-path="images/replitai/shopify/claim-store.png" />
    </Frame>
  </Step>

  <Step title="プランを選択して支払いを有効にする">
    Shopify プランを選択して、Shopify Payments または別のプロバイダーを有効にします。Shopify が支払いを受け取るために必要な本人確認情報と銀行情報を収集します — この作業は Replit では行われません。
  </Step>

  <Step title="配送、税金、ドメインを設定する">
    Shopify で配送料を設定して税金を確認し、オプションでカスタムドメインを接続します。
  </Step>

  <Step title="ローンチして公開する">
    Shopify でストアフロントのパスワードを削除して購入者にストアを開放します。Replit に戻って **Publish** をクリックし、ストアフロントをパブリック URL にデプロイします。
  </Step>
</Steps>

<Note>
  支払い、本人確認、税金、配送、不正検査は Shopify 上で行われます。完全なライブ公開チェックリストとコネクタの詳細については、[Shopify に接続する](/references/integrations/shopify#go-live-on-shopify) をご覧ください。
</Note>

## 次のステップ

<CardGroup cols={2}>
  <Card title="Shopify に接続する" icon="bag-shopping" href="/references/integrations/shopify">
    コネクタリファレンス：Shopify 接続の仕組みと完全なライブ公開チェックリスト。
  </Card>

  <Card title="カスタムドメインを追加する" icon="globe" href="/build/add-custom-domain">
    ローンチ前にストアにブランドド URL を設定しましょう。
  </Card>

  <Card title="SEO を改善する" icon="magnifying-glass" href="/build/improve-seo">
    購入者が検索でストアを見つけやすくしましょう。
  </Card>

  <Card title="ランディングページを立ち上げる" icon="rectangle-list" href="/build/landing-page">
    ストアへのトラフィックを促進するフォーカスキャンペーンページを構築しましょう。
  </Card>
</CardGroup>

## 関連

* [Shopify に接続する](/references/integrations/shopify)
* [カスタムドメインを追加する](/build/add-custom-domain)
* [Agent インテグレーション](/references/integrations/overview)