> ## Documentation Index
> Fetch the complete documentation index at: https://docs.replit.com/llms.txt
> Use this file to discover all available pages before exploring further.
# Custom connectors
> Learn how Pro and Enterprise customers can create a custom API connector, configure authentication, and test an endpoint for a service outside Replit's library.
Custom connectors let Pro and Enterprise customers connect supported APIs that aren't in
Replit's [integration library](/features/integrations/overview). Use them to connect
specialized services without waiting for a first-party connector.
Custom connectors are added to your workspace, not your personal account.
Authorized workspace admins can create and manage them.
Custom connectors are in beta and available exclusively for Enterprise customers.
Workspace admins can create and manage them.
## Before you begin
Have the following ready:
* An active Pro or Enterprise subscription and permission to manage connectors in your workspace.
* A publicly accessible HTTPS REST API and its base URL.
* Credentials for the API and access to its documentation.
* Optionally, a read-only endpoint you can use to test the connection.
Custom API connectors are different from custom [MCP servers](/features/mcp/overview).
Use **Add custom connector** for an API; the MCP server options in the same menu
are a separate setup flow.
Only connect to APIs you trust with your data. Keep credentials out of the
connector description and Agent instructions. Enter them only in the
authentication fields.
## Create a custom connector
Select **Integrations** in the sidebar of your Enterprise workspace. Open
**Add custom**, then select **Add custom connector**.
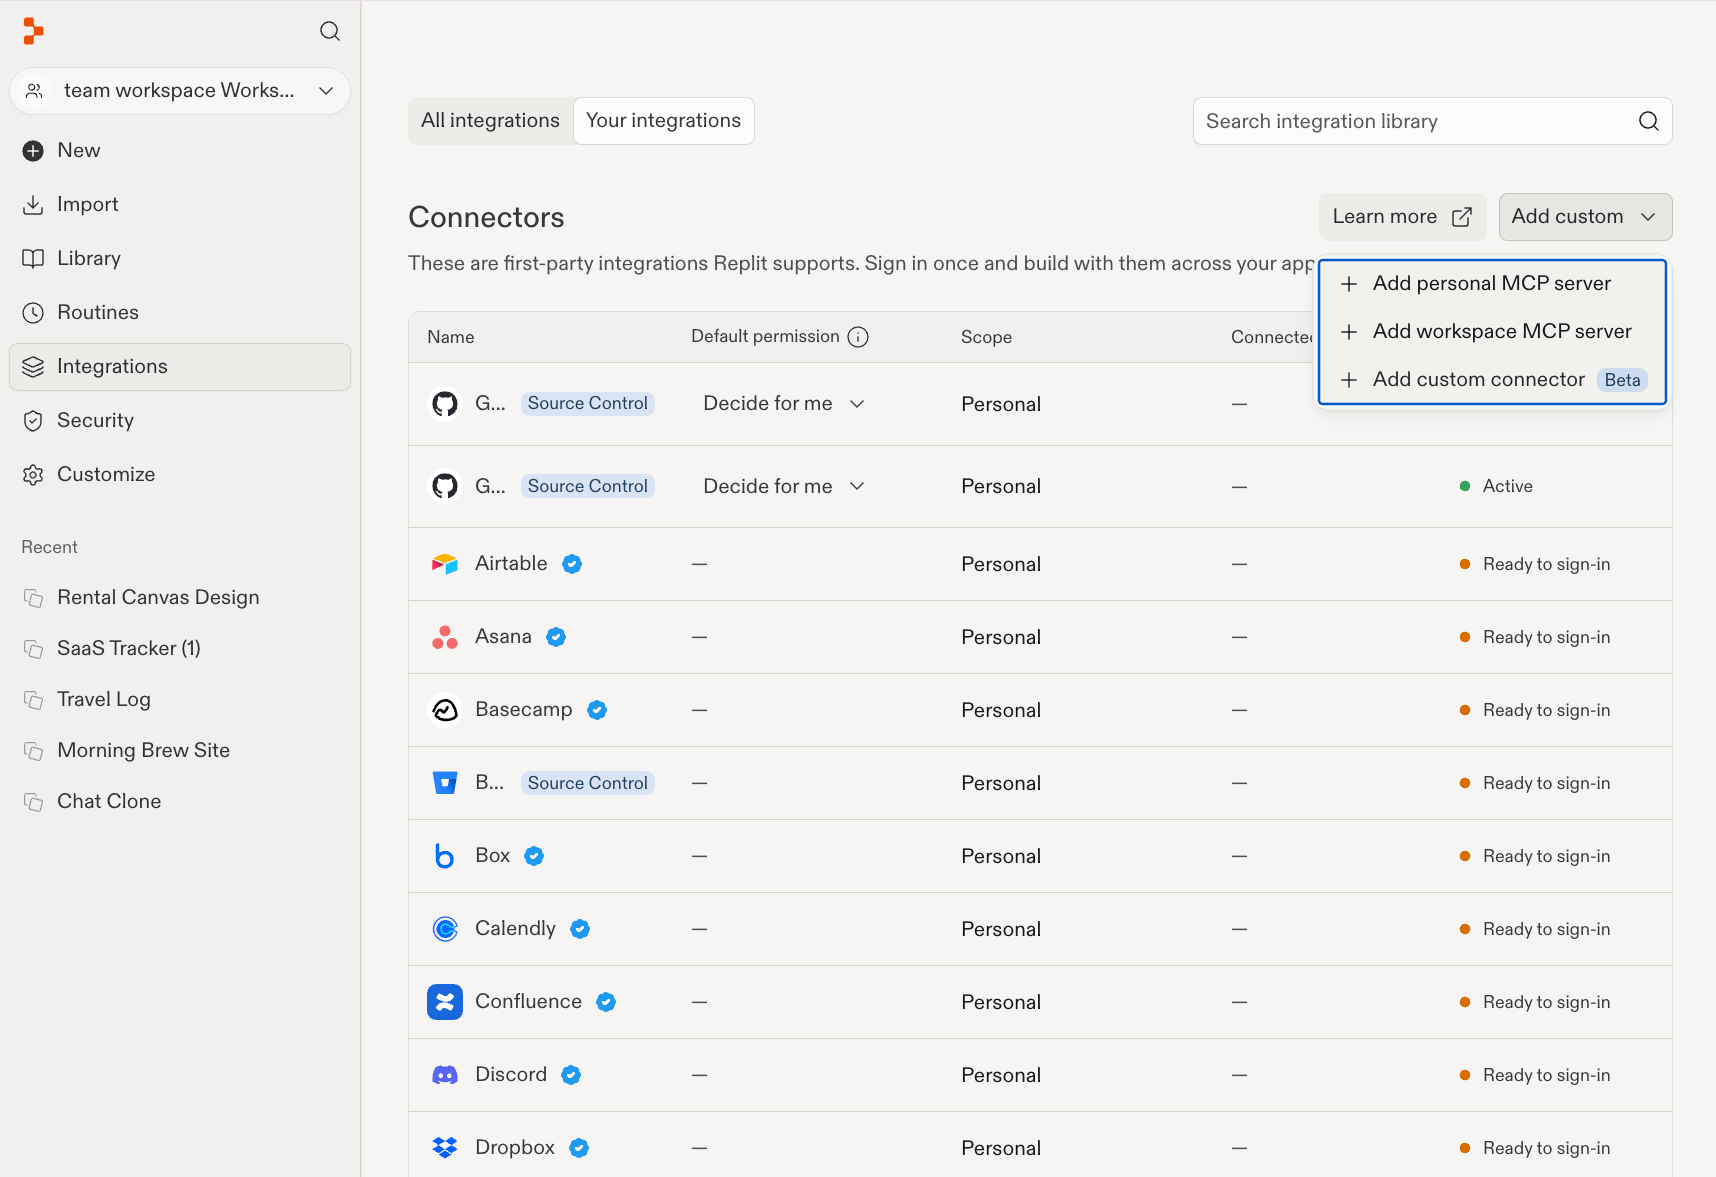 Complete the following fields:
| Field | What to enter | Example |
| ---------------------- | ------------------------------------------------------------------------------------------------------------ | -------------------------------------------------------------------- |
| **Connector name** | A recognizable name for the service. | `Acme API` |
| **Description** | A short description of what the API does. | `Create and track customer orders` |
| **Base URL** | The API's root URL, including any required version prefix. | `https://api.example.com` |
| **Agent instructions** | Guidance on using the API, such as a documentation URL and endpoint conventions. Do not include credentials. | `Read https://api.example.com/docs. Use GET /orders to list orders.` |
Replace the example values with those for your service. Agent instructions
have a 500-character limit.
Complete the following fields:
| Field | What to enter | Example |
| ---------------------- | ------------------------------------------------------------------------------------------------------------ | -------------------------------------------------------------------- |
| **Connector name** | A recognizable name for the service. | `Acme API` |
| **Description** | A short description of what the API does. | `Create and track customer orders` |
| **Base URL** | The API's root URL, including any required version prefix. | `https://api.example.com` |
| **Agent instructions** | Guidance on using the API, such as a documentation URL and endpoint conventions. Do not include credentials. | `Read https://api.example.com/docs. Use GET /orders to list orders.` |
Replace the example values with those for your service. Agent instructions
have a 500-character limit.
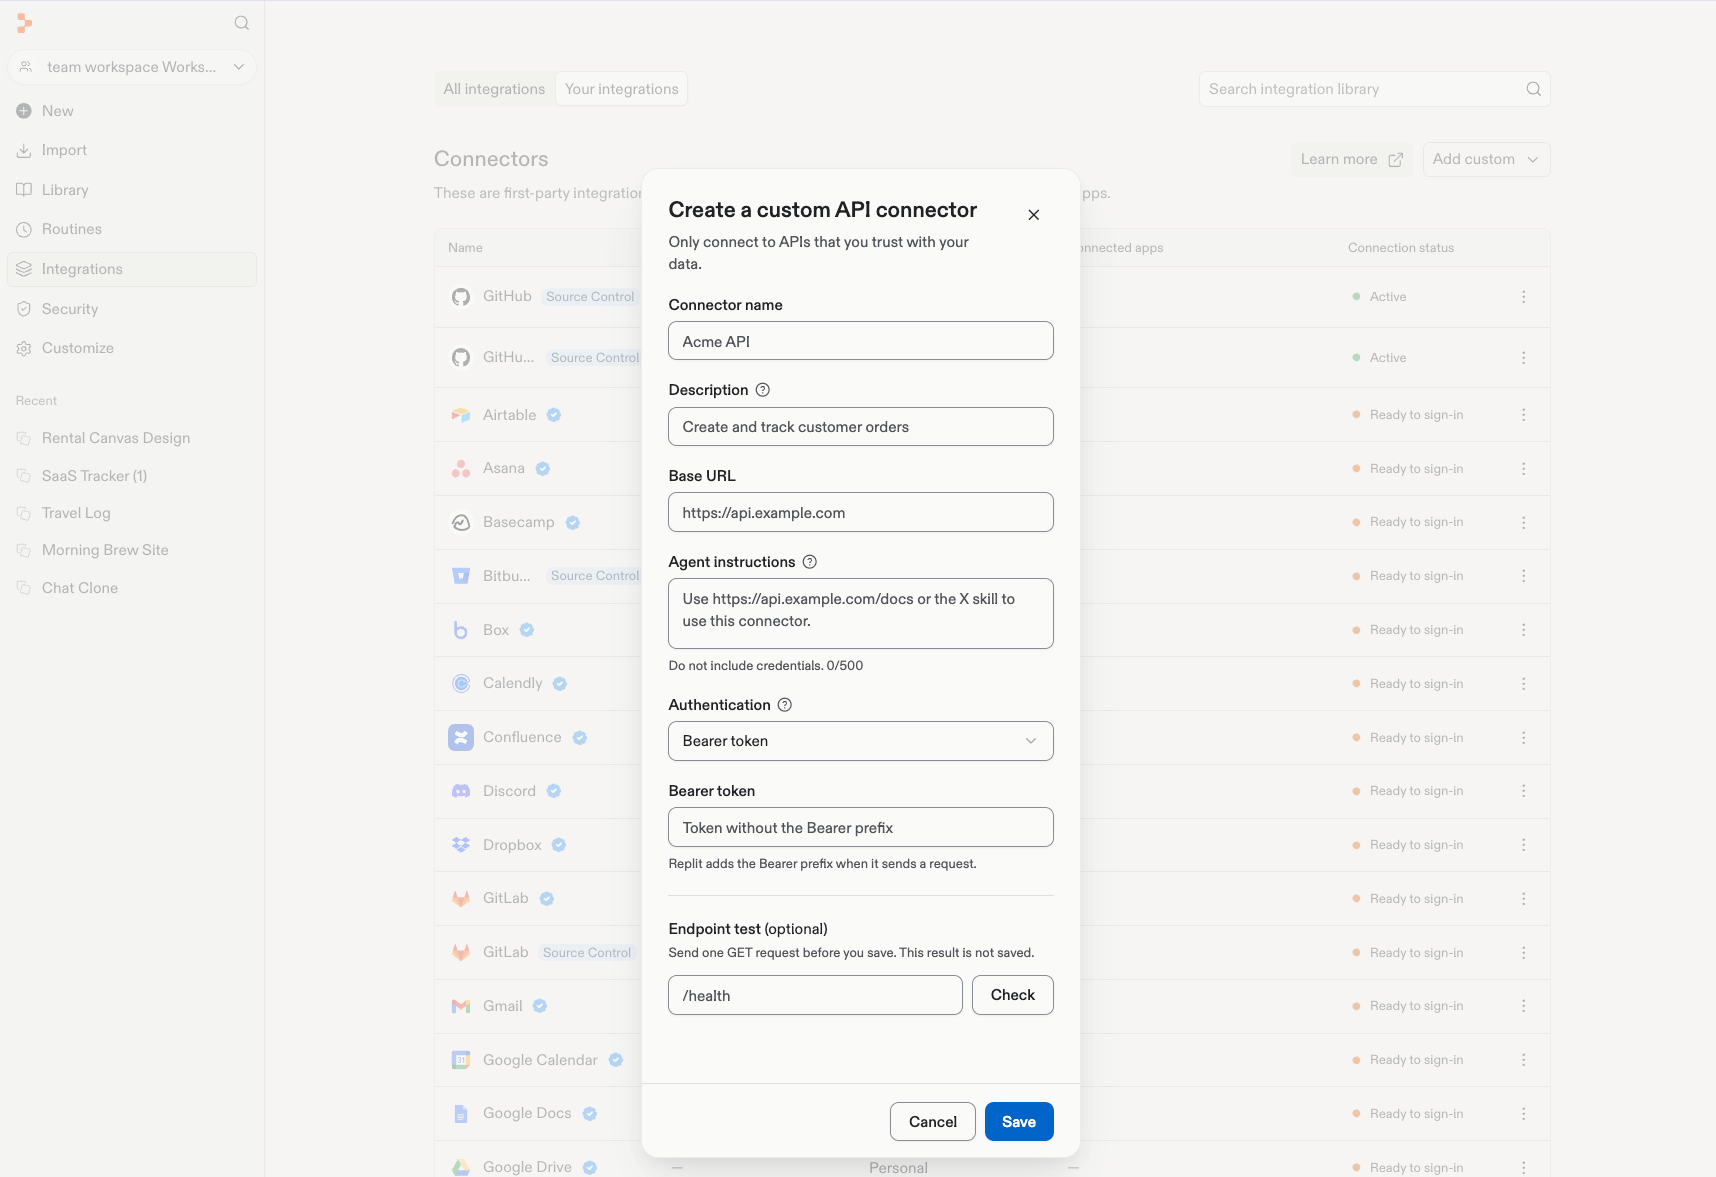 Select the authentication method that matches your API and complete the
fields shown.
For an API that uses a bearer token, select **Bearer token** and enter the
token without the `Bearer` prefix. Replit adds the prefix when sending a
request.
Optionally, enter a path such as `/health` under **Endpoint test** and select
**Check**.
The check sends one GET request before you save. Its result is not saved.
Choose an endpoint your API supports that does not change data.
A successful check verifies that request, not every endpoint or permission
you might need.
Review the configuration, then select **Save**.
## Troubleshoot an endpoint test
If the test fails, check the following against your API's documentation:
* **URL and path:** Confirm that the base URL and test path form the intended endpoint.
* **Authentication:** Confirm that the credential is valid and has permission to access the endpoint. For bearer authentication, omit the `Bearer` prefix from the token field.
* **Request method:** Choose an endpoint that accepts GET requests.
* **Reachability:** Confirm that the API is publicly accessible over HTTPS.
## Related documentation
* [Agent integrations](/features/integrations/overview) — Explore supported integrations
* [Managing your connectors](/replitai/managing-connectors) — Connector administration for your workspace
Select the authentication method that matches your API and complete the
fields shown.
For an API that uses a bearer token, select **Bearer token** and enter the
token without the `Bearer` prefix. Replit adds the prefix when sending a
request.
Optionally, enter a path such as `/health` under **Endpoint test** and select
**Check**.
The check sends one GET request before you save. Its result is not saved.
Choose an endpoint your API supports that does not change data.
A successful check verifies that request, not every endpoint or permission
you might need.
Review the configuration, then select **Save**.
## Troubleshoot an endpoint test
If the test fails, check the following against your API's documentation:
* **URL and path:** Confirm that the base URL and test path form the intended endpoint.
* **Authentication:** Confirm that the credential is valid and has permission to access the endpoint. For bearer authentication, omit the `Bearer` prefix from the token field.
* **Request method:** Choose an endpoint that accepts GET requests.
* **Reachability:** Confirm that the API is publicly accessible over HTTPS.
## Related documentation
* [Agent integrations](/features/integrations/overview) — Explore supported integrations
* [Managing your connectors](/replitai/managing-connectors) — Connector administration for your workspace