> ## Documentation Index
> Fetch the complete documentation index at: https://docs.replit.com/llms.txt
> Use this file to discover all available pages before exploring further.
# Canvas
> Open, navigate, and add to the canvas, the infinite surface where Replit Design displays your frames.
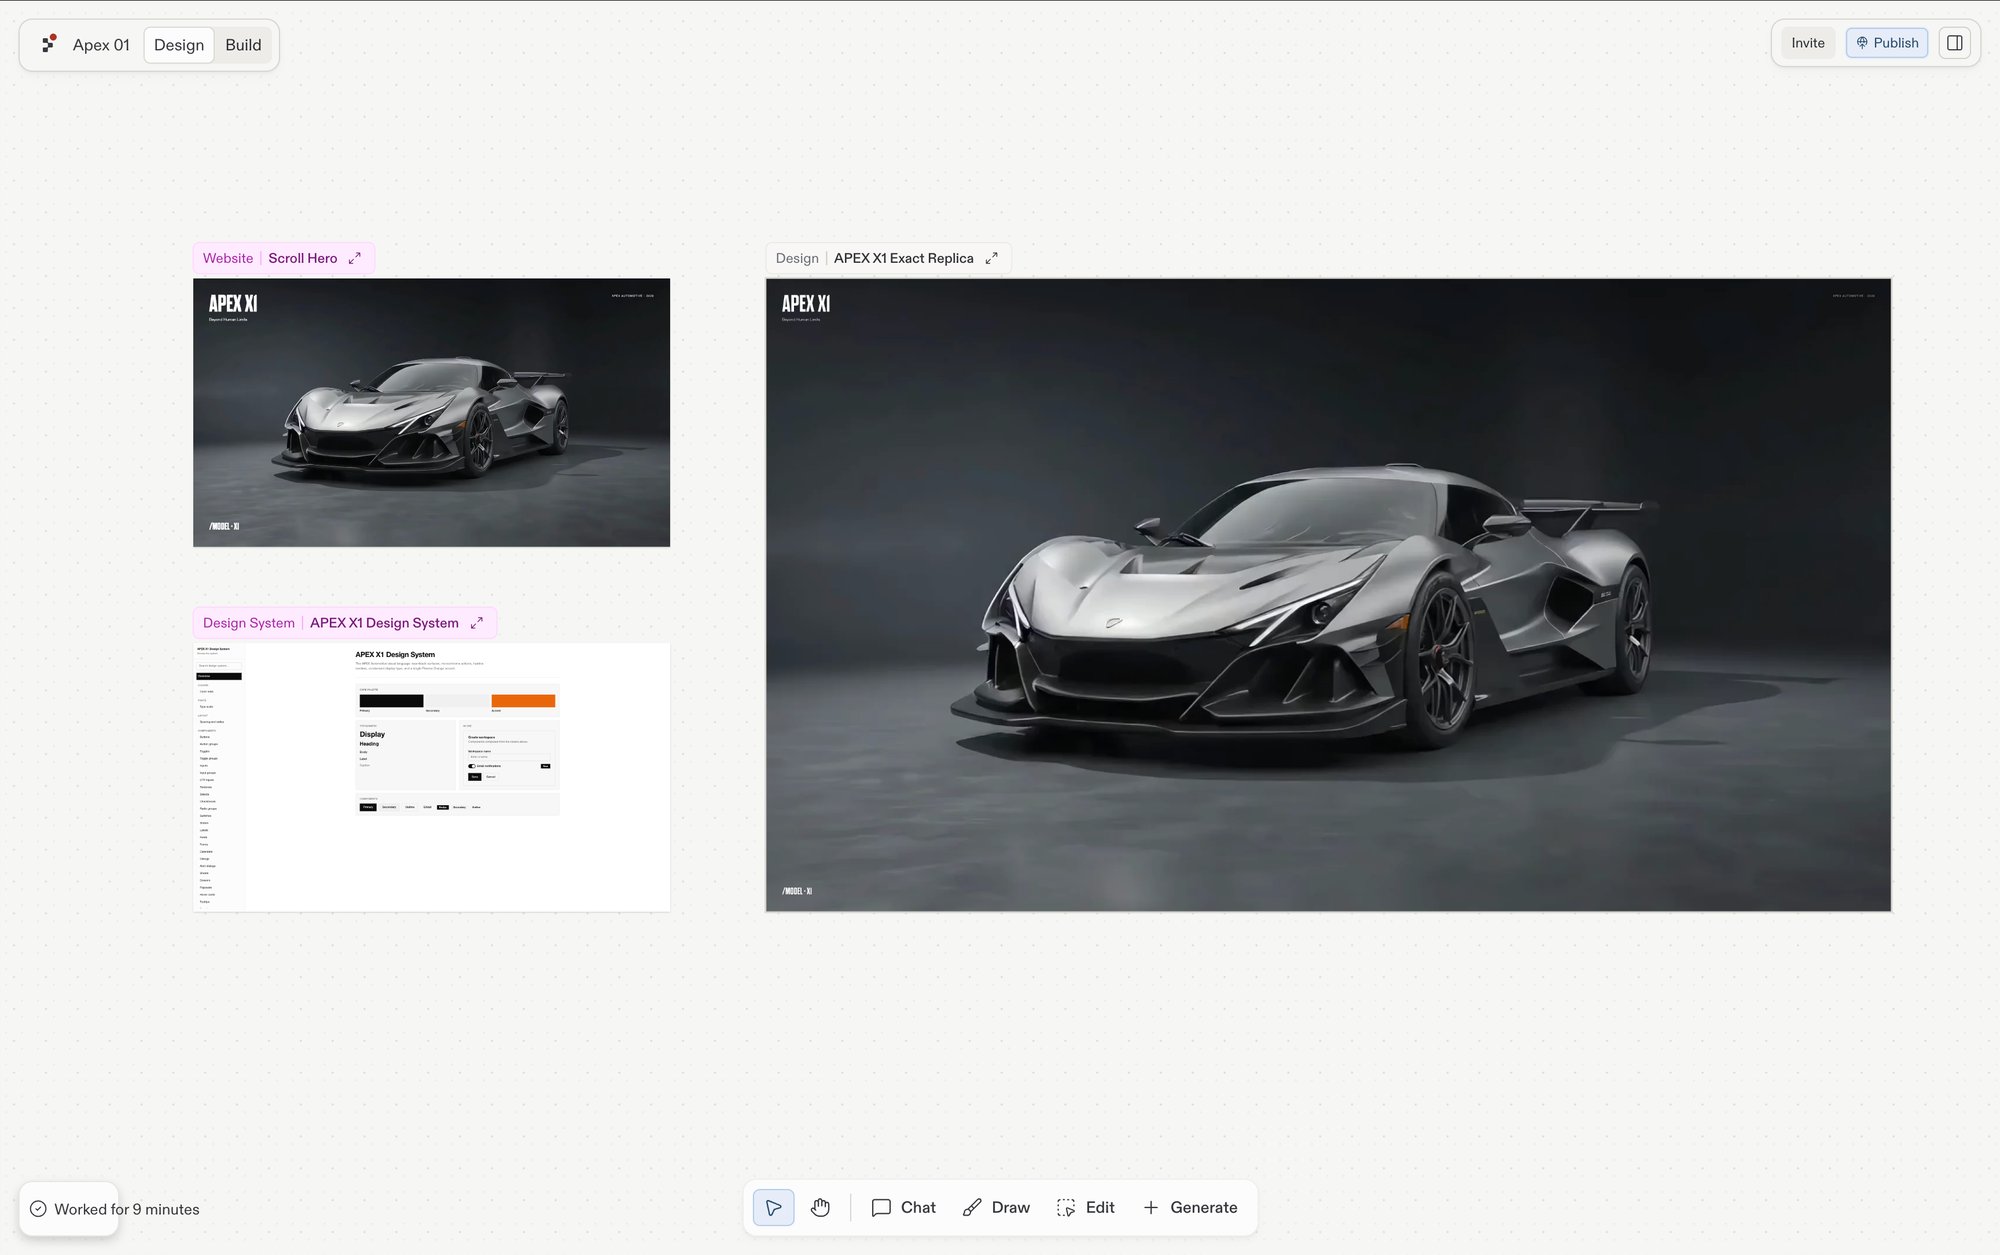
The canvas is the infinite pan-and-zoom surface where Replit Design displays your frames. Everything you design lives here: generate frames, drag them around, zoom in on a detail, and iterate until one is right.
 ## Open the canvas
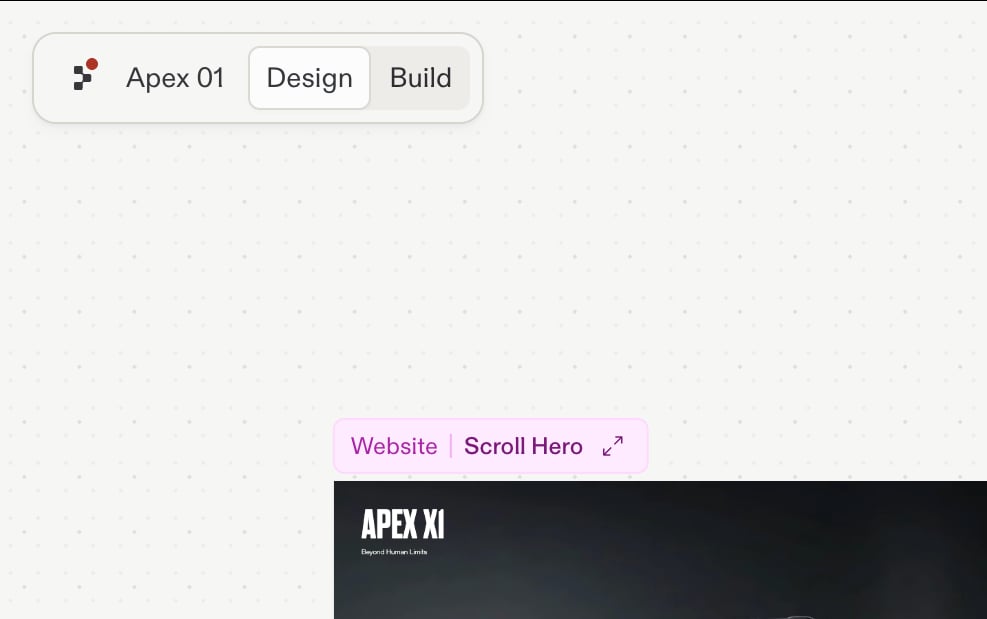
The canvas is the first thing you see in Replit Design. In a project, select **Design** in the header and the canvas fills the pane; select **Build** to switch back to your running app.
## Open the canvas
The canvas is the first thing you see in Replit Design. In a project, select **Design** in the header and the canvas fills the pane; select **Build** to switch back to your running app.
 Starting fresh at [replit.com/design](https://replit.com/design) prompts you to create a new design, which opens on the canvas. See [Design vs. Build](/design/design-vs-build) for when to use each surface.
## What lives on the canvas
* **Frames**: every tile on the board. A frame can be a design mockup, a web app, a mobile app, slides, an image, a video, or a vector graphic. Generate them from a chat prompt, the toolbar's [Generate menu](/design/toolbar#generate), or the [library panel](/design/library-panel). Everything you do to a frame, Build, Focus, suggestions, happens through the frame itself: see [Frames](/design/frames).
* **Drawings and notes**: markup you add with the [Draw tool](/design/toolbar#draw), such as sketches, arrows, shapes, and sticky notes. Agent reads your markup, so you can circle a problem area and ask for a change.
* **The chat panel**: Agent chat docked alongside the canvas. Selecting frames before sending a message attaches them as snapshots so Agent has visual context.
For what each component is and how they fit together, see the [components overview](/design/core-components).
## Navigate the board
Pan, zoom, and select work from any tool unless noted.
**Panning:**
* Trackpad: two-finger drag.
* Mouse: middle-click-and-drag, or hold spacebar and left-click-drag.
* [Pan tool](/design/toolbar#pan): click-and-drag with the left mouse button.
**Zooming:**
* Trackpad: pinch.
* Mouse: `Ctrl` (or `Cmd` on macOS) + scroll wheel.
* Keyboard: `Cmd`/`Ctrl` + `+` to zoom in, `Cmd`/`Ctrl` + `-` to zoom out, `Cmd`/`Ctrl` + `0` to reset zoom.
Zoom is anchored on the cursor, so the spot under the cursor stays put as the rest of the board scales around it.
**Selecting:**
* Single frame: click it with the [Interact tool](/design/toolbar#interact).
* Multi-select: hold `Shift` and click each frame, or drag a marquee rectangle across the board.
* Deselect: click an empty area, or press `Escape`.
Selecting one or more frames surfaces the [per-frame action bar](/design/frames#per-frame-action-bar) and attaches those frames to the next Agent message as snapshots.
### Keyboard shortcuts
| Shortcut | Action |
| ------------------------------ | ------------------------------------ |
| `V` | Activate the Interact tool |
| `H` | Activate the Pan tool |
| Hold `Space` + drag | Pan from any tool |
| `Cmd` / `Ctrl` + scroll | Zoom |
| `Cmd` / `Ctrl` + `+` | Zoom in |
| `Cmd` / `Ctrl` + `-` | Zoom out |
| `Cmd` / `Ctrl` + `0` | Reset zoom |
| `Shift` + click | Add a frame to the current selection |
| `Cmd` / `Ctrl` + `Shift` + `C` | Copy the selected frame as a PNG |
| `Escape` | Deselect |
## Right-click menu
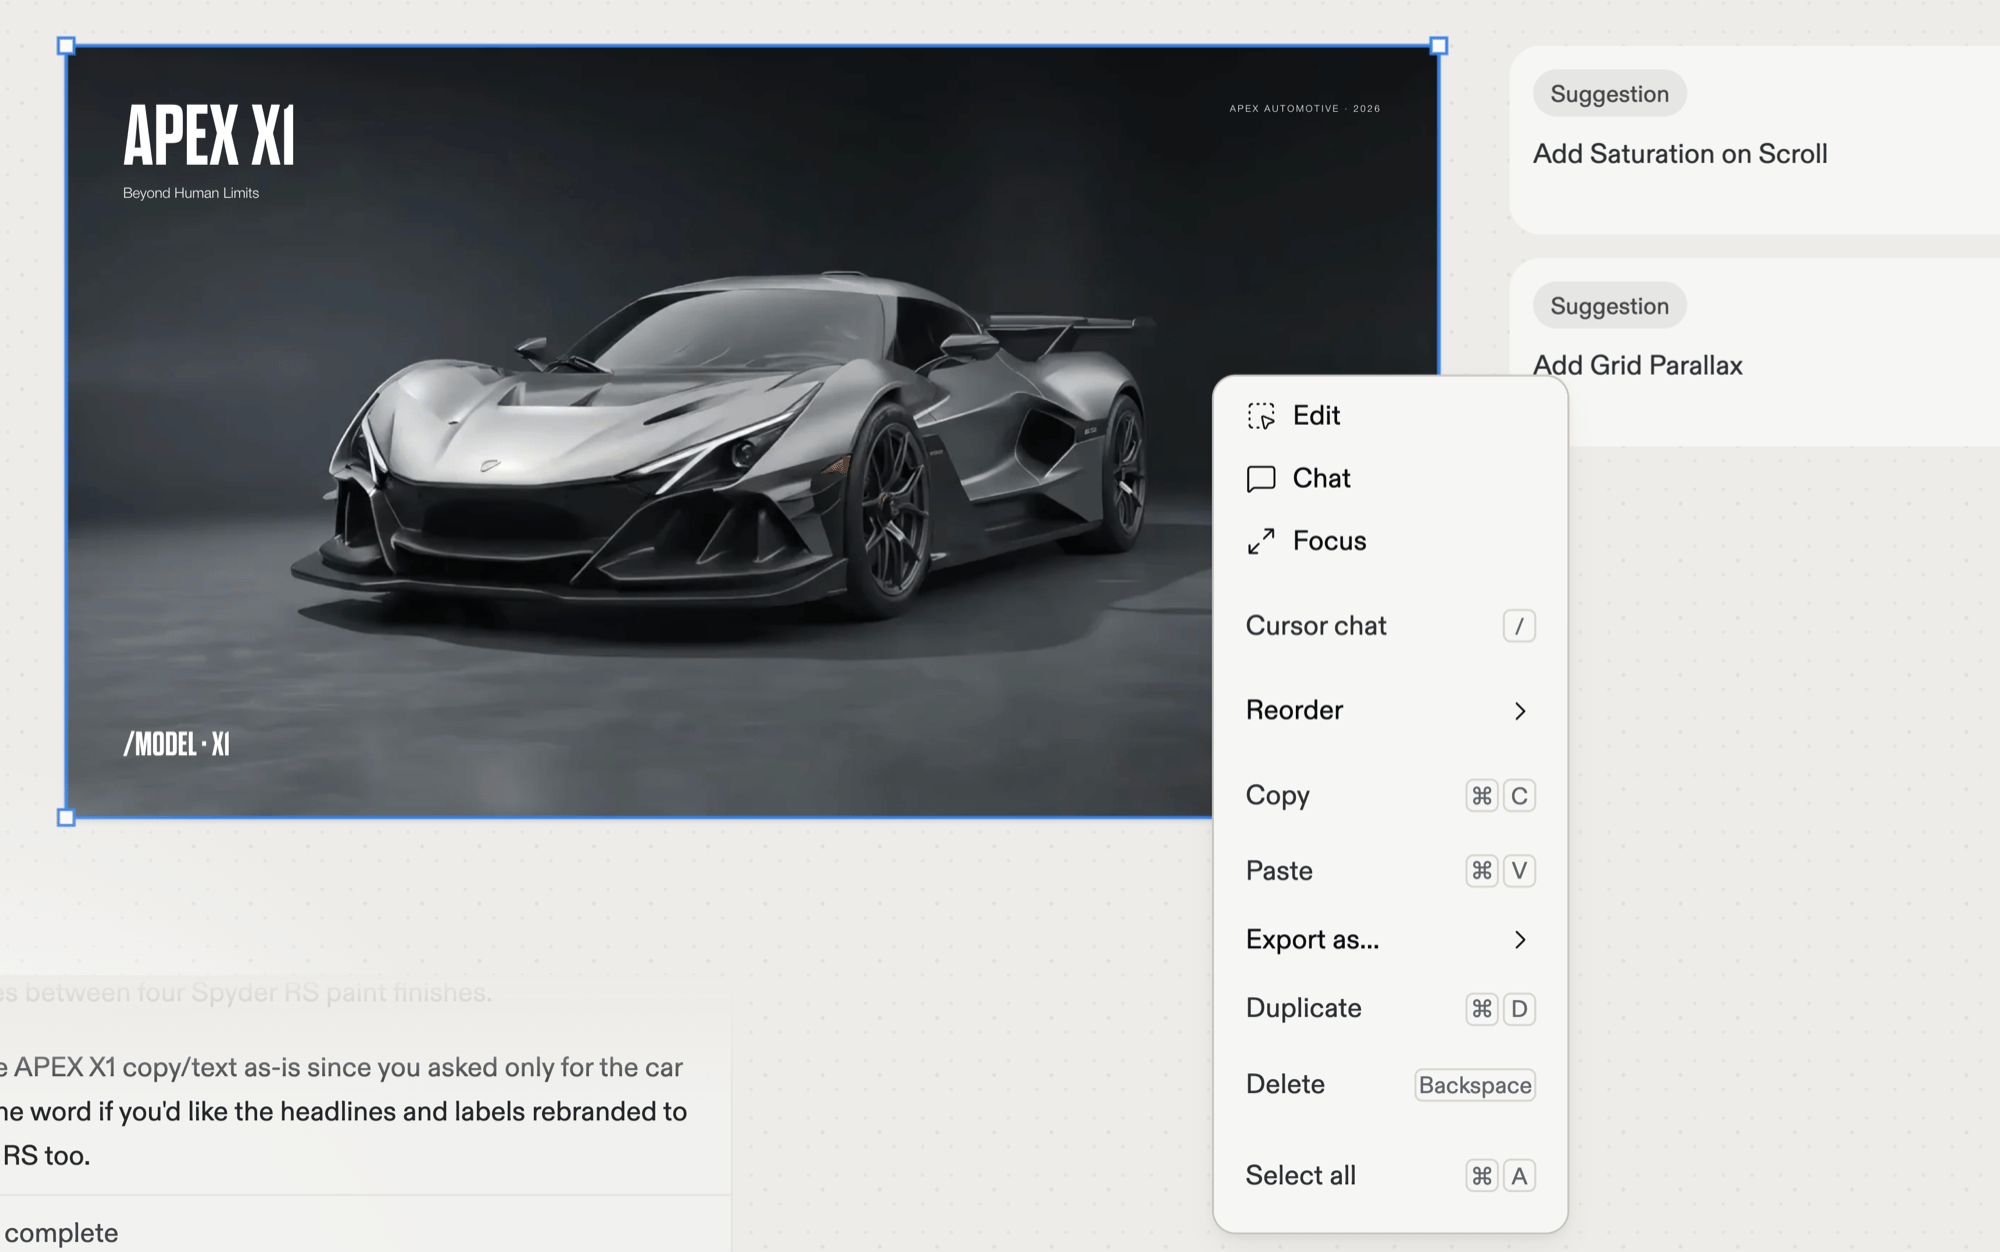
Right-click anywhere on the board to open a context menu. The menu is contextual, so the actions adapt to what's under the cursor: a frame gets frame actions, while empty canvas gets board-level actions, and app frames add **Refresh artifact**.
On a selected frame the menu includes:
| Action | Shortcut | What it does |
| ------------------------------ | ----------------------------- | ------------------------------------------------------------ |
| Edit | | Switch to the Edit tool to select elements inside the frame. |
| Chat | | Chat with Agent about the frame. |
| Focus | | Enter [focus mode](/design/frames#focus) on the frame. |
| Cursor chat | `/` | Start a quick chat at the cursor position. |
| Reorder | | Move the frame forward or backward in the stacking order. |
| Copy, Paste, Duplicate, Delete | `⌘C`, `⌘V`, `⌘D`, `Backspace` | Standard clipboard and frame management. |
| Export as… | | Export the frame as a file. |
| Select all | `⌘A` | Select every frame on the board. |
Starting fresh at [replit.com/design](https://replit.com/design) prompts you to create a new design, which opens on the canvas. See [Design vs. Build](/design/design-vs-build) for when to use each surface.
## What lives on the canvas
* **Frames**: every tile on the board. A frame can be a design mockup, a web app, a mobile app, slides, an image, a video, or a vector graphic. Generate them from a chat prompt, the toolbar's [Generate menu](/design/toolbar#generate), or the [library panel](/design/library-panel). Everything you do to a frame, Build, Focus, suggestions, happens through the frame itself: see [Frames](/design/frames).
* **Drawings and notes**: markup you add with the [Draw tool](/design/toolbar#draw), such as sketches, arrows, shapes, and sticky notes. Agent reads your markup, so you can circle a problem area and ask for a change.
* **The chat panel**: Agent chat docked alongside the canvas. Selecting frames before sending a message attaches them as snapshots so Agent has visual context.
For what each component is and how they fit together, see the [components overview](/design/core-components).
## Navigate the board
Pan, zoom, and select work from any tool unless noted.
**Panning:**
* Trackpad: two-finger drag.
* Mouse: middle-click-and-drag, or hold spacebar and left-click-drag.
* [Pan tool](/design/toolbar#pan): click-and-drag with the left mouse button.
**Zooming:**
* Trackpad: pinch.
* Mouse: `Ctrl` (or `Cmd` on macOS) + scroll wheel.
* Keyboard: `Cmd`/`Ctrl` + `+` to zoom in, `Cmd`/`Ctrl` + `-` to zoom out, `Cmd`/`Ctrl` + `0` to reset zoom.
Zoom is anchored on the cursor, so the spot under the cursor stays put as the rest of the board scales around it.
**Selecting:**
* Single frame: click it with the [Interact tool](/design/toolbar#interact).
* Multi-select: hold `Shift` and click each frame, or drag a marquee rectangle across the board.
* Deselect: click an empty area, or press `Escape`.
Selecting one or more frames surfaces the [per-frame action bar](/design/frames#per-frame-action-bar) and attaches those frames to the next Agent message as snapshots.
### Keyboard shortcuts
| Shortcut | Action |
| ------------------------------ | ------------------------------------ |
| `V` | Activate the Interact tool |
| `H` | Activate the Pan tool |
| Hold `Space` + drag | Pan from any tool |
| `Cmd` / `Ctrl` + scroll | Zoom |
| `Cmd` / `Ctrl` + `+` | Zoom in |
| `Cmd` / `Ctrl` + `-` | Zoom out |
| `Cmd` / `Ctrl` + `0` | Reset zoom |
| `Shift` + click | Add a frame to the current selection |
| `Cmd` / `Ctrl` + `Shift` + `C` | Copy the selected frame as a PNG |
| `Escape` | Deselect |
## Right-click menu
Right-click anywhere on the board to open a context menu. The menu is contextual, so the actions adapt to what's under the cursor: a frame gets frame actions, while empty canvas gets board-level actions, and app frames add **Refresh artifact**.
On a selected frame the menu includes:
| Action | Shortcut | What it does |
| ------------------------------ | ----------------------------- | ------------------------------------------------------------ |
| Edit | | Switch to the Edit tool to select elements inside the frame. |
| Chat | | Chat with Agent about the frame. |
| Focus | | Enter [focus mode](/design/frames#focus) on the frame. |
| Cursor chat | `/` | Start a quick chat at the cursor position. |
| Reorder | | Move the frame forward or backward in the stacking order. |
| Copy, Paste, Duplicate, Delete | `⌘C`, `⌘V`, `⌘D`, `Backspace` | Standard clipboard and frame management. |
| Export as… | | Export the frame as a file. |
| Select all | `⌘A` | Select every frame on the board. |
 ### Export a frame as PNG
Save any artifact or design frame as a PNG image. This is useful for sharing a preview in a doc or chat, capturing a snapshot before you iterate further, or sending a screenshot to a teammate.
Select the artifact or design frame you want to export, then wait for it to finish loading.
Select **Export** in the frame's action bar. You can also right-click the frame and select **Export as…** > **PNG**. The image downloads to your computer with a filename based on the frame's name.
To copy the selected frame as a PNG instead of downloading it, press `Cmd+Shift+C` (or `Ctrl+Shift+C` on Windows and Linux).
The exported PNG matches what the frame currently shows on the canvas. If your app or design is still loading, wait for it to fully render before exporting.
## The canvas and the live app
The canvas and the live app preview share the same pane, and a few modes bridge them:
* **Focus mode**: the **Focus** action on a selected frame expands it to fill the view. Select **Exit focus** at the top of the board to return to the canvas.
* **Read-only mode**: when the canvas is locked inside a background-task context, iteration actions hide and only Focus remains.
Building a new app from a Design frame requires Core or Pro; every other canvas capability works on every plan. See [Billing](/billing/ai-billing) for plan details.
**Reference**
* [Components overview](/design/core-components): the building blocks and how they fit together.
* [Frames](/design/frames): frame kinds; the per-frame action bar; Build and Focus.
* [Elements](/design/elements): the individual pieces inside a frame.
* [Toolbar](/design/toolbar): the full tool catalog.
**Learn**
* [Explore suggestions](/design/explore-suggestions): branch new directions from a selected frame and apply the winner to your app.
* [Design vs. Build](/design/design-vs-build): when to use each surface.
### Export a frame as PNG
Save any artifact or design frame as a PNG image. This is useful for sharing a preview in a doc or chat, capturing a snapshot before you iterate further, or sending a screenshot to a teammate.
Select the artifact or design frame you want to export, then wait for it to finish loading.
Select **Export** in the frame's action bar. You can also right-click the frame and select **Export as…** > **PNG**. The image downloads to your computer with a filename based on the frame's name.
To copy the selected frame as a PNG instead of downloading it, press `Cmd+Shift+C` (or `Ctrl+Shift+C` on Windows and Linux).
The exported PNG matches what the frame currently shows on the canvas. If your app or design is still loading, wait for it to fully render before exporting.
## The canvas and the live app
The canvas and the live app preview share the same pane, and a few modes bridge them:
* **Focus mode**: the **Focus** action on a selected frame expands it to fill the view. Select **Exit focus** at the top of the board to return to the canvas.
* **Read-only mode**: when the canvas is locked inside a background-task context, iteration actions hide and only Focus remains.
Building a new app from a Design frame requires Core or Pro; every other canvas capability works on every plan. See [Billing](/billing/ai-billing) for plan details.
**Reference**
* [Components overview](/design/core-components): the building blocks and how they fit together.
* [Frames](/design/frames): frame kinds; the per-frame action bar; Build and Focus.
* [Elements](/design/elements): the individual pieces inside a frame.
* [Toolbar](/design/toolbar): the full tool catalog.
**Learn**
* [Explore suggestions](/design/explore-suggestions): branch new directions from a selected frame and apply the winner to your app.
* [Design vs. Build](/design/design-vs-build): when to use each surface.