> ## Documentation Index
> Fetch the complete documentation index at: https://docs.replit.com/llms.txt
> Use this file to discover all available pages before exploring further.

# Chat

> Learn how Chat helps you explore ideas, add context, turn conversations into Projects, and tailor Replit to your needs.

export const ChatOverviewCover = () => <div className="chat-mkt" role="img" aria-label="A Replit Chat workspace with a conversation, context sources, modes, and routine controls" style={{
  margin: "28px 0 42px",
  borderTop: 0,
  paddingTop: 0
}}>
    <div className="chat-use-case-visual" style={{
  aspectRatio: "auto",
  minHeight: "clamp(220px, 34vw, 320px)",
  overflow: "hidden",
  background: "radial-gradient(circle at 50% -18%, rgba(255,255,255,.82), transparent 42%), radial-gradient(circle at 4% 96%, rgba(255,184,146,.48), transparent 38%), linear-gradient(140deg, #ff764d, #ff3c00 60%, #c92d00)"
}}>
      <div aria-hidden="true" style={{
  position: "absolute",
  inset: 0,
  background: "linear-gradient(180deg, rgba(255,255,255,.14), rgba(255,255,255,0) 48%, rgba(111,24,0,.2))"
}} />
      <div aria-hidden="true" style={{
  position: "relative",
  zIndex: 1,
  display: "flex",
  width: "100%",
  minHeight: "inherit",
  alignItems: "center",
  justifyContent: "center",
  padding: "clamp(14px, 3vw, 28px)"
}}>
        <div style={{
  display: "grid",
  gridTemplateColumns: "minmax(58px, .28fr) minmax(0, 1fr)",
  width: "min(760px, 86%)",
  minHeight: "clamp(164px, 24vw, 220px)",
  overflow: "hidden",
  border: "1px solid rgba(255,255,255,.58)",
  borderRadius: 24,
  background: "rgba(255,255,255,.2)",
  boxShadow: "0 18px 36px rgba(55,27,18,.2)",
  backdropFilter: "blur(6px)"
}}>
          <div style={{
  display: "grid",
  alignContent: "start",
  gap: 12,
  padding: "clamp(16px, 3vw, 24px) clamp(12px, 2vw, 20px)",
  borderRight: "1px solid rgba(255,255,255,.3)"
}}>
            {[["100%", "rgba(255,255,255,.9)"], ["76%", "rgba(255,255,255,.52)"], ["76%", "rgba(255,255,255,.52)"], ["52%", "rgba(255,255,255,.52)"]].map(([width, background], index) => <span key={index} style={{
  width,
  height: 10,
  borderRadius: 999,
  background
}} />)}
          </div>
          <div style={{
  display: "flex",
  minWidth: 0,
  flexDirection: "column",
  justifyContent: "space-between",
  padding: "clamp(18px, 3vw, 26px)"
}}>
            <div style={{
  display: "grid",
  gap: 10
}}>
              <span style={{
  width: "55%",
  height: 10,
  borderRadius: 999,
  background: "rgba(255,255,255,.8)"
}} />
              <span style={{
  justifySelf: "end",
  width: "67%",
  height: 28,
  borderRadius: "14px 14px 4px 14px",
  background: "rgba(255,255,255,.78)"
}} />
              <span style={{
  width: "76%",
  height: 34,
  border: "1px solid rgba(255,255,255,.42)",
  borderRadius: "14px 14px 14px 4px",
  background: "rgba(255,255,255,.14)"
}} />
            </div>
            <div style={{
  display: "flex",
  alignItems: "center",
  gap: 10,
  padding: "10px 11px 10px 13px",
  border: "1px solid rgba(255,255,255,.58)",
  borderRadius: 15,
  background: "rgba(255,255,255,.16)"
}}>
              <span style={{
  width: "68%",
  height: 7,
  borderRadius: 999,
  background: "rgba(255,255,255,.7)"
}} />
              <span style={{
  display: "grid",
  width: 22,
  height: 22,
  marginLeft: "auto",
  placeItems: "center",
  borderRadius: 8,
  background: "rgba(255,255,255,.9)",
  color: "#4b5563",
  fontSize: 14,
  fontWeight: 700
}}>
                ↑
              </span>
            </div>
          </div>
        </div>
      </div>
    </div>
  </div>;

<ChatOverviewCover />

Chat is where you work with Replit in Conversations. Use it to ask questions,
explore ideas, analyze information, organize context, run Routines, and
describe what you want to create.

## What you can do in Chat

* **Start and continue Conversations.** Ask a question, explore an idea, or
  describe a result you want to create. [Learn about Conversations.](/chat/conversations)
* **Give Replit useful context.** Add files, images, connected tools, and clear
  instructions so your request is grounded in the information that matters.
  [Learn about context.](/chat/add-context)
* **Research and analyze.** Ask Replit to find information, compare sources,
  and turn what it finds into a useful brief, plan, or decision.
* **Run recurring work.** Create a Routine to check a source or complete a
  recurring task, then review each result in the same Conversation.
  [Learn about Routines.](/chat/routines)
* **Turn work into a Project.** When a Conversation becomes substantial, turn
  it into a Project to build an app, slide deck, design, or other outcome.
  [Compare Conversations and Projects.](/chat/conversations-and-projects)

## Start with a Conversation

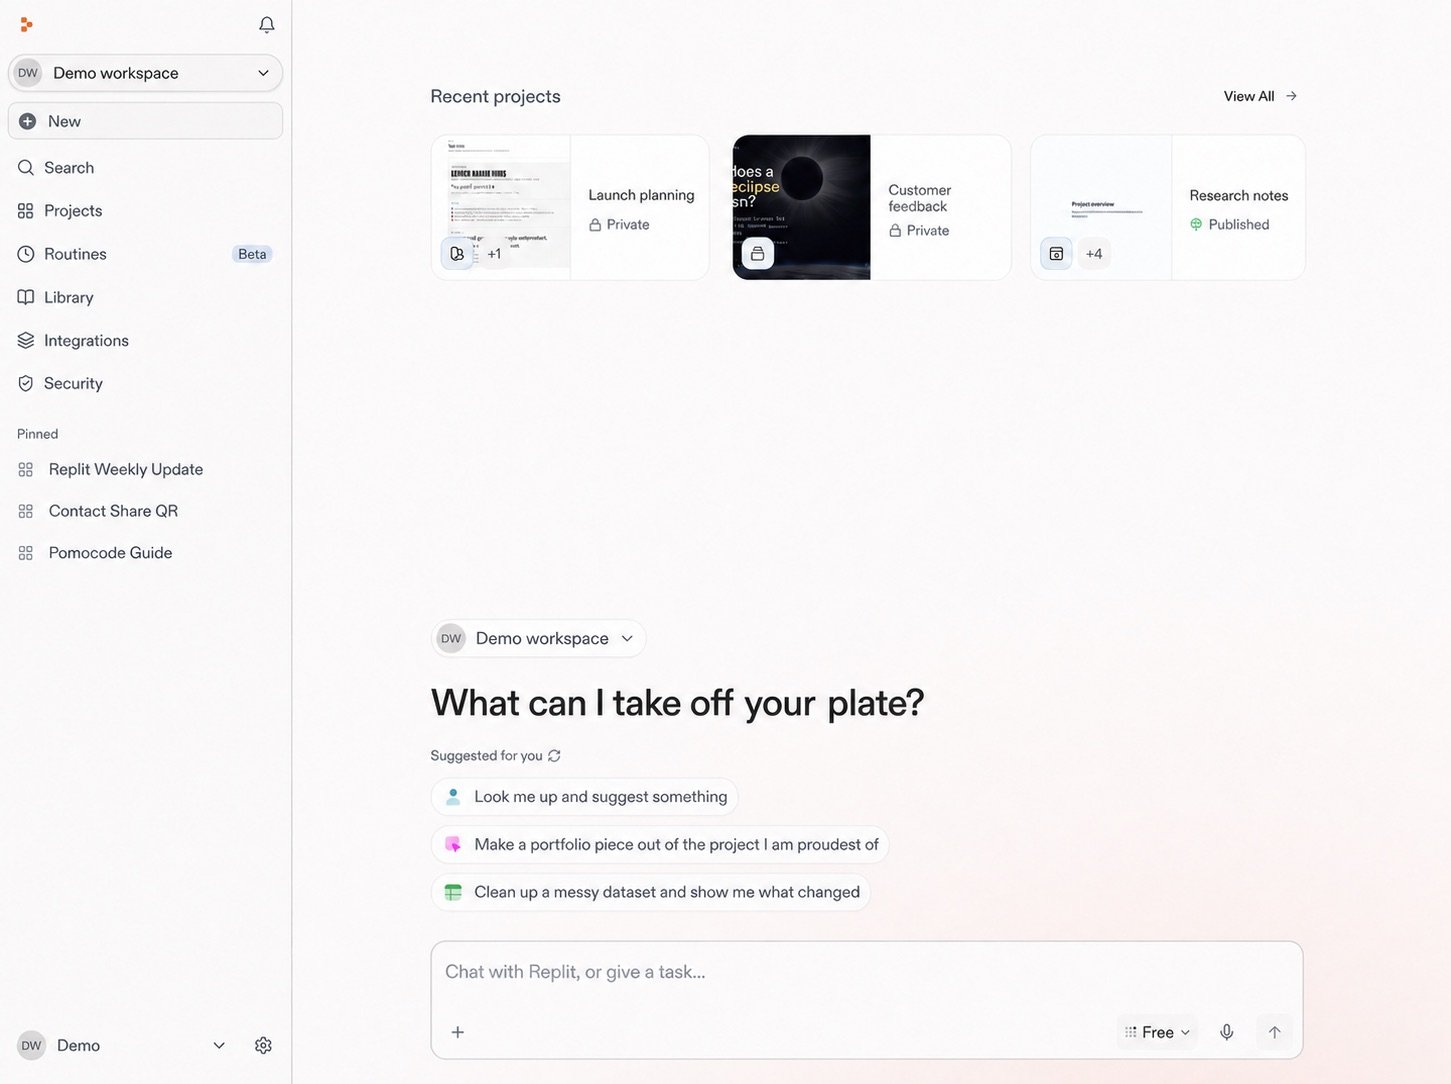
Open a new Conversation whenever you want to investigate, plan, or create.
Begin with a focused request, then use follow-ups to clarify the outcome and
move the work forward.

<Frame caption="Start a new Conversation from your Replit home.">
  <img src="https://mintcdn.com/replit/teDUL4A-lNO7dv1O/images/chat/start-new-conversation-home-sanitized-neutral.jpg?fit=max&auto=format&n=teDUL4A-lNO7dv1O&q=85&s=cf93f549696aff0eab748dd953aea0b6" alt="Replit home showing suggested prompts and the Conversation message box" width="1451" height="1084" data-path="images/chat/start-new-conversation-home-sanitized-neutral.jpg" />
</Frame>

## Add context when it matters

Replit can work from the information you provide. Upload a document or image,
connect a supported service, or tell Replit what details should shape the work.

* [Upload and use files](/chat/upload-and-use-files) for documents,
  spreadsheets, screenshots, and other source material.
* [Integrate your tools](/chat/integrate-your-tools) to use information from
  supported services such as Slack, Google Drive, and Salesforce.
* [Work with Figma](/chat/work-with-figma) to use a design frame as visual
  direction.

## Choose how Replit works

Before you send a request, choose the mode that matches the work. Free Mode is
included with Core and Pro plans and is useful for everyday chat, creation, and
building. Power Mode and Max Mode use credits when you need more capability or
want to choose a specific model.
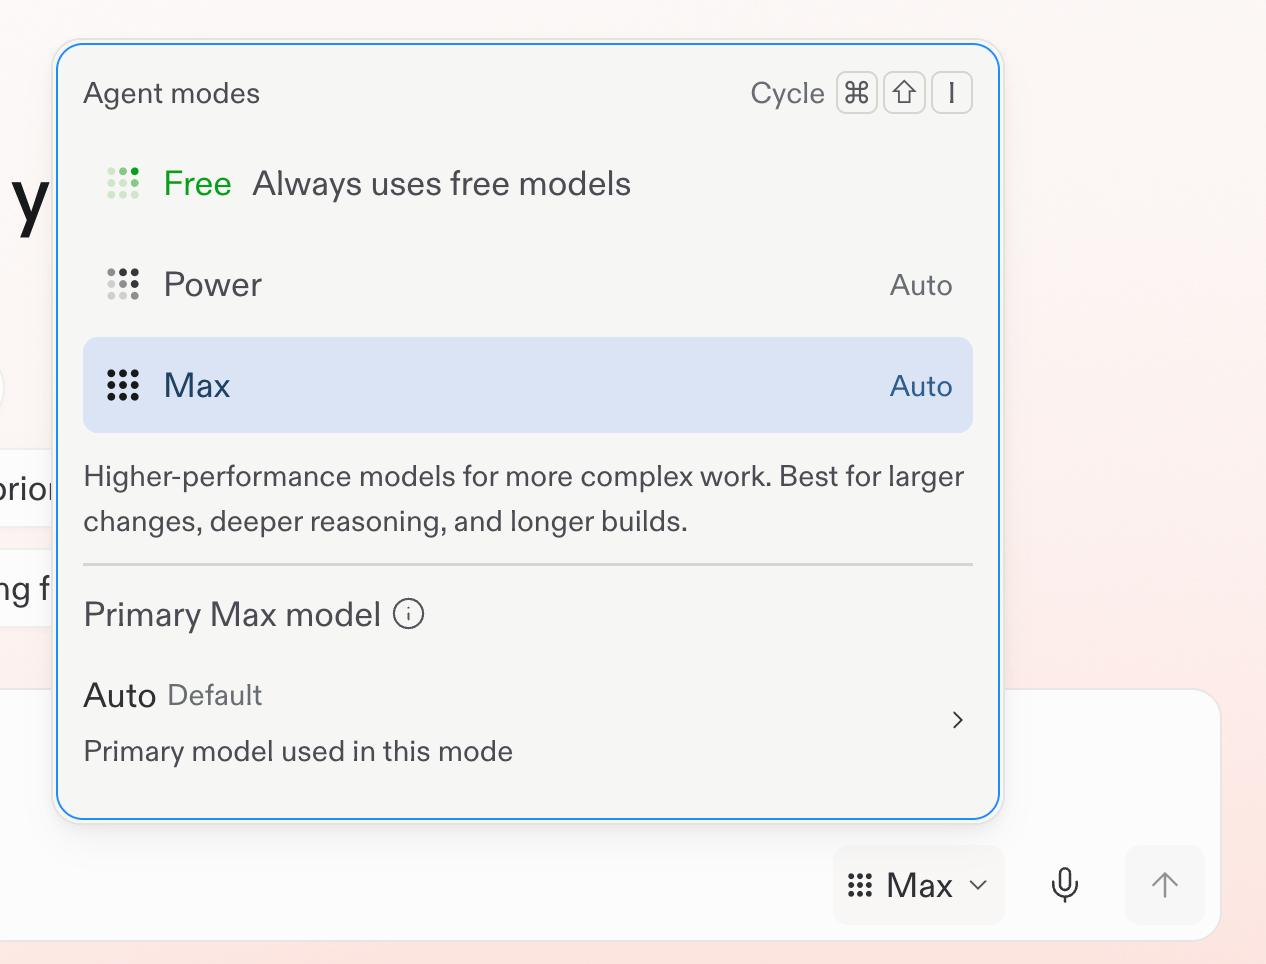
<Frame caption="Choose a mode from the selector below the prompt box.">
  <img src="https://mintcdn.com/replit/teDUL4A-lNO7dv1O/images/chat/agent-modes-selector.png?fit=max&auto=format&n=teDUL4A-lNO7dv1O&q=85&s=01b29cf86c7ba82e431790bc6746cc72" alt="Mode selector with Free selected, alongside Power and Max options" width="1266" height="964" data-path="images/chat/agent-modes-selector.png" />
</Frame>

Learn more about [Agent Modes](/chat/agent-modes) and [getting the most out of
Free Mode](/chat/free-mode).

## Explore Chat

Start with [Conversations](/chat/conversations) to choose your first path, or
learn how to [prompt Replit](/chat/prompting) with clear direction and context.
